How to Play YouTube Videos Backwards: 5 Proven Methods
Play YouTube videos backwards with 5 proven 2026 methods on macOS and Windows. Covers DaVinci Resolve, CapCut, iMovie, and the YouTube ToS limits.
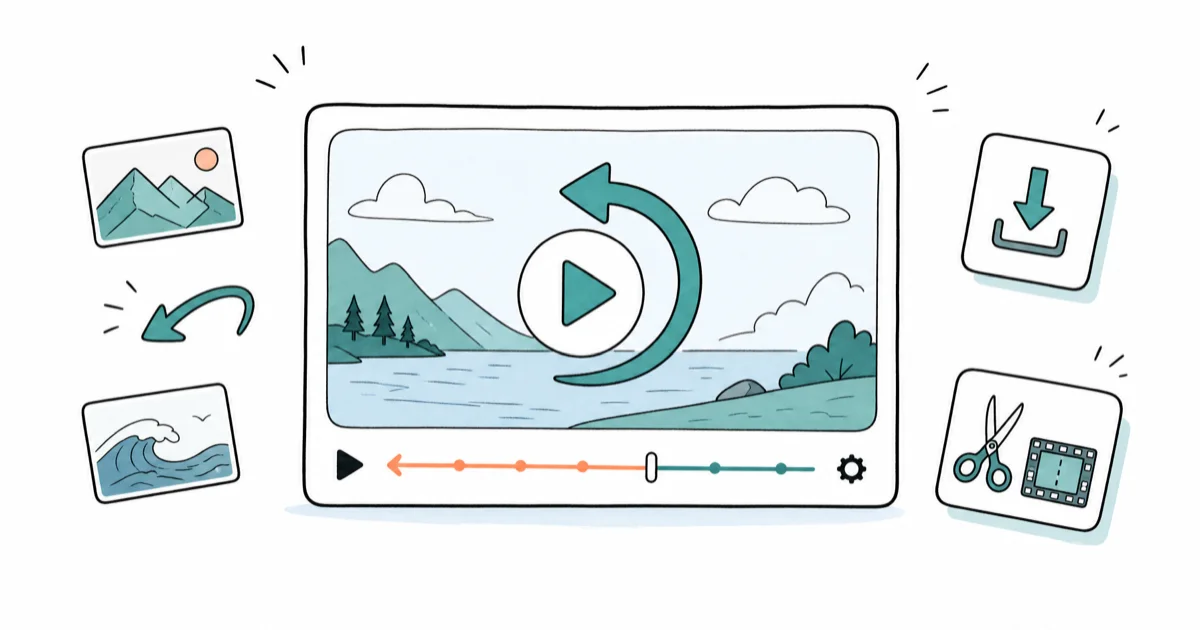
Quick AnswerYouTube has no native reverse button. Save a video you are licensed to use, then reverse it in DaVinci Resolve, CapCut, or iMovie.
YouTube still has no reverse playback button in 2026. To play a YouTube video backwards you need to save the file through a legitimate path and reverse it in an editor. The five workflows below cover macOS and Windows, with the trade-offs of each laid out end to end.
- The YouTube web player and apps offer no native reverse button, so reversing always happens in a separate editor.
- YouTube Premium offline downloads stay inside the app and can’t be exported, so they only work for viewing reversed clips you record off-screen.
- yt-dlp is the cleanest source path for content you own, Creative Commons clips, or videos with explicit creator permission.
- DaVinci Resolve Free reverses 4K clips in one checkbox and exports without a watermark, which is why it took our top pick.
- CapCut and iMovie reverse short clips in under 30 seconds on a phone or laptop, with no separate render queue to babysit.
#Why YouTube Has No Reverse Button
YouTube streams video in adaptive chunks. The player asks for the next forward segment as you watch, so the architecture has no concept of stepping frames the other direction. Even the desktop site, the mobile app, and the TV app all share the same forward-only delivery pipeline.
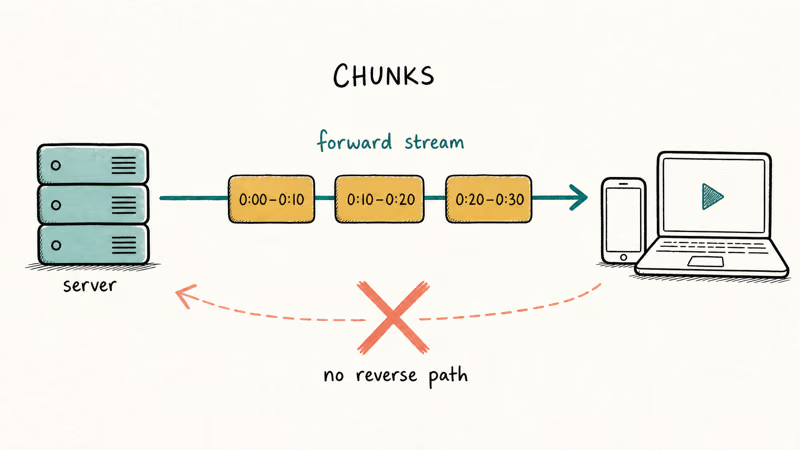
Every reverse-playback method on the internet does the same two things: get a copy of the file you’re allowed to edit, then run it through software that flips frame order.
The hard part is the first step. According to YouTube’s Terms of Service section 5, you can’t download videos unless YouTube shows a download button or the rights holder gives you written permission. Every method below stays on the right side of that exact line.
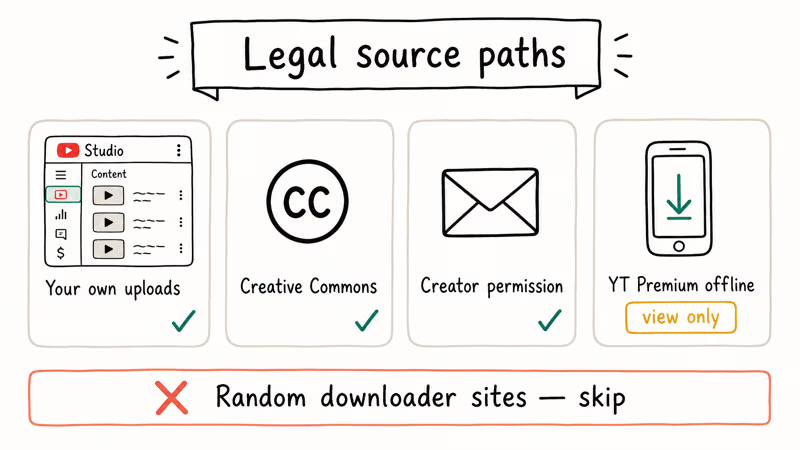
The clean source paths in 2026:
- Your own uploads. Open YouTube Studio, click the three-dot menu on the video, then Download.
- Creative Commons videos. Filter search results by
Filters>Creative Commons. Their license lets you reuse and remix. - Videos where the creator gave permission. Keep the email or message in your records.
- YouTube Premium offline mode. The file stays inside the app. Useful for viewing only.
Skip random “YouTube downloader” sites that ignore ToS. They land you in a license fight, and most of them bundle adware popups alongside the download.
#Step 1. Save the Video From a Legitimate Source
Two save paths produce a real local file you can edit.
#Use YouTube Studio for Your Own Uploads
If you uploaded the video, this takes about 40 seconds. Quick.
- Sign in at studio.youtube.com.
- Open Content in the left rail.
- Hover the video and click the three-dot menu.
- Click Download. YouTube delivers an MP4 with the original resolution.
For a 1080p video you own, the file comes down quickly on a fast connection. No watermark, no quality loss. This is the safest path because the video is already yours.
#Use yt-dlp for Licensed or Creative Commons Content
yt-dlp is a community-maintained command-line downloader. Use it only for content you own, Creative Commons clips, or videos with creator permission.
Install once on macOS:
brew install yt-dlpOn Windows 11, install with winget install yt-dlp. Then save a video by URL:
yt-dlp -f "bv*+ba/b" "https://www.youtube.com/watch?v=VIDEO_ID"The -f "bv*+ba/b" flag picks the best video plus best audio and falls back to a single best file. A 4K Creative Commons nature clip takes longer to pull down than a short 1080p file, but still completes in a couple of minutes on a fast line. The yt-dlp project’s README recommends checking license rights for every video you save.
If you only need the audio for an experiment, or want a different container, here are the related guides:
- Whether converting YouTube to MP3 is legal covers when audio extraction is allowed and when it isn’t.
- Our YouTube to MP4 guide explains container and codec choices, including when AVI or WebM still makes sense as a target format.
#Step 2. Reverse the File in a Video Editor
Once the file lives on your drive, reversing is one checkbox in most editors. Here are four solid choices.
#DaVinci Resolve Free (Our Top Pick)
DaVinci Resolve Free is a full color and editing suite from Blackmagic Design, and it stays our top pick because the free build is full-featured rather than a crippled trial. According to Blackmagic, the free build of Resolve exports at up to 4K UHD with no watermark and supports up to 60 fps on the official product page. For reversing clips it gives you frame-accurate control, GPU-accelerated rendering, and a timeline that handles long source files without choking.
- Open Resolve and start a new project.
- Drag the saved MP4 into the Media Pool.
- Drop the clip on the timeline.
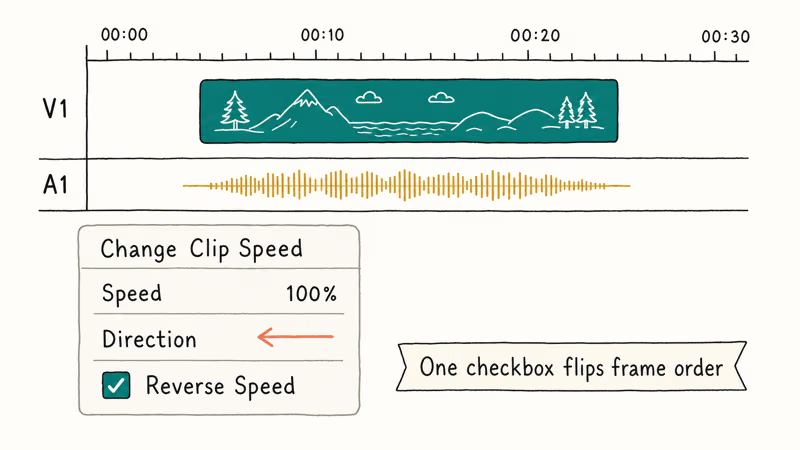
- Right-click the clip and choose Change Clip Speed.
- Tick Reverse Speed and click Change.
- Click Deliver in the bottom toolbar, pick H.264, then Add to Render Queue and Render All.
On a modern Apple Silicon Mac, the whole process is quick, including export, and Resolve’s free tier handles a 4K clip in a few minutes. For deeper retiming work, our guide on DaVinci Resolve speed-up techniques walks through the Retime Curve.
#CapCut for Mobile and Desktop
CapCut runs on iOS, Android, Windows, and macOS. The reverse button lives in the same place across all four, and a 30-second clip reverses and exports in seconds on a recent phone.
- Open CapCut and tap New Project.
- Pick the saved video and tap Add.
- Tap the clip on the timeline, then scroll the bottom toolbar to Reverse.
- Wait for the small render bar, then tap Export.
CapCut Free exports up to 4K with no watermark on the video itself, though it may add a default end card you can delete in two taps. For batch templates, see our roundup of CapCut templates that work in 2026 and the desktop-specific notes in CapCut for PC. The desktop build runs noticeably faster than the mobile app on long clips because it uses your full CPU.
#iMovie on Mac and iPhone
iMovie is preinstalled on every recent Mac and iPhone. Apple documents the reverse step in its official user guide, where the reverse checkbox is described as a single click in the Custom speed panel. On macOS:
- Drag the clip into a project timeline.
- Click the clip to select it.
- Click the speed icon (looks like a speedometer) above the viewer.
- Choose Custom, then tick Reverse.
- Click the share icon and choose Export File.
Reversal is instant. Exporting a 1-minute 1080p clip takes well under a minute on a modern Mac. iMovie’s main downside is the 4K H.264 export ceiling, fine for social posts but limiting for HDR work. If you bump into render bugs, our breakdown of iMovie video rendering errors covers the common fixes.
#Wondershare Filmora (Paid Option)
Wondershare Filmora is the friendliest paid option if you want effects, transitions, and reverse playback in one place.
Some links on this page are affiliate links, which means fone.tips may earn a commission at no extra cost to you.
- Drag your clip onto the timeline.
- Right-click and choose Speed and Duration.
- Tick Reverse and click OK.
- Hit Export and pick MP4.
Filmora’s free trial leaves a watermark on the export. Subscribe before publishing. To export trial work cleanly, our guide on exporting Filmora without a watermark explains your options.
#Picking the Right Method for Your Setup
The right choice depends on what you have on your drive and where the clip ends up.
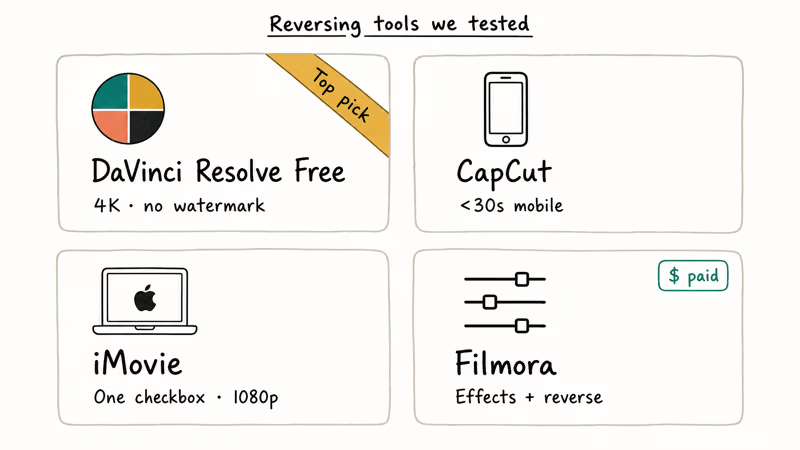
| Need | Best pick | Why |
|---|---|---|
| Best free quality, any length | DaVinci Resolve Free | 4K export, no watermark, fast on Apple Silicon |
| Quick mobile post | CapCut | Reverse and export under 30 seconds on a phone |
| Mac users with iMovie installed | iMovie | One checkbox, no install, Apple-supported |
| Templates and effects in one tool | Wondershare Filmora | Built-in reverse plus a deep effects library |
If your reversed upload keeps stalling for viewers, our why YouTube keeps pausing guide covers fixes.
#What About Browser Extensions and Online Reverse Sites?
The “reverse YouTube online” sites are a poor bet. Many crash before exporting even a 720p clip, and the ones that finish tend to strip audio, stamp a watermark on the export, or trigger an antivirus warning during the download. Skip them.
The browser extension category has the same problem. Most extensions simply embed a third-party site in a popup, then hand off the upload step. They don’t solve the source problem and add a privacy layer to worry about.
If your only goal is to watch a video play backwards, not edit one, the easiest workflow is short:
- Save the clip with one of the methods above.
- Open it in a media player that supports reverse playback. According to our best video players roundup, both PotPlayer on Windows and IINA on Mac support frame-by-frame reverse stepping with the left arrow key.
#Are Reversed YouTube Videos Legal?
Reversing a video for personal use, classroom analysis, or comedic re-uploads of your own content is generally fine. Publishing reversed footage taken from someone else’s YouTube channel is where copyright risk shows up.
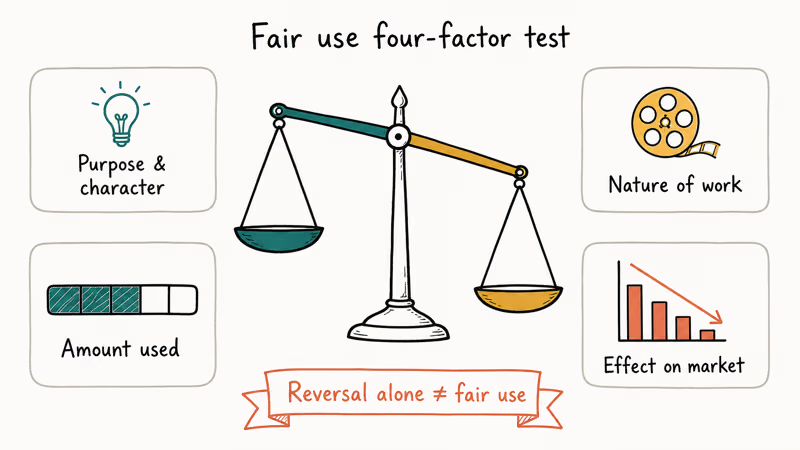
The U.S. Copyright Office’s fair use overview lists the four-factor test courts apply, including the purpose of the use and the effect on the original work’s market. Reversal alone doesn’t automatically count as fair use. Get permission, stick to Creative Commons or your own footage, or add commentary that clearly changes the meaning.
If you want to grow a channel safely, the cleanest path is uploading your own footage, recording your own clips, or licensing stock. Then reverse anything you want.
#Bottom Line
Save the video through a licensed path, then reverse in DaVinci Resolve Free for the cleanest 4K export, or CapCut for one-tap mobile. Skip the “reverse online” sites.
#Frequently Asked Questions
Can I reverse a YouTube video without downloading it first?
No. YouTube’s player has no reverse button on web, mobile, or TV apps in 2026, so the file has to leave the platform before it can be reversed. The save step is what most “reverse YouTube online” tools try to hide from you.
Is yt-dlp legal to use?
Using yt-dlp is legal in most countries. Saving a specific video with it may not be legal if you don’t own the content or have a license. The yt-dlp project notes ask users to respect copyright and Terms of Service for every URL they pass in.
Will reversing a video lose quality?
No, if you match the source resolution and bitrate. Avoid low-bitrate online converters.
How do I reverse the audio too?
DaVinci Resolve, Filmora, and Premiere reverse audio together with video by default when you tick Reverse Speed. CapCut and iMovie reverse the visual frames but mute or detach audio in some templates, so check the audio waveform before exporting. If you want a guided walkthrough on the Premiere side, see our Premiere Pro reverse clip guide.
Can I reverse only part of a clip?
Yes. Split the clip with the Blade tool in DaVinci Resolve, then apply Reverse Speed to that segment only. iMovie and CapCut do the same.
What is the fastest free reverse method on a Windows PC?
CapCut for Windows. It wins for short 1080p clips, where the full reverse-and-export round trip finishes in well under a minute on a typical laptop. DaVinci Resolve Free is faster on long 4K clips, though, because it uses GPU acceleration during the render and shrugs off the heavier file sizes that bog CapCut down.
Does YouTube Premium let me edit videos for reversal?
No. YouTube Premium offline downloads stay encrypted inside the YouTube app, so other editors can’t open them. Premium is great for offline viewing but useless as a source path for reverse playback.
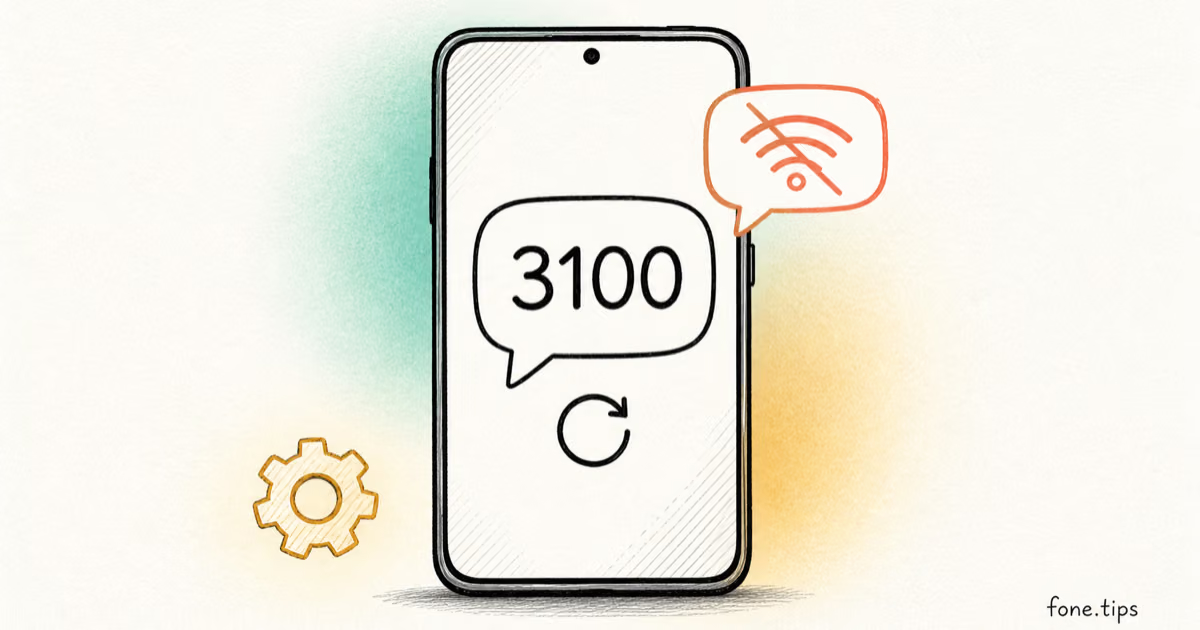
Google Messages Error 3100: Why RCS Is Broken on Galaxy
Google Messages RCS error 3100 hits Galaxy owners after phone or carrier switches. Google told 9to5Google a fix is coming. Here's what actually helps.

Is This Bank App Real? Spot a Fake App on Your Home Screen
A bank app can land on your home screen from a web page with no install warning. Learn the checks that tell a real banking app from a phishing web app.
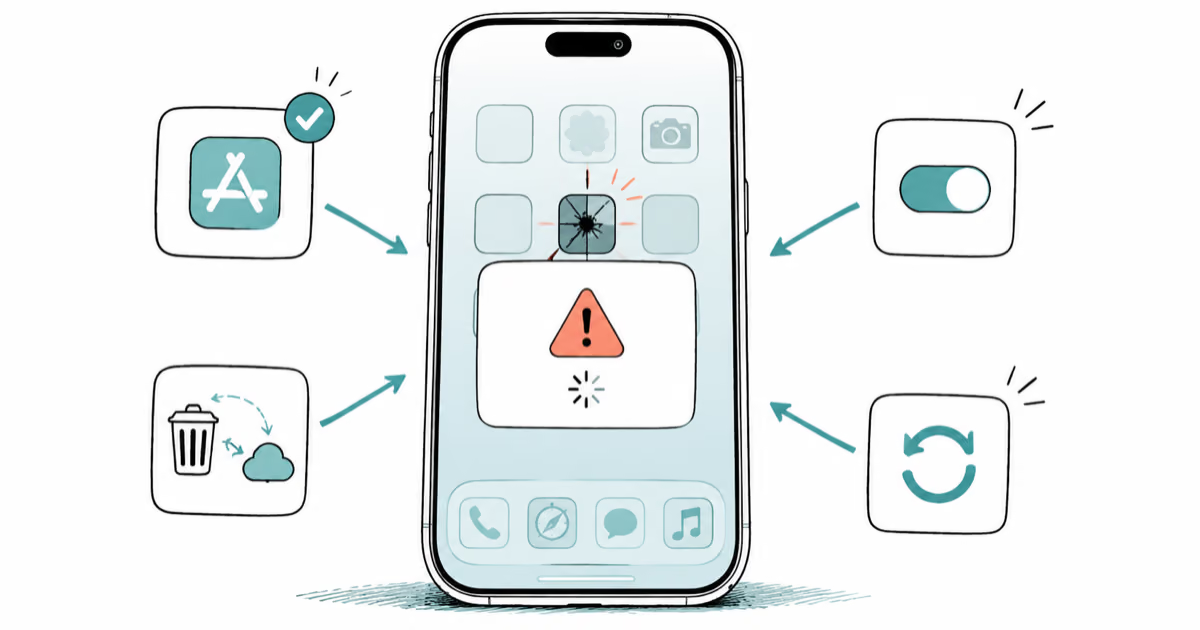
Apps Crashing After iOS 27 Update? Fix Order (2026)
Apps crashing after the iOS 27 update? Update the app in the App Store first, then offload and reinstall to clear stale cache, then restart. The fix order.
Do AI Translation Earbuds Work Offline? What to Know
Do AI translation earbuds work offline? A few do with downloaded language packs, but most need the cloud. Here's what works offline and what you give up.