What Does Restore iPhone Mean? Process and When to Use It
Restore iPhone wipes data and reinstalls iOS, returning the device to factory state. Learn the process, effects, and how it differs from Reset.
Quick AnswerRestoring an iPhone wipes all content and settings, then reinstalls a clean copy of iOS so the device boots like new out of the box. Apple uses the word Restore to mean a factory-state reinstall through Finder, iTunes, or recovery mode.
Restore iPhone is Apple’s term for wiping the device and reinstalling iOS in one pass. It’s the heaviest fix in the iPhone toolkit, and it’s also the step Apple Support hands you when a softer reset hasn’t worked. The behavior is straightforward: every personal byte goes, the OS image is rewritten, and the device hands you the Hello screen.
- A Restore erases every photo, app, message, setting, and saved password, then reinstalls the current public iOS release in a single Finder, iTunes, or recovery-mode flow.
- A standard Restore over a USB-C or Lightning cable takes a while from “Restore iPhone” click to the Hello screen, especially if the iOS firmware download is not already cached.
- Restore is different from Reset: Reset All Settings keeps your data, Erase All Content and Settings keeps the OS, and Restore wipes both and lays down a fresh iOS image.
- You can recover almost everything afterward by signing back into iCloud or choosing Restore Backup from a Mac or PC, so a Restore is destructive only if you skipped the backup step.
- Restore is a legitimate fix for your own iPhone; restoring a found, lost, or stolen device that is still tied to another person’s iCloud account does not unlock it and is treated as unauthorized access under federal law.
#What Does “Restore iPhone” Actually Do?
When you click Restore iPhone in Finder or iTunes, three things happen back to back. First, the device’s storage is securely erased. Second, the current public iOS firmware (an .ipsw package) is downloaded if Apple does not already have it cached. Third, that firmware is flashed onto the iPhone and the device reboots into the standard Hello-screen setup flow.
What’s gone afterward: nothing personal stays. Even your Apple ID is logged out unless you sign back in during setup.
The word Restore confuses people because it has two meanings inside Apple’s own UI. The button labelled Restore iPhone wipes the device. The button labelled Restore Backup copies a saved backup back onto a clean iPhone. Apple uses the first meaning when you Restore from a Mac or PC, and the second meaning when you pull a backup from iCloud during setup.
#Restore vs Reset vs Erase: What’s the Difference?
These three labels live in different menus and do very different work. Mixing them up is how people lose data they meant to keep.
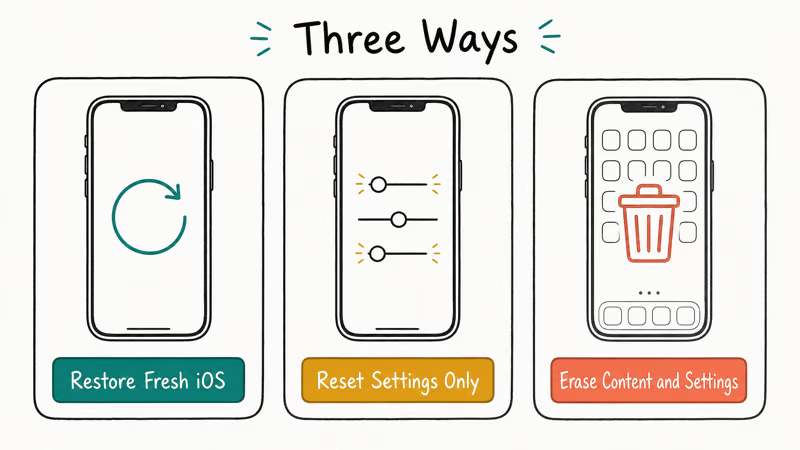
| Action | What it erases | What it keeps | Where you find it |
|---|---|---|---|
| Reset All Settings | Wallpaper, network, keyboard, Home Screen layout | Photos, apps, messages, accounts | Settings > General > Transfer or Reset iPhone > Reset |
| Erase All Content and Settings | All user data | The installed iOS version | Settings > General > Transfer or Reset iPhone > Erase All Content and Settings |
| Restore iPhone | All user data and the OS image | Nothing | Finder / iTunes > device page > Restore iPhone |
| Restore from Backup | Nothing (it’s the recovery step) | Existing iOS install | Finder / iTunes > Restore Backup, or iCloud during setup |
The practical difference: if your iPhone has a deep iOS bug, Erase All Content and Settings might not help because the bad firmware stays on disk. A Restore swaps the firmware itself. Apple’s Finder guide says macOS Catalina or later can use Finder with an iPhone, while its factory-restore guide directs Mac users to Finder and Windows users to Apple Devices. Those pages document the workflow, not a technician hardware-swap policy.
If you just want a quick refresh without losing your photos, see our walkthrough on how to reset your iPhone, which covers the three softer reset paths that stop short of a full Restore.
#When a Restore Is the Right Fix
Restore is a strong fix, not a routine one. The cases that actually call for a Restore:
- Persistent crashes after an iOS update. Apps quit at launch, the Home Screen freezes, Settings panes never load.
- Battery percentage drops without normal use. A clean OS image rules out a runaway daemon stuck on the device.
- Recovery-mode boot loops. If the device drops into recovery mode on its own, Restore is the only way out from Finder. Our guide on iPhone stuck in recovery mode walks through the recovery and DFU sequence step by step.
- Selling, trading in, or gifting the iPhone. Apple recommends a Restore (after signing out of iCloud) before a device leaves your hands. According to Apple’s trade-in preparation guide, erasing and restoring removes your Apple ID lock so the next owner can activate the phone cleanly.
- You forgot the passcode and your iPhone is disabled. Apple recommends Restore via recovery mode in this case; if the device is locked from too many wrong attempts, the official path is documented in our piece on reset iPhone without passcode and computer.
- Suspected malware or sketchy profile. Restore wipes any rogue MDM profile or shady configuration along with everything else, which is faster and more thorough than chasing it through Settings.
You don’t need to Restore for routine slowness. Try Reset All Settings first.
#How to Restore an iPhone Through Finder or iTunes
This is Apple’s official method. You’ll need the device, a Mac or PC, and a working cable. Total time varies by firmware download speed, cable reliability, computer speed, and device storage state.
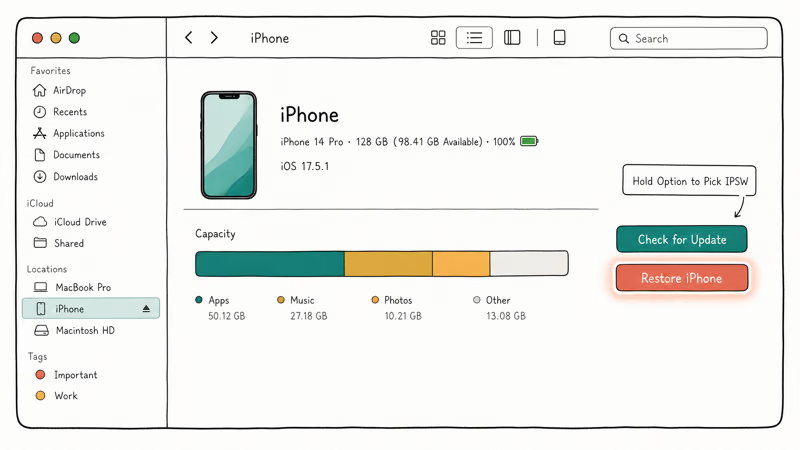
- Update Finder or iTunes. macOS 10.15 Catalina and newer use Finder; older Macs and all Windows PCs use iTunes. Open the App Store or Apple’s iTunes download page and pull the latest build.
- Sign out of Find My. Go to Settings > [Your Name] >
Find My>Find MyiPhone and toggle it off. You’ll be asked for your Apple ID password. This step is required, or the Restore stops with the “Find My iPhone must be turned off” error. - Connect the iPhone. Use the cable that shipped with the phone, or any Apple-certified cable. Cheap cables can drop the data line during the firmware flash and are a common cause of restore failures.
- Open the device page. In Finder, the iPhone appears in the sidebar. In iTunes, it shows as a small phone icon in the top-left.
- Trust the computer. On the iPhone, tap Trust and enter the passcode if prompted.
- Back up first. Click Back Up Now under “Backups.” Choose “Encrypt local backup” if you want passwords, Health data, and saved Wi-Fi networks included.
- Click Restore iPhone. Confirm when the dialog asks if you want to erase and reinstall iOS.
- Wait. Finder downloads the latest
.ipsw(around 7 GB on iOS 18), flashes the device, and reboots it. Don’t unplug.
If the Restore hangs on the progress bar for more than an hour, that is the time to investigate cable and USB port issues. Our walkthrough on iPhone won’t restore in recovery mode covers the recovery-mode forced restart, which is the next step Apple Support hands you.
#Three Things to Do Before You Hit Restore
Three jobs, in order: back up, sign out, write down credentials.
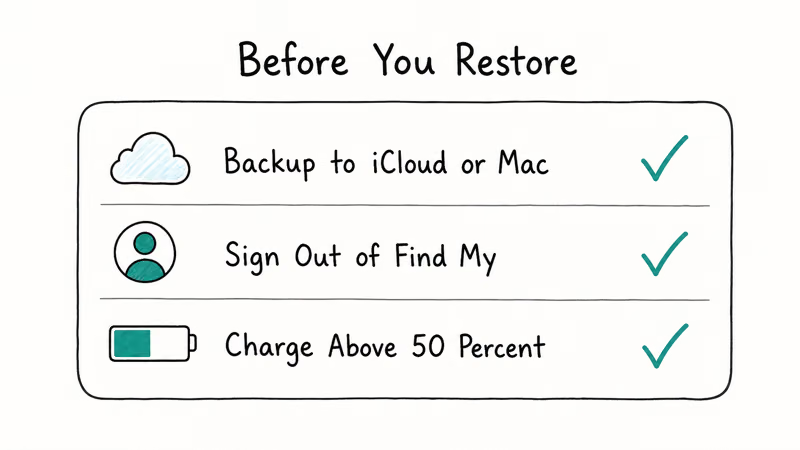
Back up first. The official Apple recommendation, per the back up your iPhone support article, is to make both an iCloud backup and a computer backup before any factory action.
iCloud runs automatically when the phone is on Wi-Fi, charging, and locked. A fresh manual iCloud backup right before the Restore catches anything from the last 12 hours. The Finder or iTunes backup is faster to restore from and includes the iOS Keychain if you tick “Encrypt local backup.”
Sign out of Find My and iCloud. If Find My iPhone is on and you Restore the device, the new “owner” (even if that is you, freshly set up) will hit Activation Lock at the Hello screen and need your Apple ID password. That is the point of the lock. Sign out at Settings > [Your Name] > Sign Out before the Restore so the next setup is friction-free.
Write down anything not in the backup. Two-factor authentication codes for sites you have not linked to iCloud Keychain. Authenticator app seeds. Apple Pay cards if you don’t want to re-add them. Anything stored in apps that don’t back up to iCloud or your Mac.
If your backup got stuck the last time you tried, our notes on iPhone backup failed cover the most common storage and Apple ID causes.
#Restoring from a Backup vs Setting Up as New
Once the Restore finishes and the iPhone shows the Hello screen, the setup flow asks how you want to start. There are three real options:
- Restore from iCloud Backup. Sign in with your Apple ID and pick the most recent backup. Photos, messages, and app data stream down over Wi-Fi. Apps re-download themselves from the App Store. This can take a long time depending on backup size and connection speed. The iPhone is technically usable while it works.
- Restore from Mac or PC. Plug into the same computer that holds your Finder or iTunes backup, click Restore Backup, and the data copies over the cable. It’s usually much faster than iCloud for large backups because it avoids downloading everything over Wi-Fi.
- Set Up as New iPhone. Skip the backup entirely. Apps, settings, and data start empty. This is the cleanest possible state and the right choice if you Restored to fix corruption you suspect was inside the backup itself.
There is a fourth path that comes up with disabled devices and forgotten passcodes: starting from no working access at all. The official answer is to Restore in recovery mode, then choose Set Up as New (because you can’t enter Apple ID to download the backup). If you do remember the Apple ID, you can Restore from iCloud at the Hello screen after the wipe.
#When a Restore Fails or Gets Stuck
Restore failures look scary, but they almost always trace back to four causes: a flaky cable, an unstable USB port, an Apple-server hiccup during a new iOS release, or a third-party security tool blocking iTunes traffic on Windows.
Try this fix sequence:
- Swap the cable. Use the original Apple cable if you have one.
- Plug straight into the computer. Skip USB hubs and dock pass-throughs.
- Reboot the computer. Yes, really. Finder and iTunes ship a helper process (
AppleMobileDeviceHelper) that occasionally wedges and only a reboot frees it. - Force restart the iPhone. Volume Up, Volume Down, hold Side button until you see the Apple logo or the recovery cable screen.
- Try recovery-mode Restore. This is the official Apple recovery path and is documented in our piece on iPhone won’t restore in recovery mode if the standard recovery sequence itself stalls.
- Try a different computer. On Windows, antivirus or VPN clients can break the iTunes USB tunnel.
If the Restore stops because the backup itself is corrupt, that is a separate problem with a separate fix. Our notes on iTunes corrupt backup cover the file-level repair steps.
A standalone third-party tool can help when Apple’s own Restore path hangs in DFU and you don’t want to drive to an Apple Store. Tenorshare ReiBoot scripts the same recovery sequence Apple’s technicians use, but no software tool can fix hardware failure.
Some links on this page are affiliate links, which means fone.tips may earn a commission at no extra cost to you.
Tried RecBoot first? See our RecBoot doesn’t work guide.
It isn’t magic. If the issue is hardware, no software fix will help. As a one-button alternative to manually navigating recovery and DFU, though, it removes friction.
#Restoring Someone Else’s iPhone Is Not Allowed
Restoring is only legitimate on a device you own or that you are authorized to wipe. This matters because the Restore button is the same on every iPhone, but the legal context is not.
Your own iPhone. Restore freely. Sign out of Find My first, run the wipe, and the next setup flow is yours.
A used iPhone you bought from a stranger. Activation Lock is the deciding factor. After the Restore, the Hello screen asks for the previous owner’s Apple ID password if Find My was on at sale time.
There is no legitimate way around this. Apple’s Activation Lock guide says a used iPhone isn’t ready until the previous owner removes it from their account. If the seller isn’t present, Apple directs them to use a browser to remove the device; don’t accept the seller’s password as a handoff.
A found iPhone. Hand it to the carrier store, the original owner, or local law enforcement. According to Apple’s Find My support documentation, the device’s IMEI and Apple ID binding identify the legitimate owner. Restoring a found iPhone does not unlock it and is treated as unauthorized access under the federal Computer Fraud and Abuse Act in the United States, with parallel laws in the EU, UK, Canada, and Australia.
Stolen. Don’t restore. Return.
For stale iCloud accounts attached to your iPhone, see how to delete an iCloud account from an iPhone for the official sign-out path.
#Bottom Line
If your iPhone is misbehaving in a way that survived a reboot, a software update, and Reset All Settings, Restore is the next correct step, not the first one. Back up to iCloud and to your Mac or PC, sign out of Find My, click Restore iPhone in Finder, and plan for about half an hour of unplug-free wait time.
If the device is locked or stuck and Finder can’t talk to it, recovery mode (or Tenorshare ReiBoot as a one-button alternative) is your next stop. Only Restore an iPhone that is yours. Activation Lock is the wall that catches everyone else, by design.
#Frequently Asked Questions
Does restoring an iPhone delete everything?
Yes. Restore erases all user data and reinstalls iOS from scratch. Back up first and you’ll put almost everything back during setup.
How long does a Restore take?
On a recent iPhone over USB-C, the wipe-and-reinstall phase takes 20 to 35 minutes once the iOS firmware is downloaded. The firmware download adds 10 to 25 minutes the first time. iCloud restore-from-backup afterward can take 1 to 8 hours of background app downloading on Wi-Fi, depending on backup size. A local Finder or iTunes backup runs over the cable and is usually 15 to 45 minutes for backups under 100 GB.
What’s the difference between Restore and Erase All Content and Settings?
Erase All Content and Settings runs on the iPhone, wipes user data, and keeps the existing iOS on disk. Restore wipes data and reinstalls iOS, so it can fix corrupted iOS files that Erase can’t touch.
Will Restore remove Activation Lock?
No. Activation Lock is tied to the Apple ID, not the device, and survives every form of restore including DFU. After the Restore, the Hello screen asks for the Apple ID and password that were signed in when Find My was last enabled. The only legitimate path is signing out of the original Apple ID, either on the device before the Restore or remotely from iCloud.com Find Devices.
Can you Restore an iPhone without a computer?
Partially. You can erase the device directly from Settings > General > Transfer or Reset iPhone > Erase All Content and Settings, and that wipes data and resets iOS to a setup-screen state. You can’t reinstall iOS itself without a computer, so this is technically Erase, not Restore, in Apple’s terminology. The difference matters only when the iOS install on disk is broken, in which case you need Finder or iTunes anyway.
What happens if the Restore fails halfway?
The iPhone usually ends up in recovery mode, showing a cable-and-laptop graphic on screen. From there, plug it into Finder or iTunes and you’ll be offered Restore or Update. Persistent failures point to a hardware fault that an Apple Store can confirm.
Should you Restore as new or from backup?
Restore as new if you’re troubleshooting a problem you suspect was caused by something in the old setup: a misbehaving profile, a corrupt app, or a setting you can’t trace. Restore from backup if the goal was to fix iOS itself and you want your data back. For everyday Restores, backup restore is the practical default; setup as new fits stubborn problems that survived a backup-restore cycle.
Mac mini M6 vs M5 Pro: Which Model Should You Buy?
Mac mini M6 vs M5 Pro compared on price, memory, ports, displays, and real workloads. Find the better 2026 Mac mini for your desk and budget.
Apple Siri Settlement: Who Qualifies and How to Claim
Apple's $250 million Siri settlement covers iPhone 15 Pro and iPhone 16 models bought June 2024 to March 2025. See who qualifies and how claims work.
iOS 26.6.1 Security Update: What Apple Fixed and Who Gets It
Apple released iOS 26.6.1 on August 17 with 29 security fixes, including an IPSec interception bug. See what it patches, who gets it, and how to update.
iPhone Adaptive Power: How It Works and When to Use It
Learn how iPhone Adaptive Power works, which models support it, what it changes, and when Low Power Mode is still the better battery-saving choice.