How to Watch VLC Frame by Frame: Step-by-Step Guide
Step VLC video one frame at a time with the E key, a custom hotkey, or the Next Frame toolbar button. Includes reverse-frame workarounds and tips.
Quick AnswerPress E on your keyboard to step VLC forward one frame at a time, then hit Spacebar to resume playback. To step backward, install the Jump to Time extension because VLC has no native reverse-frame hotkey.
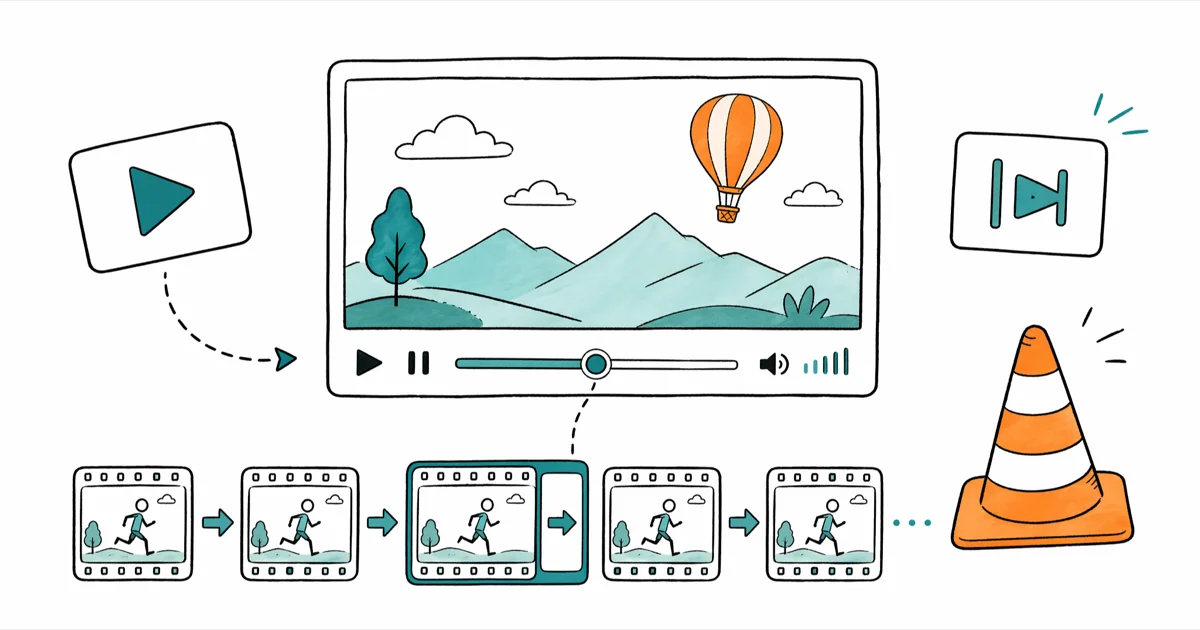
VLC frame by frame is a one-key trick: press E to nudge the video forward exactly one frame, then press Spacebar to resume normal playback. It’s the fastest free way to scrub through a clip when you need to read a license plate, freeze a sports moment, or pull a clean screenshot. The catch most people hit on day one: VLC can’t step backward one frame without help, and there’s no setting toggle to fix that.
- Press E to advance one frame and Spacebar to resume; the default hotkey works on every desktop VLC build since version 1.1.
- VLC has no native frame-step-backward function. You either install the Jump to Time and Previous Frames extension or open the file in a video editor.
- Remap the key under
Tools>Preferences>Hotkeys, double-click Next Frame, press your new key, and click Save. - Add a permanent toolbar button through
Tools>Customize Interface, then drag Frame by Frame from Toolbar Elements onto Line 2. - Read displayed and lost frame counts under
Tools>Media Information>Statistics, paused on the frame you want to inspect.
#How Do You Play VLC Frame by Frame on Windows or Mac?
Open your clip, press spacebar to pause, then tap E to step forward one frame.
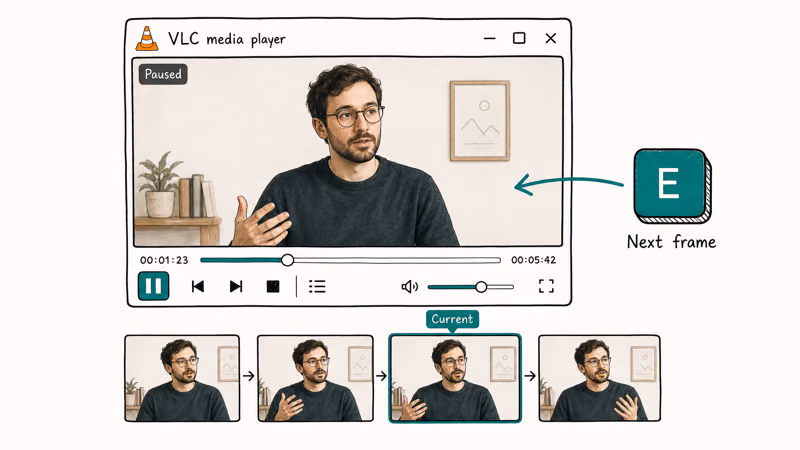
According to VideoLAN, version 1 of VLC’s Hotkeys reference lists “E” as the default Next Frame binding on Windows, macOS, and Linux builds. The keyboard behaves the same whether the player is paused or running.
The hotkey advances by one source frame per press. The on-screen timecode only moves when enough frame duration accumulates, so it may not tick on every press. The hotkey should not permanently disturb audio sync when playback resumes.
Useful behavior to know:
- Hold the key and VLC steps forward repeatedly, with the rate varying by codec and system load.
- The E key fires even with the playback toolbar hidden, so fullscreen scrubbing still works.
- Subtitle tracks freeze on the current cue while you step forward.
If E does nothing, your VLC build is older than 1.1 or another app is intercepting the keypress. Update from the official VLC downloads page and quit any keyboard remappers (Karabiner, AutoHotkey) before retrying. VLC’s project history on Wikipedia confirms the Next Frame command shipped in the 1.1 release back in 2010, so any current binary supports it.
#How to Remap the Frame-by-Frame Hotkey
The E key is convenient, but it collides with editing apps and gaming overlays. Remap it once and you won’t fight that conflict again.
- Open VLC and click
Tools>Preferences(orCmd + ,on macOS). - In the Simple Preferences window, click the Hotkeys tab. On smaller windows, use the search box and type “Next Frame.”
- Double-click the row labeled Next Frame. A small “Hotkey change” dialog opens.
- Press the key you want to assign. A right-arrow combination can work well when you need to avoid conflicts with editing apps.
- Click Assign, then Save at the bottom of the Simple Preferences window.
Restart VLC if the new key doesn’t take effect on the very next clip. VideoLAN’s hotkey config file documentation confirms that VLC reads hotkey settings on launch, so a fresh start guarantees the binding is live.
#How to Add a Frame-by-Frame Button to the VLC Toolbar
Prefer the mouse? Expose Next Frame as a dedicated playback button.
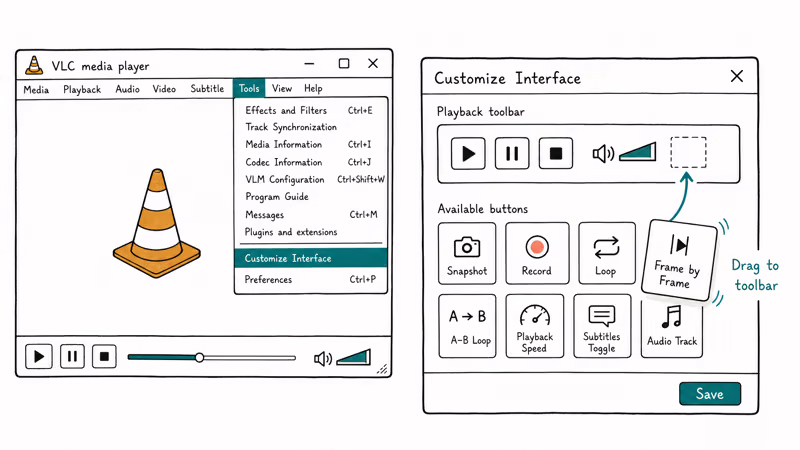
- Click
Tools>Customize Interface(Windows) orVLC>Customize Interface(macOS). - In the Toolbar Editor, scroll the Toolbar Elements panel until you see the Frame by Frame icon (it looks like a forward-stepping film cell).
- Drag the icon onto Line 2 of the bottom toolbar, where the play, pause, and stop buttons already live.
- Click Close. The button stays put through future launches.
One click acts the same as one E press. The button is especially handy when you’ve remapped E to a less-friendly combination.
#Can You Step Backwards Frame by Frame in VLC?
Not natively. VLC’s playback engine reads forward only, and VideoLAN’s developer documentation confirms that frame-stepping backward isn’t supported by the core decoder. You have three realistic workarounds.
Option 1: Install the Jump to Time and Previous Frames extension. Download the Lua add-on from VideoLAN’s official addons site and drop it into ~/Library/Application Support/org.videolan.vlc/lua/extensions/ on macOS or %APPDATA%\vlc\lua\extensions\ on Windows. Restart VLC, open the View menu, and pick the new extension to expose a Previous Frame action you can bind.
Option 2: Enter a precise timestamp with Ctrl + T. Subtract a frame’s worth of time (33 ms for 30-fps, 41 ms for 24-fps) and jump there. It’s fiddly, but it works in a pinch when you can’t install extensions.
Option 3: Open the clip in a dedicated editor. MiniTool MovieMaker has Step Forward and Step Backward buttons next to the timecode in its Preview pane, and the free tier handles the file types most VLC users throw at it. If you’d rather stay in a free workflow, our roundup of free video editing software with no watermark covers four alternatives that ship with native frame-step controls.
Some links on this page are affiliate links, which means fone.tips may earn a commission at no extra cost to you.
VideoLAN recommends the Lua extension route for users who only need occasional reverse-frame access. The extension is a workaround, not a true timeline; for surgical work like color-grading reference or motion-tracking debug, an editor with real frame controls still wins.
#How to Find the Current Frame Number in VLC
VLC doesn’t show the active frame index on the playback bar, but it tracks it under the hood.
- Pause the video on the frame you want to inspect.
- Open
Tools>Media Information(orCtrl + Ion Windows,Cmd + Ion macOS). - Click the Statistics tab.
- Under the Video block, read the Displayed frames and Lost frames counts. Add them together to get the running frame index from the start of playback.
This is useful when you’re comparing two captures of the same source (say, the original encode versus a re-encode) and want to confirm both players landed on the same frame.
The Statistics tab refreshes every half-second. Wait a beat after pausing before you trust the number.
#How to Capture Frames as Images in VLC
Pair frame-stepping with VLC’s built-in snapshot tool and you have a free, fast way to pull stills.
- macOS: Pause on the target frame, then press
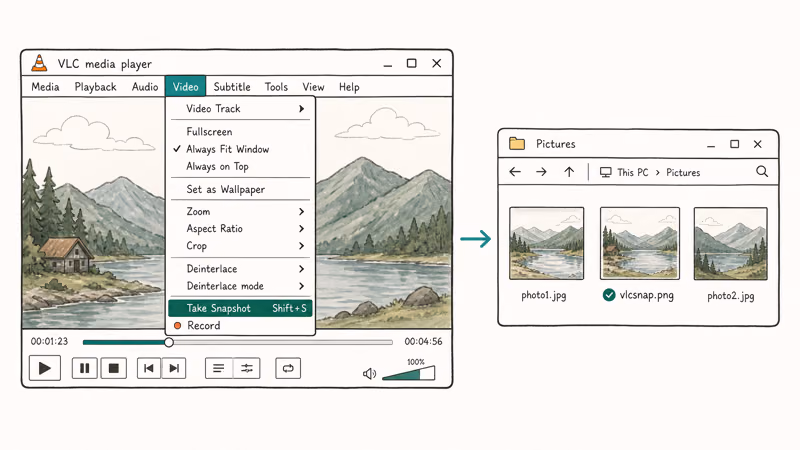
Cmd + Alt + S(or clickVideo>Snapshot). The PNG drops into~/Pictures. - Windows: Use
Shift + SorVideo>Take Snapshot. The file lands inC:\Users\<you>\Picturesby default. - Linux:
Ctrl + Alt + Ssaves to~/Picturesunless you’ve changed it inPreferences>Video.
To change the output folder or switch from PNG to JPG, open Tools > Preferences > Video and edit the Video Snapshots section. PNG keeps every pixel at full quality, which matters if you plan to zoom in. JPG saves disk space when you’re capturing dozens of frames in a row.
For multi-frame extraction (every nth frame of a clip), VLC’s Scene Filter is a better fit than mashing the snapshot key. The VideoLAN documentation on scene capture walks through the command-line flags, including frame ratio and output prefix.
#Troubleshooting Files VLC Won’t Play
Frame-stepping is only useful if the clip actually loads. Two common blockers stop people short.
The codec error (typically Windows error 0xc00d36c4 or a green-screen audio dropout) means the file uses a codec VLC can’t decode. Three resources cover the fix from different angles:
- Our walkthrough on the 0xc00d36c4 error shows the K-Lite Codec Pack route, which adds the missing decoders in about four minutes.
- The deeper audio codec not supported guide expands the same fix to broader audio decoding failures.
- If you’d rather try a different player first, our best video players roundup pits VLC against four free alternatives.
The other blocker is corrupted MKV containers. VLC handles most MKV files fine, but heavily damaged ones produce frozen playback. The best MKV player roundup includes two repair-tolerant players, and our extract subtitles from MKV guide is the companion piece if you need the captions back after a re-encode.
If your file plays but loads upside down or sideways (a common phone-recording quirk), use the rotate-a-video in Windows Media Player guide first. Analyzing a sideways clip is a waste of your time.
#Bottom Line
Set up VLC once: remap Next Frame to a key that doesn’t clash with your other apps, add the toolbar button for screen-shares, and bookmark the Jump to Time extension for the day you actually need to go backward. With those three changes locked in, VLC stops feeling like a one-direction player and starts working like a lightweight forensic viewer. If reverse-frame is a daily need, install MiniTool MovieMaker or Shotcut and treat VLC as the playback companion.
#Frequently Asked Questions
Can you watch frame by frame in VLC on iOS or Android?
No. The mobile builds don’t expose Next Frame.
Why doesn’t the E key work in my copy of VLC?
Three usual suspects to check in order. Your build is older than 1.1, in which case you should update from videolan.org. Another app is grabbing the keypress before VLC sees it, so quit any keyboard remappers and try again. Or you’ve already remapped Next Frame to a different key and forgotten about it; open Tools > Preferences > Hotkeys and inspect the current binding before you blame the software.
How do I know the exact frame rate of my video in VLC?
Open Tools > Media Information, click the Codec tab, and read the Frame rate field under the Video stream. Common values are 23.976 fps (film), 29.97 (NTSC), or 59.94 (high-frame-rate broadcast).
Is there a frame counter overlay I can turn on?
Not in the stock build. You can approximate one by enabling the OSD time display (Settings > Subtitles & OSD) and dividing the displayed timecode by the frame rate. For a true overlay, the Statistics tab in Media Information is the closest you’ll get without third-party tools.
Does pressing E forward affect audio sync?
Stepping forward should not permanently affect audio sync; when playback resumes, VLC re-syncs audio to the current playback position. If you hear drift, restart playback or reload the file.
Can VLC step through a YouTube or streaming URL frame by frame?
Yes, if VLC can load the stream. Paste the URL via Media > Open Network Stream and use the same E hotkey once playback starts. Buffering can stutter the steps, so let the stream fill before you start nudging frames. Geographically restricted streams sometimes refuse to load entirely, in which case VLC throws a generic “can’t open URL” error before you get to frame-stepping.
What’s the smallest time increment VLC can step?
One full source frame. For 30-fps content that’s about 33 milliseconds per step; at 60 fps it’s roughly 17 milliseconds; at 24-fps film it’s about 41 milliseconds. Sub-frame analysis needs an editor like DaVinci Resolve.
Where does VLC save frame-by-frame snapshots?
Pictures folder by default. On macOS and Linux that’s ~/Pictures. On Windows it’s C:\Users\<you>\Pictures. Change the path under Tools > Preferences > Video > Video snapshots, and pick PNG for pixel-perfect captures or JPG for smaller files.

Apps Crashing After iOS 27 Update? Fix Order (2026)
Apps crashing after the iOS 27 update? Update the app in the App Store first, then offload and reinstall to clear stale cache, then restart. The fix order.

Do AI Translation Earbuds Work Offline? What to Know
Do AI translation earbuds work offline? A few do with downloaded language packs, but most need the cloud. Here's what works offline and what you give up.

How to Set Up Translation Earbuds (Pairing and Modes)
How to set up translation earbuds: charge, install the app, pair over Bluetooth, pick two languages, and choose a mode. A step-by-step first-use guide.

Translation Earbuds Not Translating? How to Fix Them
Translation earbuds not translating? Usually it's the app, the internet, or the language settings. Here's how to fix pairing, sound, and lag fast.