Lenovo Stuck on Boot Menu? Here Are the Real Fixes (2026)
Fix a Lenovo laptop stuck on the boot menu in 8 steps: hard reset, BIOS boot order, Novo button, Safe Mode, bootrec commands, and Lenovo Diagnostics.
Quick AnswerPress F2 at startup to enter BIOS, open the Boot tab, and set your internal drive (Windows Boot Manager) as the first device. If that fails, unplug power, hold the power button 15 seconds, then restart with no USB devices attached.
A Lenovo stuck on the boot menu almost always points to a scrambled boot order, a connected USB device, or corrupted Boot Configuration Data. The good news: hardware failure is rare. This guide assumes you own the laptop and have authorization to access its BIOS and recovery tools.
Hardware swaps are usually the last resort, not the first. Eight fixes work across IdeaPad, ThinkPad, Yoga, and Legion. Start cheap (a hard reset) and step down the list.
- A scrambled BIOS boot order is the single most common cause; setting Windows Boot Manager first inside BIOS fixes most cases without any other action.
- USB drives, SD cards, and even phone charging cables can hijack the boot order on Lenovo laptops, so disconnect everything before you start diagnosing.
- A 15-second power-button hold with the charger unplugged clears residual motherboard charge and resolves a meaningful share of cases on its own.
- Corrupted Boot Configuration Data needs a Windows USB installer plus four bootrec commands: fixmbr, fixboot, scanos, and rebuildbcd, run from Command Prompt in the recovery environment.
- Run Lenovo Diagnostics from the F12 boot menu before reinstalling Windows so you don’t put a fresh OS onto a failing drive.
#What Causes a Lenovo to Stop on the Boot Menu?
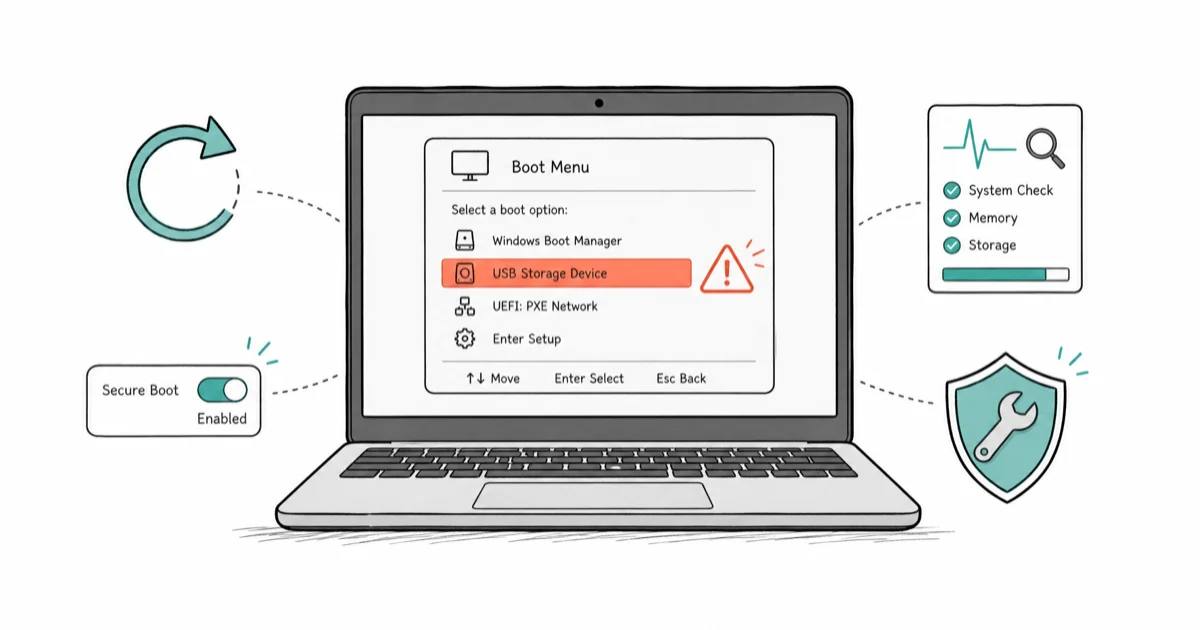
When BIOS can’t decide where to load Windows from, it stops and asks you. That’s the boot menu. Three triggers cover the bulk of cases.
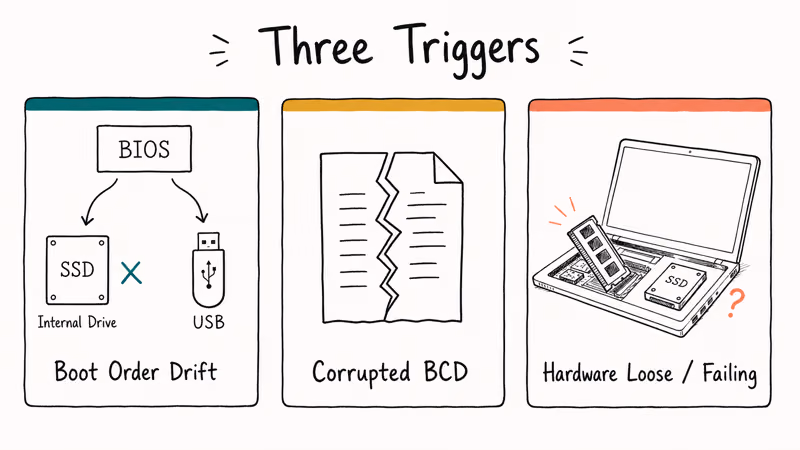
Trigger one is boot order drift. A Windows update, a drained CMOS battery, or a previously connected USB drive can each push the internal drive out of the first slot, leaving BIOS unsure where to look on the next boot.
Number two: corrupted Boot Configuration Data, which usually shows up after a forced shutdown during an update or a power outage mid-install.
And finally, hardware. A loose RAM stick, a failing SSD, or a dislodged storage cable inside the chassis after a drop. Run software fixes first because they’re reversible. Hardware checks come last because they’re cheaper after diagnostics confirm the failure, not before.
#Fix 1: Perform a Hard Reset First
This sounds too simple, and people skip it. They shouldn’t.
A hard reset clears residual charge from the motherboard that can leave the boot controller in an undefined state. On many IdeaPad and ThinkPad models, the 15-second power-button hold clears a stuck boot menu on the first attempt.
- Unplug the laptop from the charger.
- Remove the battery if it’s removable. Older IdeaPads have a release latch on the bottom; ThinkPads and recent Yogas use internal batteries.
- Hold the power button for 15 seconds.
- Reinsert the battery and reconnect the charger.
- Press power and watch whether Windows loads or the boot menu reappears.
Non-removable battery? Pinhole reset underside. Paperclip in for five seconds. On many models, this clears the loop almost instantly.
#Fix 2: Disconnect Every External Device
USB drives are the most common external trigger for this exact failure. Your Lenovo is trying to boot from a connected USB device, can’t find a valid OS on it, and dumps you at the boot menu while it waits for input.
Unplug everything: USB sticks, external drives, SD cards, USB hubs, and any USB mouse or keyboard you don’t actually need. Then restart. If Windows loads, reconnect devices one at a time and reboot between each one to isolate the offender.
Surprisingly, printers and USB-C docks count too. A blank flash drive left over from an old Linux installer can register as bootable inside Lenovo BIOS for years after you reformatted it for ordinary file storage; the boot signature lingers in the master boot record long after the visible filesystem changes. Pull every connection, including the dock.
#Fix 3: Set the Boot Order in BIOS Correctly
This is where the majority of stuck-boot-menu cases get fixed. Your BIOS is set to look at a USB or network device before the internal drive, finds nothing, and stalls indefinitely.
According to Lenovo’s support page on selecting the boot device, there are 3 entry methods that cover virtually every Lenovo product line shipped since 2019:
- IdeaPad, Yoga, Legion: Tap F2 (or Fn + F2) repeatedly the moment you press power
- ThinkPad: Tap F1 repeatedly, or follow the on-screen “To interrupt normal startup” prompt
- Novo button models: With the laptop off, press the small circular Novo button next to the power button or on the left edge. The Novo Menu lets you pick BIOS Setup directly
Once you’re inside BIOS:
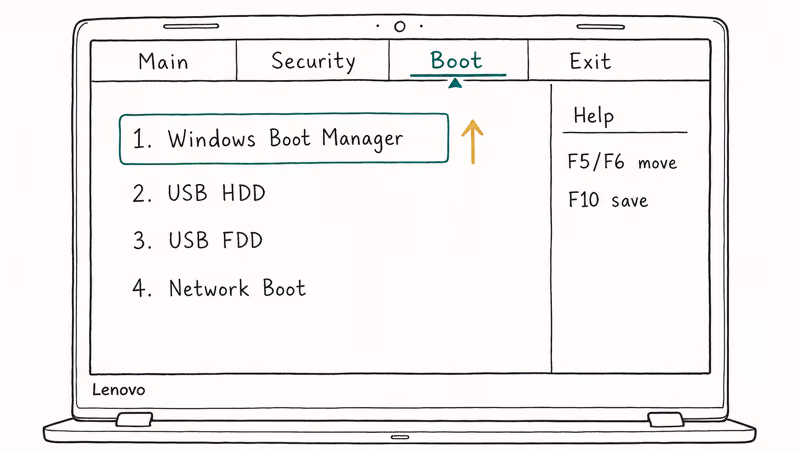
- Use arrow keys to move to the Boot tab.
- Find your internal drive in the boot list. It’s usually labeled Windows Boot Manager, the SSD model name, or SATA HDD.
- Move it to the top of the boot order with F5/F6 or + / - (the active keys are shown on the right pane).
- Press F10 to save and exit.
If your internal drive doesn’t appear at all, skip ahead to Fix 7. Hardware or BCD problem, not a settings tweak.
#Disable Fast Boot If F12 Stops Responding
Some Lenovo models with Fast Boot enabled skip the F12 boot menu on subsequent restarts. Inside BIOS, find Fast Boot under the Boot tab and switch it to Disabled. Save, exit, then try F12 again. If you’re also seeing a stuck logo or a post-update lockup, our guide on a laptop that won’t power on covers the deeper variants of this failure.
#Fix 4: Boot Into Safe Mode From Recovery
Safe Mode loads Windows with only the essential drivers. If a recent driver install or a Windows Update broke the boot sequence, Safe Mode lets you sign in and roll back the offender.
On Windows 11 and Windows 10, F8 no longer works the way it did on Windows 7. The reliable path is the recovery environment:
- Restart and tap F11 when you see the Lenovo logo to open Windows Recovery Environment (WinRE).
- Pick
Troubleshoot>Advancedoptions > Startup Settings. - Click Restart, then press 4 for Safe Mode or 5 for Safe Mode with Networking.
Inside Safe Mode, open Device Manager. Roll back any drivers updated in the last few days. Then check Settings > Update & Security > View update history and uninstall recent updates if their dates line up with when the laptop first failed. If the laptop won’t reach WinRE on its own, you’ll need a Windows USB recovery drive for Fix 6.
#Fix 5: Reset BIOS to Default Settings
Incorrect BIOS settings, such as a misconfigured Secure Boot, a TPM toggle, or an accidentally changed storage controller mode, can prevent the OS from loading. Resetting to defaults wipes the tweaks while leaving your data untouched on the drive.
- Enter BIOS using the key for your model from Fix 3.
- Look for Load Setup Defaults or Load Optimal Defaults, or press F9 if your BIOS shows it as a hotkey.
- Confirm, then press F10 to save and exit.
The Lenovo BIOS/UEFI support hub recommends loading defaults as the first response when boot behavior turns unpredictable after a settings change. One specific toggle to check: Intel Platform Trust Technology (PTT). If you switched it after the original Windows install, BitLocker can lock you out of the drive. Flip it back to its prior state and the boot should return on the next start.
#Fix 6: Repair the Boot Sector With Bootrec Commands
If the internal drive shows up in BIOS but Windows still won’t load, the Boot Configuration Data (BCD) file is most likely corrupted. This happens after hard shutdowns during updates or with a drive that’s starting to fail. The commands below rebuild the BCD and the master boot record from the recovery environment, which repairs the boot path without touching your personal files.
You’ll need a Windows 11 or Windows 10 USB installer. Microsoft’s Media Creation Tool states that the source USB drive must hold at least 8 GB and will be wiped clean during the build. Run the tool on any working PC.
- Plug the USB into the broken Lenovo and boot from it (set USB as first boot device in BIOS temporarily).
- On the Windows setup screen, click Repair your computer, not Install now.
- Open
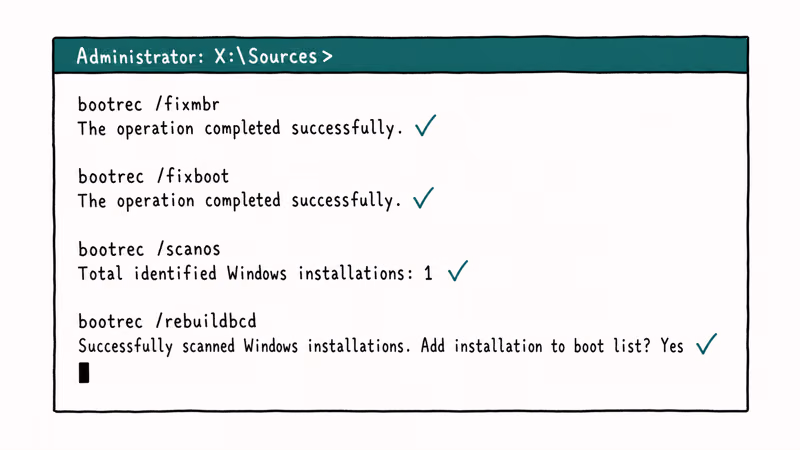
Troubleshoot>Advancedoptions > Command Prompt. - Run these four commands one at a time:
bootrec /fixmbr
bootrec /fixboot
bootrec /scanos
bootrec /rebuildbcd- Restart and remove the USB drive.
If you hit a BCD 0xc00000e9 error along the way, those steps are model-agnostic and apply to any Lenovo. The 0xc0000098 error is another common variant pointing to a missing boot entry, which rebuildbcd typically fixes on the first pass.
If you don’t have a USB installer to hand, our guide on repairing Windows 10 without a disc walks through the built-in recovery options that ship inside Windows itself.
#Fix 7: Run Lenovo’s Built-in Diagnostics
Before you decide it’s software, rule out hardware. Lenovo’s built-in tool runs without Windows, so it works even when the system won’t boot.
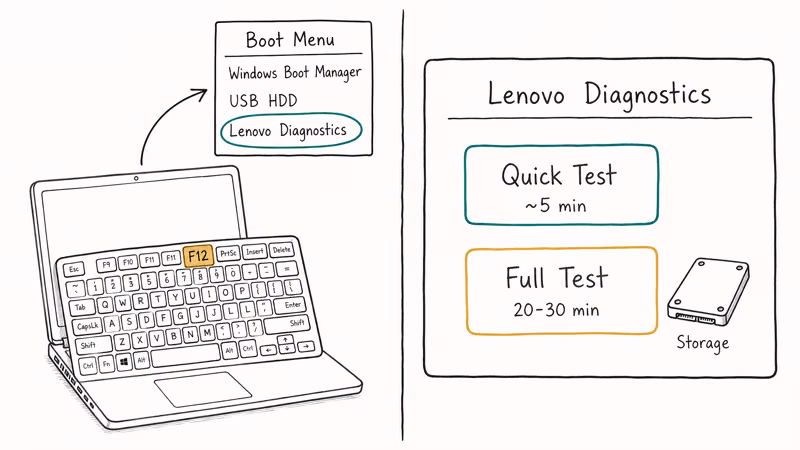
- Restart and tap F12 repeatedly to open the boot menu.
- Pick Lenovo Diagnostics from the list (some BIOS versions label it UEFI Diagnostics).
- Run the Quick Test first. About 5 minutes.
- If Quick Test passes, run the Full Test on the storage device. 20 to 30 minutes, and it catches intermittent failures Quick Test misses.
A failing drive will report an error code here. According to Lenovo’s diagnostic download page, the standalone bootable USB version covers Lenovo systems shipped from 2018 onward. When the Full Test storage check passes on a machine stuck in a boot-menu loop, the real fix is usually a BCD repair rather than a drive swap, which avoids an unnecessary SSD purchase.
RAM test fail? Reseat accessible modules. Soldered-RAM Yogas and Legions need service.
#Fix 8: Reset This PC or Reinstall Windows
If everything above failed, a clean Windows install is the answer. Hardware passed diagnostics. Software is the holdout. A wipe restores a known-good state.
#Option A: Reset This PC (keeps personal files)
- Boot the Windows USB installer and pick Repair your computer.
- Open
Troubleshoot>Resetthis PC. - Choose Keep my files to preserve documents and photos (apps and most settings get removed) or Remove everything for a full wipe.
#Option B: Full Windows Install
This erases the drive. Use it when the drive is suspected of having multiple corrupted areas or when Reset This PC fails midway through.
- Boot from the Windows USB installer.
- Click Install now and follow the prompts.
- Delete the existing partition on the target drive and install to the unallocated space.
Back up anything you can’t afford to lose before either option. If Windows won’t boot at all, a recovery tool like Wondershare Recoverit can build a bootable USB and pull files off the drive before the wipe.
Some links on this page are affiliate links, which means fone.tips may earn a commission at no extra cost to you.
#When Should You Stop Fixing and Replace the Drive?
If Lenovo Diagnostics flagged the storage device as failing, every minute spent on software fixes is wasted.
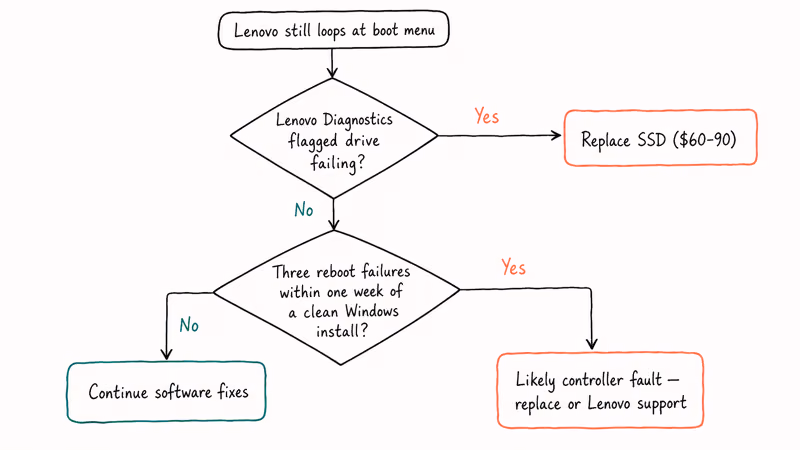
A 1 TB NVMe SSD sits between $60 and $90 in 2026, and most IdeaPad models take less than 30 minutes to swap with two screws and a Phillips head.
The harder call is when the drive passes diagnostics but the laptop still loops. A reasonable cutoff is three repeat failures inside a week after a clean Windows install, which often points to a controller fault that single-pass diagnostics can’t catch.
Both that condition and a flat-out failed test warrant Lenovo support or a hardware swap. For the longer reliability question of whether to repair or replace, the Lenovo vs HP comparison breaks down how the two brands hold up over their service life.
#The Bootable USB Stick You Need to Reinstall
If the boot sector stays corrupt and a repair won’t hold, reinstalling Windows is the reset that works, and that means booting from a USB stick made with Microsoft’s Media Creation Tool. Any reliable 16GB-or-larger USB 3.0 drive does the job, so keep one in a drawer and a dead boot menu never strands you again.
Last updated on Jun 13, 2026
As an Amazon Associate fone.tips earns from qualifying purchases. Prices and availability on Amazon are accurate as of the date above and subject to change.
#Bottom Line
Check BIOS boot order first. Push Windows Boot Manager to the top, save, exit. Most cases solved.
If the internal drive doesn’t appear in BIOS at all, jump straight to Fix 7 and run Lenovo Diagnostics. Skip the temptation to reinstall Windows first; a fresh OS on a failing drive will fail again within days.
Contact Lenovo support with your serial number if Diagnostics reports a hardware error and the laptop is under warranty.
#Frequently Asked Questions
What key opens the boot menu on a Lenovo laptop?
F12 on most IdeaPad, Yoga, Legion, and ThinkPad models. A few older ThinkPad T-series boards use F11. The Novo pinhole button is the keyboard-free fallback.
Why does my Lenovo keep going back to the boot menu instead of loading Windows?
Almost always a boot order issue. BIOS is set to look at a USB drive or network adapter before the internal drive, finds nothing bootable on the external source, and dumps you at the menu. Disconnect every USB device, then check the boot order in BIOS (Fix 3 above). If the internal drive still doesn’t show up, the next likely cause is corrupted Boot Configuration Data covered in Fix 6.
My Lenovo boot menu shows no bootable devices. What does that mean?
BIOS can’t see your internal drive as a valid boot source. Either the drive has failed, the drive connector worked loose (often after a drop or repair), the BCD is corrupted, or Secure Boot is rejecting the OS. Run Lenovo Diagnostics from F12 first. A passing storage test means the drive is healthy and you’re dealing with a BCD issue that the bootrec commands in Fix 6 will repair.
Will resetting BIOS delete my files?
No. BIOS settings live in firmware; user data lives on the SSD. They don’t overlap. Only a factory reset or full Windows reinstall touches user data.
My Lenovo is stuck on a black screen, not the boot menu. Is this a different problem?
Yes, and the diagnosis path is different. A black screen typically points to the display, GPU, or a failed Windows boot animation rather than a stalled boot order. Connect an external monitor with HDMI: if the external monitor shows the desktop, the laptop’s display panel or graphics driver is the issue. If both screens stay black, run a hard reset (Fix 1), then check whether the Lenovo logo appears on next power-on.
Can I fix this without a USB drive or Windows disc?
Sometimes. Tap F11 at the Lenovo logo to reach WinRE, then run Startup Repair. Up to 15 minutes; not always successful. Worth trying before borrowing a working PC to build an installer.
What is the Novo button and when should I use it?
The Novo button is a small recessed button on most IdeaPad and Lenovo Legion laptops, located either next to the power button or on the left edge. With the laptop off, press it with a paperclip or pen tip. It opens the Novo Menu, which gives you direct access to BIOS Setup, the boot menu, and the system recovery partition. It’s the fastest way in if your keyboard isn’t responding during the normal F2/F12 timing window.
I forgot my Windows password after getting back in. How do I fix that?
If the boot fix worked but the login password no longer works, you can reset your Windows admin password using a reset disk. PIN issues after a boot repair often come from a TPM clear during diagnostics; the Windows 10 PIN not working guide covers that case, plus the recovery path for signing in without a password. None of these touch user files.

iPhone Stuck on EDGE? How to Get 5G or LTE Back (2026)
iPhone stuck on EDGE with crawling data? Here's why the E icon appears, which settings force 5G or LTE back, and when the problem is your carrier.
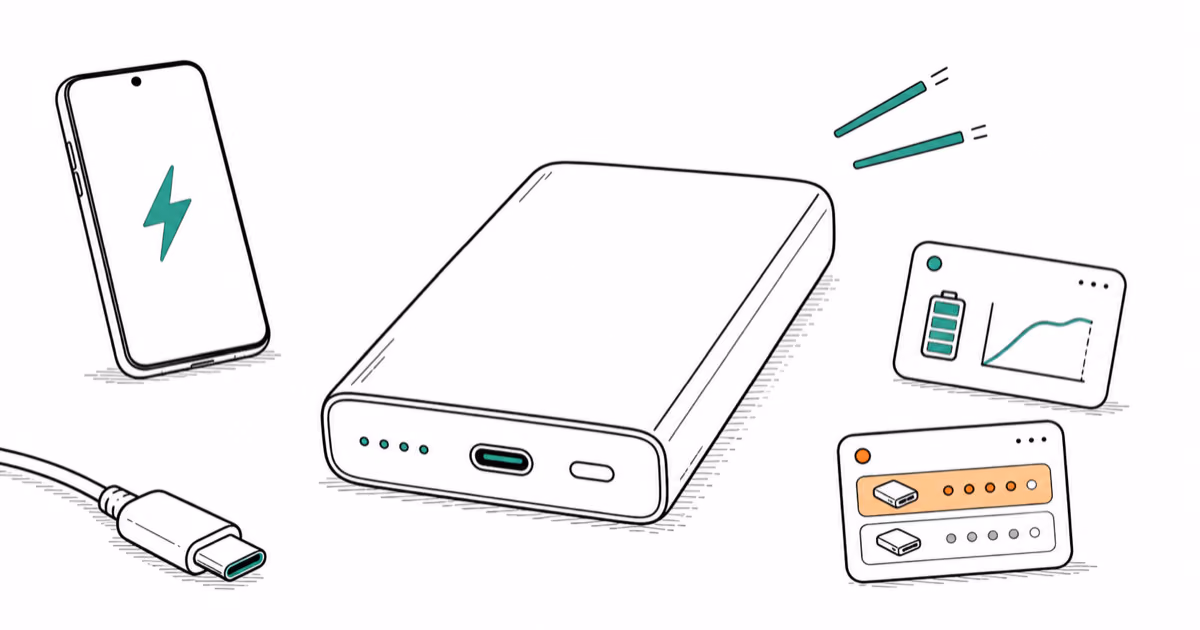
Best Power Bank for Samsung Galaxy (2026): 4 Top Picks
Best power bank for Samsung Galaxy in 2026, with USB-C PD and PPS picks that match 45W Super Fast Charging 2.0 for reliable daily wired top-ups.

Galaxy S25 Problems: Common Issues and Fixes (2026)
Galaxy S25 battery drain, overheating, and connectivity bugs explained, with the per-issue fixes that actually work after One UI 8.5 in 2026.

One UI 8.5 Problems: 2026 Fix Guide for Galaxy Phones
One UI 8.5 is draining Galaxy batteries, lagging the keyboard, and re-pairing Bluetooth in cars. Here are the per-issue fixes that work in 2026.