Windows Scanning and Repairing Drive Stuck? 5 Quick Fixes
Stuck on the Windows scanning and repairing drive screen? Press Escape to skip it, then run CHKDSK or Repair-Volume to fix the underlying corruption.
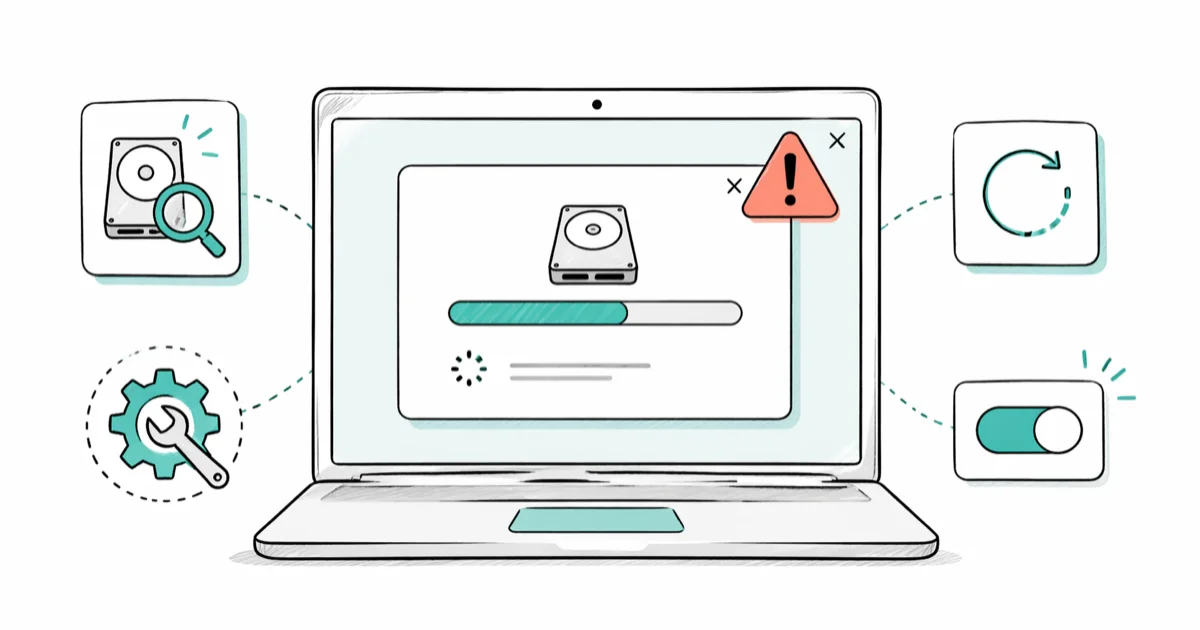
Quick AnswerThe scanning and repairing drive loop appears when Windows detects file system errors after an improper shutdown or power failure. Press Escape during boot to skip the scan, then run CHKDSK or Repair-Volume from Command Prompt to complete the repair manually.
The Windows scanning and repairing drive loop hits at the worst possible time, right after a forced shutdown. On a large or failing drive, the scan can crawl for an hour or more before it finishes. The fix is straightforward: skip the scan, boot to your desktop, then repair the volume on your own schedule.
- Press Escape during boot to skip the automatic scan and reach your desktop in under 30 seconds
- CHKDSK with the /f flag fixes file system errors detected on the volume
- Repair-Volume with -SpotFix targets only broken NTFS metadata, finishing in minutes on a healthy drive
- Repeat appearances of the loop usually point to malware or a failing drive, not leftover corruption
- SMART health checks tell you whether your drive is software-fixable or near end of life
#Why Does Windows Get Stuck on Scanning and Repairing Drive?
Your drive has NTFS file system corruption, and Windows is running a consistency check before it loads the rest of the OS. According to Microsoft, the /f flag repairs file system errors on Windows 10 and 11 systems, while the /r flag finds bad sectors and recovers readable data from them. The full reference lives in Microsoft’s CHKDSK documentation.
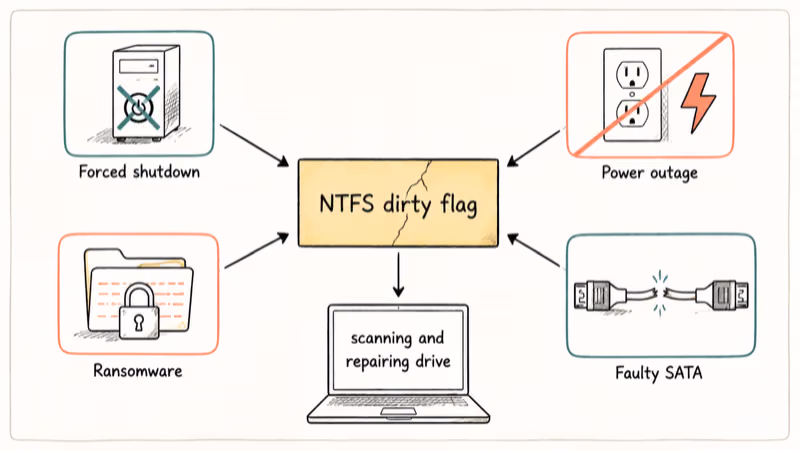
Force-quitting Windows, a hard crash, or a power outage leaves the file system in a half-written state. Physical damage, ransomware, and faulty SATA cables also trigger it.
If you’ve seen the NTFS.SYS stop code on this machine before, the same root cause is at play. Windows uses the same dirty-volume flag whether you’re on a Surface tablet, a custom desktop, or a budget laptop, so the fix path is identical.
#How Do I Skip the Scanning and Repairing Loop Right Now?
Press Escape as soon as the “Scanning and repairing drive” message appears. Most keyboards register the keystroke within 2 seconds, and Windows continues to your login screen.
Here’s the exact sequence:
- Wait for the scanning and repairing drive message (usually 30 seconds after power-on)
- Press Escape or any key on your keyboard
- Windows skips the scan and continues to your lock screen
That’s the trick. The scan resumes on the next boot if you don’t fix the corruption, so don’t restart without running one of the repair commands below.
If the keyboard doesn’t respond, hold the power button for 10 seconds to force shutdown, then power on again. On the second attempt, Windows often skips the scan automatically and loads recovery options instead, where you can choose Continue to Windows to reach your desktop.
#Best Fixes When Windows Still Boots Normally
Once you’ve made it past the lock screen, you can repair the drive without restarting into Safe Mode. These methods run from the desktop while you keep using your PC.
#Method 1: Run the Error Checking Tool
The graphical front end for CHKDSK lives in File Explorer.
- Open File Explorer and right-click your system drive (usually C:)
- Select Properties then click the Tools tab
- Under Error checking, click Check
- Click Scan drive when prompted (Windows often says the drive is fine; run it anyway)
- Reboot when the scan reports completion
On an SSD, this scan usually finishes quickly and often reports no errors. A large mechanical hard drive takes much longer. SSDs always scan faster than mechanical drives because they don’t seek physically.
#Method 2: Use the Storage Health Monitor
Windows 11 has a hardware-level health check buried in Settings.
- Go to
Settings>System>Storage>Advancedstorage settings - Click Disks & volumes
- Pick your system drive and click Properties
- Read the Drive health card
If health reports Caution or Bad, your drive is degrading. Replace it before the loop becomes permanent. A Healthy verdict means the problem is software, and CHKDSK or Repair-Volume can fix it.
This check pulls SMART data directly from the drive controller, so it’s more reliable than third-party utilities for first-pass triage.
#Repair the Corruption Using Safe Mode Commands
When Windows refuses to boot past the scanning screen, Safe Mode with Command Prompt is the fastest path to a working system.
Step 1: Enter Safe Mode
Force three consecutive failed boots by holding the power button during startup. On the fourth power-on, Windows loads the Automatic Repair screen. Then:
- Click Advanced options
- Pick
Troubleshoot>Advancedoptions > Startup Settings - Click Restart, then press 6 for Safe Mode with Command Prompt
If you hit the Windows automatic repair loop instead of this menu, that’s a separate fault to clear before continuing here.
Step 2: Run CHKDSK
At the command prompt, type:
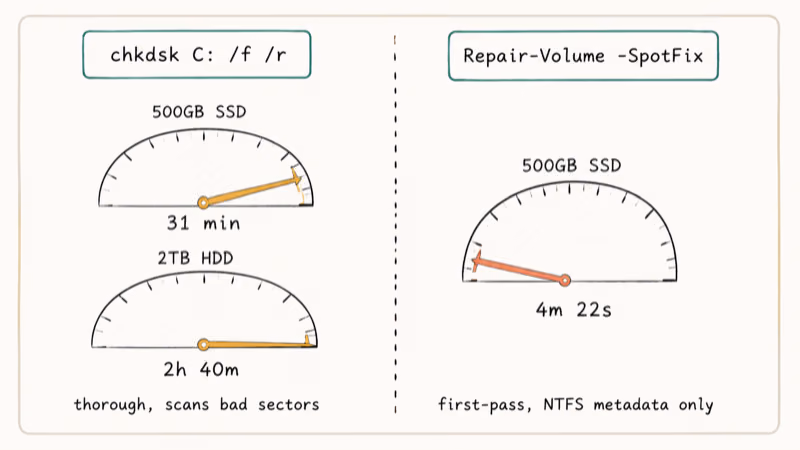
chkdsk C: /f /rThe /f flag fixes file system errors. The /r flag finds bad sectors and recovers readable data from them. This combination takes a fair while on an SSD, and considerably longer on a large mechanical hard drive.
Step 3: Use Repair-Volume as a faster alternative
PowerShell ships with a newer command called Repair-Volume that targets only critical metadata. According to Microsoft’s PowerShell guidance, the -SpotFix parameter takes the volume offline for a few seconds rather than the hours needed for a full scan. Full reference: Repair-Volume on Microsoft Learn.
- Right-click Windows PowerShell and pick Run as Administrator
- Type:
Repair-Volume -DriveLetter C -SpotFixOn a drive where a full CHKDSK pass would take a while, Repair-Volume -SpotFix finishes far faster. SpotFix is the right call for first-pass repair because it skips sectors that aren’t flagged dirty.
Step 4: Reboot
After either command finishes, type exit and restart the PC. The scanning loop should be gone.
#Preventing the Loop From Coming Back
A successful repair means nothing if the same corruption returns next week. Two causes account for almost every recurring case: malware activity and degrading hardware.
#Check for Malware
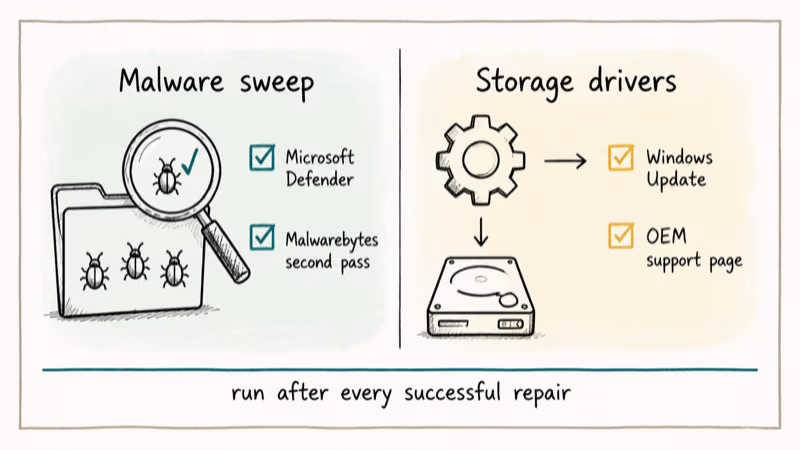
Ransomware and file-locking malware corrupt the NTFS journal repeatedly. Run a full antivirus scan if the loop returns within a week of a successful repair. Microsoft Defender catches most threats, but a dedicated tool like Malwarebytes Free is worth running as a second opinion.
Running both tools together catches more than either one alone, since a second scanner often flags adware or payloads the first one misses. If your loop pairs with high disk usage symptoms, malware is the most likely cause.
#Update Storage Drivers
Outdated AHCI, NVMe, or RAID controller drivers can corrupt write operations and trigger the scan on every boot. To update:
- Go to
Settings>Windows Update - Click Check for updates
- Open Advanced options > Optional updates to find driver updates Windows hasn’t installed yet
- Restart after applying any storage-related drivers
If Windows Update doesn’t surface a fresh driver, pull the latest one from your motherboard or laptop OEM support page. Tools like the Driver Talent driver utility can scan for outdated controllers, though we recommend checking the OEM page first to avoid bundled software.
#Knowing When to Replace the Drive
If the loop returns after a clean malware scan and updated drivers, the drive itself is the problem. Pull SMART data using a free tool like CrystalDiskInfo. Pay attention to these attributes:
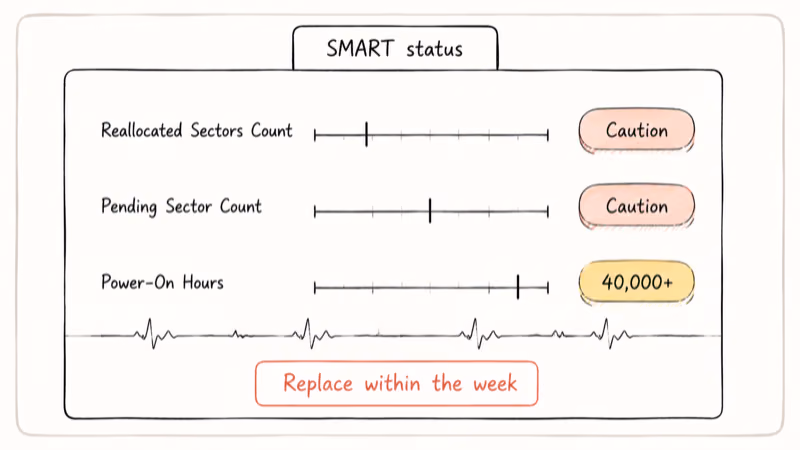
- Reallocated Sectors Count: any value above 0 means the drive has remapped damaged sectors
- Pending Sector Count: a non-zero count signals sectors waiting to be marked bad
- Power-On Hours: drives over 40,000 hours are well past warranty for most consumer SKUs
Microsoft recommends replacing any drive that reports a SMART failure prediction. If your drive shows Caution in Windows Storage health and any of the warning attributes above, back up everything you can read and replace it within the week. A boot device not found error on the next start means you’ve waited too long.
The scan loop combined with SSD not showing up symptoms at boot is also a hardware-failure signal. SSDs often die suddenly rather than degrade gracefully, so don’t trust the drive past the first warning.
#Bottom Line
Press Escape to skip the scan, boot to Windows, then run Repair-Volume -DriveLetter C -SpotFix in an admin PowerShell. That’s the 5-minute fix for the majority of cases. If the loop returns within a week, run a full Malwarebytes scan first, then check SMART status with the Settings health card. A drive showing Caution health and re-triggering the scan needs replacement, not another CHKDSK pass.
#Frequently Asked Questions
How long should the scanning and repairing process take?
A smaller SSD usually finishes a full scan in well under an hour, while a large mechanical drive can take several hours, especially with the /r flag active.
Will pressing Escape damage my drive?
No. Pressing Escape skips the scan but leaves the corruption in place. Your data stays safe. You’ll need to run CHKDSK or Repair-Volume after booting, or Windows will try the scan again on the next startup.
Does CHKDSK or Repair-Volume delete files?
Both commands repair the file system without touching your documents or photos. In rare cases, CHKDSK moves orphaned data into a Found.000 folder at the root of the drive when it can’t reattach files to their original directories. That’s recovered data, not deleted data, and you can sort through it once Windows is back. Always keep an external backup before running heavy disk repairs on an aging drive.
Why does the loop start every single boot after I fix it?
Recurring loops point to either malware re-corrupting the file system or a drive that’s physically failing. Run Malwarebytes in Safe Mode and check SMART status with CrystalDiskInfo.
Is Repair-Volume better than CHKDSK?
For first-pass fixes, yes. Repair-Volume with SpotFix targets only the broken NTFS journal entries and finishes in minutes instead of hours. CHKDSK with /f /r is more thorough because it also scans for bad sectors. Run SpotFix first, then schedule CHKDSK overnight if the issue returns.
Why does this happen after I force-shut my computer?
Forcing a shutdown while Windows is writing to disk leaves a transaction half-finished. The NTFS journal expects either a complete write or a clean rollback, and anything in between flags the volume dirty. That dirty flag is what triggers the scan on the next boot. Always shut down through the Start menu, or hold Shift while clicking Restart for a clean dismount of the drive when you need a fast restart.
Can a BIOS or chipset firmware update prevent the loop?
Sometimes. Storage controller firmware updates from Intel, AMD, or your laptop OEM occasionally fix write-corruption bugs. An outdated chipset driver can cause repeated loops, and a firmware update from the OEM support page sometimes resolves it permanently.

Bluetooth Not Working on Snapdragon X? Fixes for 2026
Bluetooth not working on your Snapdragon X Copilot+ PC? Generic audio, mice, and keyboards work, but vendor apps often lack an ARM build. Fixes inside.

Docker Desktop and WSL2 Not Working on Snapdragon X? Fix It
WSL2 runs fine on Snapdragon X, but Docker Desktop ARM is Early Access and throws WSL errors. Use WSL2 plus native ARM64 Ubuntu and Docker Engine.

Does iTunes Work on Snapdragon X? ARM Windows 11 Guide
Yes, iTunes runs on Snapdragon X laptops through Prism emulation, but the Apple Devices app is the smoother route. Here is what to install on ARM.

Does OBS Studio Work on Snapdragon X? ARM64 Build Guide
Yes, OBS Studio has an experimental ARM64 build since version 31.1, but x64 plugins won't load and hardware encoding is missing. Here is what works.