How to Upgrade Your PC: A Safe Hardware Upgrade Guide
Upgrade your PC safely with this hands-on guide: RAM, SSD, GPU, and CPU swaps, warranty risks, and how to verify Windows 11 compatibility first.
Quick AnswerUpgrade your PC by adding more RAM, switching to an SSD, and refreshing the GPU or CPU on hardware you own outright. Run Microsoft PC Health Check first to confirm Windows 11 compatibility, and remember BIOS updates or hardware swaps can void OEM warranty.
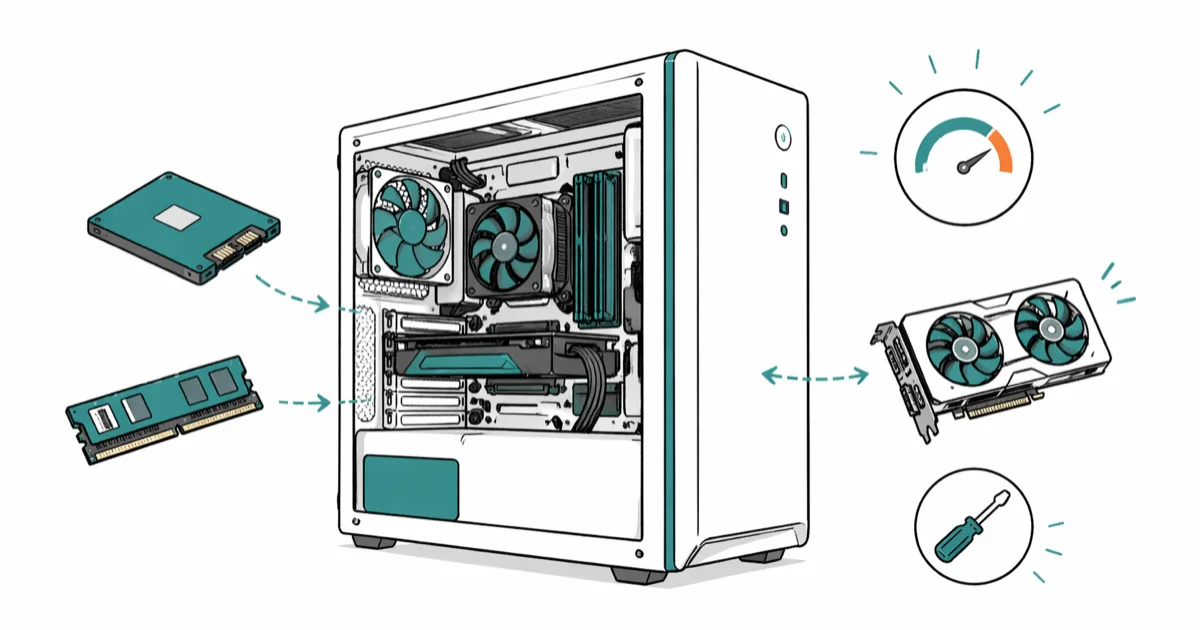
A PC upgrade can rescue an aging desktop without forcing you to buy a brand-new machine, but only if you start with the right diagnostics and stay inside safe legal limits. This guide covers RAM, storage, GPU, and CPU upgrades on hardware you own outright, plus the warranty and compatibility checks most tutorials skip.
The order matters: assess first, run Microsoft’s official tools second, then open the case.
- Only upgrade hardware you personally own outright. Leased or employer-issued PCs need written approval before any internal change.
- Microsoft’s PC Health Check is the official tool for confirming Windows 11 eligibility (TPM 2.0, 4 GB RAM, 64 GB storage, 1 GHz dual-core 64-bit CPU).
- A SATA-to-NVMe SSD swap is often the single biggest perceived speed-up because it cuts storage latency dramatically.
- BIOS updates and CPU or motherboard swaps can void your OEM warranty and break manufacturer support contracts.
- Always verify PSU wattage and motherboard socket compatibility before ordering parts; mismatch is the #1 reason DIY upgrades stall.
#Is Your PC Eligible for a Windows 11 Upgrade?
Before buying any parts, run Microsoft’s official compatibility tools. The free PC Health Check app tells you whether your current hardware passes the Windows 11 floor. For eligible Windows 10 systems, the Windows Update Assistant handles the in-place upgrade without touching firmware.
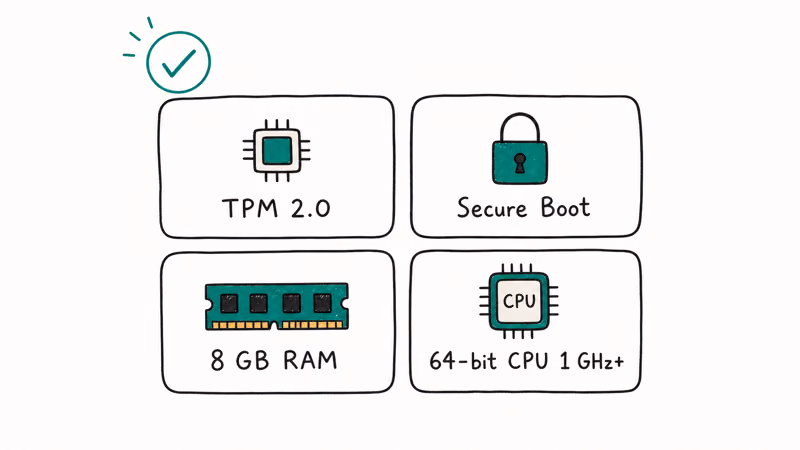
According to Microsoft’s Windows 11 specifications, the operating system requires a 1 GHz dual-core 64-bit CPU on the approved list, 4 GB of RAM, 64 GB of storage, TPM 2.0, and UEFI Secure Boot. If your CPU is older than Intel’s 8th-gen Core or AMD Ryzen 2000 series, no amount of RAM or SSD will make the system officially eligible, so you’d need a motherboard and CPU swap.
Check the OEM support page for your exact model before you order anything.
#Assessing Your PC’s Requirements
Open Task Manager and click the Performance tab to see what runs hot under your normal load. CPU pegged at 100% with eight Chrome tabs, memory sitting at 90% before you launch a game, or disk queue spiking on every boot each point to a different fix.
Document the RAM capacity and speed, storage type and free space, graphics card model, processor model, and operating system version. CPU-Z (free) reports motherboard chipset, RAM channel layout, and CPU socket.
#How Much Faster Does Adding RAM Really Make Your PC?
Adding RAM helps when you’re memory-starved, not when you’re CPU-bound. Moving from 8 GB to 16 GB can make browser-heavy multitasking feel much smoother, but moving from 16 GB to 32 GB usually delivers little perceptible gain for general office work.
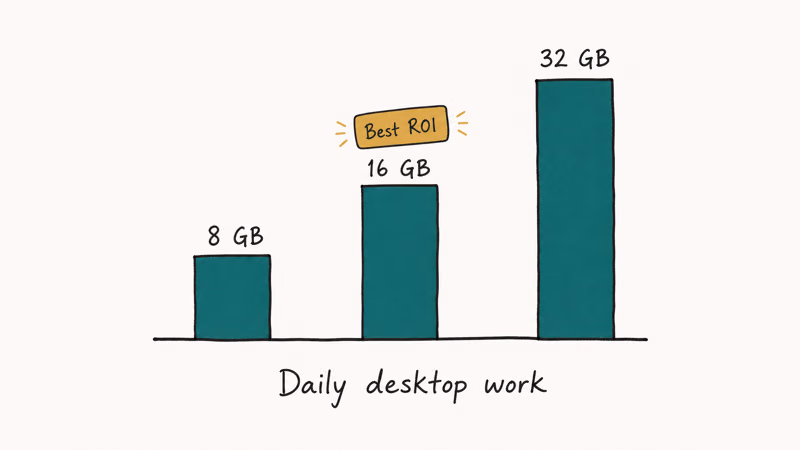
Identify the compatible RAM modules for your motherboard (DDR4 vs DDR5, speed in MT/s, capacity per slot) and install them according to the manufacturer’s instructions. If your system already hits 75-90% RAM use during your typical workload, more memory is the cheapest win on the list. For deeper symptoms, our guide to low-memory errors in Windows walks through the diagnostics first.
#Enhancing Storage Capacity
Running out of disk space slows updates, game patches, and everyday file operations.
Pick between a hard disk drive (HDD) and a solid-state drive (SSD). SSDs deliver dramatically lower random read latency. Our best hard drive for gaming round-up covers bulk-capacity options.
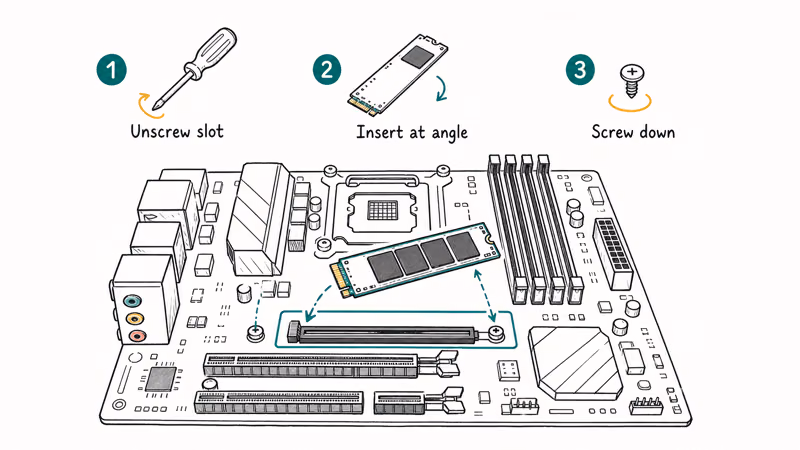
#Installing a Solid-State Drive (SSD)
Replacing your primary hard drive with an SSD is the single most visible upgrade you can make. Swapping a 7200 RPM SATA HDD for an NVMe SSD can cut Windows boot time and app launches dramatically.
Clone your existing hard drive to the SSD with free tools like Macrium Reflect or Samsung Data Migration, or perform a fresh installation of the operating system for optimal performance. A fresh install also clears years of registry clutter and unused background services, which is often worth the hour it takes. If you’re moving files between drives, our SSD-to-HDD migration guide covers the safe copy order before you reformat the old disk.
#Upgrading the Graphics Card Before the CPU
For gamers and graphic-intensive applications, the GPU upgrade is usually first. A faster card boosts frame rates, render times, and creative app performance more visibly than a CPU bump, provided your processor isn’t already the bottleneck.

Match the new card to your motherboard’s PCIe slot and your PSU’s wattage. Check physical clearance, too: many modern GPUs are 30+ cm long.
#Updating the Processor
A new CPU can unlock performance for video editing, code compilation, and CPU-bound games, but the socket compatibility window is narrow. Identify supported processors for your motherboard chipset and BIOS revision before ordering. Higher clock speeds and core counts help, but they’re worthless if the chip doesn’t fit your socket or if your BIOS doesn’t recognize it.
A CPU change often requires a BIOS update first, and OEM BIOS releases are slower than enthusiast boards. The Dell BIOS update guide walks through that path for prebuilt machines, but read your motherboard manual before flashing. A failed update can brick the board.
#Optimizing the Operating System
Keep the OS current with the latest Windows updates. Microsoft confirms that monthly cumulative updates ship the bulk of these fixes.
Beyond updates, disable startup programs you don’t need (Task Manager → Startup), trim background apps, and adjust power settings to High Performance if you’re on a desktop. These tweaks recover real percentage points on older hardware.
#Cooling Solutions for Better Performance
Overheating throttles the CPU and GPU, masquerading as a “slow PC”. Invest in efficient cooling like a tower CPU cooler and at least two case fans (intake + exhaust). Our Ryzen 5 3600 cooler picks cover the budget-to-quiet range.
Organize cables and clear dust monthly. A 5 °C drop in CPU temperature is realistic from a clean case alone.
#Power Supply Considerations
Adding a beefier GPU or CPU may push your PSU past its safe wattage. Check the PSU label and the manufacturer’s recommended wattage for any new card. The cheapest mistake people make is reusing a 5-year-old 450 W unit with a 750 W-class GPU. Upgrade to a quality 80 Plus Bronze or higher unit when in doubt, because failure under load can damage other components.
#Cleaning and Maintenance
Regular cleaning is the boring upgrade that prevents thermal throttling. Clean the internal components (fans, heat sinks, intake filters) to prevent dust buildup. Use compressed air on the keyboard, ports, and exterior, and run Windows Security’s full scan monthly.
For drive housekeeping, our quick vs full format comparison explains when each is appropriate, and the AMD Quick Stream fix is worth bookmarking if you run older AMD chipsets.
#Performance Testing and Monitoring
After completing upgrades, benchmark to confirm the gain. Free tools like UserBenchmark, 3DMark Time Spy, and Crystal Disk Mark give before/after numbers that prove the work paid off. Monitor temperatures with HWiNFO under sustained load. If the CPU exceeds 90 °C or the GPU exceeds 85 °C, revisit cooling before another upgrade.
#Authorization, Warranty, and Safety Reminders
A few non-negotiable rules before you open the case:
- Make these changes only on your own computer. Leased PCs, work-issued laptops, and employer-owned desktops require written authorization before any internal modification. Opening the chassis on someone else’s hardware can breach your lease or employment agreement.
- BIOS updates and major hardware swaps can void your OEM warranty or terminate manufacturer support. Dell, HP, and Lenovo all publish what is and isn’t covered, so read the support page for your specific model number first.
- Power down, unplug, and ground yourself before touching components. A static discharge has fried more DIMMs than any of us would like to admit.
- Keep the original parts until the upgrade is verified stable for at least a week. If a new component fails or proves incompatible, you’ll want the originals for rollback.
- For laptops, check the manufacturer’s serviceable-parts list before ordering anything. Many post-2020 laptops have soldered RAM and storage; opening them voids the warranty without delivering an upgrade path.
#Bottom Line
Treat a PC upgrade as a layered project, not a single purchase. Start with diagnostics, run Microsoft’s official compatibility tools, and confirm warranty implications before any part touches the case. The order that delivers the most visible improvement on a 4-7 year-old desktop is: SSD first, RAM second, GPU third, CPU and motherboard last. Skip steps and you’ll spend more for less perceptible gain.
If you can’t open the chassis legally (leased PC, employer hardware, or warranty still active and important to you), stick to software optimization, official Windows updates, and OEM-approved memory upgrades through the manufacturer’s service channel.
#Frequently Asked Questions
How long does a typical PC upgrade take?
Simple RAM or SSD swaps take 30-60 minutes. A full CPU plus motherboard plus BIOS flash runs a half day.
Can I upgrade a laptop the same way?
Partly. Many laptops still allow RAM and storage upgrades, but post-2020 ultrabooks often solder both components to the board. Always check the OEM service manual for your exact model before ordering parts, and remember that opening a laptop’s bottom panel usually requires breaking a warranty seal.
Do I need to reinstall Windows after upgrading?
For most upgrades, no. Adding RAM, swapping a GPU, or expanding storage doesn’t require a reinstall. Switching the primary drive to a new SSD is the exception: cloning works, but a fresh install gives the cleanest result and lets Windows redetect the new boot device properly. Plan an hour to install Windows, then another hour to reinstall your most-used apps and copy your user folder back from a backup or an external drive before you reformat the old disk.
Will a BIOS update void my warranty?
It depends on the OEM. Microsoft’s documentation states that Windows-delivered firmware updates are supported, but manufacturer-specific BIOS flashes outside Windows Update can affect warranty status on some prebuilt systems. Always read the support article for your model before flashing.
Can I upgrade my graphics card without changing anything else?
Yes, if the new card fits your case, slot, and PSU. Most modern GPUs need 8-pin or 12VHPWR power.
Is it cheaper to upgrade or buy a new PC?
For desktops 4-7 years old, targeted upgrades (SSD plus RAM) almost always win on cost-per-performance. For machines older than 8 years, especially laptops, a new system often delivers better value once you factor in the locked-in CPU socket, slower RAM standard, and aging PSU.
What if my motherboard doesn’t support Windows 11?
You have three paths. Stay on Windows 10 until its October 2025 end-of-support deadline, swap the motherboard and CPU together to gain TPM 2.0 plus a supported processor, or replace the whole tower. Microsoft doesn’t officially support installing Windows 11 on unsupported hardware, even though community workarounds exist. The workaround route also forfeits future security updates on some builds, so weigh the few hundred dollars of new hardware against the risk of running an unpatched system long-term.
How do I know if my PSU has enough wattage?
Add the manufacturer-rated TDP of the CPU and GPU, then add roughly 100-150 W for the rest of the system. The total should sit at no more than 70-80% of the PSU’s rated wattage. Free tools like the OuterVision PSU Calculator provide a more precise estimate based on your full parts list.

Bluetooth Not Working on Snapdragon X? Fixes for 2026
Bluetooth not working on your Snapdragon X Copilot+ PC? Generic audio, mice, and keyboards work, but vendor apps often lack an ARM build. Fixes inside.

Docker Desktop and WSL2 Not Working on Snapdragon X? Fix It
WSL2 runs fine on Snapdragon X, but Docker Desktop ARM is Early Access and throws WSL errors. Use WSL2 plus native ARM64 Ubuntu and Docker Engine.

Does iTunes Work on Snapdragon X? ARM Windows 11 Guide
Yes, iTunes runs on Snapdragon X laptops through Prism emulation, but the Apple Devices app is the smoother route. Here is what to install on ARM.

Does OBS Studio Work on Snapdragon X? ARM64 Build Guide
Yes, OBS Studio has an experimental ARM64 build since version 31.1, but x64 plugins won't load and hardware encoding is missing. Here is what works.