Trusted Devices List is Not Available: Causes and Solutions
Fix the Trusted Devices List is Not Available error on Apple devices by checking network settings, updating iOS, and re-signing into your Apple ID.
Quick AnswerSign out of your Apple ID, reset network settings, update to the latest iOS version, then sign back in to restore your trusted devices list.
If your own iPhone or iPad shows “Trusted Devices List is Not Available” when you try to manage two-factor authentication, sign in on a new device, or update Apple ID settings, the fix is almost always on your end: network, iOS version, or a stuck Apple ID session. This guide walks through the official Apple ID and iCloud recovery flow first, then explains when a reputable third-party Apple ID removal tool is appropriate for your own device.
- The error is most often caused by an unstable internet connection, an outdated iOS version, or a stalled Apple ID sync.
- Signing out of your Apple ID and signing back in restores the trusted devices list in most cases without losing data.
- Resetting network settings clears stored Wi-Fi and cellular configuration that can block the list from loading.
- Updating to the latest iOS or iPadOS release patches known bugs that trigger trusted device errors on older builds.
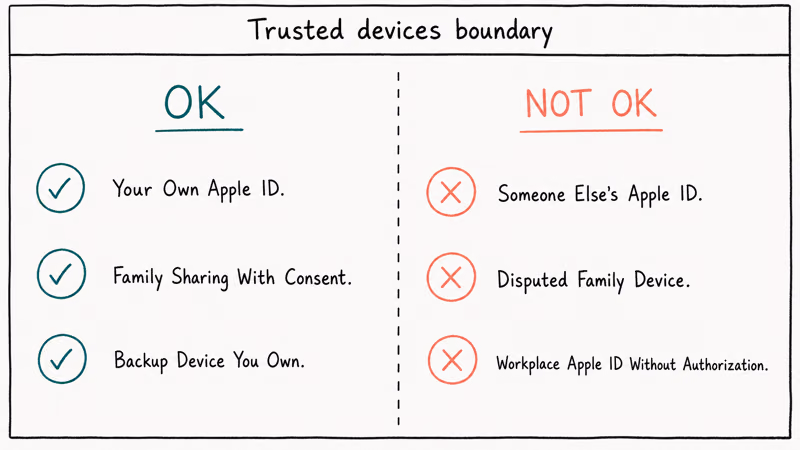
- Third-party Apple ID removal tools are a last resort and should only ever be used on a device and account you own or are explicitly authorized to manage.
#What Is the Trusted Devices List and Why Does It Matter?
The trusted devices list is the record Apple keeps of every iPhone, iPad, or Mac that you have already signed into with your Apple ID and verified with two-factor authentication. When you try to sign in on a new device, Apple sends a verification code to one of these trusted devices to confirm it’s really you.
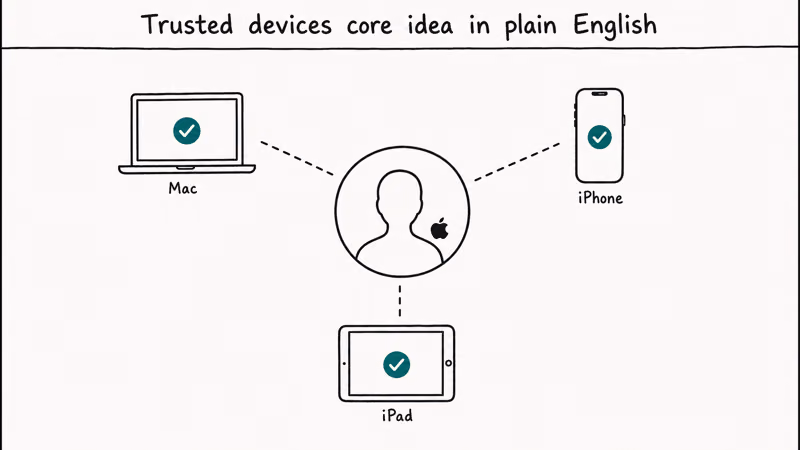
According to Apple’s two-factor authentication overview, a 6-digit verification code is automatically delivered to all your trusted Apple devices when you sign in on a new device or browser. If the list can’t load, the entire two-factor flow stalls and you may struggle to add new devices, recover your account, or change account-level security settings.
This error often appears right after switching networks, such as moving from cellular to a captive hotel Wi-Fi that blocks Apple’s sign-in endpoints. Restoring a stable connection usually clears the message within a minute or two.
#What Causes the Trusted Devices List Is Not Available Error?
A few specific conditions trigger this message:
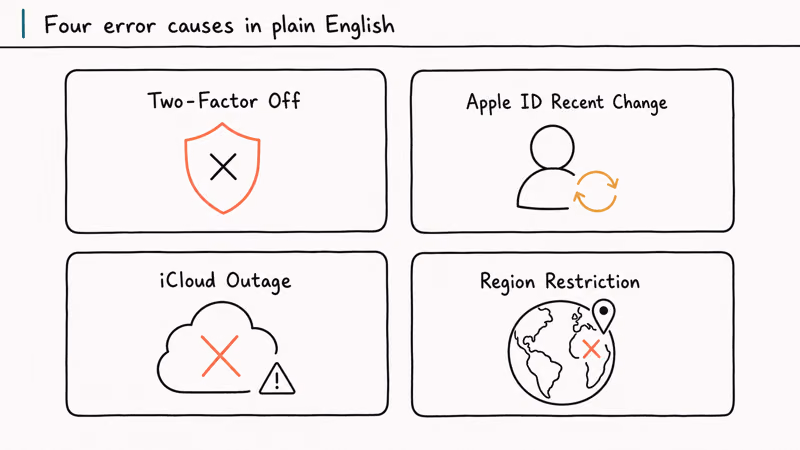
- Network connectivity issues. A weak Wi-Fi signal, captive portal, or restricted corporate network can block the Apple ID endpoints needed to load the list.
- Outdated iOS or iPadOS. Older builds sometimes carry known bugs around Apple ID sync that Apple has since patched.
- Apple ID session out of sync. A token mismatch on the device makes Apple’s servers refuse to return the list until you sign out and back in.
- Two-factor configuration changes in flight. If you recently added or removed a trusted phone number, the list may be temporarily unavailable while Apple recomputes it.
- Apple server-side issues. Apple’s System Status dashboard confirms when Apple ID, iCloud Account & Sign In, or related services are degraded, which can block the list from loading even when your device is fine.
In practice, one of the most common causes is an outdated iOS build on a device that has skipped two or more point releases.
#Basic Troubleshooting Steps for Trusted Devices Errors
Before doing anything more invasive, run through these official Apple recovery steps on your own device, in order.
#1. Check and Reset Your Network Connection
A stable connection is non-negotiable for any Apple ID operation.
- Switch between Wi-Fi and cellular data and try again.
- If you are on Wi-Fi, disconnect from any VPN temporarily.
- Reset network settings:
Settings>General>Transferor Reset iPhone>Reset>Reset Network Settings.
Resetting network settings clears saved Wi-Fi passwords, so make sure you have them handy.
#2. Restart Your Device
A clean restart clears stale Apple ID session state.
- Press and hold the side button and either volume button.
- Slide to power off, wait 30 seconds, then turn the device back on.
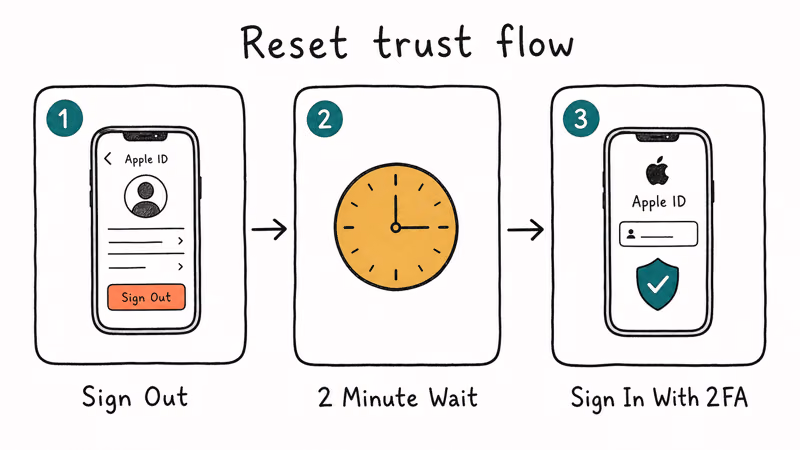
#3. Sign Out and Back Into Your Apple ID
Refreshing your Apple ID session is the fix that resolves this error most often.
- Go to Settings > [Your Name] > Sign Out.
- Enter your Apple ID password and choose what data to keep on the device.
- Sign back in with your Apple ID credentials.
Back up your device before signing out. If you are unable to complete sign-out cleanly, our guide on how to remove the Apple ID from your iPhone walks through the official path step by step.
#4. Update iOS to the Latest Version
Apple regularly ships fixes for Apple ID and two-factor bugs in iOS and iPadOS point releases.
- Go to
Settings>General>Software Update. - Download and install any pending update.
- Turn on automatic updates so you stay current.
For full account hygiene after an update, see our walkthrough on how to update Apple ID settings on your iPhone or iPad.
#5. Reset All Settings
This resets system preferences without erasing your photos, messages, or apps.
- Go to
Settings>General>Transferor Reset iPhone>Reset>Reset All Settings. - Reconfigure Wi-Fi, Bluetooth, and notification preferences after the reset.
Be aware that aggressive lockout settings can compound the issue. Apple states that after 10 failed Screen Time passcode attempts, the device may enforce a security delay or data-erase policy.
#Advanced Solutions and Authorized Third-Party Tools
If the official Apple ID recovery flow above does not resolve the issue, the next step is to contact Apple Support. Reputable third-party Apple ID removal tools exist, but they’re appropriate only when you own the device and the Apple ID, or have explicit written authorization from the owner.
#Contact Apple Support First
- Visit Apple’s support website and start an Apple ID case.
- Call Apple Support or open a chat session for hands-on account recovery.
- Book a Genius Bar appointment if the device is local to an Apple Store.
Apple Support can verify ownership through proof of purchase and security questions and can manually restore trusted device entries that the device-side flows can’t.
#Third-Party Apple ID Removal Tools (Owner-Only)
Use these tools only on your own device after the official Apple ID flow has failed, and never on a device or account belonging to someone else without their written consent.
- Tenorshare 4uKey: removes a stuck Apple ID without the password on a device you own.
- iToolab UnlockGo: similar Apple ID removal flow with a focus on preserving local data where possible.
- EaseUS MobiUnlock: bypasses several screen locks and can remove a forgotten Apple ID on owned hardware.
Some links on this page are affiliate links, which means fone.tips may earn a commission at no extra cost to you.
Running any of these tools will sign the device out of iCloud and typically erase its current state, so back up first. Never use them to bypass somebody else’s Activation Lock or sign-in screen — that is the definition of stolen-device misuse and is unlawful in most jurisdictions. Likewise, don’t trust schemes that claim to unlock an iPhone with a picture or with any other shortcut around Face ID.
#Reset Location & Privacy
- Go to
Settings>General>Transferor Reset iPhone>Reset>Reset Location & Privacy. - Re-grant location and privacy permissions to apps as you use them.
If location services on the device are unreliable in general, our iPhone GPS not working guide covers deeper fixes.
#Legal Boundaries and Privacy Considerations
This is a troubleshooting guide for your own Apple ID and devices you own or have explicit, written authorization to manage. Apple’s account security is built on two-factor authentication precisely so that nobody else can quietly remove a trusted device, change a password, or remove Apple ID from your hardware.
Removing an Apple ID, bypassing Activation Lock, or signing out of someone else’s iCloud without their permission is unlawful in most countries and violates Apple’s terms of service. The same applies to using any third-party Apple ID removal tool on a phone you found, bought second-hand without a verified iCloud sign-out, or were “given access to” by another person.
If you bought a used iPhone or iPad and it still shows another person’s Apple ID, the only safe path is to contact the original owner and have them remove the device from their Apple ID at appleid.apple.com, or return the device for a refund. Apple Support won’t unlock somebody else’s Activation Lock for you, and no legitimate third-party tool should either.
#Preventing Future Occurrences
A few habits keep trusted device issues from recurring on your own account.
- Keep iOS and iPadOS current. Apple recommends installing updates as soon as they’re available, and many trusted-device fixes ship in those updates.
- Maintain a stable internet connection during any Apple ID change, and avoid making security changes from public Wi-Fi.
- Keep at least one trusted phone number on file in Settings > [Your Name] > Sign-In & Security so you can still receive 6-digit verification codes if all your devices are unreachable.
- Use a strong, unique password for your Apple ID and store it in a password manager.
- Leave two-factor authentication on. According to Apple’s account-security guidance, two-factor authentication is required for many modern Apple services and significantly reduces account takeover risk.
#Bottom Line
For your own Apple ID on your own device, the trusted devices list is almost always recoverable through the official Apple ID flow: check the network, reset network settings, sign out and back in, install pending iOS updates, then escalate to Apple Support if the list is still missing. Reach for third-party Apple ID removal tools only as a last resort on owned hardware, and never apply any of this to a device or account that is not yours.
#Frequently Asked Questions
Can I still use two-factor authentication if my trusted devices list is unavailable?
Yes. You can usually still receive a 6-digit verification code at a trusted phone number you set up in advance, even when no trusted devices are reachable. If you have neither, you’ll need to start Apple’s account recovery flow.
Will Reset All Settings delete my data?
No. Reset All Settings only clears system preferences such as Wi-Fi passwords, display, and notification settings. Your photos, messages, apps, and local files remain in place. Back up before any reset just to be safe.
How often should I update iOS to avoid this error?
Install iOS and iPadOS updates as soon as they’re released, and keep automatic updates on. Apple ships frequent security and Apple ID fixes inside point releases, and skipping multiple versions in a row is a common trigger for trusted-device sync problems.
Can a VPN cause the trusted devices list to be unavailable?
Yes. Some VPNs route Apple ID traffic through endpoints that Apple’s servers treat as suspicious or unreachable. Disable the VPN, retry the trusted devices list, and then re-enable the VPN if everything works.
Is it safe to use third-party software to remove an Apple ID?
Only on a device and account you own, and only after the official Apple ID flow and Apple Support have failed. Using these tools on someone else’s device is unlawful and may permanently lock the hardware out of iCloud services.
Why does the error appear right after I add a new trusted phone number?
Apple takes a short time to recompute the trusted devices and trusted phone numbers list after a change. Wait a few minutes, switch to a strong network, and reopen Settings > [Your Name] > Sign-In & Security. If it still fails after 10 minutes, sign out and back in.
Does Apple’s System Status page actually help diagnose this?
Yes. If Apple’s System Status dashboard shows a red or yellow indicator next to “Apple ID” or “iCloud Account & Sign In”, the trusted devices list will be unreliable until Apple clears the incident, regardless of what you do on the device.

iPhone 17 Cellular Data Not Working on iOS 26? 9 Fixes
iPhone 17 cellular data still dropping on iOS 26? Apple fixed the launch bug in iOS 26.0.1, but recovery failures persist. Here's the fix ladder.

iPhone Cellular Data Not Working Abroad? eSIM Fixes
Travel eSIM showing no data abroad? Fix iPhone roaming with the data-line check, Data Roaming toggle, APN settings, and network selection steps.

iPhone Cellular Data Not Working for Some Apps? 8 Fixes
Some iPhone apps refuse to load on cellular while others work fine. Check the per-app cellular toggle, Low Data Mode, VPN profiles, and Screen Time.

iPhone Stuck on EDGE? How to Get 5G or LTE Back (2026)
iPhone stuck on EDGE with crawling data? Here's why the E icon appears, which settings force 5G or LTE back, and when the problem is your carrier.