How to Use Snap Layouts in Windows 11 for Multitasking
Arrange windows neatly with Windows 11 Snap layouts: hover the maximize button, drag to the edge, use keyboard shortcuts, and switch between snap groups.
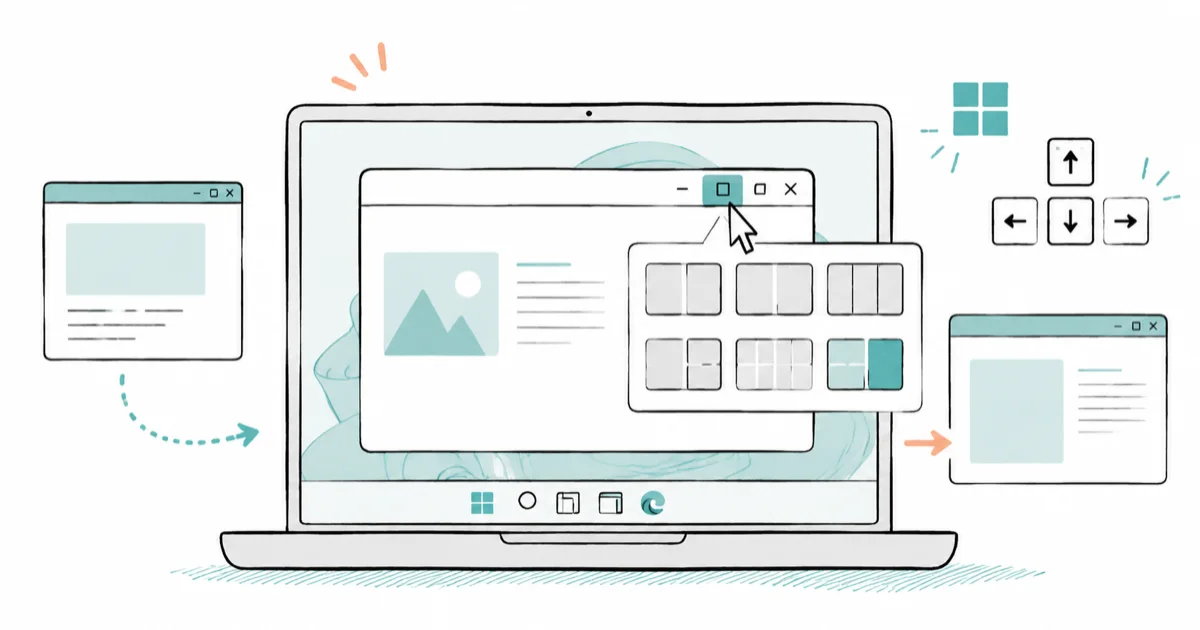
Quick AnswerHover a window's maximize button to reveal Snap layout zones, then click one to place the window. You can also drag it to a screen edge or press Windows + an arrow key.
Snap layouts in Windows 11 let you arrange windows into neat grids automatically. You can snap by hovering the maximize button, dragging to an edge, or using a keyboard shortcut. Windows remembers each arrangement as a snap group you can return to in one click.
- Hover the maximize button or press Windows + Z to open the snap layout grid.
- Windows + Left or Right Arrow snaps the active window to that half of the screen.
- Snap groups form automatically and let you restore a whole arrangement from the taskbar.
- Turn snapping on or off under Settings, then System, then Multitasking.
- Drag the divider between two snapped windows to resize both at once.
#What Are Snap Layouts and Snap Groups?
Snap layouts are the preset grids Windows offers when you place a window. Microsoft’s Snap your windows guide confirms that Windows + Z opens the snap layout flyout in Windows 11, showing the grid options for the current window.
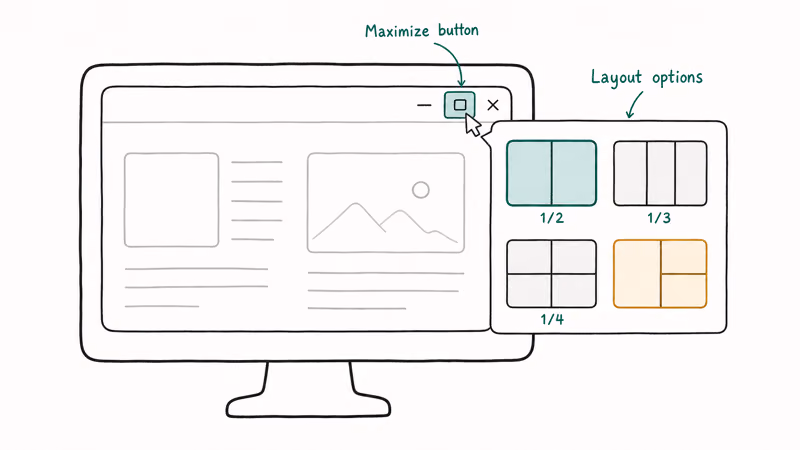
Pick a zone and the window fills it. Snap Assist then offers your other open windows to fill the rest.
Snap groups are the second half of the feature, and they’re what makes snapping worth learning. When you snap two or more windows together, Windows quietly saves that set as a group. You can bring the whole group back later without re-snapping anything, which is the real time-saver here.
#Three Ways to Snap a Window
There’s no single right method, just the one that fits your hands. The first is the mouse: drag a window to the left or right edge and it snaps to that half, or drag to a corner for a quarter.
The second is the hover.
Rest your pointer on the maximize button, and the layout grid appears so you can drop the window into any zone. The third is the keyboard, which is the fastest once it’s muscle memory. For speed, the keyboard route is usually the one to learn, especially when juggling several windows at once. If a window won’t cooperate, File Explorer not responding covers related glitches.
#How Do Snap Groups Help You Switch Tasks?
Snap groups shine when you get interrupted. According to Microsoft’s multitasking guide, snap groups are created automatically when you snap windows together, with no setup on your part.
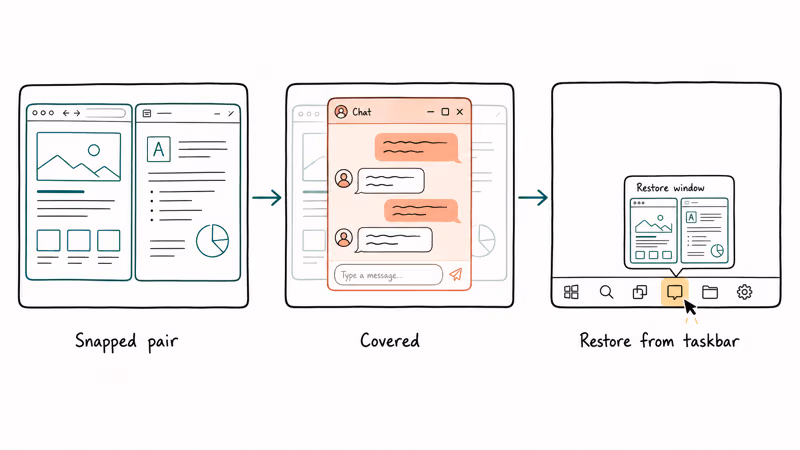
Say you’ve snapped a browser and a document side by side. Then a chat app pops up and covers them.
Hover any taskbar icon that belongs to the group, and Windows offers to restore the entire arrangement or just that one app. The groups also show up in Task View and in the Alt + Tab switcher, so you can jump back to a saved layout from wherever you are. That one-click restore is why snap groups beat manually re-snapping a workspace every time you switch contexts.
#Keyboard Shortcuts for Faster Snapping
The keyboard is where snapping gets quick. Microsoft’s Windows keyboard shortcuts list states that Windows + Left or Right Arrow snaps a window to that half of the screen.
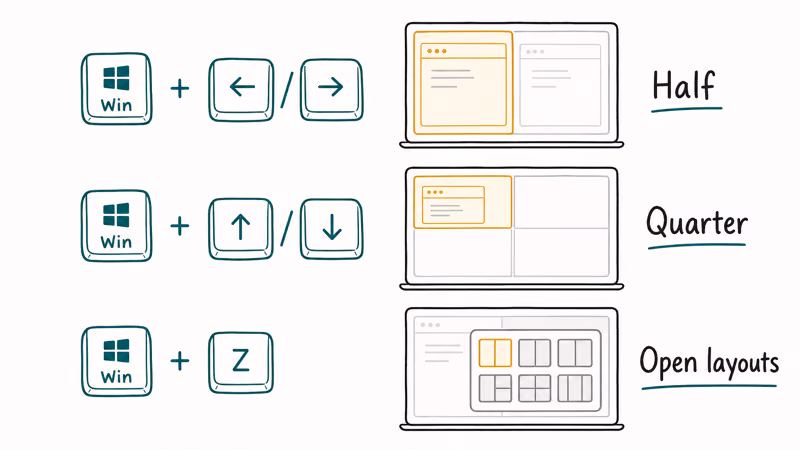
From there, add an Up or Down arrow to snap into a quarter.
Press Windows + Z to open the layout flyout, then type the number of the layout and zone you want. It feels fiddly for one day, then it’s automatic. Pair snapping with a clean machine, and if yours feels sluggish, the slow Windows PC guide can help before you blame the feature.
#Enabling and Customizing Snap Settings
Snapping is on by default, but you can tune it. Go to Settings, then System, then Multitasking, and you’ll find a Snap windows switch plus a dropdown of options.
The options matter more than they look.
You can toggle the snap bar that appears when you drag to the top, decide whether snap groups show in the taskbar and Alt + Tab, and allow snapping without dragging all the way to the edge. If you ever want stills of your tidy layout, screenshot on Windows covers that, and the same arrangement looks great in a screen recording on Windows 11.
#Snapping Across Multiple Monitors
Snap layouts work per display, which is where they really pay off. Each monitor gets its own grid, so you can run a four-zone layout on a large screen and a simple split on a laptop panel at the same time.
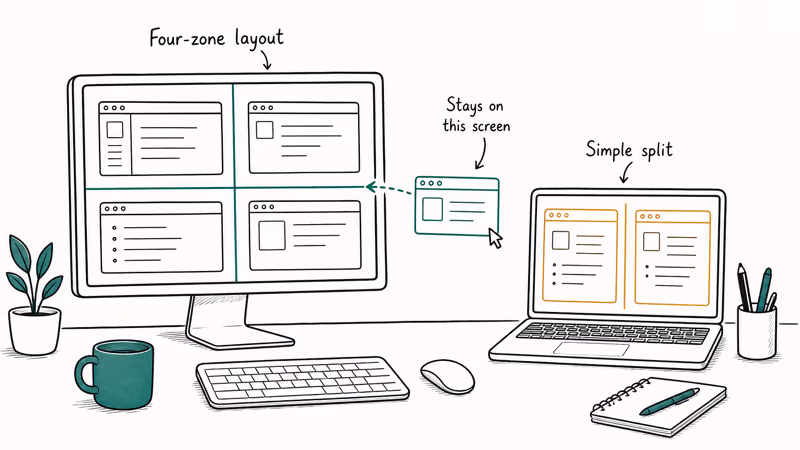
Drag a window to a monitor’s edge to snap it there.
With two monitors, snapping a window to the inner edge of one display should keep it on that screen rather than jumping across, which is the behavior most people want. Resizing also stays local: drag the divider between two snapped windows and only that pair adjusts, leaving the other monitor untouched. A quick health check never hurts, so it’s worth knowing what TPM 2.0 is and whether your PC meets the Windows 11 baseline.
#Bottom Line
Learn the keyboard route, Windows plus the arrow keys and Windows + Z, because it’s faster than hovering the maximize button every time. Once you start using snap groups from the taskbar, switching between paired windows becomes a single click, which is where Snap layouts pays off most. Turn on the snap bar and group options in Multitasking settings, and the whole system gets noticeably smoother.
#Frequently Asked Questions
How do I snap two windows side by side in Windows 11?
Press Windows + Left Arrow on the first window, then Windows + Right Arrow on the second. Each fills half the screen instantly.
What is a snap group?
A snap group is a saved set of windows you’ve snapped together. Windows creates it automatically the moment you arrange two or more windows. Later, hovering a taskbar icon that belongs to the group lets you restore the whole arrangement in one click, even after other apps have covered it. The groups also appear in Task View and Alt + Tab.
What is the keyboard shortcut for Snap layouts?
Press Windows + Z to open the snap layout flyout for the current window. Then pick a zone with your mouse, or type the layout and zone numbers to place the window with the keyboard alone.
Why don’t I see Snap layouts when I hover maximize?
Snapping may be turned off, or the snap-bar option is disabled. Go to Settings, then System, then Multitasking, switch Snap windows on, and make sure the dropdown option for showing layouts on hover is enabled. After that, the grid should appear whenever you rest the pointer on a window’s maximize button.
Can I change the available snap layouts?
Available layouts depend on your screen size and resolution, so bigger displays unlock more zones. You can’t design a custom grid yourself.
Does snapping work across multiple monitors?
Yes. Each monitor has its own snap layouts, and you snap a window by dragging it to that display’s edge or using the keyboard shortcuts while the window is on that screen. Arrangements and resizing stay local to each monitor.

Bluetooth Not Working on Snapdragon X? Fixes for 2026
Bluetooth not working on your Snapdragon X Copilot+ PC? Generic audio, mice, and keyboards work, but vendor apps often lack an ARM build. Fixes inside.

Docker Desktop and WSL2 Not Working on Snapdragon X? Fix It
WSL2 runs fine on Snapdragon X, but Docker Desktop ARM is Early Access and throws WSL errors. Use WSL2 plus native ARM64 Ubuntu and Docker Engine.

Does iTunes Work on Snapdragon X? ARM Windows 11 Guide
Yes, iTunes runs on Snapdragon X laptops through Prism emulation, but the Apple Devices app is the smoother route. Here is what to install on ARM.

Does OBS Studio Work on Snapdragon X? ARM64 Build Guide
Yes, OBS Studio has an experimental ARM64 build since version 31.1, but x64 plugins won't load and hardware encoding is missing. Here is what works.