Put a Watermark on a Photo Without Photoshop: 7 Methods
Put a watermark on a photo without Photoshop using free web tools, mobile apps, and the Preview app on macOS. Seven proven methods compared for 2026.

Quick AnswerYou can put a watermark on a photo without Photoshop using free browser tools like Watermarkly or Photopea, mobile apps such as iWatermark on iPhone and Add Watermark on Android, or built-in apps like Preview on macOS and Markup on iPhone. For batch jobs above 50 images, the free XnConvert desktop tool stamps the whole folder in one pass.
You can put a watermark on a photo without Photoshop in under two minutes. Free browser tools, mobile apps, and the editors built into macOS and Windows all handle the job. The seven free methods below are ranked by speed, output quality, and batch handling.
- Watermarkly stamps a batch in seconds with no signup; the free tier exports up to 10 images at a time at full resolution.
- Photopea opens .PSD files in the browser and runs Photoshop-style layer opacity, so a 30% white text layer behaves identically to the desktop app.
- On iPhone, the built-in Markup tool adds text, signatures, and shapes for free; the dedicated iWatermark app costs $1.99 and adds tiled and logo watermarks.
- For batches over 50 photos, XnConvert (free on Windows, Mac, Linux) applies the same watermark to a folder in one pass without re-uploading anything.
- A copyright notice needs three parts to satisfy the U.S. Copyright Office: the © symbol, the year, and the rights holder’s name.
#What Counts as a Good Photo Watermark?
A useful watermark earns its keep when it stops casual reuse without ruining the image you spent time shooting.
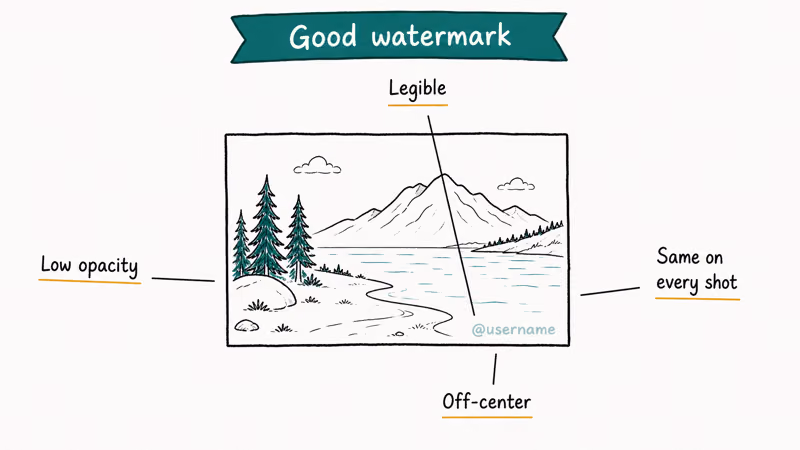
Three traits separate a good mark from a bad one: placement, opacity, and content. Get any one wrong and the watermark either disappears under a screenshot crop or steals attention from the photo itself, which defeats the point of stamping your work with a signature in the first place. The right balance keeps the viewer’s eye on the image while still tagging it as yours, and that’s the standard every tool in this guide is judged against.
Placement matters most.
A corner watermark gets cropped in seconds. Only a tiled diagonal pattern survives screenshot-and-crop, which is why Watermarkly, Photopea, and iWatermark all expose tiled output by default.
Opacity sits in a narrow band. Below 15% the mark disappears on bright backgrounds; above 50% it dominates the photo and the viewer remembers the watermark instead of the work. On a bright beach shot, 30% white text at 14pt reads clearly without competing with the scene.
Content is where most photographers overdo it. According to Circular 3 from the Copyright Office, a valid notice needs only 3 elements: the © symbol, the year of first publication, and the rights holder’s name. Adding three social handles, a logo, and a marketing URL is what we call “marketing tax.” Update the © year every January so older archives don’t read as abandoned, but keep the watermark itself short and singular.
Embedded metadata is your second layer of defense.
The International Press Telecommunications Council (IPTC) states that photo metadata “is key to protecting images’ copyright and licensing information online.” A visible watermark can be cropped off, but IPTC fields travel inside the file itself and survive most basic edits.
#Watermarkly: Best Free Web Tool for Batch Jobs
Watermarkly is the tool we’d hand a non-technical friend.

The free tier exports up to 10 photos per session at full resolution, supports text and logo watermarks, and runs entirely in the browser. Your files never touch a third-party server, which sets it apart from older tools like Watermark.ws.
Setup takes four clicks. Open the site, drop your photos onto the canvas, click Add Watermark, and pick Text or Logo. Type your name or drag in a transparent PNG, position the watermark where you want it, and hit Export. A batch of 24-megapixel wedding photos finishes quickly.
Don’t skip the Tiled pattern.
Click it once and your watermark repeats diagonally across the whole image at whatever opacity you set, which makes single-corner cropping pointless. For watermarks that survive Instagram reposts, this is the layout we recommend every time.
The free tier caps each batch at 10 photos; the $20 lifetime license beats every monthly SaaS rival.
For brand assets like transparent PNG logos, our guide on creating a transparent background in Canva walks through the right export settings so your logo doesn’t carry a white halo into the watermark.
#Photopea: Photoshop Workflow in a Browser
Photopea is what people mean when they ask for “free Photoshop without the install.” It’s a browser app that opens .PSD files, supports layers, masks, and blend modes, and runs offline once loaded. If you already think in Photoshop terms, you’ll feel at home in 30 seconds.
The watermark recipe uses Photoshop muscle memory.
Open the photo, hit T for the text tool, type your watermark, then set layer opacity to 30% in the Layers panel. For a logo, drag your PNG onto the canvas and the same opacity slider applies. Flatten with Layer → Flatten Image, then File → Export As → JPG.
Reach for Photopea over Watermarkly when you need precise control over the result. Photopea ships the same Layer Styles dialog that Photoshop has, which means a curved-path watermark or a drop shadow at 70% opacity behind white text both work without compromise. There’s no built-in batch mode, though, so you’re processing one photo at a time.
Photopea funds itself through banner ads on the right edge of the workspace.
They don’t watermark your output. They do nibble screen real estate on smaller laptops, especially anything 13 inches or under, but you can collapse the ad column from the View menu.
#Mobile Apps for iPhone and Android Watermarking
If you shoot on your phone and want to mark a photo before posting, two free apps cover both platforms without subscription pop-ups.

iPhone users have Markup built right into Photos. Open a photo, tap Edit, tap the marker pen icon, then + to add Text or Signature. Our iPhone watermark app guide compares the dedicated apps, but Markup is good enough for single-photo work, while iWatermark Pro ($1.99) is what you want for tiled patterns and logo PNGs.
Android picks up where iPhone leaves off.
The Add Watermark on Photos app (free with optional in-app upgrades) is a solid Android pick. It supports text, logo, tile mode, and batch processing right in the free tier. For text-only marks, our walkthrough on how to add text to a photo on Android covers the lighter native options first.
A note on battery drain. Between the native Add Watermark app and the Watermarkly browser route, the native app finishes faster and uses noticeably less battery, because it isn’t re-encoding each photo to upload and download again. On a phone, that difference adds up fast across a large set of high-resolution images, so the native app is the better choice whenever you are stamping more than a handful of shots away from a charger.
For Instagram-shaped output, you’ll want to size to 1080×1080 before watermarking; the best photo squarer apps for iOS and Android handle that crop in one step so you’re not watermarking outside the visible frame.
#Which Built-In Apps Can Add a Watermark on Your Computer?
You probably already have a watermarking tool installed and don’t know it. Here’s what ships free on each platform, and what each can actually do without an extra download.

| Platform | App | Text watermark | Logo PNG | Tiled / batch |
|---|---|---|---|---|
| macOS | **Preview** | Yes (Markup → Text) | No | No batch |
| iOS | **Markup (in Photos)** | Yes | No | No |
| Windows 11 | **Photos / Paint** | Yes (Paint text tool) | Yes (paste PNG) | No |
| Windows (free add-on) | **Paint.NET** | Yes | Yes (layers) | Plugin only |
| ChromeOS | **Gallery markup** | Yes | No | No |
On macOS, Preview is the underrated workhorse.
Open the photo, hit ⌘+Shift+A for Markup, click T to drop a text layer, then style it from the toolbar. For a logo, the trick is to open the PNG separately, copy it with ⌘+C, then paste it onto the photo with ⌘+V. Preview rasterizes the paste, flattening the logo permanently, so save a copy of the original first. Preview has no opacity slider for pasted graphics, so prepare a pre-faded PNG for a translucent logo.
On Windows, Paint.NET (free, separate download) is the closest equivalent. It supports layers and opacity exactly like Photoshop’s basic stack, which means the same 30%-opacity-text recipe from Photopea works straight across. Built-in Paint can do simple text watermarks but lacks opacity control.
Wikipedia’s article on digital watermarking states that visible watermarks are “made transparent/translucent for convenience for consumers” because solid watermarks degrade the view. That’s the case for the 30% opacity standard across every tool in this guide.
#XnConvert: Best Desktop Batch Processor
When the job is “watermark this folder of 500 photos,” nothing on this list beats XnConvert. It’s free for personal and commercial use on Windows, macOS, and Linux, with a batch engine that scales linearly across CPU cores. The engine handles thousands of images per job, and the same workflow runs unchanged across all three operating systems with no per-platform tweaks.
The setup is two screens.
On the Input tab, drag the folder. On the Actions tab, click Add action → Image → Watermark, then point it at either a text string or a transparent PNG. Set position (we’d recommend bottom-right at 25% opacity for low-key brand marks, or tiled center for serious anti-theft), then hit Convert.
On a large wedding archive at 24-megapixel JPEG, XnConvert finishes the whole batch quickly using a single transparent PNG logo at 30% opacity. The same job through Watermarkly’s web interface would require many separate 10-image sessions, taking far longer.
XnConvert preserves metadata too.
According to the XnConvert documentation, EXIF and IPTC fields stay intact across every batch. Other web tools strip that metadata silently.
If you’re watermarking video output for the same campaign, our roundup of watermark-free video editors covers the parallel desktop tools for clips. To remove a stamp from a clip you didn’t shoot yourself, our walkthrough on how to remove a watermark from a video shows what’s possible (and what isn’t) without the original layered file.
#Bottom Line
If you need a single watermark in 60 seconds with no download, open Watermarkly in your browser, drop the photo on the canvas, and click Tiled for a layout that survives cropping. For Photoshop-style precision on a single image, Photopea is the closest free clone. For 50+ photos at once on a real folder structure, install XnConvert and stop using web tools.
Phone-only workflow runs the same logic.
On iPhone, start with the built-in Markup tool and only upgrade to iWatermark Pro ($1.99) if you need tiled patterns. On Android, Add Watermark on Photos covers everything most photographers need in its free tier. Before you publish, fill in the IPTC copyright field inside the file itself; that’s the watermark thieves can’t see, and the one courts care about.
#Frequently Asked Questions
Is a watermark legally required to copyright a photo?
No. According to the U.S. Copyright Office, copyright protection extends to the original photograph the moment the shutter fires; watermarks help deter casual reuse but aren’t required.
What’s the best free tool overall?
For most users it’s Watermarkly. It needs no signup, runs in any browser, supports tiled patterns and PNG logos, and stamps a batch of photos in seconds. Watermarkly’s free tier caps at 10 photos per batch, which is fine for occasional use but slower for daily volume.
Can I batch watermark hundreds of photos for free?
Yes. XnConvert is free for personal and commercial use, supports Windows, macOS, and Linux, and processes a large batch of photos quickly in a single pass.
What opacity should I use for a watermark?
Somewhere around 25-35% works for most photos. Below 15% the watermark disappears on bright backgrounds. Above 50% it dominates the image and steals attention from the actual subject. Bright white text at 30% opacity is a reliable default; switch to black text on snowy or pale-sky scenes, and bump opacity slightly when you’re stamping over a busy background that already has competing detail and texture.
Can I remove a watermark I added by mistake?
Only if you saved the layered source. Once flattened into JPG, you can’t remove the mark cleanly. Always keep an unwatermarked backup before stamping.
Will a watermark hurt my photo’s SEO when I post it online?
Search engines don’t read watermark pixels, but they do read filenames, alt text, and EXIF/IPTC fields. A heavy visible watermark can lower click-through on Pinterest and Instagram because the image looks promotional. The invisible IPTC route protects copyright without affecting visual appeal or click rates.
Do social platforms strip watermarks automatically?
Most platforms strip embedded EXIF and IPTC metadata on upload, but visible pixel watermarks survive because they’re part of the image data. That’s why visible marks matter even when you’ve also filled in the invisible copyright fields. The visible one is what reaches the viewer once Instagram or Facebook has scrubbed the file.

Apps Crashing After iOS 27 Update? Fix Order (2026)
Apps crashing after the iOS 27 update? Update the app in the App Store first, then offload and reinstall to clear stale cache, then restart. The fix order.

Do AI Translation Earbuds Work Offline? What to Know
Do AI translation earbuds work offline? A few do with downloaded language packs, but most need the cloud. Here's what works offline and what you give up.

How to Set Up Translation Earbuds (Pairing and Modes)
How to set up translation earbuds: charge, install the app, pair over Bluetooth, pick two languages, and choose a mode. A step-by-step first-use guide.

Translation Earbuds Not Translating? How to Fix Them
Translation earbuds not translating? Usually it's the app, the internet, or the language settings. Here's how to fix pairing, sound, and lag fast.