How to Make Transparent Background in Canva Easily?
Learn how to make a transparent background in Canva. Covers Background Remover, PNG export, and fixing white background issues on Pro and Free plans.
Quick AnswerTo make a transparent background in Canva, use BG Remover or the transparent image tool, then export as PNG. Canva offers limited free background-free downloads, while Canva Pro supports repeated transparent-background design exports.
Making a transparent background in Canva is straightforward if you have the right plan. The process differs depending on whether you’re removing an image background with AI or making a design element transparent manually.
Canva supports separate transparency workflows for background removal, PNG export, and element opacity. The Background Remover tool requires Canva Pro, but transparency sliders and manual element transparency work on free accounts too. Before diving in, check our guide on how to put a watermark on a photo without Photoshop for related design tips.
- Canva’s transparent image tool can remove a background and download a PNG; Canva Pro is the safer choice for repeated transparent-background exports
- Free users can use the opacity slider (0-100) and may get limited free transparent PNG downloads through Canva’s image tools
- Canva’s Background Remover works on photos, not on text layers or shapes with complex edges.
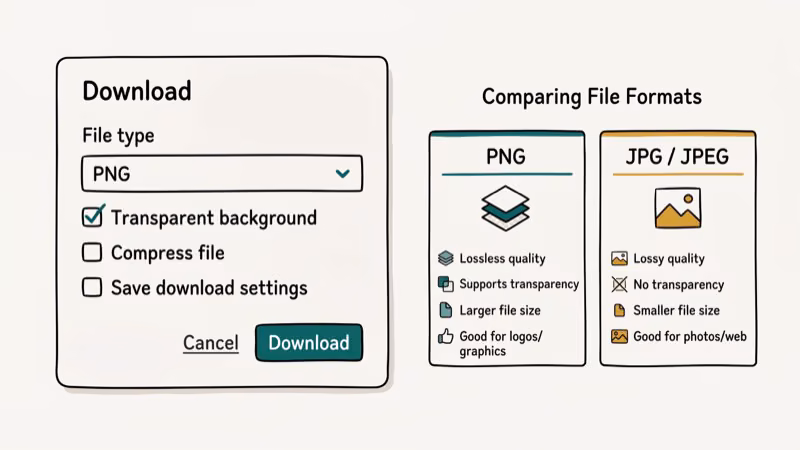
- JPEG doesn’t support transparency; always export as PNG for transparent backgrounds.
- Canva plan pricing changes over time, so verify the current Pro price before upgrading.
#Why Use a Transparent Background in Canva?
Transparent backgrounds solve a specific design problem: they let your subject stand on any background without a white or colored box around it. They’re useful for logo files, watermarks, and product images layered over other photos.
A logo saved with a transparent background looks clean on any site, while one on a white background looks unprofessional over dark themes.
For more complex image editing tasks, see our comparison of the best InDesign alternatives for Mac. For photo resizing, check our guide on how to resize an image in InDesign.
#Removing a Background With Canva Pro’s Background Remover
Background Remover uses AI to remove photo backgrounds; complex edges may still need manual touchups.
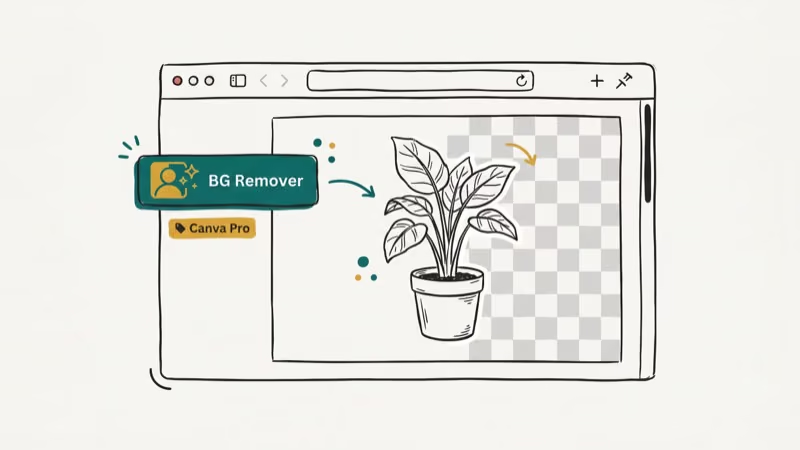
Canva states that its transparent background tool follows the same basic flow: upload an image, click BG Remover, then download the design as a PNG with a transparent background.
Steps to use Canva’s Background Remover:
Open your design, click the photo, then choose Edit photo > BG Remover and Apply.
After removing the background, download as PNG with the transparent background option enabled (covered in the next section). If the remover leaves artifacts, use the Erase and Restore brushes to refine the edges manually.
#Exporting a Transparent PNG From Canva
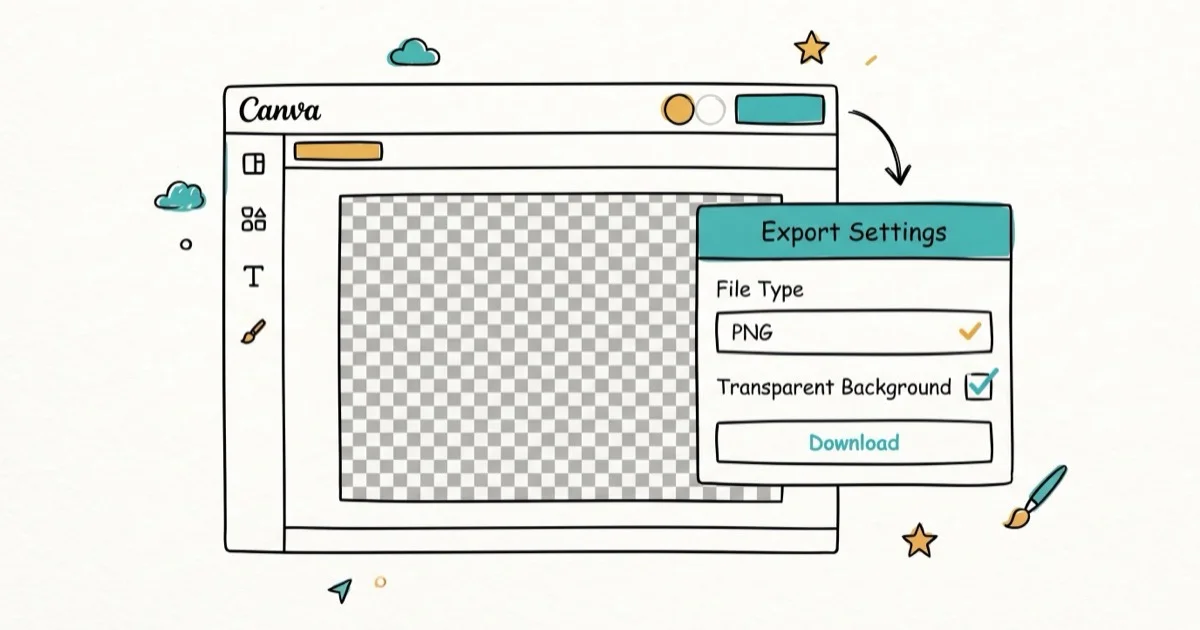
Exporting with transparency is a separate step from removing the background. Even after using Background Remover, you must select the right export settings or the image can save with a white background.
According to Wikipedia, PNG supports 24-bit RGB, 32-bit RGBA, and alpha-channel transparency on its PNG page.
Click Share, choose PNG, enable Transparent background, then click Download.
According to Canva, the Pro workflow is to choose PNG and click the transparent background option on its Pro transparent-images page. Canva states that its PNG Maker page supports one free background-free download and Pro for unlimited usage.
#Adjusting Element Transparency on Any Canva Plan
Free plan supported. This adjusts element opacity, not background removal.
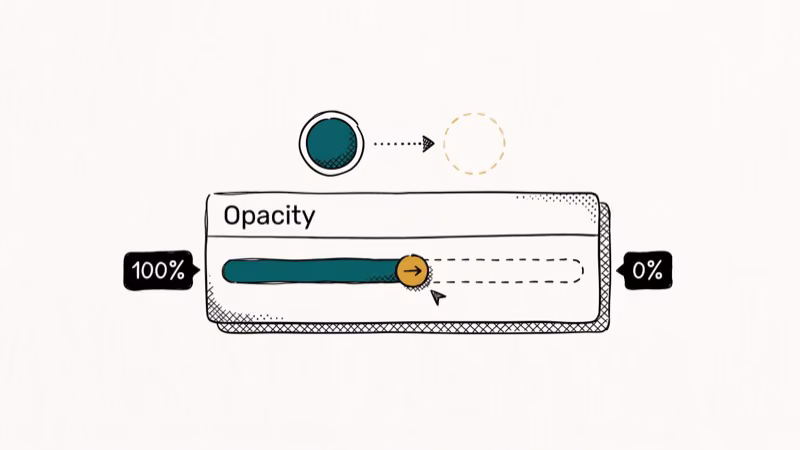
Click the element, then click the checkerboard icon (labeled Transparency on some versions). Drag the slider from 100 (fully opaque) to 0 (fully transparent), or set it to 50 for a semi-transparent overlay. Download as PNG to preserve transparency.
This method works for product mockups, watermarks, and layered design effects. It doesn’t remove the background; it makes the entire element semi-transparent.
#Does Canva Free Support Transparent Backgrounds?
The short answer: partially. Free Canva users can use the element transparency slider to make any element semi-transparent (from 0 to 100), and Canva’s current PNG Maker page says one background-free transparent PNG download may be available for free. For repeated transparent-background exports from designs, Canva Pro is still the safer plan because Canva’s Pro page explicitly includes the PNG transparent background option.
If you only need a transparent watermark overlaid on a design you’ll share as JPEG, free accounts work fine. You’ll see the transparency in the Canva editor, and it’ll look correct in your JPEG export. But if you need many standalone PNGs with transparent backgrounds for a website or another design tool, budget for Pro or use a dedicated background-removal tool.
#Troubleshooting Common Transparent Background Issues
White background still shows after export: You selected JPEG instead of PNG, or forgot to check “Transparent background” in the download settings. Re-export as PNG with the transparent option enabled.
Transparent background option is grayed out: Your account or export path may not include that Pro download option. Try Canva’s transparent image tool for a limited one-off PNG, or upgrade if you need repeated transparent-background exports.
Background Remover cuts into the subject: Use Restore, zoom in, and paint back the missing edge.
Background removal leaves a halo: Erase it manually using the Erase tool at small brush size.
#Bottom Line
Transparent backgrounds in Canva are easiest with Pro because the PNG download flow includes a transparent background option. Free users can still use opacity controls and may get limited one-off transparent PNG downloads through Canva’s image tools. Free alternatives include Photoshop’s Remove Background tool or Remove.bg for no-subscription options.
For related techniques, see changing photo background to white.
#Frequently Asked Questions
Is transparent background free in Canva?
Partially. Canva’s PNG Maker says you can download one background-free transparent PNG for free, while Canva Pro is the better fit for unlimited or repeated transparent-background exports. Free Canva users can also adjust element transparency using the opacity slider.
What file format supports transparency in Canva?
PNG is the only format Canva exports that supports transparency. JPEG, PDF, and MP4 formats don’t support transparent layers. When downloading a transparent design, always select PNG and check the “Transparent background” option in the download settings.
Why is my Canva background still white after downloading?
You used JPEG instead of PNG, or skipped the “Transparent background” checkbox. Re-download as PNG with that box checked.
Can I use Canva’s Background Remover on logos?
Background Remover works best on photographic images. For logos with solid or simple backgrounds, it usually works fine. For logos with white or transparent backgrounds already, you don’t need to run Background Remover at all. For complex vector logos, upload to Canva as SVG or PNG with a transparent background directly.
Does Canva Background Remover work on mobile?
Yes, on iOS and Android for Pro subscribers only. Tap your image, select Edit Image, then Background Remover.
How do I make only part of an image transparent in Canva?
Use the Erase tool in the Background Remover editor to selectively remove parts of an image. After removing the full background, switch to Erase mode to remove additional areas, or use Restore to bring back areas that were incorrectly removed. For precise transparency control on shapes, use the element transparency slider.

Apps Crashing After iOS 27 Update? Fix Order (2026)
Apps crashing after the iOS 27 update? Update the app in the App Store first, then offload and reinstall to clear stale cache, then restart. The fix order.

Do AI Translation Earbuds Work Offline? What to Know
Do AI translation earbuds work offline? A few do with downloaded language packs, but most need the cloud. Here's what works offline and what you give up.

How to Set Up Translation Earbuds (Pairing and Modes)
How to set up translation earbuds: charge, install the app, pair over Bluetooth, pick two languages, and choose a mode. A step-by-step first-use guide.

Translation Earbuds Not Translating? How to Fix Them
Translation earbuds not translating? Usually it's the app, the internet, or the language settings. Here's how to fix pairing, sound, and lag fast.