Fix Windows Installation Error 0x80300001 (6 Methods)
Fix Windows installation error 0x80300001 by switching BIOS to UEFI, formatting the target drive, and fixing USB compatibility. Works on Windows 10 and 11.
Quick AnswerError 0x80300001 means Windows can not install to the selected location. Switch BIOS from Legacy to UEFI mode, format the target partition during setup, and make sure your installation media is not corrupted.
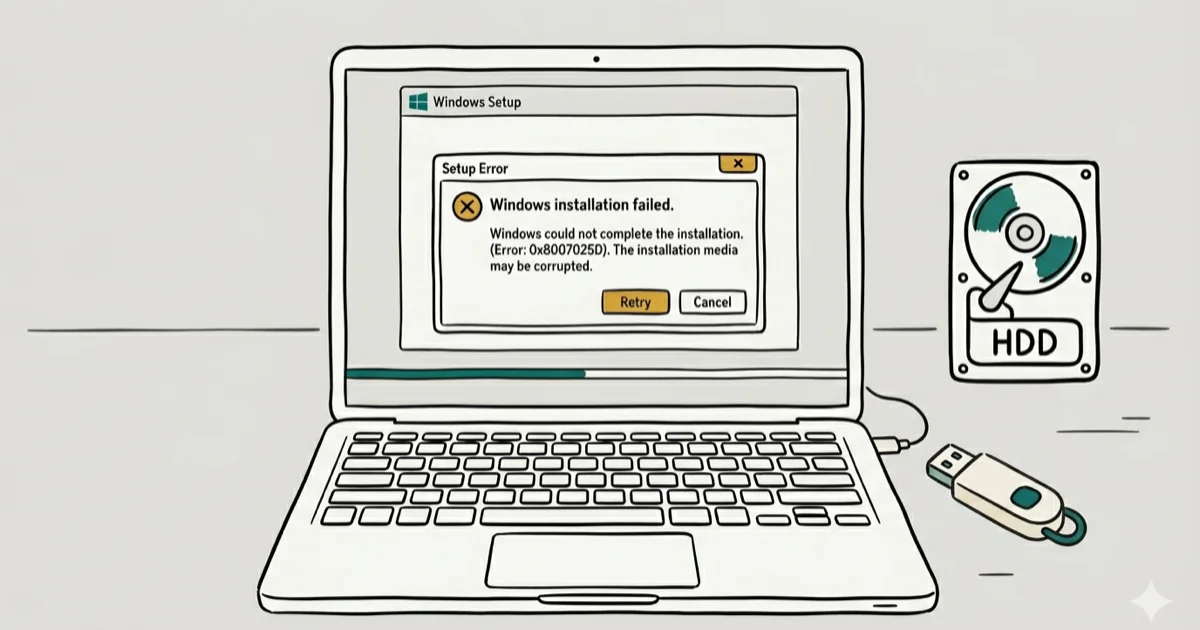
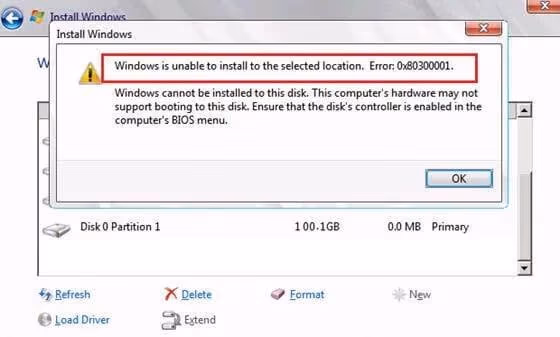
Error 0x80300001 appears during Windows installation with the message “Windows is unable to install to the selected location.” It means the installer can’t write to the target drive, usually because of a BIOS/UEFI mismatch or a partition conflict.
- Error 0x80300001 means the installer can’t access the target drive due to a BIOS or partition mismatch
- GPT disks require UEFI mode; MBR disks need Legacy mode for installation to proceed
- Disabling CSM in BIOS prevents conflicts between legacy and UEFI boot during setup
- Using a USB 2.0 port instead of 3.0 resolves USB compatibility issues on older motherboards
- Deleting all partitions and letting Windows create fresh ones eliminates partition table conflicts
#Common Causes of Error 0x80300001
The error triggers when the Windows installer can’t recognize or write to the target drive.
The most common trigger is a GPT disk with BIOS set to Legacy mode. Switching to UEFI resolves it in most cases.
The specific causes:
- BIOS set to Legacy when disk is GPT (or vice versa)
- Existing partition table conflicts on the target drive
- USB 3.0 port incompatibility with certain motherboards during installation
- Corrupted or improperly created installation media
If your installation media itself has issues, you might also see can’t read from source file or disk errors.
#How Do You Fix Error 0x80300001?
Start with the BIOS settings. Quick fix.
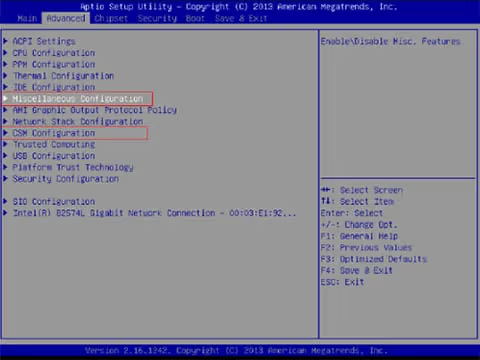
#Fix 1: Switch BIOS to the Correct Boot Mode
Restart your PC and enter BIOS (press F2, DEL, or ESC during boot). Look for the boot mode setting and change it:
- If your disk is GPT formatted: set boot mode to UEFI
- If your disk is MBR formatted: set boot mode to Legacy
- Disable CSM (Compatibility Support Module) to prevent conflicts
Save and exit BIOS, then retry the installation. According to PCMag’s boot order guide, incorrectly configured boot modes are a common cause of “unable to install” errors during Windows setup.
#Fix 2: Delete and Recreate Partitions
On the drive selection screen, click Drive options (advanced). Delete each existing partition on the target drive, then select the unallocated space and click New to format it as NTFS. Most 0x80300001 errors trace back to a BIOS/UEFI mismatch or a corrupted partition table, and this step fixes the partition side of that equation.
Warning: This erases all data on the drive. Back up anything important first. A corrupted partition table left behind by a failed Linux dual-boot is a common cause, and deleting all partitions clears it so Windows can install without the error.
#Fix 3: Use a USB 2.0 Port
Some motherboards don’t load USB 3.0 drivers during the installer’s early boot phase. Try a USB 2.0 port (usually black, not blue).
On many older motherboards the installer fails on every USB 3.0 port but completes normally from a USB 2.0 port. USB port switching tends to fix the error on machines where BIOS settings are already correct.
#Fix 4: Disconnect Extra Drives
Multiple connected drives can confuse the Windows installer about which drive to target. Power off your PC, open the case, and disconnect all drives except the target installation drive. Reconnect them after installation completes. This also prevents the bootloader from accidentally landing on the wrong disk, which can cause errors like 0x0000000a on first boot.
#Fix 5: Use Diskpart to Clean the Drive
If the partition fixes above don’t work, use Diskpart for a deeper clean. Boot from the installation media and press Shift + F10 to open Command Prompt.
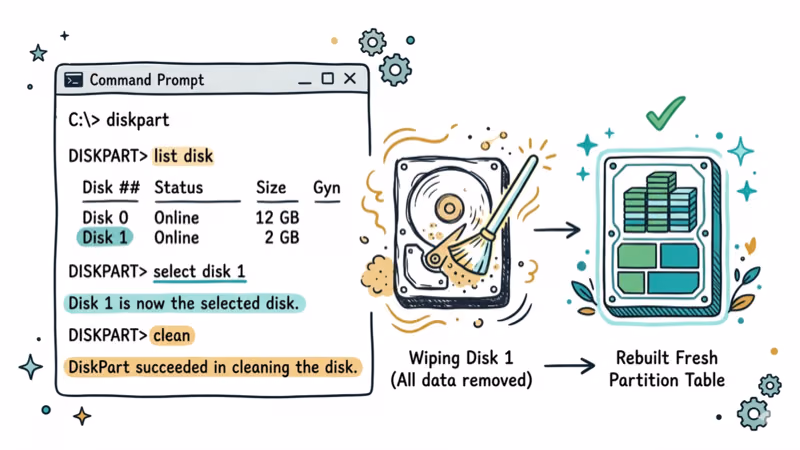
Run these commands in order:
diskpart
list disk
select disk X
clean
Replace X with your target drive number from list disk. After running clean, go back to the installer and create a new partition on the now-empty drive.
#Fix 6: Convert Between MBR and GPT
If your BIOS supports UEFI but the drive is MBR (or you need GPT for Windows 11), convert it:
In the same Diskpart session after running clean:
convert gptAccording to Windows 11 installation background, then set BIOS to UEFI mode and restart the installation. Windows 11 requires GPT and UEFI.
#Loading Custom Storage Drivers
If the Windows installer doesn’t show your target drive at all, you likely need storage controller drivers. This is common with NVMe SSDs on older motherboards and RAID configurations.
Download the storage controller driver from your motherboard manufacturer’s website, put it on a separate USB drive, and click Load driver during the drive selection screen. On many systems with an NVMe drive, loading the Intel RST driver makes the drive visible immediately.
For related keyboard issues during installation, check our guide on fixing a non-working Tab key.
#Related Windows Installation Errors
Error 0x80300001 often appears alongside other installation codes. If you see 0x80300024 during the same installation attempt, the fixes overlap since both relate to drive access issues. Error 0x80070570 points to corrupted installation media rather than BIOS settings, so you’d need to recreate the USB drive instead.
For post-installation issues like 0x80070652 or the Video Scheduler Internal Error, those are unrelated to the installation process itself and require different troubleshooting steps.
Similarly, error 0x80004002 appears after Windows is already running, so it points to runtime component registration rather than BIOS or drive setup.
#Can You Prevent Error 0x80300001?
Keep your BIOS firmware updated through your motherboard manufacturer’s website. Microsoft recommends using the official Media Creation Tool to create installation USB drives rather than third-party utilities, since it writes the media in a verified, supported format. Pick a USB drive with at least 16 GB of capacity from a reliable brand, since undersized or failing sticks are a common source of corrupted installation media. Always verify the USB drive works on another PC before starting a fresh installation.
If you’re trying to repair an existing installation, see our guide on how to repair Windows 10 without a CD.
#Seeking Professional Help
If you’ve tried all the fixes above and error 0x80300001 still appears, the issue might be hardware-level. A failing hard drive, a damaged SATA cable, or a faulty SATA port on the motherboard can all prevent the Windows installer from writing to the disk. Run manufacturer diagnostics (most drive makers offer free tools) or take the PC to a technician who can test the drive independently.
#Bottom Line
Check your BIOS settings first. If the drive is GPT, switch to UEFI mode and disable CSM. If that doesn’t work, delete all partitions and let Windows create new ones. For persistent problems, use Diskpart to deep-clean the drive.
#Frequently Asked Questions
What does error 0x80300001 mean?
It means the Windows installer can’t write to your selected drive. The most common cause is a mismatch between your BIOS boot mode (Legacy vs UEFI) and your disk’s partition style (MBR vs GPT).
Can I fix 0x80300001 without losing data?
Sometimes. If the issue is a BIOS setting or USB port, changing those settings doesn’t affect your data at all. But if you need to delete and recreate partitions, that erases everything on the target drive. Always back up important files to an external drive before attempting installation fixes.
Does this error only happen on Windows 10?
No. Error 0x80300001 appears during installations of Windows 7, 8, 10, and 11. The fixes are the same across all versions, though Windows 11 specifically requires GPT + UEFI which eliminates the Legacy/MBR mismatch scenario entirely.
How long does Windows installation take after fixing this error?
About 20-45 minutes depending on your hardware. SSDs finish in roughly 20 minutes while traditional hard drives take closer to 45. The fix itself usually takes under 5 minutes.
Can an outdated BIOS cause error 0x80300001?
Yes. Check your motherboard manufacturer’s website for BIOS updates.
Is it safe to use Diskpart clean during installation?
Yes, but it permanently erases all data and partitions on the selected drive. Double-check the disk number with list disk before running clean. The wrong disk number means losing the wrong drive’s data.
What’s the difference between MBR and GPT?
MBR (Master Boot Record) is the older partition style supporting drives up to 2 TB with a maximum of 4 primary partitions. GPT (GUID Partition Table) supports drives over 2 TB with up to 128 partitions. Windows 11 requires GPT. New installations should always use GPT with UEFI.
Can I convert MBR to GPT without losing data?
Yes, using the built-in mbr2gpt tool in Windows 10 and 11. Run mbr2gpt /convert /disk:0 from an elevated command prompt. This converts the partition style without erasing data, though you should still back up first as a precaution.

Bluetooth Not Working on Snapdragon X? Fixes for 2026
Bluetooth not working on your Snapdragon X Copilot+ PC? Generic audio, mice, and keyboards work, but vendor apps often lack an ARM build. Fixes inside.

Docker Desktop and WSL2 Not Working on Snapdragon X? Fix It
WSL2 runs fine on Snapdragon X, but Docker Desktop ARM is Early Access and throws WSL errors. Use WSL2 plus native ARM64 Ubuntu and Docker Engine.

Does iTunes Work on Snapdragon X? ARM Windows 11 Guide
Yes, iTunes runs on Snapdragon X laptops through Prism emulation, but the Apple Devices app is the smoother route. Here is what to install on ARM.

Does OBS Studio Work on Snapdragon X? ARM64 Build Guide
Yes, OBS Studio has an experimental ARM64 build since version 31.1, but x64 plugins won't load and hardware encoding is missing. Here is what works.