How to Sync Google Photos to a PC: 3 Methods (2026)
Sync Google Photos to your PC with Drive for Desktop, manual download (500 per ZIP), or Google Takeout. Three working methods for Windows in 2026.
Quick AnswerYou can't true-sync Google Photos to a PC folder. Use Google Drive for Desktop to mirror photos one-way, download up to 500 images per batch from photos.google.com, or export the full library through Google Takeout.
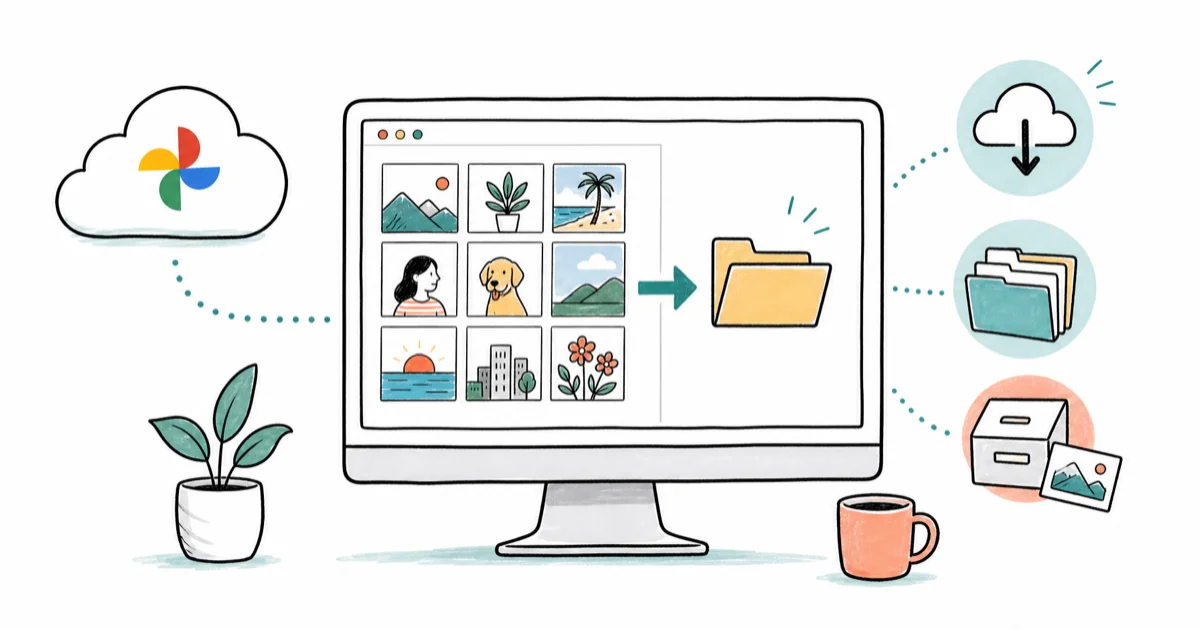
Google Photos has no two-way sync to a PC folder. The cloud library lives on Google’s servers, and the desktop tools only pull a one-way copy. This guide covers the three working methods so you can pick the one that fits, whether you want a live local mirror, a one-shot full archive, or a quick batch of recent shots from last weekend.
It’s simpler than it sounds.
Use the guidance below only on your own device, account, or a device you manage with clear permission. Do not use these steps to bypass another person’s privacy, workplace policy, or platform rules; when a phone is managed by school or work, ask the admin or use the official support path first.
- Google Photos doesn’t support true two-way sync with a PC folder. Drive for Desktop, manual download, and Google Takeout are the only working options.
- Manual web download is capped at 500 photos per ZIP. A 5,000-image library means 10 separate download sessions.
- Google Takeout exports the entire library in one job and emails a download link when the archive’s ready, usually within a few hours for libraries under 50 GB.
- Drive for Desktop streams or mirrors the Google Photos folder, but Photos appears as a read-only space inside Drive, not a normal Windows folder.
- High-resolution images and 4K videos count against your 15 GB free Google account quota since the unlimited “high quality” tier ended on June 1, 2021.
#Why Can’t You Sync Google Photos to a PC Like a Regular Folder?
Google designed Photos as a cloud-first product. Unlike OneDrive or Dropbox, Photos has no native client that mirrors your library into a local directory you can browse in File Explorer.
Even Drive for Desktop, Google’s current tool, exposes Photos as a virtual area you stream from rather than a Windows folder you sync. The Photos area inside Drive is read-only by design.
Google announced October 1, 2021 as the shutdown date for the standalone Backup and Sync app, with Drive for Desktop replacing it for both consumer and Workspace accounts (deprecation notice). The replacement keeps the upload-from-PC direction. It does not pull every photo down into a local folder unless you mirror the Photos area in Drive.
Two practical limits matter most.
The 15 GB free quota covers Gmail, Drive, and Photos combined, so a heavy email account with attachments eats into your photo space. Second, browser-based downloads from photos.google.com cap each ZIP at 500 items. That’s a hard limit on the web side, and it makes manual download impractical past a few thousand images for anyone with a normal-sized library.
#Method 1: Mirror Google Photos With Drive for Desktop
Drive for Desktop is Google’s official replacement for Backup and Sync, and it’s the only first-party tool that creates a local folder you can browse from Windows File Explorer or macOS Finder. The install is quick, including sign-in.
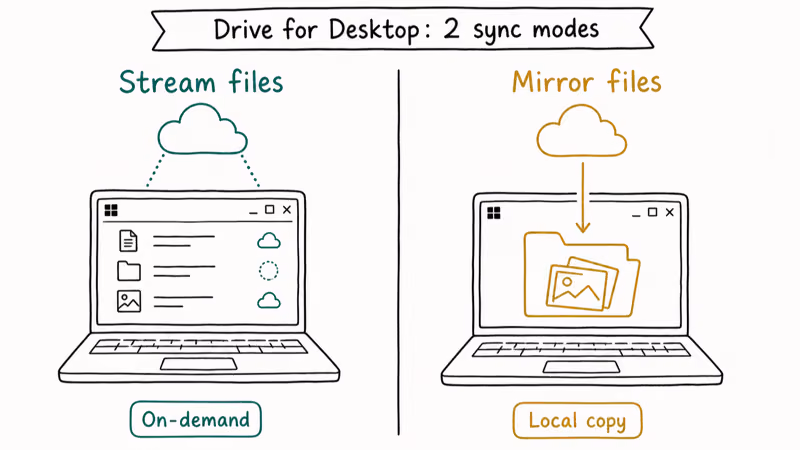
Two sync modes.
Stream files keeps photos in the cloud until you open them. Mirror files downloads everything locally.
To set it up:
- Download Google Drive for Desktop from Google’s download page and install it.
- Sign in with the Google account that owns the photo library.
- Open Drive for Desktop preferences. Under “Google Drive,” choose Mirror files if you want a local copy or Stream files if you only want on-demand access.
- In the same preferences pane, open the “Google Photos” tab. Toggle “Sync photos and videos from Google Photos.” Choose “Original quality” or “Storage saver.”
- Wait for the initial sync. For a library of around 50 GB, the first mirror pass can take several hours over a typical home connection.
The catch is folder behavior. Photos appear inside the Drive virtual drive (usually G:\ on Windows) under a Google Photos folder organized by year. You can browse, copy, and back them up further from there.
Edits don’t sync back.
It’s one-way. Any local rename or delete is independent of the cloud library, which is why we treat the mirrored folder as a backup snapshot rather than a working directory for photo editing.
If your sync stalls or files refuse to download, our guide to Google Photos not backing up covers the same diagnostics in reverse for upload failures.
#Method 2: Download Photos Manually From the Web
Manual download fits when you only need a specific album or a recent batch. Open photos.google.com in Chrome (Edge and Firefox work too) and select photos by clicking the first one, holding Shift, then clicking the last one in the range.
A blue checkmark appears on each selected photo.
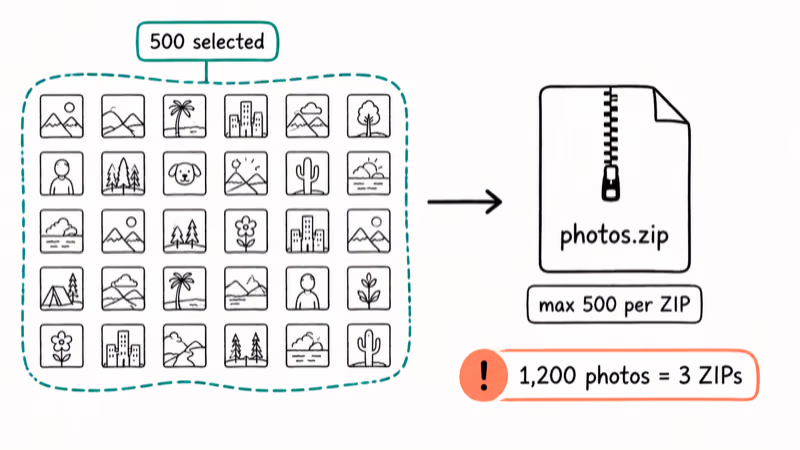
Click the three-dot menu in the top-right and choose Download. The browser bundles your selection into a ZIP file. Google’s photo download support article states that the per-ZIP cap is 500 items, and that cap has been in place since the web client was rebuilt in 2021 (download help page).
For a 1,200-image collection, each 500-item ZIP takes a while to package and download, and you’ll repeat the process three times to capture everything. Keeping a running spreadsheet of which photos went into which ZIP helps avoid duplicates and missed slots.
For libraries above roughly 2,000 images, skip straight to Google Takeout.
For album downloads, open the album, click the same three-dot menu, and choose “Download all.” Album downloads bypass the 500-item cap if the album itself contains more.
The resulting ZIP can hit several gigabytes and time out on slower connections.
After extraction, expect filenames like IMG_20240312_153201.jpg, with captions, location tags, and album organization stripped out. If you care about that metadata, Method 3 is the better choice. Pair the dump with a fast viewer from our best photo viewer for Windows 10 picks so you can scrub through thousands of files without lag.
#Method 3: Export Everything With Google Takeout
Google Takeout is the official bulk export tool for your account data. It’s the only method that captures the entire library in one job along with album structure and JSON metadata sidecars.
A library of around 50 GB typically returns a download link within a few hours.
To run a Takeout export of Google Photos:
- Open takeout.google.com and sign in.
- Click “Deselect all” so nothing’s pre-selected.
- Scroll to “Google Photos” and tick the box. Click “All photo albums included” if you want to filter to specific albums.
- Click Next. Choose delivery method (email link is default), frequency (one-time or every 2 months for 1 year), file type (ZIP for ≤50 GB, TGZ for larger), and max archive size (1, 2, 4, 10, or 50 GB chunks).
- Click Create export.
Google emails you when the archive is ready. The link works for 7 days.
After it expires, you re-run the export from the Takeout dashboard. Google’s Takeout help page reports that exports of 50 GB or more get split into multiple ZIPs, and Google states that exports “can take a few hours or several days” depending on queue (Takeout help).
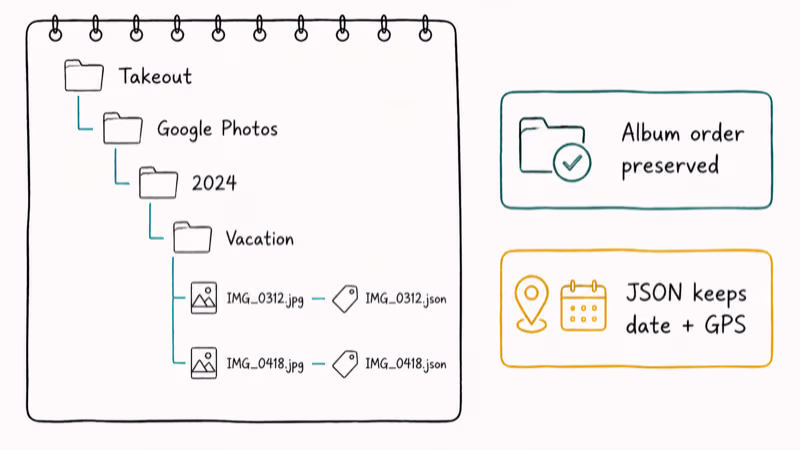
The exported folder structure mirrors your album organization. Top-level Takeout folder, then Google Photos, then one folder per year and album.
Each photo has a matching .json sidecar with the original capture date, GPS coordinates, and any descriptions you added in the cloud. That metadata is what makes Takeout the only viable choice if album order and shooting dates need to survive the move.
If you migrate to another service like iCloud, the JSON files preserve the date and location metadata, which our walkthrough on transferring Google Photos to iCloud uses as the input. Apple users on the other end can also reach a unified library through the iCloud on Android workflow.
#How Do You Avoid Storage Limits and File Format Issues?
Two storage walls trip people up. The 15 GB free quota covers Gmail, Drive, and Photos combined.
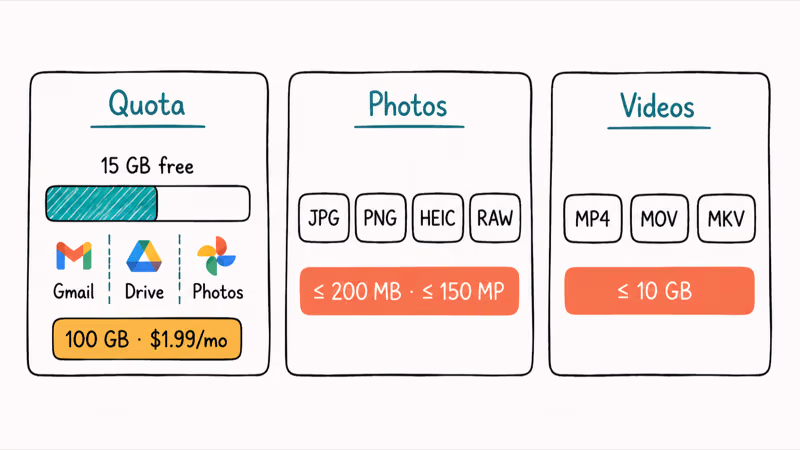
Above 15 GB you need a Google One subscription. According to Google, the cheapest paid tier is 100 GB at $1.99 per month or $19.99 per year (Google One plans).
Google’s documented format support for backup is wider than most people realize:
- Photos: JPG, PNG, WebP, GIF, HEIC, and most common RAW formats including ARW (Sony), CR2 (Canon), and NEF (Nikon).
- Videos: MP4, MOV, AVI, MKV, MTS, M2TS, MMV, MOD, TOD, ASF, DIVX, and 3GP.
- Hard limits: photos can’t exceed 200 MB or 150 megapixels, and videos can’t exceed 10 GB. Anything below 256 × 256 pixels gets rejected as a thumbnail.
The difference between Original quality and Storage saver is easy to see on a high-resolution phone photo.
Storage saver shrinks a large JPEG to a fraction of its original size, with some softening in shadow areas at 100% zoom but little difference at typical viewing distance. Original quality is the right choice if you have the storage budget. Storage saver is fine for archive copies you’ll only revisit on a phone screen.
A separate compression issue affects video uploads through Drive itself, and the rules differ from Google Photos. Our deep-dive on whether Google Drive compresses video explains when re-encoding kicks in for source-quality archiving.
#Choosing Between the Three Methods
Three things to weigh: library size, live local copy or not, album metadata or not.
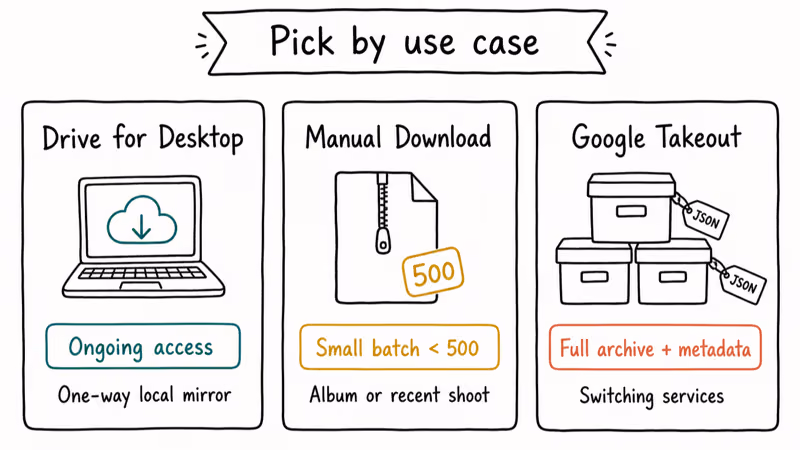
Short version. Drive for Desktop wins for ongoing access. Takeout wins for full archives. Manual download wins for one-off small batches.
Use Drive for Desktop’s mirror mode when you want photos available offline on a single PC and you don’t mind a one-way pull. Use Takeout when you’re switching services, want a complete metadata-preserving snapshot, or need to hand the library to a video editor or backup tool.
Use the web download only for a vacation album or a recent shoot under 500 images.
#Bottom Line
If you have a Google library above 5 GB and want a working local copy on Windows or Mac, install Drive for Desktop and turn on Photos mirror in the preferences. Stream mode saves disk space if you only access photos occasionally. Mirror mode is the closest thing to a true sync.
For a one-time complete backup that preserves album structure and metadata, run a Google Takeout export and store the ZIPs on an external drive.
None of the three options gives you a live two-way sync, so plan to treat the local copy as a backup snapshot, not a working folder.
#Frequently Asked Questions
Can I sync Google Photos to multiple PCs at the same time?
Yes. Install Drive for Desktop on each PC and sign in with the same account.
Does syncing Google Photos to my PC use extra cloud storage?
No. Downloading photos to your PC creates a local copy and doesn’t change your Google account quota. The cloud bytes stay where they’re stored. Only uploading new photos from the PC into Google Photos adds to the 15 GB free or paid quota.
Will edits I make on my PC sync back to Google Photos?
No. All three methods are one-way pulls. If you crop or edit a downloaded photo on your PC, the change stays local. To update the cloud version, re-upload the edited file to Google Photos through the web interface or the mobile app.
What happens if my Google Takeout download link expires?
The link works for 7 days. If you miss it, sign back in and re-run the export.
Can I use these methods on a Mac?
Yes. Drive for Desktop has a Mac client that works the same way as the Windows version. Manual web download and Google Takeout are browser-based, so they work on any operating system with a modern browser. The folder paths differ on Mac (the virtual drive shows up under /Volumes/GoogleDrive instead of G:\).
Why does Drive for Desktop show Google Photos as read-only?
Drive for Desktop treats Photos as a streaming view, not a writable folder. Bidirectional Photos sync isn’t part of the design, and Google has signaled no plans to add it. To change a photo, edit it in the Google Photos web app or the Android or iOS mobile app. The edit replicates to every logged-in client, including the desktop view, the moment your device syncs back online with Google’s servers.
How long does a full Google Takeout export take?
It varies. For libraries under 10 GB, the email link usually arrives in under an hour. A library of around 50 GB typically takes a few hours. Libraries above 100 GB can take 24 to 48 hours, especially during peak usage windows like New Year and major iOS releases.
Are there file size limits I should know about before backing up?
Photos must be under 200 MB and 150 megapixels. Videos must be under 10 GB. Anything smaller than 256 × 256 pixels gets treated as a thumbnail and rejected. RAW files from major brands like Sony, Canon, and Nikon are supported, but TIFF and PSD files aren’t.

Bluetooth Not Working on Snapdragon X? Fixes for 2026
Bluetooth not working on your Snapdragon X Copilot+ PC? Generic audio, mice, and keyboards work, but vendor apps often lack an ARM build. Fixes inside.

Docker Desktop and WSL2 Not Working on Snapdragon X? Fix It
WSL2 runs fine on Snapdragon X, but Docker Desktop ARM is Early Access and throws WSL errors. Use WSL2 plus native ARM64 Ubuntu and Docker Engine.

Does iTunes Work on Snapdragon X? ARM Windows 11 Guide
Yes, iTunes runs on Snapdragon X laptops through Prism emulation, but the Apple Devices app is the smoother route. Here is what to install on ARM.

Does OBS Studio Work on Snapdragon X? ARM64 Build Guide
Yes, OBS Studio has an experimental ARM64 build since version 31.1, but x64 plugins won't load and hardware encoding is missing. Here is what works.