How to Switch a SIM Card From Android to iPhone Easily
Switch a SIM from Android to iPhone in two minutes. Nano SIM swap, eSIM activation for iPhone 14 and newer, carrier unlock checks, contact migration.
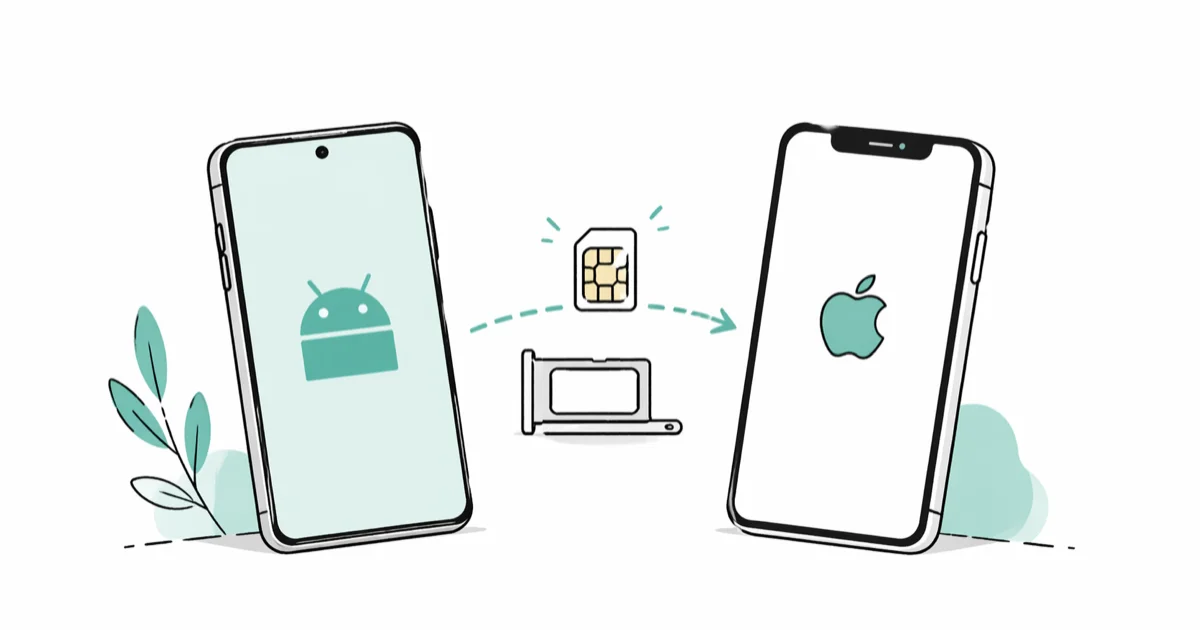
Quick AnswerPower off both phones, eject the nano SIM tray on your Android, transfer the card to your iPhone tray with the gold contacts down, and power on. Your phone number activates within 30 seconds.
Switching a SIM card from Android to iPhone takes about two minutes once both devices are powered down and the iPhone is carrier-unlocked. On the major US carriers, the signal usually returns within seconds of powering the iPhone back on.
The trick isn’t the swap itself. It’s checking three things first: the SIM size, the iPhone’s carrier-lock status, and where your contacts actually live. Skip those checks and you risk a rejected card, a missing contact list, or hours stuck on “Searching…”
- Modern iPhones and Android phones both use the nano SIM size, so no adapter is needed
- Always power off both devices before pulling or inserting the SIM tray
- A locked iPhone rejects another carrier’s SIM until you unlock it through the original carrier
- US iPhone 14 and later models have no physical SIM slot and require an eSIM transfer instead
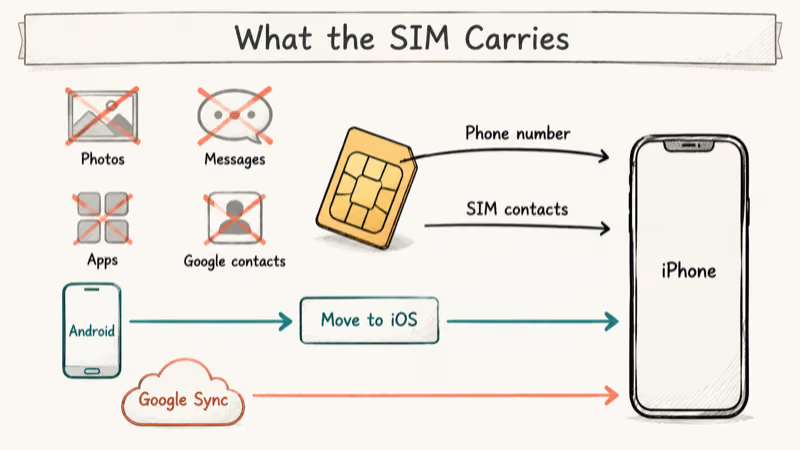
- The SIM card carries only your phone number, not photos, messages, or app data
#Pre-Swap Checks That Save You Time
Three short verifications save you from carrier rejection, contact loss, and activation delays once the swap starts.
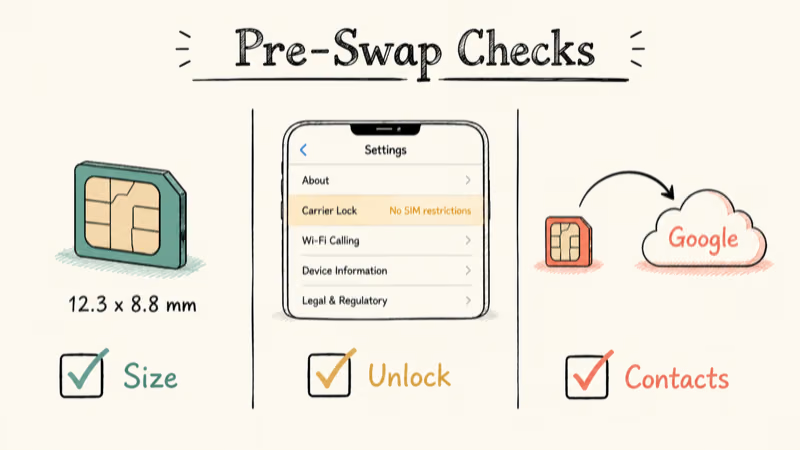
Confirm the SIM size. Almost every Android phone sold since 2015 already uses a nano SIM, the same format every iPhone since the iPhone 5 accepts. Apple’s iPhone SIM tray and ejector tool guide confirms that every iPhone with a physical SIM slot, from iPhone 5 through iPhone 13, uses the nano SIM size. If your Android still uses a micro SIM, ask your carrier for a free nano replacement before you swap.
Verify the iPhone is unlocked. Open Settings, tap General, then About, and look at Carrier Lock. “No SIM restrictions” means any carrier’s SIM will work. A carrier name in that field means the iPhone is locked, and your Android SIM will be rejected the moment you insert it.
Request the unlock from that carrier; it’s free once the device is paid off. Our carrier lock guide explains every status message.
Find where your contacts live. Open Contacts on the Android, tap the menu, and check whether entries are saved to the SIM, your Google account, or both. SIM-stored contacts move with the card. Google contacts stay in the cloud and require a re-sync on the iPhone, which we cover in the data section below.
#How Do You Physically Swap the SIM Card?
When both phones use nano SIM, the actual transfer takes about 30 seconds.
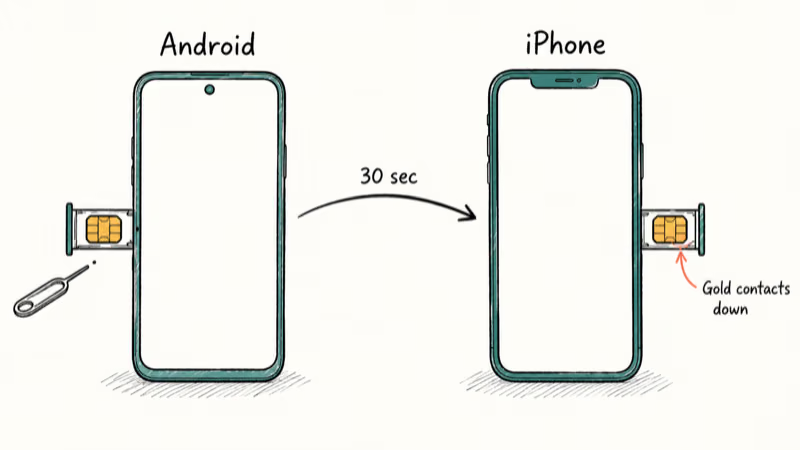
On the Android phone. Power the device off completely. Find the SIM tray, usually on the left edge near the volume buttons or on the top edge for Pixel models. Push the SIM ejector tool firmly into the pinhole until the tray pops out, then lift the nano SIM by its edges to keep skin oils off the gold contacts.
On the iPhone. Power off the iPhone. The SIM tray sits on the right edge on every iPhone with a physical SIM slot. Eject it the same way, set the nano SIM into the tray with the gold contacts facing down and the notched corner aligned, and slide the tray back until it clicks flush.
Power on the iPhone. Your carrier’s name should appear in the top-left corner within 30 seconds.
If you see “Searching…” for more than a minute, toggle Airplane Mode on for 10 seconds and back off to force the radio to reconnect. Persistent “No Service” usually means the carrier hasn’t activated the new device yet, so check our iPhone no service errors guide for carrier settings updates and SIM reseat tips.
If the iPhone shows a “SIM Failure” or “Invalid SIM” warning instead, the carrier database hasn’t recognized the IMEI yet, or the contacts on the SIM are dirty. Our SIM failure on iPhone fixes cover the recovery sequence step by step.
#Moving to an eSIM-Only iPhone (iPhone 14 and Newer in the US)
If your new iPhone was sold in the US and is an iPhone 14 or later, the physical SIM slot is gone and your Android’s plastic SIM can’t move over at all. Apple’s eSIM and physical SIM documentation states that iPhone 14, iPhone 15, iPhone 16, and all newer US models support eSIM exclusively, and each device can store multiple eSIM profiles with two active at the same time. The carrier plan moves digitally instead of through the tray.
#Automatic Carrier Detection at Setup
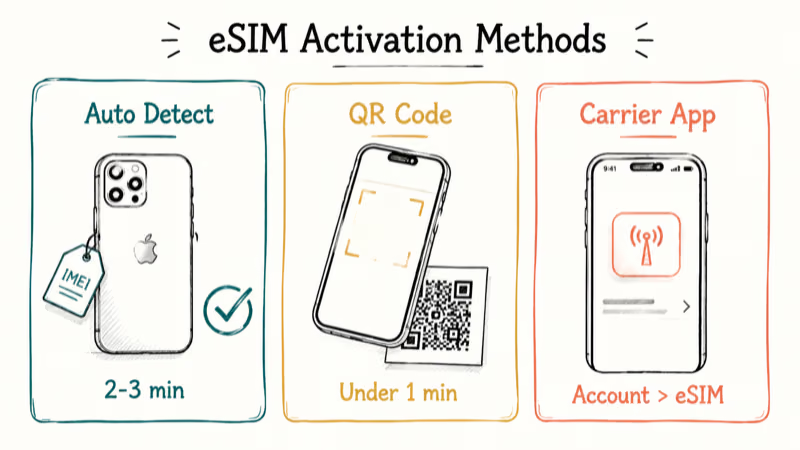
The fastest path works for T-Mobile, AT&T, and Verizon customers. Power on the new iPhone, connect to a Wi-Fi network, and walk through the setup wizard until the “Set Up Cellular” screen appears. The phone reads your carrier from the IMEI, asks you to sign in with your carrier credentials, and provisions the eSIM in two to three minutes.
#Using a QR Code
If automatic detection fails, ask your carrier for an eSIM activation QR code. On the cellular screen, choose “Use QR Code,” point the camera at the code, and confirm the plan name. The eSIM downloads in under a minute. Carriers usually email the code or post it inside the account portal.
If the plan installs but mobile data stays dead, work through the fixes for an eSIM not working after the switch.
#Carrier App Method
Prefer to skip cellular setup during onboarding? Finish the iPhone setup over Wi-Fi, install your carrier’s app from the App Store, sign in, and choose the eSIM activation option in account settings.
According to T-Mobile’s eSIM support page, the T-Mobile app activates an eSIM without a store visit, and AT&T and Verizon offer near-identical flows in their own apps. If you’re brand new to iPhone, our guide on activating an iPhone without a SIM shows how to finish setup over Wi-Fi and add cellular later.
#Bringing Over Contacts and Other Data
A SIM card holds your phone number plus, at most, a few dozen contacts written directly to the chip. Photos, text messages, app data, and Google contacts all live elsewhere and need separate migration.
#Importing SIM Contacts to iPhone
Once the SIM is seated, open Settings, tap Contacts, then tap Import SIM Contacts. The pull finishes in seconds and adds any names and numbers stored on the SIM into your iPhone Contacts app. Anything saved to your Google account on the Android won’t show up here.
#Using Move to iOS for Bulk Transfer
Apple’s Move to iOS app can bring messages, photos, and contacts from Android to iPhone. Apple’s Move to iOS guide lists contacts, message history, camera photos and videos, web bookmarks, mail accounts, and calendars among the supported content. It also explains that the iPhone creates a temporary Wi-Fi network for the transfer; the completion time depends on how much content you move.
Install Move to iOS from the Google Play Store on your Android phone. During iPhone setup, tap “Move Data from Android,” hold the phones close together, and enter the pairing code that appears. Both phones must be on the same Wi-Fi network, and the iPhone needs enough free storage to hold everything coming over. If the transfer stalls, our Move to iOS not working fixes walk through the most common pairing failures.
#Syncing Google Contacts
Most contacts in Google? Open Settings > Contacts > Accounts > Add Account > Google, sign in, and toggle Contacts on. They sync within minutes and stay synced afterward.
If the iPhone shows a “SIM card is not from Verizon Wireless” message after insertion, the device is carrier-locked rather than broken, and our SIM card is not from Verizon Wireless fix explains how to confirm and resolve it.
#What If the iPhone Is Carrier-Locked?
A carrier-locked iPhone refuses SIM cards from any other network. Most US carriers lock new devices financed on a payment plan and remove the lock automatically once the balance hits zero. The unlock is yours to request only on devices you legally own; attempting to unlock someone else’s phone without explicit permission can violate carrier terms and federal law.
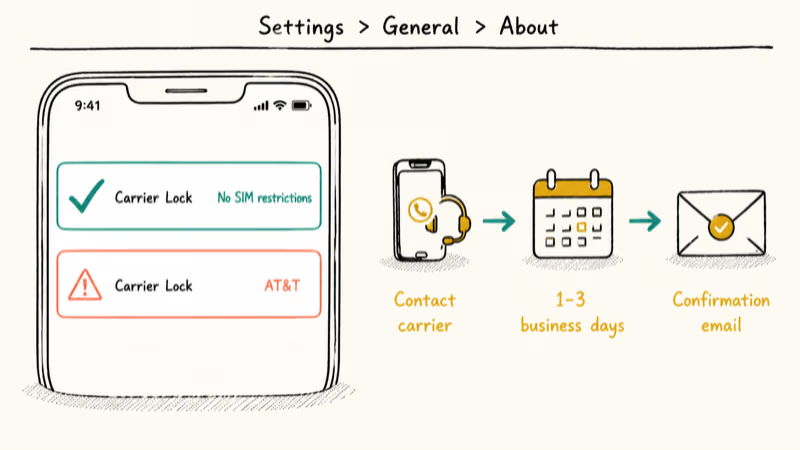
Check the lock again at Settings > General > About > Carrier Lock. If a carrier name shows up, contact that carrier’s customer service through their app, website chat, or in-store. The unlock is free once the device is paid off and usually completes inside 1 to 3 business days, with a confirmation email when the change goes live.
AT&T users can speed this up with our AT&T iPhone unlock walkthrough, which lists the exact form fields the request needs.
#Your Old Android After You Pull the SIM
Once the SIM leaves the Android phone, that device can no longer make voice calls or send standard SMS over the cellular network. It still works fine on Wi-Fi for streaming, web browsing, and voice calls through apps like FaceTime, WhatsApp, or Signal.
Planning to sell or hand off the Android? Factory reset it before it leaves your hands. On stock Android, open Settings, tap System, then Reset, then Erase All Data (Factory Reset). On Samsung, the path is Settings > General Management > Reset > Factory Data Reset.
The reset wipes accounts, apps, photos, and saved Wi-Fi passwords so the next owner starts on a clean slate.
#Bottom Line
For US users on a recent Android paired with an iPhone 13 or earlier, the physical SIM swap is a 30-second job once the iPhone is unlocked. A US iPhone 14 or later skips the tray entirely and uses eSIM activation through your carrier app or a QR code. Run Move to iOS during the iPhone’s first boot to migrate photos and messages in one pass, and keep the Android handy a few days to verify nothing important stayed behind.
#Frequently Asked Questions
Can any Android SIM work in any iPhone?
Only when the iPhone is unlocked and uses a physical SIM tray. A locked iPhone rejects SIMs from other carriers, and a US iPhone 14 or later has no SIM tray to use. If your Android still has a micro SIM, your carrier will swap it for a nano SIM at no cost.
What happens to your phone number after the swap?
Your number stays with the SIM card. The moment you insert the SIM into the iPhone, your number and carrier service activate on that device, usually inside 30 seconds.
Do text messages transfer with the SIM card?
No, text messages live on the phone’s internal storage, not on the SIM. Use Apple’s Move to iOS during initial iPhone setup to migrate SMS and iMessage history, or accept that the message log stays on the Android if you skip that step.
Can you put the SIM back in the Android later?
Yes, with no carrier action required. Pull the SIM from the iPhone, slot it into the Android tray, power on, and the cellular service comes back inside about 30 seconds. This makes it safe to test the swap before you commit to the iPhone for the long term.
Why does my iPhone show “No SIM” after I insert the card?
Almost always the SIM is not seated flush. Eject the tray, confirm the gold contacts face down, the notched corner matches the tray notch, and the tray sits flat. Wipe the gold contacts with a dry microfiber cloth if grime is visible. If the message persists after a clean reseat, ask your carrier for a free replacement chip, since a worn or bent card is the most common cause of repeat warnings.
Do you need to deactivate the Android before pulling the SIM?
No carrier deactivation is required. Removing the SIM disconnects the Android from cellular service instantly, and the phone keeps every other function as long as Wi-Fi is reachable.
How can you tell which SIM size your phone uses?
Nano SIM measures 12.3 by 8.8 millimeters and is the only size used in iPhone 5 and later. Micro SIM is 15 by 12 millimeters, mostly seen on Android phones from 2010 through 2014. Standard SIM is 25 by 15 millimeters and is essentially extinct on consumer phones today. Your carrier will identify the size and provide a free replacement if you bring the chip into a store.
Will WhatsApp chats move during a SIM swap?
No, WhatsApp stores chats on the device, not the SIM card. A tray swap moves only your phone number and any contacts written to the SIM. Use WhatsApp’s official Android-to-iPhone transfer tool before pulling the SIM out of the Android, or you’ll lose access to those threads on the new iPhone.
Mac mini M6 vs M5 Pro: Which Model Should You Buy?
Mac mini M6 vs M5 Pro compared on price, memory, ports, displays, and real workloads. Find the better 2026 Mac mini for your desk and budget.
Apple Siri Settlement: Who Qualifies and How to Claim
Apple's $250 million Siri settlement covers iPhone 15 Pro and iPhone 16 models bought June 2024 to March 2025. See who qualifies and how claims work.
iOS 26.6.1 Security Update: What Apple Fixed and Who Gets It
Apple released iOS 26.6.1 on August 17 with 29 security fixes, including an IPSec interception bug. See what it patches, who gets it, and how to update.
iPhone Adaptive Power: How It Works and When to Use It
Learn how iPhone Adaptive Power works, which models support it, what it changes, and when Low Power Mode is still the better battery-saving choice.