How to Fix Samsung Galaxy S7 Won't Turn On: 7 Methods
Galaxy S7 won't turn on? Use charging, force restart, Safe Mode, cache wipe, reset, battery, and repair checks before wiping data or repair.
Quick AnswerHold Power and Volume Down together for 15 seconds to force restart your Galaxy S7. If nothing happens, plug the phone into a wall charger and leave it untouched for 30 full minutes before pressing any button again.
Your Samsung Galaxy S7 went black and the buttons do nothing. The same seven checks below cover the usual battery, charging, app, cache, reset, and repair paths. Run them in order. Move to the next method only when the previous one truly does nothing.
Use these steps only on a Galaxy S7 you own or have explicit permission to repair. Don’t run recovery menus, factory resets, or charging diagnostics on someone else’s phone or accounts.
- A dead Galaxy S7 is almost always a battery, charging-port, or boot software problem after roughly nine years of daily use
- Force restart with Power plus Volume Down clears most stuck-screen and frozen-boot cases without erasing data
- Safe Mode boots the phone with all third-party apps disabled so you can spot a bad install fast
- Cache partition wipe clears corrupted system files but keeps your photos, contacts, and messages intact
- Factory reset is the last software fix and erases everything not synced to your Google account
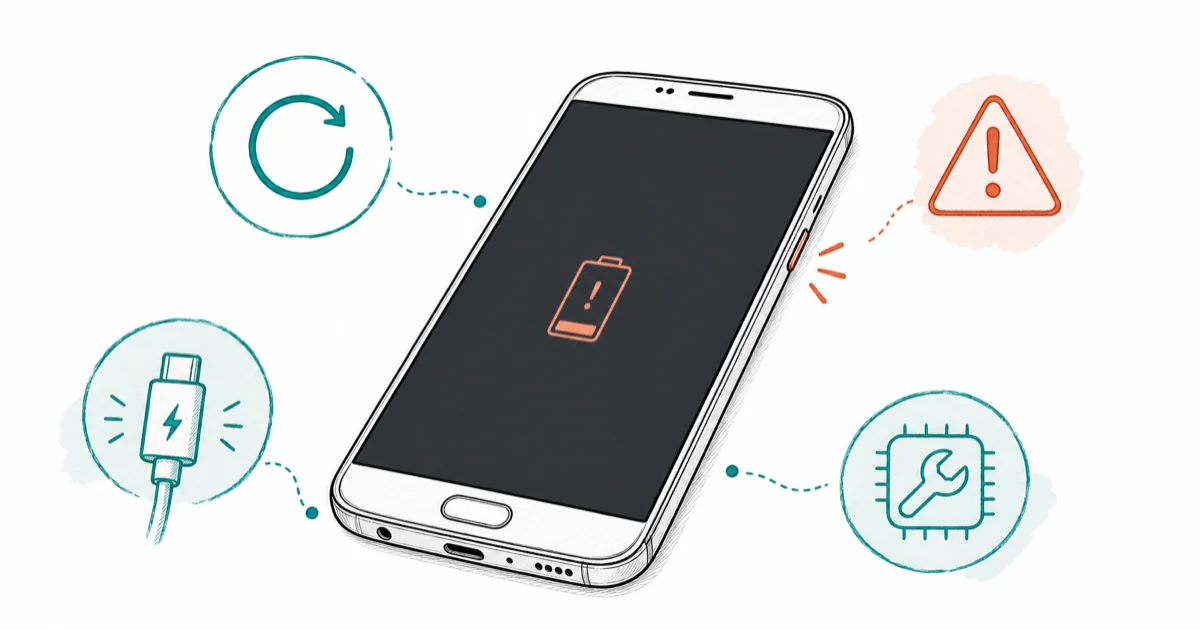
#Why Won’t Your Galaxy S7 Turn On?
The cell drains below cut-off voltage and won’t respond until charging pushes it back. Battery depletion is the most common reason an S7 acts dead.
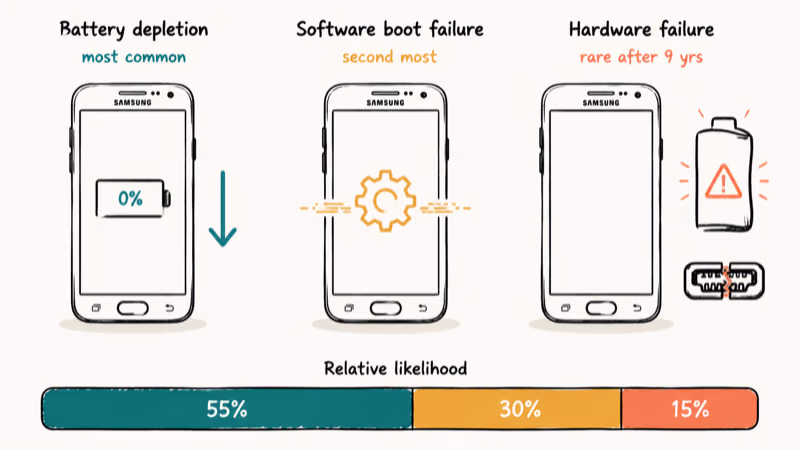
Software boot failure is second. A bad app, a stalled system update, or a corrupted cache partition can stop the phone before the lock screen ever appears. The screen stays black, but you’ll often feel a brief vibration when you press Power.
Hardware failure (a swollen battery, a broken charging port, water ingress, or a cracked display ribbon) is rarer but plausible after seven years of daily charging. Run the software fixes first. If the S7 still refuses to boot after Method 5, the next call is a service center, not another reset.
A deeply discharged S7 may respond only after a longer wall charge plus a force restart. That’s the playbook below.
#Method 1: Charge for 30 Full Minutes First
Don’t skip this step. A deeply discharged S7 won’t even show the charging icon for the first few minutes, and a quick “is anything happening?” press will trick you into thinking the phone is dead.
- Use the original Samsung micro-USB cable that came with the S7, or a known-good replacement if the original is frayed
- Plug into a wall outlet, not a laptop USB port. A wall brick pushes 5 to 10 watts where a laptop port often delivers only 2.5
- Leave the phone face-up, untouched, for 30 minutes
- After 30 minutes, press Power once and wait 10 seconds
A wall charger can pull a deeply discharged S7 out of cut-off voltage after several minutes before any icon shows. If the screen still does nothing after a full hour on the wall charger, swap in a different known-good cable. A frayed cable can mimic a dead phone.
If charging itself looks broken, work through our Galaxy S7 not-charging guide for charging-port and battery-specific tests, then return to Method 2.
#Method 2: Force Restart With Power and Volume Down
A force restart cuts power and forces the boot ROM to reload. It works on every S7 model regardless of charge level, as long as the battery has at least 5 percent remaining.
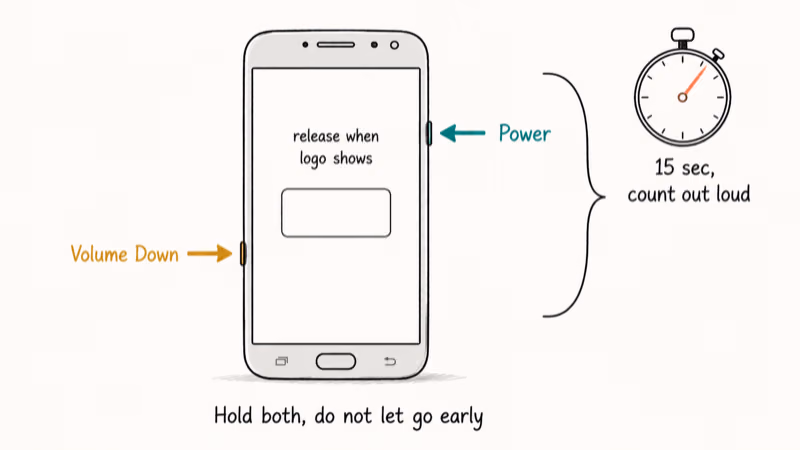
- Press and hold the Power button on the right side of the phone
- While still holding Power, press and hold the Volume Down button
- Keep both buttons held for a full 15 seconds. Count to 15 out loud
- When the Samsung logo appears on screen, release both buttons together
- Wait 30 to 45 seconds for the phone to finish booting
A force restart often resolves a stuck S7. If it doesn’t, Safe Mode (Method 3) is the next step because a recently installed app may be crashing the launcher mid-boot. Holding the buttons for less than 10 seconds can abort the reset and require a clean retry.
If you see the Samsung logo and the phone still gets stuck, the boot is hanging on a software issue. Continue to Method 3.
#Method 3: Boot Into Safe Mode to Catch a Bad App
Safe Mode boots Android with every third-party app disabled. According to Google’s Safe Mode help page, this is the standard isolation step before assuming the operating system itself is corrupt. If your S7 boots fine in Safe Mode but crashes in normal mode, the culprit is one of the apps you installed in the past week or two.
If you keep landing on a Samsung black screen state, Safe Mode is the right diagnostic before you escalate to a cache wipe.
- Press and hold Power until the Samsung logo appears
- The instant the logo shows, release Power and immediately press and hold Volume Down
- Keep Volume Down held through the full reboot, about 30 seconds
- When the lock screen appears, look for “Safe mode” in the lower-left corner
If your phone runs fine in Safe Mode for 5 minutes, an app is the cause. Open Settings > Apps, sort by Install date, and uninstall everything you added in the week before the phone died. Restart and test in normal mode after each uninstall.
If your S7 crashes the same way in Safe Mode, the issue is below the app layer. Continue to Method 4.
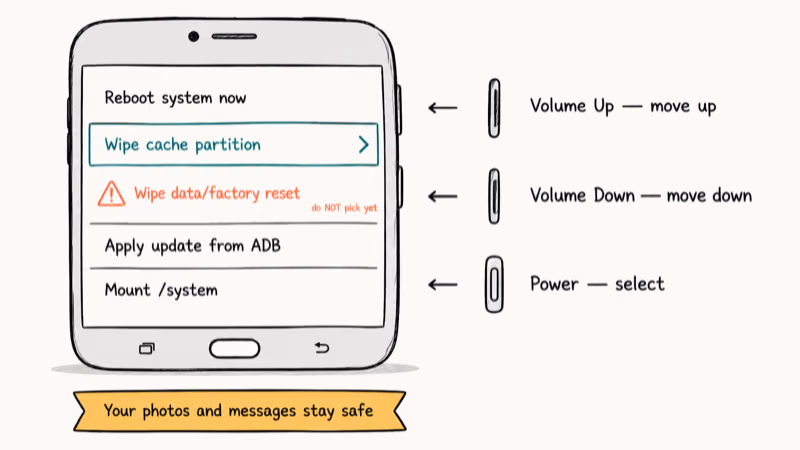
#Method 4: Wipe the Cache Partition in Recovery Mode
The cache partition stores temporary system files that the OS rebuilds on each boot. A corrupted cache can hang boot indefinitely. Wiping the cache is safe and won’t delete photos, contacts, messages, app data, or accounts.
- Power the phone off completely (hold Power, tap Power off)
- Press and hold Volume Up + Home + Power buttons together
- When the blue Android Recovery screen appears, release all buttons
- Use Volume Down to highlight Wipe cache partition
- Press Power once to select it
- After “Cache wipe complete,” press Power on Reboot system now
The Android logo cycles for about 90 seconds while the cache rebuilds. A successful cache wipe can let a boot-looping S7 boot cleanly on the next try.
If the phone still won’t boot, this is the point where many S7s reveal a boot loop pattern that needs a factory reset.
#Method 5: Factory Reset as the Last Software Fix
Warning: a factory reset erases every photo, message, login token, and app on the device. Anything not synced to your Google account is gone. If your S7 turns on but stays stuck on the lock screen, sync first. If it won’t reach the lock screen, you’ll have to accept the loss or recover data from a broken Android device at a service center afterward.
- Power the phone off
- Press and hold Volume Up + Home + Power
- Release all buttons when the Android Recovery screen appears
- Use Volume Down to highlight Wipe data/factory reset
- Press Power to select it
- On the confirmation screen, press Volume Down to highlight Factory data reset and press Power
- After completion, press Power on Reboot system now
The first boot after factory reset takes 5 to 8 minutes. Don’t interrupt it. If the setup wizard appears and lets you sign in to Google, the cause was software-only and you’re done.
If the phone still doesn’t reach setup, stop here. The cause is hardware. Don’t keep retrying. It won’t change the outcome, and a swollen battery on heavy retry can stress the chassis further.
#Method 6: Test for a Bad Battery or Charging Port
After eight or nine years of daily charging, the lithium-ion battery in an S7 loses capacity until it can’t deliver enough current to boot. Battery University’s BU-808 article on prolonging lithium batteries confirms that lithium-ion cells stored at high temperatures lose capacity faster than cells kept at room temperature, which is why dashboard or summer-pocket use can age an S7 battery faster.
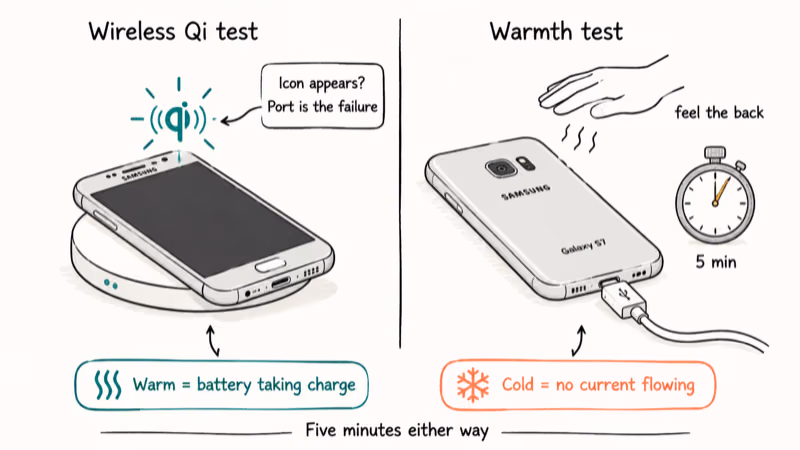
Two quick tests:
- Wireless charging test: rest the phone on a Qi pad. The S7 supports wireless charging natively. If the wireless icon appears but micro-USB charging does not, the port is the failure point, not the battery.
- Warmth test: plug the cable in with the screen face-down for 5 minutes, then check the back of the phone. If it’s room-temperature, no current is flowing. If it’s mildly warm but the screen is dead, the battery is taking charge but the boot circuitry has failed.
If wireless charging works but the battery still drains in 4 hours of standby, the cell is shot. An S7 battery swap at an iFixit-rated shop runs about $60 to $80 in the United States.
#Method 7: When Should You Stop and Take It to a Pro?
You’ve worked through six software and hardware tests. If your S7 still won’t boot, the issue is one of these: a swollen battery, a damaged display connector, a water-damaged logic board, or a failed boot-loader chip. None of these are DIY repairs unless you have soldering experience and a hot-air rework station.

Where to go:
- An iFixit-rated independent repair shop for out-of-warranty work, since Samsung no longer offers warranty service on the S7
- A data-recovery specialist if the phone is dead but you need photos off the storage
- A used-phone trade-in counter if the quoted repair exceeds $80, since refurbished S7 units sell for about $40 to $90
iFixit’s Galaxy S7 device page states that the back glass must be heated and pried before any internal access, which is why DIY battery swaps on this model frequently crack the rear panel and break the screen seal. Pay a shop with the right heat tools instead.
#Bottom Line
Charge for 30 minutes, then force restart with Power and Volume Down. Those two steps catch the most common dead-looking S7 causes. If the phone still won’t boot, Safe Mode and a cache wipe will catch software-side problems before you commit to a factory reset. When all seven methods fail on a Galaxy S7 specifically, the next call is an iFixit-rated repair shop, not another reset attempt.
If you have a sister device on a newer release line, our Galaxy S10 won’t turn on guide covers the equivalent fixes for the post-Bixby button layout. The S7 is a nine-year-old phone in 2026, and these steps buy you time, not permanence.
Samsung Galaxy Guide
#Frequently Asked Questions
Can I fix my Galaxy S7 without losing data?
Yes. Methods 1 through 4 preserve all data. Only Method 5 (factory reset) erases photos and apps that aren’t backed up to your Google account.
How long should I charge a dead S7 before trying to power it on?
Give it 30 full minutes on a wall charger before any button press. If there is no response after a full hour with a known-good cable, the battery or charging port has likely failed and you’ll need a repair shop.
Is a force restart the same as a factory reset?
No. Force restart cuts power and reboots without touching data. Factory reset wipes storage and reinstalls Android. Always try force restart first.
Why does my Galaxy S7 vibrate but show nothing on screen?
If the phone vibrates and you hear a notification chime but the screen stays black, the display ribbon cable or panel has likely failed. Try the force restart once. If the screen stays dark, this is hardware, not software, and a cache wipe won’t fix it. Take it to a repair shop with display-replacement experience for a quote.
Can I use a non-Samsung charger to revive my Galaxy S7?
Micro-USB chargers from Anker or Belkin work fine. Give third-party chargers 60 minutes before pressing Power, since they often deliver less wattage than Samsung’s original brick on a deep-discharged battery.
Will a factory reset fix a swollen battery?
No. A swollen battery is hardware, not software. Stop using the phone and take it to a repair shop. A swelling cell can rupture the screen or chassis if you keep charging it.
Is the Galaxy S7 worth repairing in 2026?
If a battery swap costs less than $80, yes. If a logic-board repair is quoted above $100, no. The S7 stopped getting Samsung security patches years ago, and refurbished units sell for $40 to $90. Before deciding, our Samsung Galaxy data recovery guide covers what you should pull off the phone first if you plan to retire it.
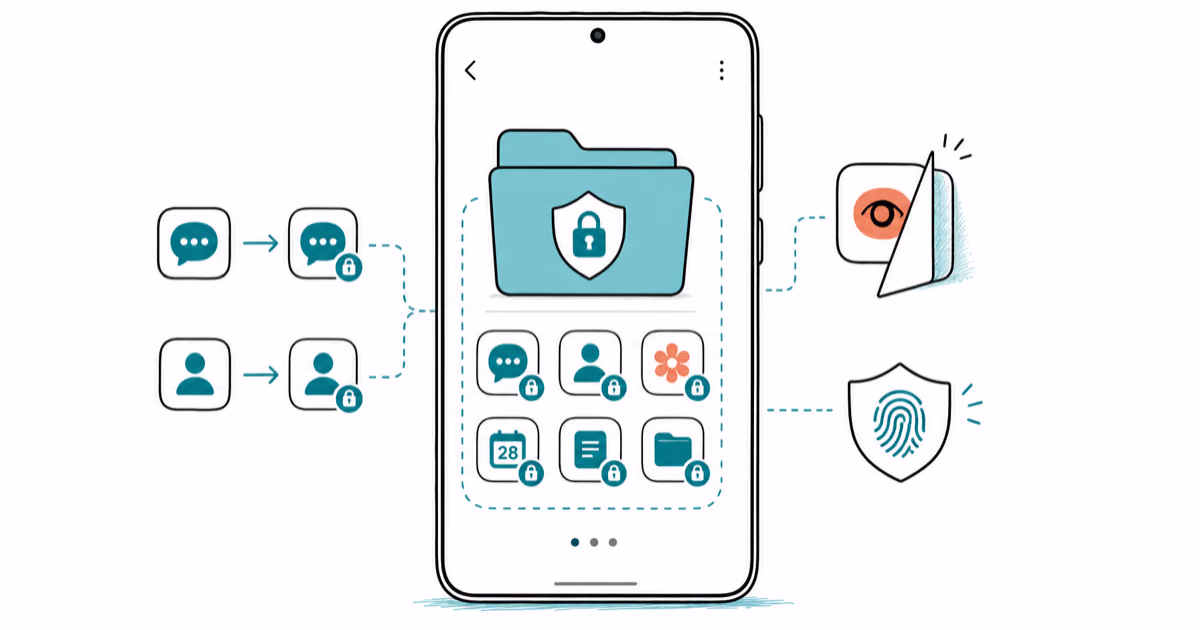
Samsung Secure Folder: Setup, Hide Apps, Clone Apps
Set up Samsung Secure Folder in under 5 minutes. Hide apps and photos, clone a banking app, and hide the Secure Folder icon on any Galaxy S8 or newer.

How to Use Google Find Hub: Setup + Find Lost
Set up and use Google Find Hub to locate, ring, lock, or erase your own Android phone, including offline finding and powered-off Pixel support.
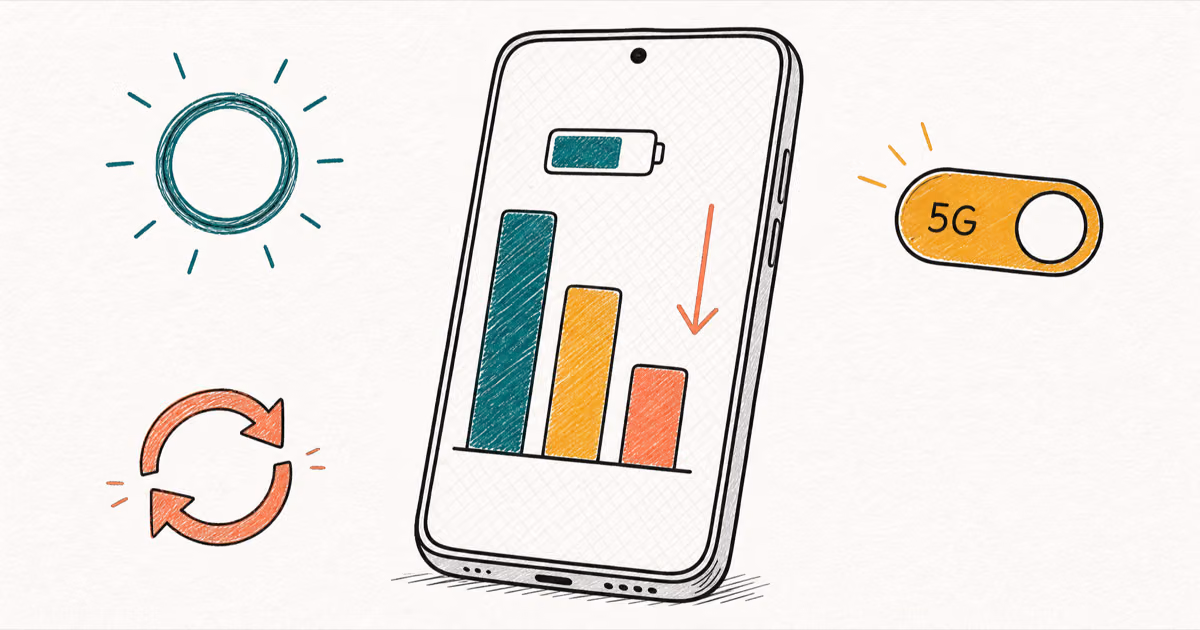
Samsung Galaxy Battery Draining Fast: 2026 Fix Guide
Diagnose Galaxy S25 battery drain in five minutes through Battery Usage, then walk through six reversible Galaxy settings before a factory reset.

Samsung Parental Controls: Full Setup Guide for Parents
Set up Samsung parental controls in three layers: Samsung Kids, Google Family Link, and Digital Wellbeing. Free step-by-step guide for Galaxy parents.