Kernel Mode Heap Corruption: Causes, Fixes & Prevention
Fix Kernel Mode Heap Corruption (0x0000013A) on Windows. Update drivers, run memory diagnostics, and repair system files. Step-by-step guide.
Quick AnswerUpdate your graphics and hardware drivers first, since outdated or corrupt drivers cause this BSOD in most cases. Then run Windows Memory Diagnostic and SFC /scannow to check for faulty RAM and corrupted system files.
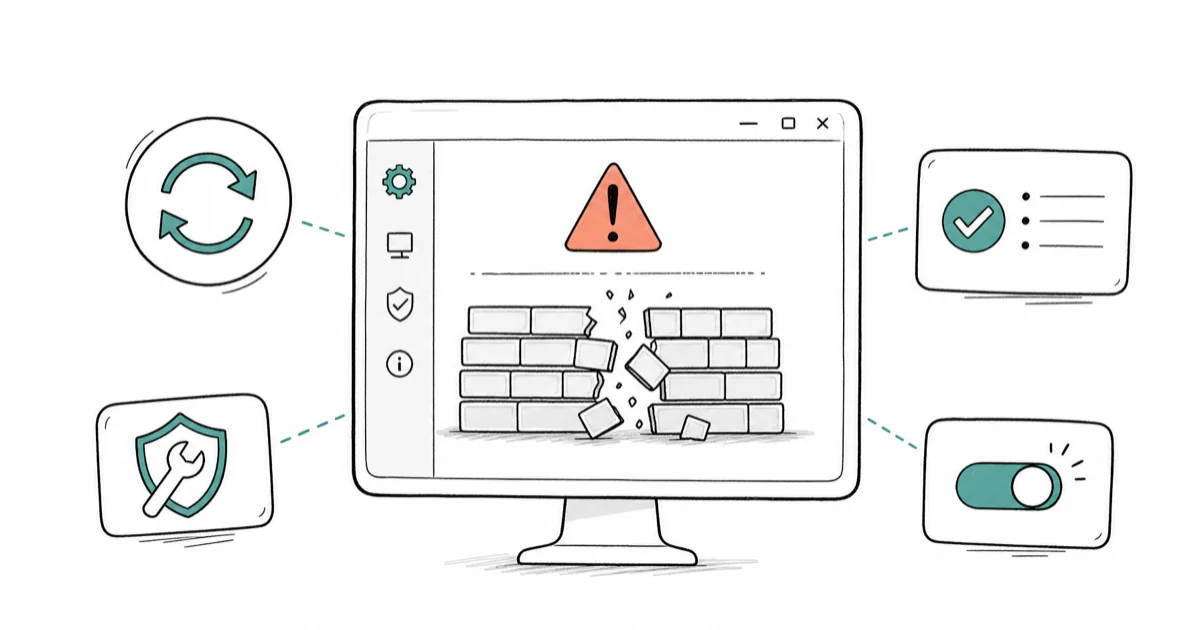
The Kernel Mode Heap Corruption blue screen (stop code 0x0000013A) crashes your PC when Windows detects corrupted memory in the kernel heap. The cause is usually a bad driver or failing RAM module. Here’s how to diagnose it and stop the crashes.
- Stop code 0x0000013A points to corrupted kernel heap memory, most often triggered by outdated or faulty graphics drivers
- Running SFC /scannow in an elevated Command Prompt repairs corrupted system files and resolves the error without hardware changes in many cases
- Faulty RAM is the leading hardware cause, and Windows Memory Diagnostic or MemTest86 confirms whether your modules need replacing
- Driver Verifier can pinpoint the driver responsible when multiple drivers are suspect
- Keeping Windows and all device drivers current is the single most effective way to prevent this BSOD from recurring
#What Causes Kernel Mode Heap Corruption?
This BSOD fires when the Windows kernel detects that something wrote to memory it shouldn’t have, corrupting the heap data structure. Three causes account for the vast majority of cases.
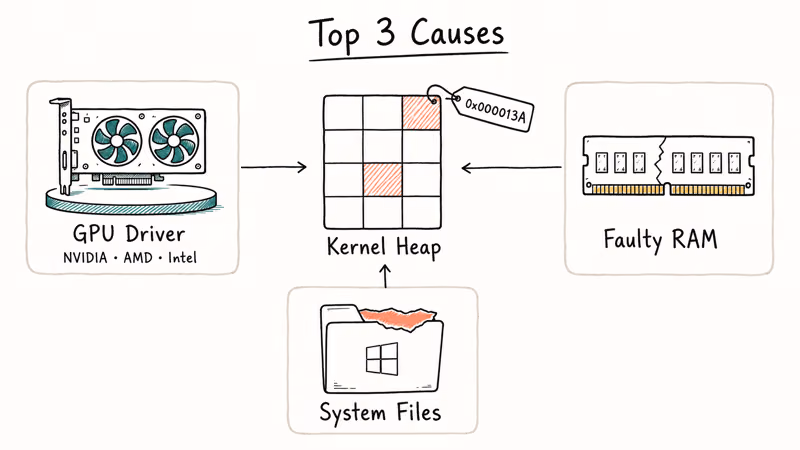
Outdated or buggy drivers top the list. Graphics drivers from NVIDIA, AMD, and Intel are frequent offenders because they interact heavily with kernel memory. According to Microsoft’s documentation on bug check 0x13A, this stop code means “the kernel mode heap manager has detected corruption in a heap.” A recent graphics driver update or rollback is the first place to look if the crashes started after a driver change.
Defective RAM modules are the second biggest trigger. When a memory stick develops bad sectors, data gets written or read incorrectly at the hardware level. No software fix helps. If you’ve been seeing random BSODs alongside this one, such as the Bad Pool Caller error or a Kernel Data Inpage Error, faulty RAM is likely the common thread.
Corrupted system files round out the top three. A failed Windows update, sudden power loss, or malware infection can damage core OS files that manage memory allocation.
Less common causes include overclocking (especially RAM timings), aggressive antivirus software hooking into kernel memory, and third-party utilities that install kernel-mode drivers.
#How Do You Diagnose the Exact Cause?
Start with Event Viewer. Press Win + R, type eventvwr.msc, and press Enter. Go to Windows Logs > System and look for Critical or Error entries timestamped right before the crash. The faulting module name in the event detail usually points directly at the guilty driver.
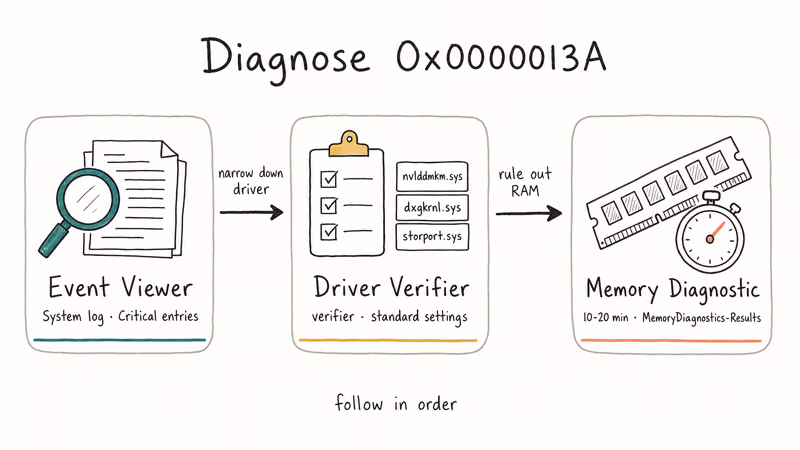
Next, run Driver Verifier to stress-test suspicious drivers:
- Open Command Prompt as Administrator
- Type
verifierand press Enter - Select Create standard settings
- Choose Automatically select all drivers installed on this computer (or pick specific ones if Event Viewer already named the crashing driver)
- Restart your PC
Driver Verifier forces extra validation on every driver call. If a driver misbehaves, Windows crashes with a more specific BSOD that names the faulty driver file. Microsoft recommends using Driver Verifier as the primary tool for tracking down driver bugs in kernel mode. If Driver Verifier triggers a crash, the newer BSOD can name the faulty driver file.
Disable Driver Verifier after diagnosis by running verifier /reset in an elevated Command Prompt, then restarting. Leaving it enabled permanently slows your system.
For hardware diagnosis, run Windows Memory Diagnostic:
- Search for Windows Memory Diagnostic in the Start menu
- Click Restart now and check for problems
- Wait for the test to complete after reboot (takes 10-20 minutes depending on RAM size)
Results appear in Event Viewer under Windows Logs > System with source “MemoryDiagnostics-Results.”
#Updating and Rolling Back Drivers
Outdated graphics drivers cause the majority of 0x0000013A crashes. Start here.
- Open Device Manager (right-click
Start>Device Manager) - Expand Display adapters
- Right-click your GPU and select Update driver > Search automatically
- Repeat for Network adapters and Storage controllers
Don’t rely on Windows Update alone for GPU drivers. Download the latest version directly from your manufacturer’s driver page. Microsoft’s support documentation on updating drivers states that downloading directly from the hardware maker is the most reliable method for getting current drivers.
If the crashes started after a recent driver update, roll back instead: right-click the device in Device Manager > Properties > Driver > Roll Back Driver.
#Repairing System Files With SFC and DISM
System File Checker scans and repairs corrupted Windows files. Open Command Prompt as Administrator and run:
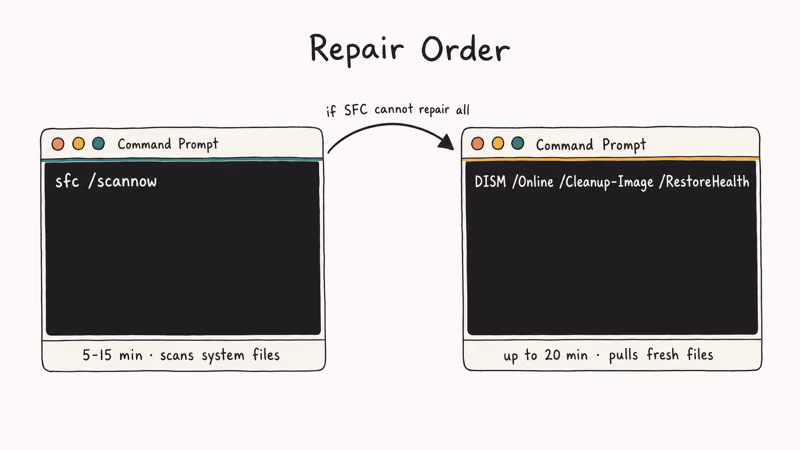
sfc /scannowWait for the scan to finish (takes 5-15 minutes). If SFC reports it found corrupted files but couldn’t fix all of them, follow up with DISM:
DISM /Online /Cleanup-Image /RestoreHealthDISM pulls fresh copies of damaged files from Windows Update. The process takes up to 20 minutes. If you run into problems with the DISM command itself, check our guide on DISM Error 87 for troubleshooting steps.
#Testing Your RAM for Hardware Faults
If driver updates and file repairs didn’t stop the crashes, your RAM is the next suspect. Windows Memory Diagnostic catches most issues, but MemTest86 is more thorough. Download it, create a bootable USB, and run at least two full passes. Any errors mean you need to replace the faulty module.
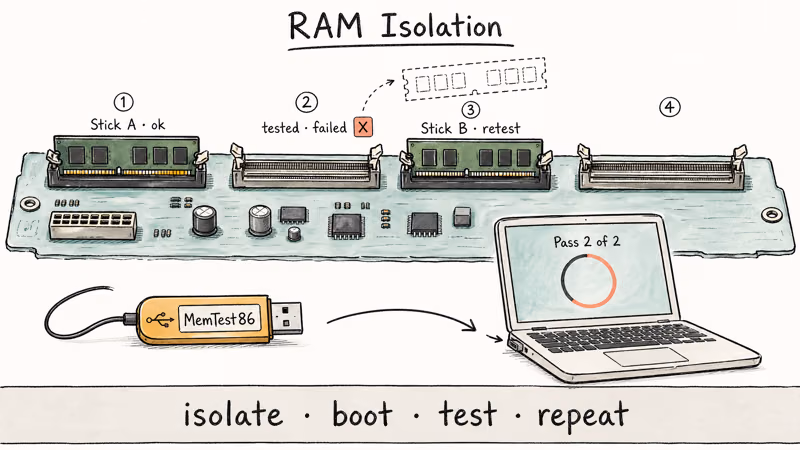
For PCs with multiple RAM sticks, try removing one stick at a time and running your system to isolate which module is bad. If crashes stop with one stick removed, test each module individually before replacing hardware.
#Additional Fixes for Persistent Crashes
If the error keeps coming back after trying drivers, SFC, and RAM testing, work through these remaining fixes.
#Adjust Virtual Memory Settings
Increasing your page file size gives Windows more headroom for memory management:
- Search for Advanced system settings in the Start menu
- Under Performance, click
Settings>Advanced>Change - Uncheck Automatically manage paging file size for all drives
- Select your system drive, choose Custom size
- Set Initial size to 1.5x your RAM and Maximum size to 3x your RAM
- Click Set, then OK, and restart
#Check for Overclocking
If you’ve overclocked your CPU or RAM, reset to stock speeds. Enter BIOS (usually by pressing Del or F2 during startup) and load default settings. Unstable RAM timings and voltages directly cause kernel heap corruption.
#Perform a Clean Boot
Third-party software conflicts can trigger this error. A clean boot starts Windows with only essential Microsoft services:
- Press Win + R, type
msconfig, press Enter - Go to the Services tab
- Check Hide all Microsoft services, then click Disable all
- Go to the Startup tab and click Open Task Manager
- Disable all startup items
- Restart
If the error stops, re-enable services in groups to find the conflicting program. This error sometimes overlaps with the System Thread Exception Not Handled BSOD, which also points to driver or software conflicts.
#Preventing Kernel Mode Heap Corruption
Prevention comes down to three habits.
Keep drivers updated monthly. Set a reminder to check for GPU, chipset, and storage driver updates. Windows Update catches some, but manufacturer sites publish driver fixes weeks before Microsoft distributes them.
Run Windows Update consistently. Cumulative updates include kernel patches that fix known heap corruption bugs. Delaying updates by more than a month puts you at risk.
Monitor your RAM health. If your PC is older than 3 years, run MemTest86 once or twice a year. RAM degrades over time, and catching failing modules before they cause data loss is worth the 30-minute test. Related BSOD errors like IRQL_NOT_LESS_OR_EQUAL (0x000000D1) and Video Scheduler Internal Error also stem from memory or driver instability, so stable hardware and current drivers prevent a whole family of crashes.
#Bottom Line
Start with driver updates. Updating or rolling back the graphics driver is the first fix to try because driver faults are the most common trigger. If drivers don’t help, run SFC /scannow and DISM to repair corrupted system files, and test your RAM with MemTest86 when software fixes fail.
#Frequently Asked Questions
Can overclocking cause Kernel Mode Heap Corruption?
Yes. Overclocking your CPU or RAM beyond stable limits causes memory write errors that corrupt the kernel heap. Reset to stock speeds in BIOS first.
How long does Windows Memory Diagnostic take?
Expect 10-20 minutes depending on how much RAM your PC has. For thorough testing, use MemTest86 with at least two full passes, which takes 1-3 hours.
Does this error always mean hardware failure?
No. Software causes such as outdated drivers, corrupted system files, and third-party software conflicts can trigger this error too; hardware faults are only one possible category, usually faulty RAM or storage.
Will reinstalling Windows fix this BSOD?
A clean install fixes it when the root cause is corrupted system files or software conflicts. It won’t fix faulty RAM. Try SFC, DISM, and driver updates first.
Can antivirus software trigger Kernel Mode Heap Corruption?
Some antivirus programs install kernel-mode drivers that hook into system memory. Aggressive real-time scanners have been known to conflict with certain GPU drivers. If the error started after installing or updating your antivirus, temporarily disable it and test for stability over 24-48 hours.
What is the difference between this and Kernel Data Inpage Error?
This error (0x0000013A) points to driver or RAM problems. Kernel Data Inpage Error (0x0000007A) points to hard drive or SSD failures instead.
How do I find which driver caused the crash?
Open Event Viewer (Win + R, type eventvwr.msc, go to Windows Logs > System) and check the Critical event from the crash timestamp. The faulting module field names the driver file. If that doesn’t help, enable Driver Verifier to force Windows to catch the misbehaving driver at the exact moment it acts up.
Should I replace RAM if Memory Diagnostic finds errors?
Yes. RAM errors don’t fix themselves. If MemTest86 reports even a single error, replace the faulty module after testing each stick individually to isolate the bad one.

Bluetooth Not Working on Snapdragon X? Fixes for 2026
Bluetooth not working on your Snapdragon X Copilot+ PC? Generic audio, mice, and keyboards work, but vendor apps often lack an ARM build. Fixes inside.

Docker Desktop and WSL2 Not Working on Snapdragon X? Fix It
WSL2 runs fine on Snapdragon X, but Docker Desktop ARM is Early Access and throws WSL errors. Use WSL2 plus native ARM64 Ubuntu and Docker Engine.

Does iTunes Work on Snapdragon X? ARM Windows 11 Guide
Yes, iTunes runs on Snapdragon X laptops through Prism emulation, but the Apple Devices app is the smoother route. Here is what to install on ARM.

Does OBS Studio Work on Snapdragon X? ARM64 Build Guide
Yes, OBS Studio has an experimental ARM64 build since version 31.1, but x64 plugins won't load and hardware encoding is missing. Here is what works.