How to Mirror on Procreate: Symmetry Tools Explained
Learn how to mirror on Procreate using the Symmetry Drawing Guide. Step-by-step setup for all 4 modes, rotational symmetry, and disabling it.
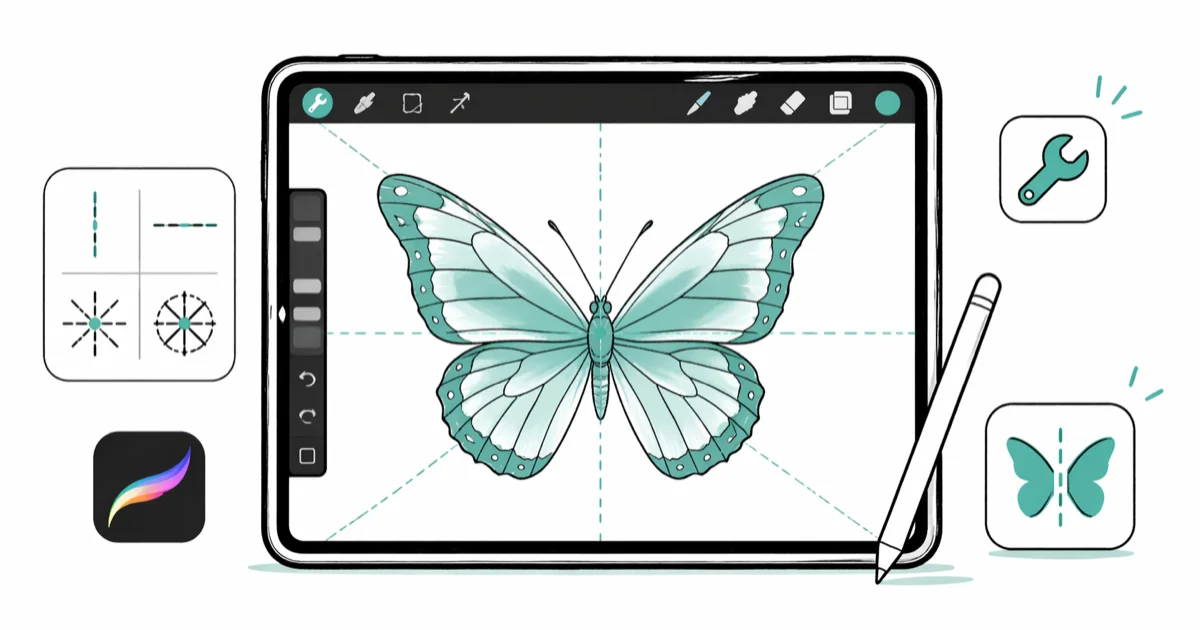
Quick AnswerOpen Actions > Canvas > Drawing Guide, choose Edit Drawing Guide > Symmetry, then pick a symmetry mode. Mirroring affects brush strokes only on layers with Drawing Assist enabled.
Procreate’s mirror tool lets you create symmetrical designs by reflecting your brush strokes across one or more axes. The setup lives inside Canvas > Drawing Guide > Symmetry.
- Procreate has 4 symmetry modes: Vertical, Horizontal, Quadrant, and Radial
- Set up a Symmetry guide, then enable Drawing Assist on each layer you want mirrored
- The symmetry guide is adjustable with drag-and-rotate nodes on the canvas
- Rotational Symmetry flips and rotates strokes instead of straight mirroring
- Turn off Drawing Assist to stop mirroring; hiding the Drawing Guide only hides its line
#How Do You Turn on Mirroring in Procreate?
The mirror tool lives inside the Drawing Guide settings. It’s not obvious at first because you need to go through two menus before you see the symmetry options.
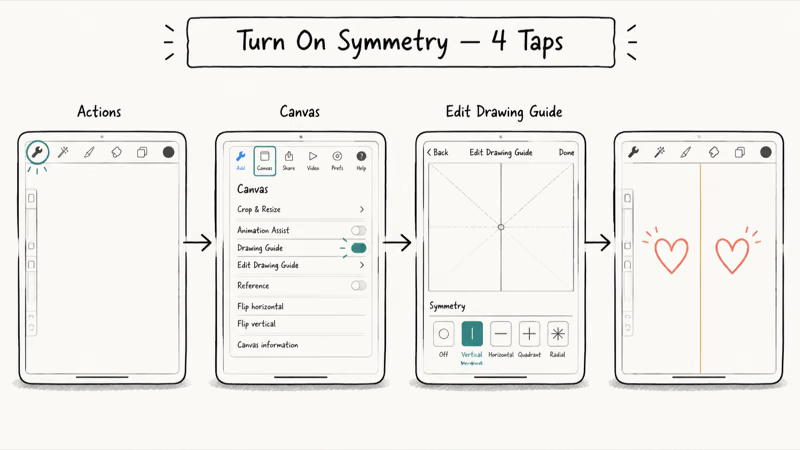
Open the Actions menu (wrench icon, top-left corner), tap Canvas, and toggle Drawing Guide on. Then tap Edit Drawing Guide below the toggle and select Symmetry from the bottom row. A vertical guide line appears on your canvas. Tap Done to start drawing.
Your strokes will mirror across the center line on whichever layer has Assisted Drawing enabled.
If you’re working with other image editing tools like Photoshop, the concept is the same but Procreate keeps it simpler with a single toggle.
#The Four Symmetry Modes
Procreate gives you four distinct ways to mirror your work. Each one splits the canvas differently.
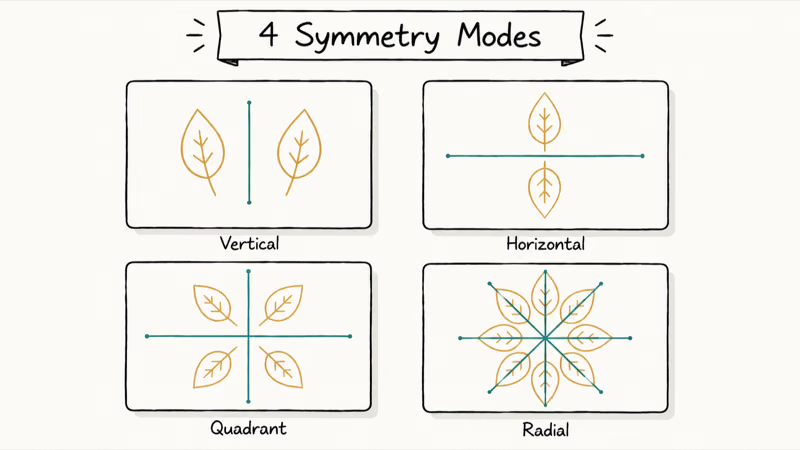
Vertical reflects strokes left-to-right across a vertical center line. This is the default mode, and it’s what most artists use for faces, logos, and mandalas.
Horizontal reflects top-to-bottom. Good for landscapes with water reflections.
Quadrant splits the canvas into four equal sections. Whatever you draw in one quarter appears in all four simultaneously, making it ideal for tile patterns, wallpaper designs, and repeating motifs that need four-way consistency.
Radial divides the canvas into eight segments radiating from the center. According to Procreate’s current Symmetry guide, Radial mode is designed for mandala-style artwork where one brush stroke becomes eight simultaneous strokes.
To switch between modes, go back into Edit Drawing Guide > Symmetry and tap the one you want.
#How to Customize the Mirror Axis
You don’t have to stick with the default center-line position. The symmetry guide has two colored nodes that let you reposition and rotate the axis freely on your canvas before or during a project.
Drag the blue node to move the entire guide line to a new position on the canvas. Drag the green node to rotate the guide at any angle. This is useful when you want diagonal symmetry or need the mirror axis off-center for asymmetric compositions.
Repositioning the guide only affects new strokes. If you need to add a watermark or overlay later, do that on a separate layer.
#What Does Rotational Symmetry Do?
Rotational Symmetry is a toggle inside the Symmetry options that changes how strokes get mirrored. It flips and rotates your strokes around the axis point instead of creating a straight reflection.
Here’s the difference. With standard symmetry, drawing a curve on the left produces an identical curve on the right. Turn Rotational Symmetry on, and the mirrored stroke gets rotated 180 degrees, creating pinwheel-like patterns rather than mirror-image ones. The effect is especially noticeable in Radial mode where eight rotated copies radiate outward from the center point.
Based on Savage Interactive’s current Symmetry documentation, this combination works well for kaleidoscope effects.
#Working with Layers and Assisted Drawing
Mirroring is layer-specific. Each layer can have its own Assisted Drawing toggle.
According to Procreate’s current Drawing Assist guide, setting up Symmetry switches Drawing Assist on for the current primary layer. New layers remain normal unless you enable the feature on them: tap a layer thumbnail and select Drawing Assist. The layer name shows an “Assisted” tag when active, so you can tell which layers will mirror new brush strokes.
This layer-specific control is powerful. You can draw mirrored linework on one layer, then add freehand shading on a layer above with Assisted Drawing turned off. Your shading won’t mirror, but your lines stay symmetrical.
If you use an Apple Pencil, check Apple’s current compatibility list before choosing one for your iPad; each Pencil generation works only with specific iPad models and, in some cases, minimum iPadOS versions. Features on third-party styluses vary by manufacturer, so don’t assume identical behavior.
#How to Turn Off Mirroring
Drawing Assist controls whether a layer’s new strokes follow the saved symmetry settings. The Drawing Guide toggle controls whether the guide line is visible.
First, open the Layers panel, tap each layer marked “Assisted,” and turn off Drawing Assist. Then go to Actions > Canvas and toggle Drawing Guide off.
The guide line disappears.
Procreate’s Drawing Assist guide says enabling Drawing Assist from Layer Options reuses the last guide and its settings. Hiding the guide line is therefore not a reliable way to stop mirroring; turn off Drawing Assist on the layer and check that its “Assisted” tag disappears.
#Tips for Better Symmetry Results
Use a stabilized brush. Increase StreamLine or stabilization gradually in the brush properties until the stroke feels steady without becoming sluggish. This can reduce visible wobble in Radial mode, where each brush stroke is repeated across eight segments.
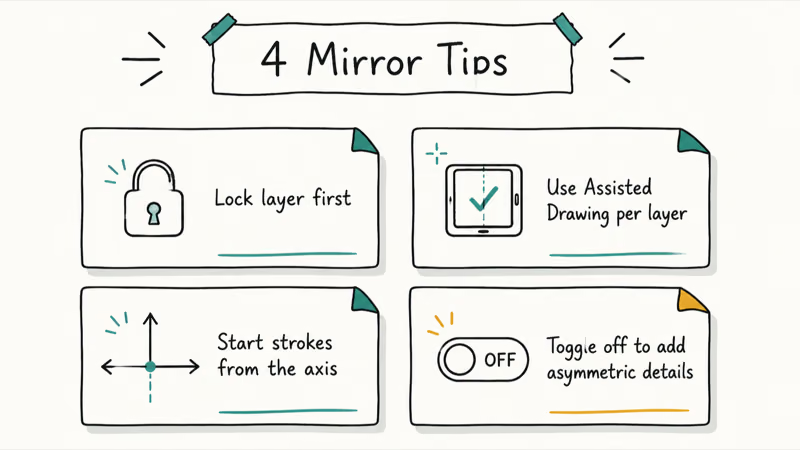
Plan your axis position early. Moving the guide mid-project creates misalignment.
Combine symmetry with clipping masks. Create your mirrored design on one layer, add a new layer above it, tap the upper layer, and select Clipping Mask. Now you can paint details that stay within the bounds of your symmetrical shapes without affecting the base layer.
Set the canvas for its destination. According to Procreate’s current layer-limit guide, 300 DPI is a common value for printed images, while screen artwork is best sized in pixels. It also explains that the maximum layer count depends on the iPad’s RAM and the canvas’s pixel dimensions, so check the available-layer readout before committing to a large canvas. Artists looking for precise Photoshop compositing techniques can export from Procreate as a PSD file to preserve layers.
#Advanced: QuickMenu for Faster Mirroring Access
The QuickMenu has six customizable action slots for quick access during your workflow. Adding symmetry-related actions here saves time if you toggle mirroring frequently.
Go to Actions > Prefs > Gesture Controls > QuickMenu and choose the gesture you want to use. Open QuickMenu, press and hold a slot, then assign an action such as Flip Horizontally, Flip Vertically, or Drawing Assist. Procreate’s current QuickMenu guide lists all three actions; the trigger depends on the gesture you configured.
This shortcut is especially useful for artists who experience iPad lag during complex projects with many layers.
#Bottom Line
Start with Vertical symmetry mode for your first project. It’s an intuitive fit for faces, logos, and decorative patterns. If you need more complexity, try Quadrant or Radial mode. You can reposition the guide or switch modes without losing your existing work.
#Frequently Asked Questions
Does mirroring work on Procreate Pocket?
Yes, but the iPhone interface uses a different path. The current Procreate Pocket handbook says to go to Modify > Actions > Guides > Symmetry, then use Guide Settings to edit it.
Can you mirror text in Procreate?
Drawing Assist mirrors new brush strokes; it doesn’t retroactively mirror existing typed characters. To make a reflected copy, duplicate the editable text layer first and rasterize only the duplicate if needed. Procreate’s Transform handbook states that Flip Horizontal or Flip Vertical flips the selected content; use one of those controls, align the copy, and keep the original text layer editable.
How do you change the mirror axis after you start drawing?
Go back to Actions > Canvas > Edit Drawing Guide > Symmetry and drag the green or blue nodes to reposition or rotate. Only new strokes follow the updated guide.
Can you use multiple symmetry axes at the same time?
Not with separate guide lines. Quadrant mode mirrors across both vertical and horizontal axes simultaneously, giving you four-way symmetry, and Radial mode provides eight-way symmetry. These modes combine multiple axes into a single guide, which is the closest Procreate gets to multi-axis mirroring. For most symmetrical artwork, Quadrant covers what you’d need from two separate axes.
Does Assisted Drawing need to be on for every layer?
Only for layers where you want mirroring. Tap the layer thumbnail and look for Drawing Assist in the menu.
What brushes work best with symmetry mode?
Any brush works with symmetry. Studio Pen and Technical Pen from the default library have high StreamLine values that reduce wobble. For mandala art, try the Gel Pen. Artists working on detailed line art can also use custom brushes.
Can you mirror an existing drawing that wasn’t made with symmetry?
Yes. Duplicate the layer, tap the Transform tool (arrow icon), and use Flip Horizontal or Flip Vertical. Then drag the flipped copy to align it with the original artwork. This manual method works for anything, regardless of how it was originally created, and it’s the standard approach when you need to mirror something you’ve already finished without the symmetry guide.
Why are my mirrored strokes not appearing?
Check that Drawing Assist is enabled on the active layer and that a Symmetry guide has been configured for this canvas. Turn the Drawing Guide on temporarily to inspect the guide line and settings, then verify your brush opacity is above 0%.
Google Messages Error 3100: Why RCS Is Broken on Galaxy
Google Messages RCS error 3100 hits Galaxy owners after phone or carrier switches. Google told 9to5Google a fix is coming. Here's what actually helps.

Is This Bank App Real? Spot a Fake App on Your Home Screen
A bank app can land on your home screen from a web page with no install warning. Learn the checks that tell a real banking app from a phishing web app.
Apps Crashing After iOS 27 Update? Fix Order (2026)
Apps crashing after the iOS 27 update? Update the app in the App Store first, then offload and reinstall to clear stale cache, then restart. The fix order.
Do AI Translation Earbuds Work Offline? What to Know
Do AI translation earbuds work offline? A few do with downloaded language packs, but most need the cloud. Here's what works offline and what you give up.