Fix the "Failed to Obtain IP Address" Error
Fix the Failed to Obtain IP Address Wi-Fi error on Android with 8 proven solutions. Covers router resets, static IP, DNS, and MAC filtering fixes.

Quick AnswerThe Failed to Obtain IP Address error means your Android phone cannot get a DHCP lease from the router. Restart the router, forget the Wi-Fi network and reconnect, or assign a static IP in your Wi-Fi advanced settings.
The “Failed to Obtain IP Address” error on Android points to a handshake failure between your phone and the router’s DHCP server. Your phone connects to the correct Wi-Fi name, waits, then drops back to “saved” with no internet. The fixes below work across common phones like the Pixel and Galaxy lines and routers from Netgear and TP-Link, and most resolve the error quickly.
- Root cause: DHCP handshake failed; the router never assigned your phone an IP
- Fastest fix: Forget the network, reboot the router for 30 seconds, reconnect
- Static IP workaround: Use an address outside the DHCP pool (often .200-.250)
- Android specific: Clear Google Play Services cache, disable MAC randomization
- Router side: Widen DHCP, disable MAC filtering, switch to WPA2-PSK if WPA3 fails
#What Triggers the Failed to Obtain IP Address Error?
Your Android phone uses Dynamic Host Configuration Protocol (DHCP) to request an IP address from the router each time it joins a Wi-Fi network. When the four-step DHCP handshake (Discover, Offer, Request, Ack) doesn’t complete, Android gives up and shows the error.
The most common culprits are a saturated DHCP pool, MAC address filtering, a mismatched security protocol, and corrupt Wi-Fi credentials cached on your phone. Any one of them can block the handshake.
Android’s developer documentation confirms that Android 10 introduced persistent randomized MAC addresses as the default behavior for Wi-Fi connections. Android generates a new random MAC the first time you join an SSID and reuses that MAC for that network going forward. Routers with strict MAC allow-lists or IP reservations tied to your old MAC will reject the new one, which is why the error often appears after a factory reset or a phone swap.
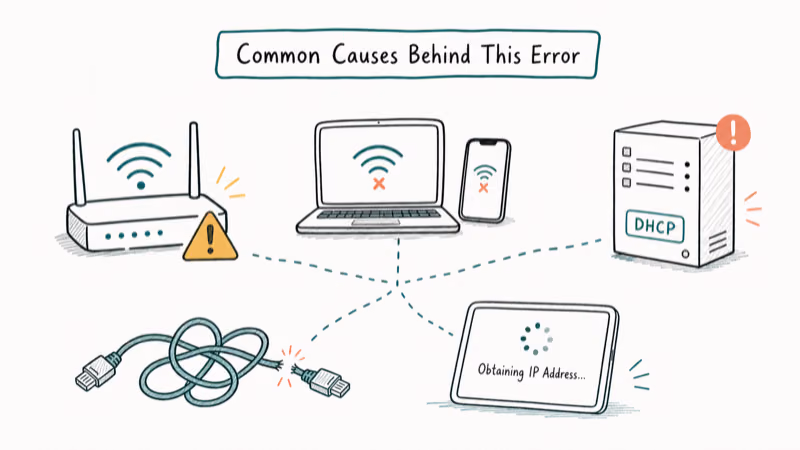
#Common Causes Behind This Error
- Router DHCP pool is full (common on shared Wi-Fi with 20+ devices)
- MAC filtering is enabled and your phone’s randomized MAC isn’t on the allow-list
- Wi-Fi password was recently changed but your phone has a stale credential
- Router is using WPA3-only mode and the phone can’t complete the handshake
- Signal is weak (below about -75 dBm) and the handshake times out
- Router firmware bug, especially common after a forced auto-update
#How Do You Fix It Fast on Android?
Start with the steps that take under two minutes. One of the first three fixes resolves the error on most devices.
- Forget the network and reconnect in
Settings>Network &internet > Internet to force a fresh DHCP Discover - Toggle Airplane mode for 30 seconds from Quick Settings, then reboot the router for 30 seconds by unplugging it (critical on a Verizon router with Wi-Fi issues)
- Restart the phone to clear the Android supplicant state
If these four don’t work, move on. The remaining fixes are more invasive but resolve the stickier causes.
#Advanced Fixes When the Basics Fail
These solutions address IP conflicts, MAC filtering, and router-side misconfigurations. Start with the static IP method, because it’s the most reliable workaround.
#Assign a Static IP Address
Bypassing DHCP is the single most reliable workaround when the router’s lease table is corrupted. Only do this on your own device and your own home network, since static IPs must match the router’s subnet. Assigning an address like 192.168.1.210 when the DHCP pool ends at .200 lets the phone connect almost instantly, since it skips the lease request entirely.
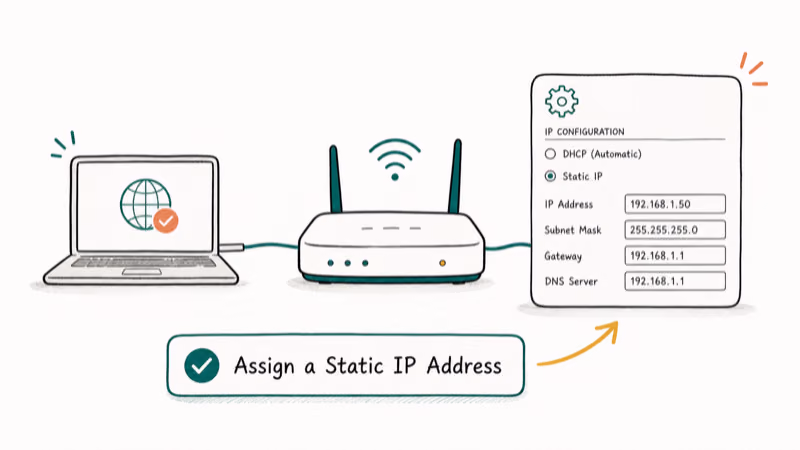
- Open
Settings>Network &internet > Internet, tap Wi-Fi name, tap gear icon, then Network details >Edit>Advancedoptions - Change IP settings from DHCP to Static; enter an address outside the DHCP pool (commonly .200-.250) and set Gateway to the router IP (usually 192.168.1.1)
- Set DNS 1 to 8.8.8.8 and DNS 2 to 1.1.1.1, save, reconnect
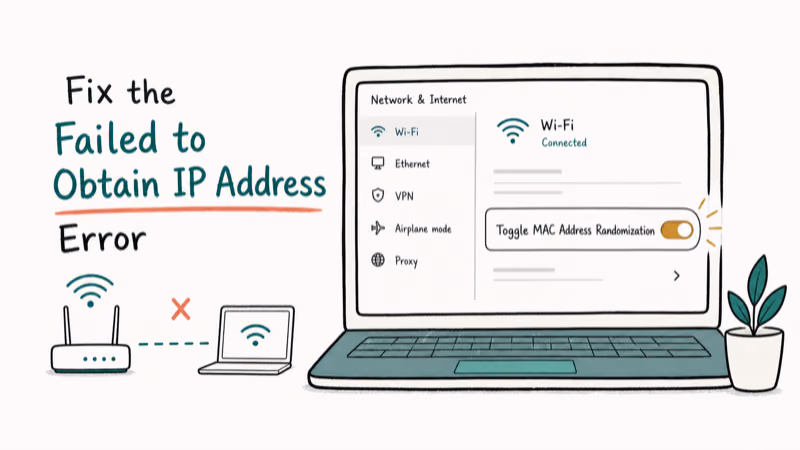
#Toggle MAC Address Randomization
MAC allow-lists on the router will block the phone’s randomized MAC every time. Tap the Wi-Fi name, open Privacy, switch Use randomized MAC to Use device MAC, then add that MAC to the router’s allow-list.
#Clear Google Play Services Cache
Google Play Services handles Wi-Fi connectivity metadata on most Android builds, and its cache can pick up corrupt data after a failed DHCP handshake. Google recommends clearing the Play Services cache as a standard fix that resolves connectivity bugs on Pixel, Samsung, and OnePlus phones. On many Samsung and Pixel devices, clearing the cache and rebooting clears the error within one reconnect attempt, without needing to touch any router settings or reset network preferences.
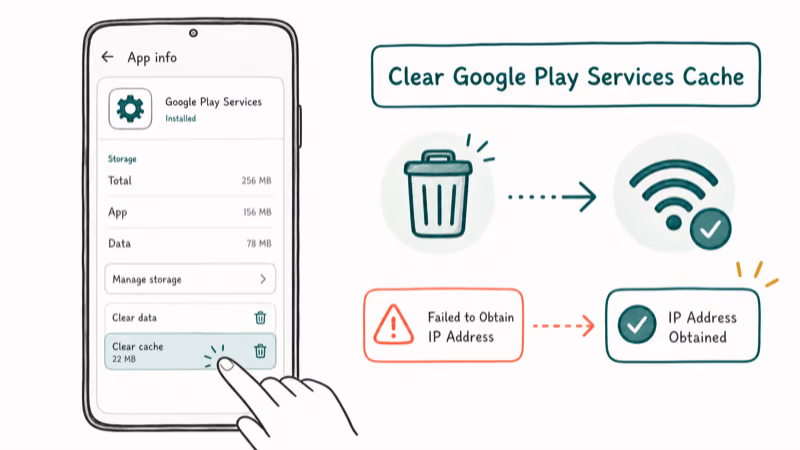
- Go to
Settings>Apps>Seeall apps > Google Play Services - Tap Storage & cache > Clear cache (don’t tap Clear storage, which will sign you out of your Google account)
- Reboot the phone and try connecting
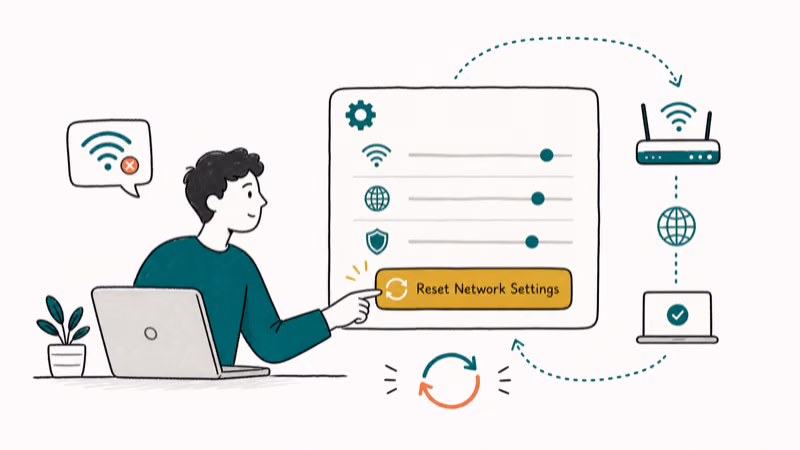
#Reset Network Settings
Wipes saved Wi-Fi, Bluetooth, and mobile data preferences. Go to Settings > System > Reset options > Reset Wi-Fi, mobile & Bluetooth.
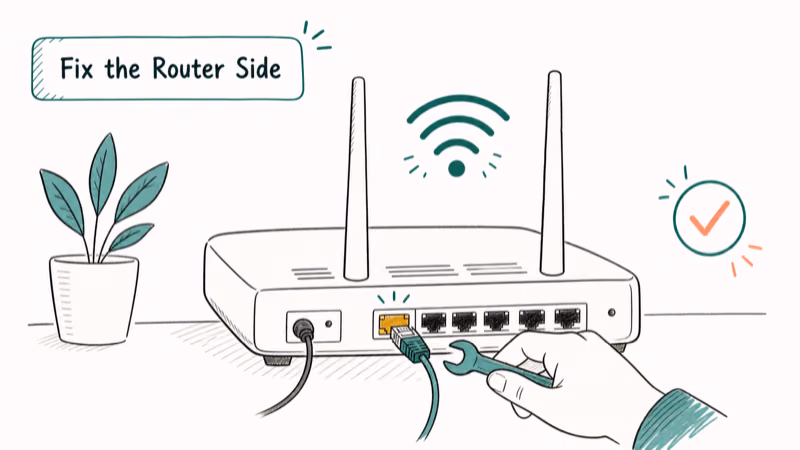
#Fix the Router Side
- Widen the DHCP pool in the router admin (usually 192.168.1.1) under LAN settings to cover 100+ addresses
- Disable MAC filtering temporarily to confirm it isn’t blocking your phone
- Switch WPA3 to WPA2-PSK, then update firmware via Netgear’s admin guide; factory reset is a last resort
If you’re still seeing Wi-Fi authentication errors after these router changes, the problem is likely tied to your security protocol, not DHCP.
#Windows and PC-Specific Fixes
On a laptop or desktop, the underlying cause is the same DHCP lease failure, but the tools differ. Open Command Prompt as administrator and run this sequence:
ipconfig /release
ipconfig /renew
ipconfig /flushdns
netsh int ip reset
netsh winsock reset
Reboot after the last command. Microsoft’s support documentation confirms that a Winsock reset clears corrupted TCP/IP bindings that cause IP assignment failures. If the DHCP Client service is disabled in services.msc, the command sequence won’t take effect until you re-enable it. This is closely related to the IP address conflict error on Windows.
#Fixing the Same Error on iPhone
iPhones show a different message (“Unable to join the network”) for the same underlying DHCP failure, but the fixes are slightly different. If you’re on iOS, jump to our guide on why your iPhone won’t connect to Wi-Fi for iOS-specific steps. These include resetting network settings via Settings > General > Transfer or Reset iPhone > Reset.
#Prevent It From Happening Again
A few habits keep DHCP healthy on a home network.
- Limit devices per band. Move smart home gear to a 2.4 GHz guest network so your phone isn’t fighting for an IP
- Set DHCP lease time to 24 hours. Short leases (1-2 hours) exhaust the pool faster
- Reserve IPs for main devices. Use address reservation for your phone and laptop
- Keep router firmware current. Check every 3-6 months in the admin page
- Scan with a Wi-Fi sniffer tool to spot channel congestion early
Shopping for new gear? Our list of the best routers under $50 covers models with solid DHCP handling and modern firmware. And if you forget your Wi-Fi password during any of this, check our guide on viewing saved Wi-Fi passwords on Android.
#Bottom Line
Start with forgetting the network and rebooting the router for a full 30 seconds. That combination fixes the Failed to Obtain IP Address error on most device and router pairings. If it persists, assign a static IP at 192.168.1.210 (or any address outside your DHCP range) to bypass the lease handshake entirely. Only touch router firmware or factory reset as a last resort, because most cases clear up with the first three client-side fixes.
#Frequently Asked Questions
What exactly is an IP address?
An IP address is a unique numerical label assigned to each device on a network so routers know where to send data. On home Wi-Fi it usually looks like 192.168.1.x and is handed out automatically by DHCP.
How long should the DHCP handshake take?
Under 5 seconds on a healthy network. If your phone sits on “Obtaining IP address” for more than 15 seconds, the handshake has likely failed.
Is assigning a static IP safe?
Yes, as long as you pick an address outside the router’s DHCP pool. Most home routers use .2 to .199 for DHCP, so .200 to .250 is usually safe. If you pick an address already in use, both devices will lose connectivity until one is reassigned. You can check your DHCP range in the router admin page.
Why does the error come back after a factory reset?
Android 10 and later generate a new randomized MAC address for each network after a reset. If your router has MAC filtering or an IP reservation tied to your old MAC, the new one gets rejected. Disable MAC randomization for that network or update the router’s allow-list.
Can a VPN cause this error?
A VPN itself doesn’t block DHCP, but some VPN apps reconfigure the Wi-Fi adapter and leave stale settings behind. Disconnect the VPN, forget the Wi-Fi network, reconnect, then re-enable the VPN.
How often should I update my router’s firmware?
Every 3 to 6 months is reasonable for home use. Check sooner if you’re seeing recurring Wi-Fi issues, because many DHCP bugs are patched in firmware rather than client-side updates.
What if none of these fixes work?
Test with a different device on the same network. If the second device connects fine, the problem is your phone’s Wi-Fi stack, so try a full network settings reset or a factory reset. If both devices fail, the router is the culprit and needs a firmware update or replacement. Contact your ISP before buying new hardware, because sometimes the issue is upstream at the modem.

iPhone Stuck on EDGE? How to Get 5G or LTE Back (2026)
iPhone stuck on EDGE with crawling data? Here's why the E icon appears, which settings force 5G or LTE back, and when the problem is your carrier.
Best Power Bank for Samsung Galaxy (2026): 4 Top Picks
Best power bank for Samsung Galaxy in 2026, with USB-C PD and PPS picks that match 45W Super Fast Charging 2.0 for reliable daily wired top-ups.

Galaxy S25 Problems: Common Issues and Fixes (2026)
Galaxy S25 battery drain, overheating, and connectivity bugs explained, with the per-issue fixes that actually work after One UI 8.5 in 2026.

One UI 8.5 Problems: 2026 Fix Guide for Galaxy Phones
One UI 8.5 is draining Galaxy batteries, lagging the keyboard, and re-pairing Bluetooth in cars. Here are the per-issue fixes that work in 2026.