iPhone Won't Connect to Wi-Fi? 9 Fixes That Actually Work
iPhone won't connect to Wi-Fi? Try these 9 proven fixes covering network resets, iOS updates, router checks, and DHCP renewal that resolve most cases.
Quick AnswerToggle Airplane Mode on for 30 seconds and back off, then forget the Wi-Fi network and rejoin with the password. If that fails, go to Settings > General > Transfer or Reset iPhone > Reset > Reset Network Settings.
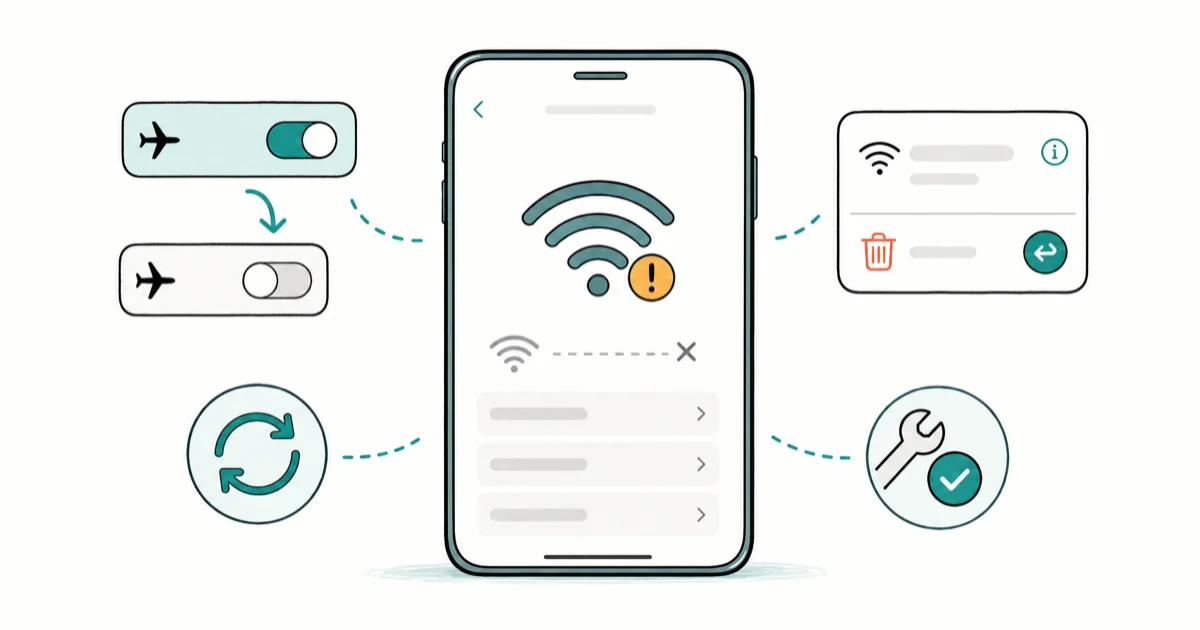
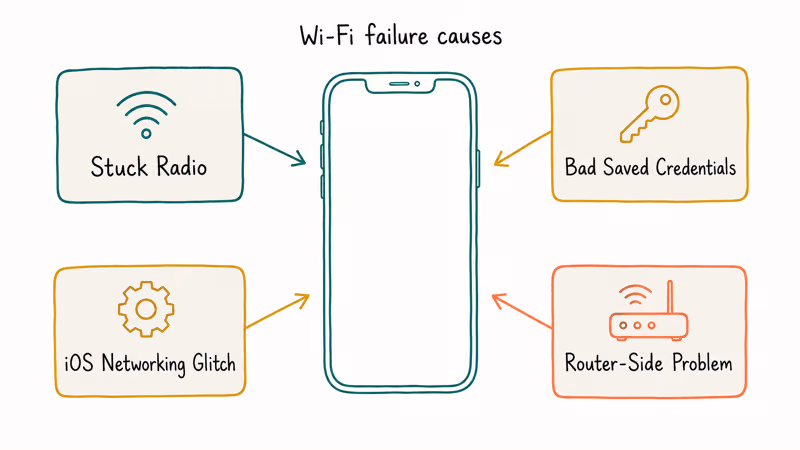
When an iPhone won’t connect to Wi-Fi, the cause is almost always one of four things: a stuck radio, bad saved credentials, an iOS networking glitch, or a router-side problem. These nine fixes work through the likely causes in order, and the first four resolve most cases without ever touching network settings.
- Toggling Airplane Mode for 30 seconds resets every wireless radio at once and clears most temporary connection refusals.
- Forgetting the network and rejoining with the password fixes corrupted saved credentials, which cause the bulk of “incorrect password” errors.
- Reset Network Settings via
Settings>General>Transferor Reset iPhone>Resetwipes saved Wi-Fi data and resolves persistent iOS-level bugs. - Renewing the DHCP lease through the network info screen often fixes situations where the iPhone joins the network but can’t reach the internet.
- If no other device can connect either, the router is the cause, not the iPhone, and the fix is on the router side.
#Why Your iPhone Won’t Connect to Wi-Fi
iPhone Wi-Fi failures fall into a handful of patterns, and the symptom usually points to the cause. Knowing the pattern saves time.
A connection that refuses entirely on one network but works on others points to a credential or router compatibility issue. Connections that succeed but show “no internet” usually mean DHCP or DNS is failing. Networks that vanish from the list completely suggest a software-level radio problem or, rarely, hardware damage. According to Apple’s official Wi-Fi troubleshooting page, most connectivity issues come from software rather than hardware, and Apple’s recommended order starts with router restarts and credential refreshes before any reset.
Most temporary connection refusals clear after a single Airplane Mode toggle, and the rest usually need a forget-and-rejoin step. Hardware failure is rare on devices less than five years old.
#What Should You Try First?
Start here. These take under two minutes combined and resolve most everyday Wi-Fi problems.
#Toggle Wi-Fi Off and Back On
Open Settings > Wi-Fi and flip the toggle off, wait ten seconds, then flip it on. The iPhone re-scans for networks and re-authenticates from a clean state. If you have multiple saved networks nearby, this also clears any stuck auto-join handshake.
#Toggle Airplane Mode for 30 Seconds
Swipe down from the top-right corner on Face ID iPhones (or up from the bottom on Touch ID models) to open Control Center. Tap the airplane icon, wait a full 30 seconds, then tap it again. This power-cycles cellular, Wi-Fi, and Bluetooth radios in one shot, which is why it fixes more than just Wi-Fi problems.
#Restart Your iPhone
A full restart clears RAM and any background process holding the network stack. On Face ID models, hold the side button and either volume button until the power slider appears, drag to power off, then hold the side button to restart. On older iPhones with a Home button, hold the side or top button until the slider appears.
If your iPhone gets stuck on the Apple logo during the restart, force-restart it instead and follow the recovery steps in that guide.
#Is the Problem Your iPhone or Your Router?
This is the question that decides where to spend your next ten minutes. Skipping it leads to half an hour of resetting the wrong thing.
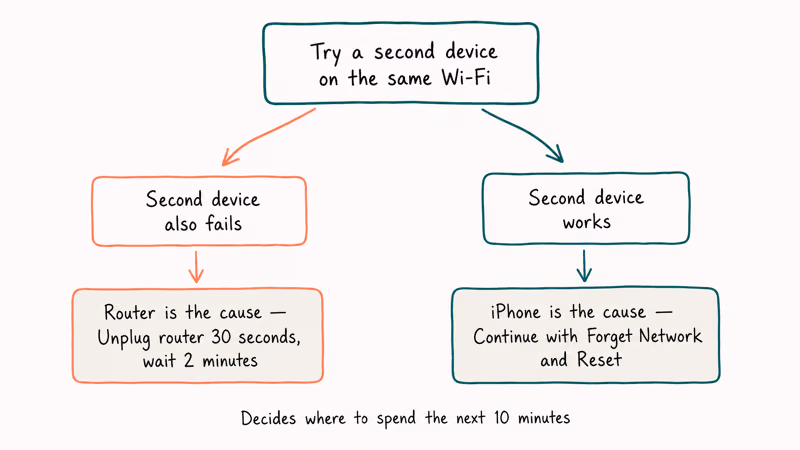
Try connecting another device to the same Wi-Fi network. A laptop, tablet, or another phone is fine. If the second device also fails, the router is the cause and no amount of iPhone fiddling will help. Restart the router by unplugging it for 30 full seconds, then plug it back in and wait two minutes for the internet light to turn solid.
If the second device connects without trouble, the problem is on the iPhone side and you should continue to the next section. This second-device check is the single most reliable way to tell an iPhone fault from a router fault, and it works across any router brand.
#Forget the Network and Rejoin
Saved Wi-Fi credentials get corrupted more often than people realize, especially after router firmware updates or password changes. Forgetting and rejoining writes a fresh entry.
Go to Settings > Wi-Fi, tap the i icon next to the network name, and tap Forget This Network. The iPhone drops back to the network list. Tap the same network and re-enter the password.
If you can’t remember the password, our guide on viewing saved Wi-Fi passwords walks through the iOS 16+ method using Face ID. For Mac users on the same network, the password lives in Keychain Access. If iOS keeps rejecting a password you know is correct, see iPhone says incorrect Wi-Fi password for the seven specific causes of that false rejection.
#Reset Network Settings
This is the strongest software fix on the iPhone side. It wipes every saved Wi-Fi network, password, VPN configuration, and cellular preference. Apps and personal data are untouched.
Go to Settings > General > Transfer or Reset iPhone > Reset > Reset Network Settings. Enter your passcode and confirm. The iPhone restarts and you’ll need to reconnect to Wi-Fi manually afterward.
This step resolves the kind of persistent connection failure that survives the earlier fixes, including the frustrating case where the iPhone repeatedly joins the network but immediately disconnects. Apple recommends this reset for any “persistent issue with how iPhone is performing” related to networking.
#When Your iPhone Joins Wi-Fi but Has No Internet
This is a different problem from total connection failure, and it usually traces to DHCP, DNS, or captive portal issues.
#Renew DHCP Lease
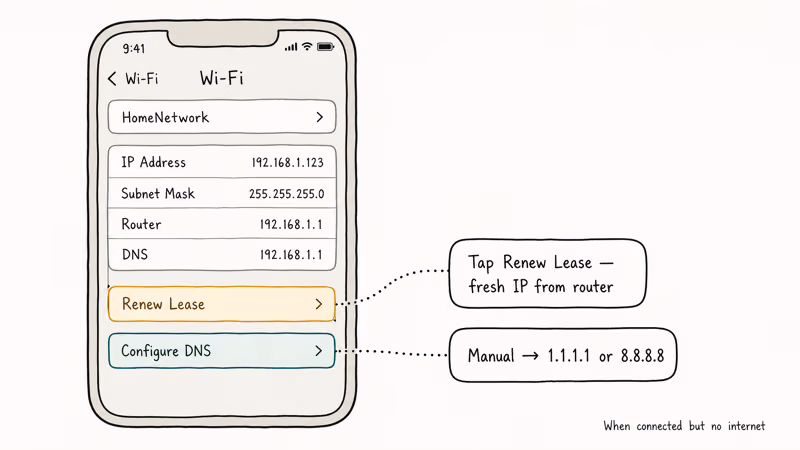
The DHCP lease is the temporary IP address your router assigns. A stale or denied lease causes the “connected but no internet” state.
Go to Settings > Wi-Fi, tap the i next to your network, scroll down, and tap Renew Lease. Confirm. The iPhone requests a fresh IP address from the router. On a flaky public network, this one step can restore a stable connection that had been dropping every few minutes.
#Switch to Public DNS
If web pages won’t load but the Wi-Fi icon shows full bars, the router’s DNS server may be slow or failing. To force public DNS, go to Settings > Wi-Fi, tap the i next to the network, tap Configure DNS, choose Manual, and add 1.1.1.1 (Cloudflare) or 8.8.8.8 (Google) as the primary server. Tap Save.
This change is per-network. Cloudflare’s 1.1.1.1 documentation confirms DNS changes affect only domain lookups.
#Check for a Captive Portal
Hotels, airports, and coffee shops often require a sign-in page. If iOS didn’t pop it, open Safari and visit http://neverssl.com to trigger the redirect.
#Update iOS and Restart Your Router
If quick fixes failed, two background factors are worth checking before deeper steps.
#Update iOS
Apple patches Wi-Fi bugs in point releases, and outdated iOS sometimes loses compatibility with newer router protocols like WPA3. Go to Settings > General > Software Update. Plug the iPhone into power before installing. Updates take 10 to 20 minutes depending on size.
An older iOS build can drop Wi-Fi repeatedly on a WPA3-only network where a newer point release holds the connection without any other change, so an update alone sometimes solves the problem.
#Update Router Firmware and Check Settings
Old router firmware causes the same compatibility issues. Sign into the admin page (usually 192.168.1.1) and check for a firmware update.
While you’re there, check that the network is broadcasting on a band your iPhone supports. Every iPhone since the iPhone 6s supports 5 GHz, but some routers run isolated 2.4 GHz and 5 GHz networks under different names. According to the Wi-Fi Alliance’s WPA3 specification, the newer security standard is one some older routers struggle to negotiate with iOS devices that prefer it.
#Disable VPNs, Profiles, and Security Apps
Anything that sits between iOS and the network can block authentication or DNS resolution silently. VPNs are the most common offender, but corporate device management profiles and third-party security apps can also interfere.
Go to Settings > General > VPN & Device Management and toggle off any active VPN. If a profile from work or school is installed, try removing it temporarily (you can reinstall later). Then disable any third-party security or ad-blocking apps. Reconnect to Wi-Fi after each change to isolate the culprit.
If Bluetooth is also acting up at the same time, the issue is likely a deeper iOS networking glitch that the Reset Network Settings step will clear.
#When to Contact Apple Support
If none of the above worked and the iPhone can’t detect any Wi-Fi networks at all, even strong ones a foot from the router, the antenna may have failed. This is uncommon but does happen, particularly after a drop or water exposure.
Contact Apple Support online or schedule a Genius Bar appointment. Apple’s internal diagnostics detect antenna and Wi-Fi chip faults that the Settings app can’t reveal. If the iPhone is under warranty or AppleCare+, hardware repair may be covered. Out-of-warranty Wi-Fi antenna repair on recent models typically runs a few hundred dollars, so get a written quote before authorizing the work.
#Bottom Line
Start with Airplane Mode and Forget Network. They fix most cases in under two minutes. For “connected but no internet,” renew the DHCP lease and switch to Cloudflare DNS first.
Reset Network Settings is the right tool only when the simpler fixes fail and isolation has confirmed the iPhone is the source. Keep iOS current; the 17.4 and later releases included real Wi-Fi stability improvements that older builds lack. If no device on your network can connect, stop troubleshooting the iPhone and restart the router instead.
#Frequently Asked Questions
Why does my iPhone keep disconnecting from Wi-Fi every few minutes?
Frequent drops usually trace to weak signal, auto-join conflicts between saved networks, or an outdated iOS build. Move within 10 feet of the router to rule out range, then go to Settings > Wi-Fi and disable Auto-Join for nearby networks you don’t actually want to use. If drops continue, update iOS and consider a network settings reset.
Will Reset Network Settings delete my photos or apps?
No. Only network data is cleared.
Can a phone case block my iPhone Wi-Fi signal?
Yes, occasionally. Thick metal-backed or magnetic cases reduce signal strength, especially on iPhone 12 and later models. The fastest test is to remove the case and check signal bars at the same spot. If bars jump, replace the case with a thinner non-metallic one.
Why does my iPhone say “Incorrect Password” when the password is right?
This usually means the saved network credentials are corrupted, not that the password is actually wrong. Forget the network in Settings > Wi-Fi, then rejoin and re-enter the password. If the iPhone still rejects it, check the router’s admin page to confirm the actual password and look for any recent firmware changes.
Should I use 2.4 GHz or 5 GHz Wi-Fi on my iPhone?
Use 5 GHz within 20 feet of the router. Use 2.4 GHz farther away.
Does turning Wi-Fi Assist off help with connection problems?
Yes, sometimes. Wi-Fi Assist falls back to cellular when Wi-Fi is weak, which can stop the iPhone from committing to a marginal connection. Toggle it off in Settings > Cellular > Wi-Fi Assist.
Is it normal for older iPhones to have more Wi-Fi problems?
Older iPhones running newer iOS versions often hit Wi-Fi quirks because Apple optimizes for current hardware. iPhones older than five years sometimes lose stability on WPA3-only networks. Forcing the router to use WPA2 or mixed mode usually restores reliable connection on those devices. If your iPhone is also refusing to turn on at all, the battery may be the deeper issue.
How long does Reset Network Settings take to complete?
Plan on five minutes total. The reset runs in under a minute, the iPhone reboots in 30 to 60 seconds, and rejoining your usual Wi-Fi adds another minute or two. Allow extra time if you have many saved networks to re-enter, since all credentials are wiped.

iPhone 17 Cellular Data Not Working on iOS 26? 9 Fixes
iPhone 17 cellular data still dropping on iOS 26? Apple fixed the launch bug in iOS 26.0.1, but recovery failures persist. Here's the fix ladder.

iPhone Cellular Data Not Working Abroad? eSIM Fixes
Travel eSIM showing no data abroad? Fix iPhone roaming with the data-line check, Data Roaming toggle, APN settings, and network selection steps.

iPhone Cellular Data Not Working for Some Apps? 8 Fixes
Some iPhone apps refuse to load on cellular while others work fine. Check the per-app cellular toggle, Low Data Mode, VPN profiles, and Screen Time.

iPhone Stuck on EDGE? How to Get 5G or LTE Back (2026)
iPhone stuck on EDGE with crawling data? Here's why the E icon appears, which settings force 5G or LTE back, and when the problem is your carrier.