How to Free Up Space on Mac: Where It Goes and Fixes
Free up space on your Mac in the right order by finding hidden storage in System Data, caches, old backups, photos, large downloads, and snapshots.
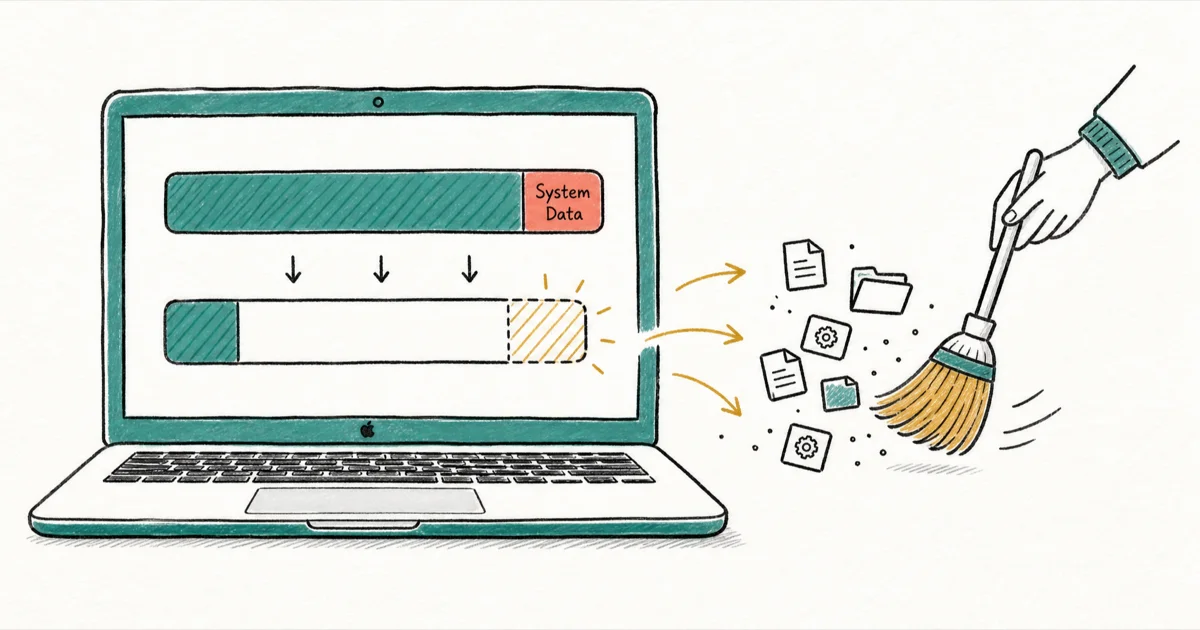
Quick AnswerOpen System Settings > General > Storage, empty the Trash, turn on Optimize Storage, clear old iOS backups and caches, then offload large photos. Attack the biggest slice first.
To free up space on a Mac, read the storage bar in System Settings > General > Storage and attack the biggest slice first. Start with built-in macOS tools and user-created clutter before touching anything risky.
Most “my Mac is full” panic comes from not knowing where the space went. This guide walks the storage bar slice by slice, then hands you an ordered reclaim plan that touches the safe stuff first, the risky stuff last, and never the files macOS needs to boot. Read it top to bottom the first time, then bookmark the steps you reuse.
- The storage bar groups everything into Apps, Documents, System Data, macOS, and media buckets; the gray System Data slice is the confusing one.
- Optimize Storage and Empty Trash Automatically are built into macOS and reclaim space with zero risk to your files.
- Old iOS backups under ~/Library/Application Support/MobileSync/Backup are often the single largest reclaim, sometimes 10 to 60 GB each.
- macOS needs roughly 10 percent of the drive free to run smoothly, so target headroom, not an empty bar.
- Files inside /System and /Library are protected by macOS and deleting them by hand can break your install.
#Where Does Your Mac Storage Actually Go?
Click Apple menu > System Settings > General > Storage. You get a colored bar with a legend, and that bar is your map.
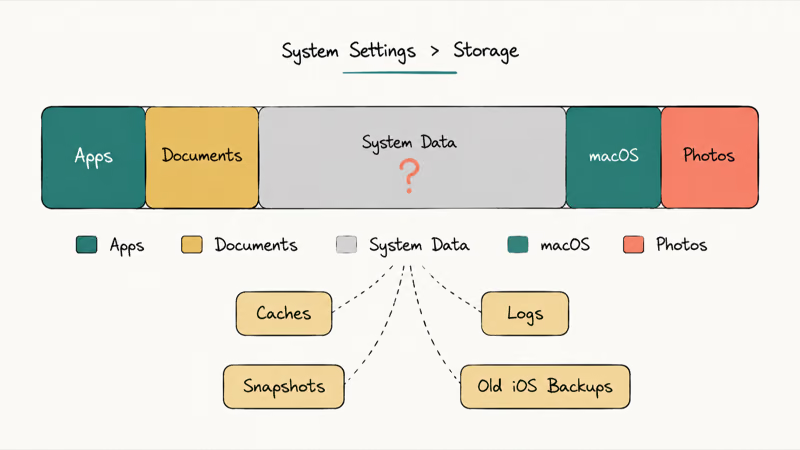
System Data is the slice that scares people. It isn’t a virus. It holds app caches, system logs, Time Machine local snapshots, mail attachments, old iOS backups, and the local AI model files that features like Apple Intelligence keep on disk. None of that shows up in Finder, which is exactly why the number looks impossible.
Apple’s Free up storage space on Mac page confirms that 1 catch-all category absorbs every file that does not fit the 5 visible groups of Photos, Apps, Documents, Mail, or the macOS install itself. That is why it balloons, and why there is no single delete button for it.
Read the bar. Note the two biggest slices. Start there. Chasing a small slice while a much larger one sits untouched is the most common cleanup mistake.
#Reclaim Space in the Right Order
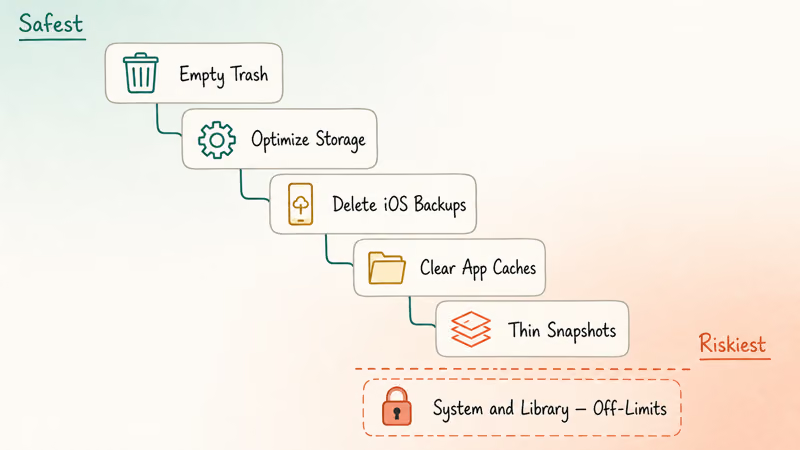
Work from safest to riskiest. The first three steps carry essentially no risk to your data, so they belong at the top of every cleanup.
#Step 1: Empty the Trash and Use the Built-In Tools
Moving a file to the Trash doesn’t free the space until you empty it. Right-click the Trash and choose Empty Trash. Then open the Storage screen and turn on the macOS recommendations: Optimize Storage moves watched Apple TV content off the drive, and Empty Trash Automatically clears trashed items after 30 days.
After you empty the Trash or enable Optimize Storage, expect one quirk: the System Data slice can briefly grow before macOS reallocates space. Wait a few minutes before you judge the result.
Sometimes the Trash refuses to clear because a file is locked or in use. Our walkthrough on how to force empty Trash on Mac covers the Terminal fallback for that case.
#Step 2: Delete Old iOS Backups and Installer Leftovers
If you have ever backed up an iPhone or iPad to this Mac, those backups live on your startup drive and they’re huge. Open Finder, choose Go > Go to Folder, and paste ~/Library/Application Support/MobileSync/Backup. Each folder there is one device backup, so old device backups are often one of the biggest safe reclaim targets.
Delete the backups you no longer need, then empty the Trash again. Old macOS installer files are the other quick win. After an update, an Install macOS [version].app file sometimes lingers in Applications, and at roughly 12 to 15 GB it’s worth dragging straight to the Trash if you aren’t mid-upgrade.
#Step 3: Clear App and Browser Caches Carefully
Clear only app caches you recognize. Our deeper guide on how to clear cache on Mac shows which folders are safe.
Browsers hide their own caches, and those files can grow over time if you never clear them. Caches that live inside /System or /Library are off-limits.
#What Should You Do About System Data and Snapshots?
Two parts of System Data deserve a dedicated pass: Time Machine local snapshots and the deeper cache files. macOS keeps local snapshots on your startup drive as a safety net even when your backup drive is unplugged, and on a busy Mac they can quietly use 20 to 50 GB.
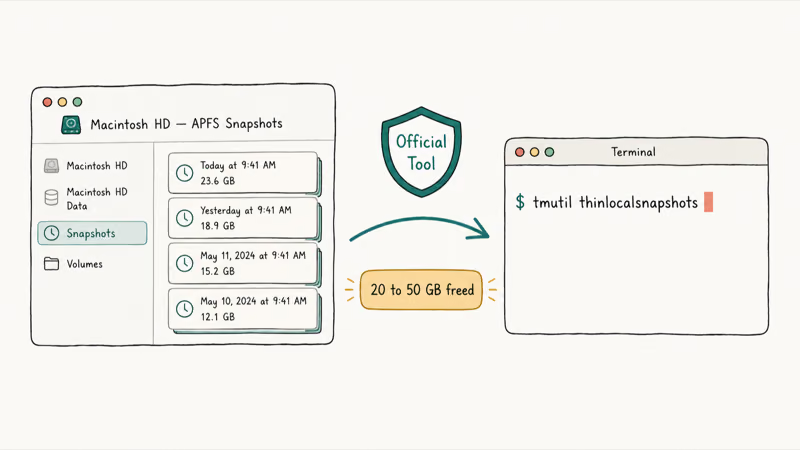
To check, open Disk Utility, select Macintosh HD, and choose View > Show APFS Snapshots. To thin them safely, open Terminal and run tmutil thinlocalsnapshots / 999999999999 4.
That command asks macOS to purge local snapshots to free space. Because it goes through the official tool, it won’t touch the snapshots you actually need. Run it once, then recheck the snapshot list to confirm the count dropped.
For a full breakdown of what is safe and what is protected inside that gray slice, read our guide on how to clear System Data storage on Mac. It covers the SIP-protected paths you must never hand-delete. Apple’s storage management documentation confirms that the system manages most of these files automatically, so your job is to remove the user-created bloat and let macOS handle the rest.
#Trimming Photos, Downloads, and Large Files
Photos and Downloads hide personal storage in plain sight. Open the Photos app, enable iCloud Photos, and choose Optimize Mac Storage in Settings; full-resolution originals move to iCloud and the Mac keeps smaller versions.
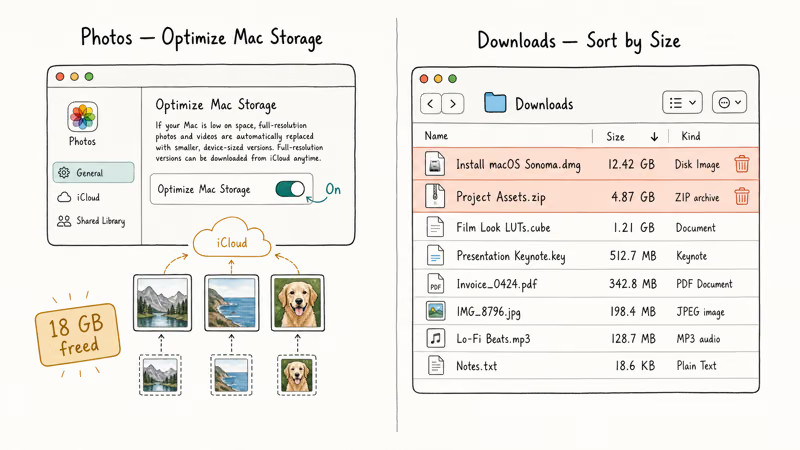
The Downloads folder is a graveyard of old disk images, installers, and zip files. Sort it by size in Finder list view, or use our step-by-step on how to delete downloads on Mac to clear it in one pass. The Storage screen’s Documents section also has a Large Files view that surfaces anything over a few hundred megabytes across the whole drive.
If your battery and performance feel off after a big cleanup, that’s sometimes a related symptom. Our piece on a MacBook battery draining fast covers the background processes that eat both storage and power.
#Why the Numbers Move After You Clean
A Spotlight reindex after deleting thousands of files briefly spikes CPU and disk activity, which is one reason a freshly cleaned Mac can feel sluggish for an hour. If search itself feels broken afterward, see our fix for Mac Spotlight not working.
The storage bar also lags reality. macOS recalculates categories in the background, so a slice can keep shrinking for minutes after you finish. Reopen the Storage screen later rather than refreshing it. Apple’s storage management documentation confirms that the system manages and recalculates these files automatically on a schedule, not the instant you delete something.
#Keeping the Bar From Refilling
Cleanup is not a one-time job. Set a rhythm.
Empty the Trash weekly, thin Time Machine snapshots monthly, and delete stale iOS backups whenever you stop using an old device. Leaving Optimize Storage on quietly handles watched media and old Mail attachments in the background, so most people never have to think about it again after the first pass.
The bigger habit is watching the Downloads folder, which is where 80 percent of the surprise bloat lands between cleanups.
#Bottom Line
Open the Storage bar, find your two biggest slices, and run the steps in order: empty the Trash and enable Optimize Storage, delete old iOS backups, clear app caches, then thin Time Machine snapshots and offload photos. For most people the iOS backups and local snapshots are the single biggest reclaim, so check those first if you only have ten minutes. Leave anything inside /System and /Library alone, and aim for roughly 10 percent free rather than a bone-empty drive.
#Frequently Asked Questions
Why is my Mac storage full when I have so little on it?
The gap is almost always System Data: caches, logs, Time Machine local snapshots, and old device backups that you never see in Finder. macOS hides these in Library folders, so a Mac with “nothing on it” can still show 60 GB or more of System Data. Reading the storage bar and thinning snapshots usually explains the missing space.
Is it safe to delete System Data on a Mac?
It’s safe to remove the user-created parts (app caches, old iOS backups, Time Machine local snapshots) using the methods above. It isn’t safe to hand-delete files inside /System, /Library, or /private, because macOS needs many of them to boot. According to Apple’s storage page, the category contains files required for macOS to run, which is why there’s no one-click delete button.
How much free space should I keep on my Mac?
Aim for at least 10 percent free. On a 256 GB Mac that’s about 25 GB of headroom. macOS uses free space for virtual memory and swap, so a 99-percent-full drive feels slow even when nothing is broken.
Will emptying caches delete my files or settings?
No. App caches are temporary working files that apps rebuild automatically the next time you open them. You might notice an app launches a second slower the first time after a clear, but your documents, logins, and settings stay intact. Avoid deleting cache folders you don’t recognize.
Do I need a third-party cleaner app to free up space?
No. Every step here uses built-in macOS tools: System Settings, Finder, Disk Utility, and Terminal. Cleaner apps automate the same actions and can be convenient, but they sometimes flag protected files as deletable, which is risky on a system volume, and they charge a subscription for work you can do free in about half an hour. The manual approach costs nothing and keeps you in control of what gets removed.
Why does System Data grow back after I clean it?
Some growth is normal because macOS constantly writes new logs, caches, and snapshots. If yours grows unusually fast, AI features that store local models, a runaway app cache, or frequent Time Machine snapshots are the usual cause. Re-run the snapshot thinning and cache clear every few weeks rather than expecting a one-time fix.

macOS 27 Compatible Macs: Every Supported Model (2026)
macOS 27 Golden Gate runs only on Apple Silicon Macs. Here is the full list of supported M-series models and the four Intel Macs that lose support.

macOS 27 Golden Gate: Every Major New Feature Confirmed
macOS 27 Golden Gate goes Apple Silicon only, adds a Gemini-powered Siri, refines Liquid Glass, and rebuilds Spotlight. Here is every confirmed change.

macOS 27 Liquid Glass: Every Readability Fix Explained
macOS 27 Golden Gate refines Liquid Glass with an intensity slider, better contrast, cleaner window corners, and edge-to-edge sidebars to fix readability.

macOS 27 Performance: What Golden Gate Makes Faster
macOS 27 Golden Gate speeds up AirDrop, network file browsing, Safari, and Spotlight, with core system improvements on the Apple Silicon-only release.