How to Transfer Data to a New iPhone Without iCloud
Move everything to your new iPhone without iCloud: Quick Start device-to-device transfer, wired migration, and encrypted Finder or iTunes backups.
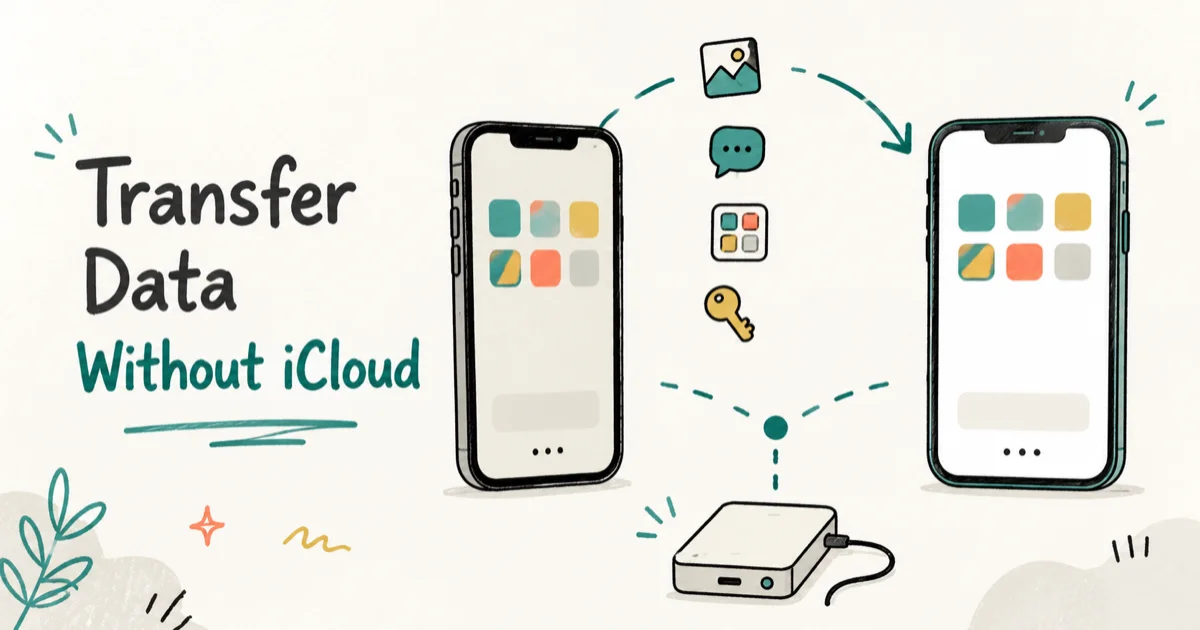
Quick AnswerUse Quick Start: turn on the new iPhone next to your old one and choose to transfer directly, wirelessly or over a cable. If the old phone is unavailable, restore from an encrypted Finder or iTunes backup instead.
You can transfer data to a new iPhone without iCloud using two Apple-built paths: a direct device-to-device transfer during setup, or an encrypted backup stored on your own computer. Neither needs iCloud storage, a subscription, or a working iCloud backup.
Which one fits depends on one thing: is the old iPhone in your hand? If yes, direct transfer. If not, you need an encrypted computer backup made while you still had it; without one, there’s no iCloud-free route back.
- Quick Start moves everything directly between two iPhones, wirelessly or over a cable, with no iCloud involved
- Both phones are tied up for the whole direct transfer, so plan for the wait before erasing anything
- An encrypted Finder or iTunes backup is the only local backup that carries your most sensitive data
- Plain unencrypted computer backups silently skip data that encrypted ones keep
- Your eSIM and Apple Pay cards re-register on the new phone rather than riding along in any backup
#Which No-iCloud Transfer Method Should You Use?
Two Apple-built methods cover nearly every handoff, and the right one is mostly decided for you.
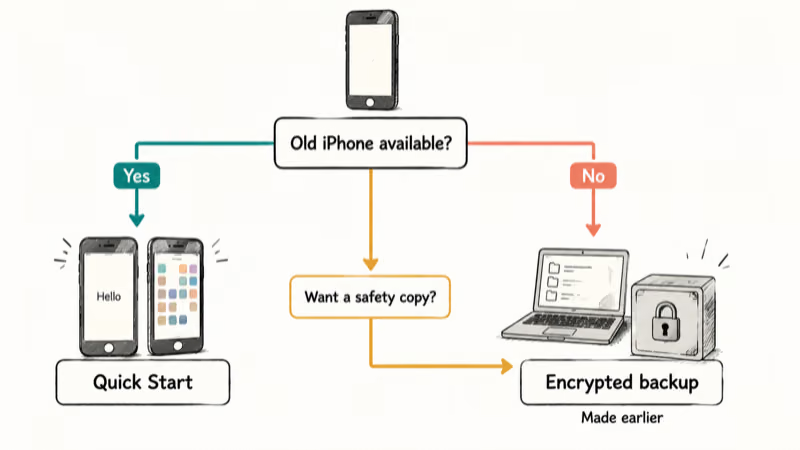
| Your situation | Use this | Why |
|---|---|---|
| Old iPhone works and is with you | Quick Start direct transfer | No computer, no storage limits, everything moves in one sitting |
| Old iPhone is gone, broken, or already erased | Encrypted computer backup | Restores from the archive on your Mac or PC |
| You want a safety copy before selling the old phone | Encrypted computer backup first, then either | The archive survives even if the transfer goes sideways |
| Old phone’s screen is dead but the phone powers on | Encrypted backup made earlier, or a wired transfer if you can still unlock it | Quick Start needs you to confirm prompts on both screens |
One thing neither method does: fix a broken activation. If the new phone refuses to activate at all, sort that out first, starting with whether it needs a SIM. Our guide to activate without a SIM covers that case.
#How Do You Transfer Directly from iPhone to iPhone?
Apple calls this Quick Start, and it kicks in on its own when you bring the phones near each other. One precondition: the new iPhone must still be on its Hello setup screen. If it’s already been set up, even briefly in the store, erase it first under Settings, General, Transfer or Reset, and start over.
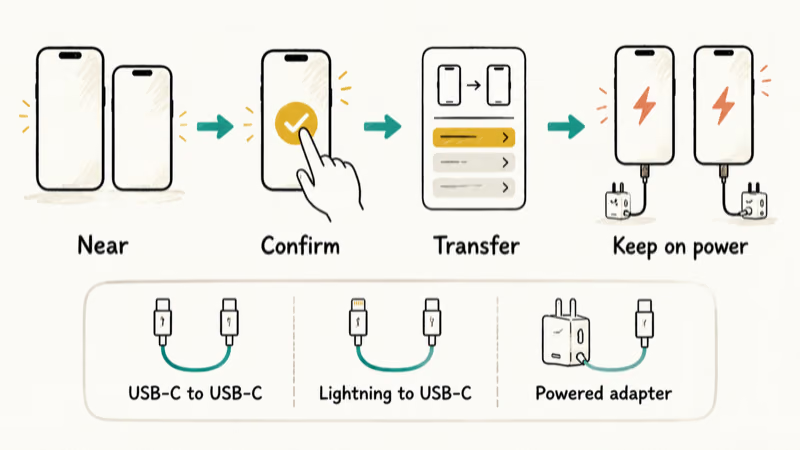
According to Apple’s Quick Start transfer page, the process “occupies both devices,” and it works with any old device on iOS 11 or later.
- Turn on the new iPhone and set it near your old one, with the old phone on Wi-Fi and Bluetooth enabled.
- A setup card appears on the old phone. Follow the prompts, scan the swirling pattern with the old phone’s camera, and confirm.
- Sign in, set up Face ID, and wait for the transfer choice screen.
- Choose Transfer from iPhone, the direct option, instead of any iCloud download.
- Keep both phones next to each other and plugged into power until the transfer finishes on both.
Prefer a cable? Apple documents a wired transfer variant with three cable setups, and the right one depends on both phones. Two USB-C iPhones connect with a USB-C charge cable, while an older Lightning iPhone moving to a USB-C one uses a USB-C to Lightning cable.
Two Lightning iPhones are the awkward pair. They need a Lightning to USB 3 Camera Adapter plus a Lightning to USB cable, with the adapter powered. Wired is the steadier choice for very full phones, though the new phone still needs a network connection during setup.
One more limit is worth knowing. If the new phone is enrolled in Apple School Manager or Apple Business Manager, then according to Apple, Quick Start’s transfer isn’t available on it at all.
#Back Up the Old iPhone with Encryption on a Mac or PC
The computer path splits by operating system, but the steps rhyme. On a Mac running macOS Catalina or later, backups live in Finder. On Windows, they live in iTunes or the Apple Devices app. Which Windows app you need depends on your hardware, so check whether iTunes on a Snapdragon PC applies to you.
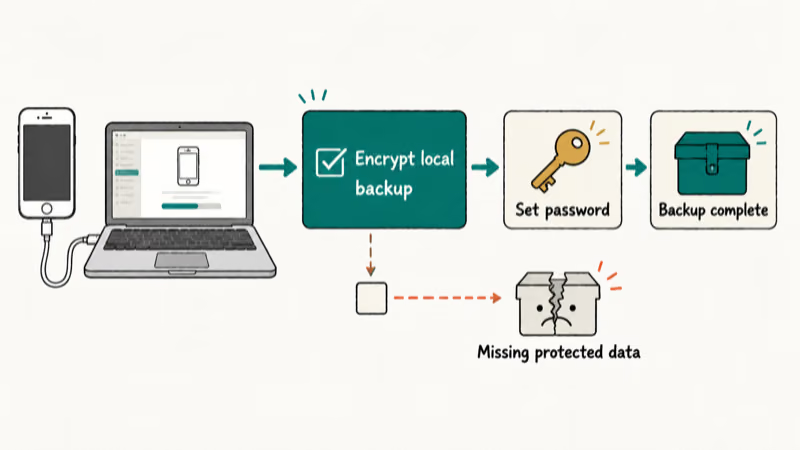
The single most important click in this flow is the encryption checkbox, and you tick it before backing up:
- Connect the old iPhone to the computer with a cable and open Finder, iTunes, or Apple Devices.
- Select the phone, then check Encrypt local backup and set a password you’ll remember.
- Run the backup and let it finish completely.
Why insist on encryption? Apple states it plainly on its encrypted backups page: “Encrypted backups can include information that unencrypted backups don’t.” Backups aren’t encrypted by default. A plain backup quietly leaves sensitive categories behind, and you only discover what’s missing after the old phone is wiped.
Don’t lose the password. Apple notes that Face ID, Touch ID, and device passcode data never ride along in any backup. Everything else in the archive is locked behind the password you set, and the backup can’t be opened without it.
#Restore That Backup on the New iPhone
With the archive made, the new phone’s setup flow takes over.
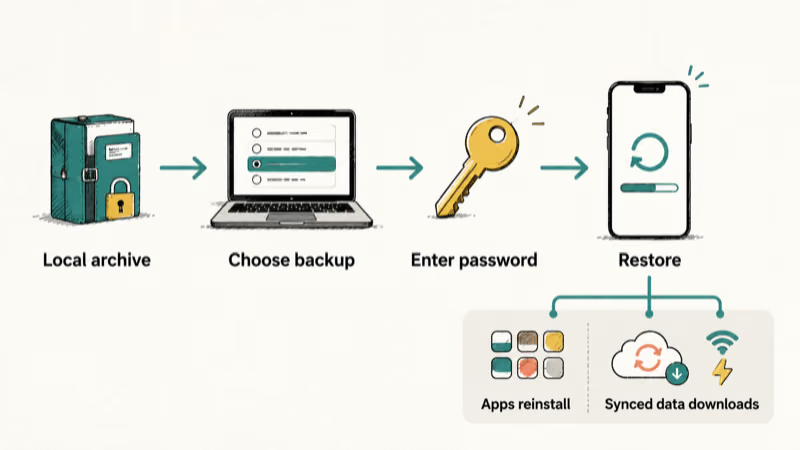
- Turn on the new iPhone and walk through setup until the transfer choice screen appears.
- Pick the option to restore from a Mac or PC.
- Connect the new phone to the same computer with a cable.
- Choose the backup you just made, enter your encryption password, and wait for the restore to complete.
Expect the new phone to keep working after the restore finishes: apps reinstall from the App Store, and anything synced to iCloud services re-downloads once you sign in, so stay on Wi-Fi and power for a while. The first encrypted backup you make also overwrites and encrypts your previous backups, per Apple’s documentation. That’s a feature here: the stale unprotected copies stop existing.
#What Transfers and What Doesn’t
Here’s the outcome by data class on each path, per Apple’s backup documentation.
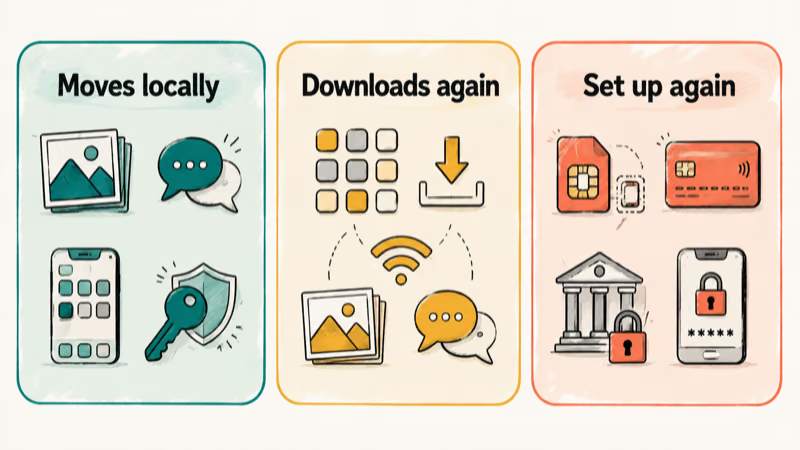
What each no-iCloud path carries, by data class.
| Data class | Quick Start direct transfer | Encrypted computer backup |
|---|---|---|
| Apps and home screen layout | Yes; apps reinstall from the App Store | Yes; apps reinstall from the App Store |
| Photos stored on the device | Yes | Yes |
| Photos in iCloud Photos | Re-download after signing in | Not in the backup; re-download after signing in |
| Messages stored on the device | Yes | Yes |
| Messages synced to Messages in iCloud | Re-download after signing in | Not in the backup, per Apple |
| Health data and saved passwords | Apple doesn’t publish a per-category list for direct transfer; verify after moving | Yes, this is what encryption adds |
| eSIM and Apple Pay cards | Re-register during or after setup | Re-register during or after setup |
The edges are where people get surprised.
- App logins: many survive the move, but banking apps and anything with strong device-binding will ask you to sign in again. That’s the app’s security choice, not a transfer failure.
- eSIM: your cellular plan doesn’t live in a backup. During setup the new phone offers to transfer the plan, and Apple warns that activating the plan on the new iPhone deactivates the old SIM at that moment, per its eSIM transfer page. Some carriers also need their own confirmation step.
- Apple Pay cards: these re-register on the new device for security. Have your bank’s verification method handy.
- WhatsApp: it keeps its own migration flow. For an iCloud-free move, use WhatsApp’s built-in chat transfer between phones rather than its iCloud restore; and if you do go the iCloud route and it hangs, our fix for when a WhatsApp restore gets stuck walks through it.
- Health data and saved passwords: carried by the direct transfer and by encrypted computer backups. This category is exactly why the encryption checkbox matters.
If a category above is critical to you, verify it on the new phone before touching the old one.
#What to Do Before You Erase the Old iPhone
The transfer finishing is not the finish line.
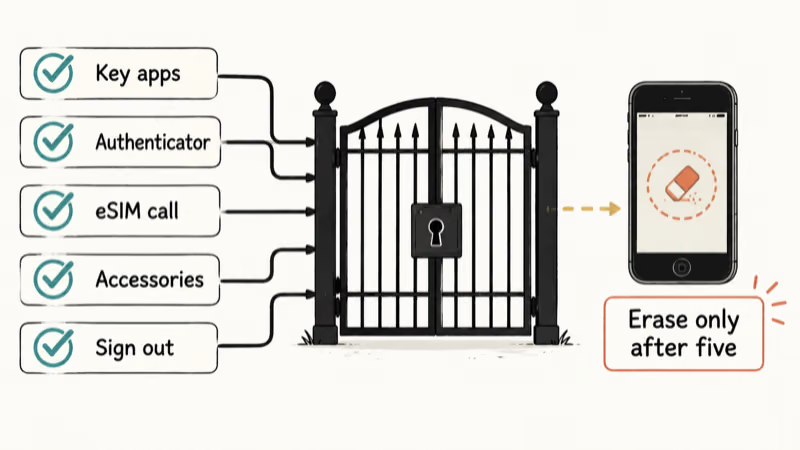
Run this list first:
- Open your most-used apps on the new phone: messages, photos, banking, authenticator apps. Anything asking for a re-login, do it while the old phone can still receive verification codes.
- Move your two-factor authenticator accounts explicitly if your authenticator app requires it. Some treat each phone as a brand-new device.
- Confirm the eSIM works by making a call from the new phone. Do your verification-code logins from step 1 before moving the plan, because the old phone loses cellular the moment the transfer activates.
- Re-pair your accessories. Earbuds and your car connect to the old phone until you tell them otherwise, and a watch that skips the hand-off cleanly can leave you fighting Apple Watch activation lock later.
- Sign out where it counts. If you plan to keep iCloud off the old phone entirely, here’s how to remove an iCloud account cleanly from the old phone before a sale or trade-in.
Only after all five: erase the old phone.
#Bottom Line
For almost everyone, the answer is Quick Start’s direct transfer. Phones side by side, plugged in, one wait, done, and iCloud never enters the picture.
The encrypted computer backup is the right tool in exactly two cases: the old phone can’t participate in setup, or you want a durable archive before wiping it. Whichever path you take, tick the encryption box on any computer backup, and don’t erase the old iPhone until the new one has proven it holds your messages, logins, and eSIM.
iPhone tips & tricks
#Frequently Asked Questions
Can you transfer everything without iCloud and without a computer?
Yes. Quick Start’s direct device-to-device transfer needs only the two iPhones, power, and time. It copies your data straight across, wirelessly or over a cable, with no iCloud storage and no computer involved.
Does the direct transfer move your apps and their logins?
It moves the apps and most of their data. Sessions for banking and other high-security apps usually require a fresh sign-in on the new phone because those apps bind logins to the specific device. Keep your password manager handy for the first day.
Why does the encrypted backup option matter so much?
Because Apple states that encrypted backups can include information that unencrypted backups don’t. Tick the box before backing up and the archive keeps those protected categories. Skip it and the backup silently omits them.
You won’t see a warning about what’s missing. The first encrypted backup also overwrites and encrypts your earlier plain backups on that computer.
How long does an iPhone-to-iPhone transfer take?
It depends on how much data you’re moving and on network conditions, and Apple doesn’t publish fixed times. A mostly empty phone finishes quickly; a very full one can take far longer. A cable removes the device-to-device wireless hop, which makes it steadier for full phones, but the new phone still needs its network connection either way.
Does your eSIM move over automatically?
Often, but not always. Setup offers a plan-transfer step, and many carriers complete it on the spot. Some carriers require a confirmation in their own app or a support contact. Verify with a phone call before erasing the old device.
Can you use the old iPhone during the transfer?
Not during a direct transfer. Quick Start occupies both devices until the copy completes, which is Apple’s documented behavior, not a glitch. If you can’t afford that downtime, make an encrypted computer backup at night and restore from it instead.
What should you check before erasing the old iPhone?
Five things: your key apps open and are signed in on the new phone, two-factor authenticator accounts moved, the eSIM makes calls, your Bluetooth accessories re-paired, and any iCloud sign-out you want is done. When all five pass, the old phone has nothing left that you need.
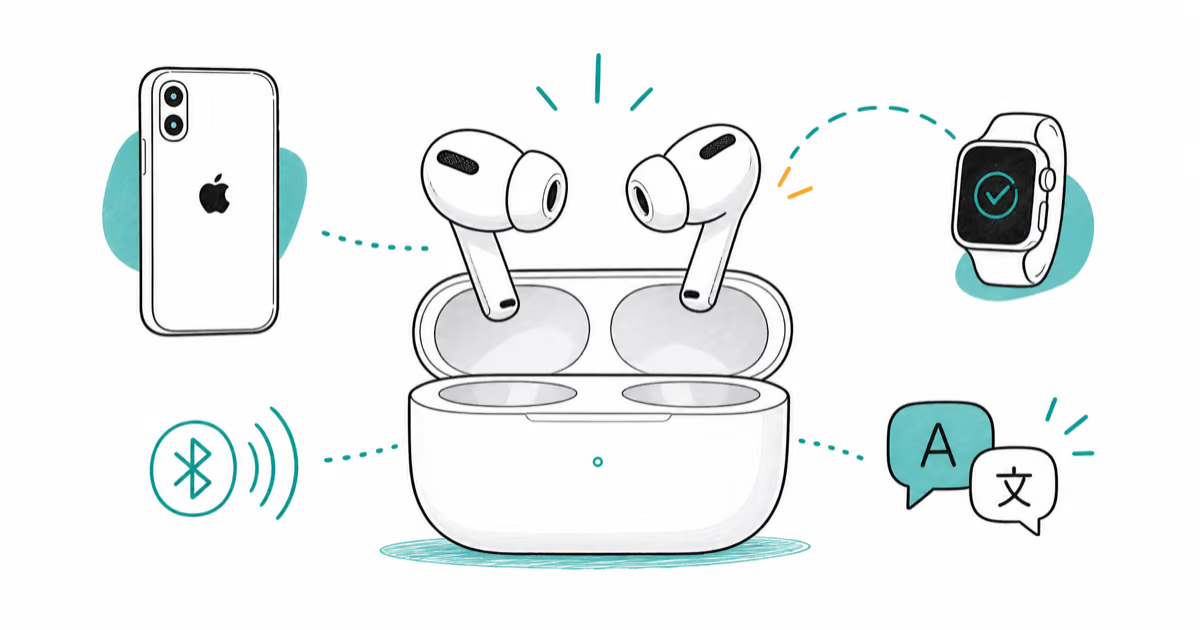
Best Wireless Earbuds for iPhone in 2026: USB-C Era Picks
Best wireless earbuds for iPhone in 2026, comparing AirPods Pro 3, Sony WF-1000XM6, Bose QC Ultra, and Anker Liberty 4 NC on the USB-C iPhone lineup.
iPhone Keyboard Lag? 7 Proven Fixes for iOS 26 (2026)
Fix iPhone keyboard lag with 7 proven fixes for iOS 26. Covers restart, storage, predictive text, third-party keyboards, and dictionary reset.
How to Block Porn on an iPhone: A Guide for Parents
Learn how to block porn on iPhone using Screen Time, DNS filtering, and safe browsers. Step-by-step guide for parents to protect kids' devices.
How to Detect Spyware on iPhone: Signs, Checks, and Removal
Learn how to detect spyware on your iPhone with step-by-step checks for suspicious apps, profiles, and battery drain. Remove threats safely.