How to Force Empty Trash on Mac: 4 Working Methods
Can't empty Trash on your Mac? Here are four proven methods to force empty Trash, including Terminal commands, Option key shortcut, and Safe Mode.

Quick AnswerTo force empty Trash on Mac, open Terminal, type sudo rm -rf ~/.Trash/*, enter your admin password, and press Return. This bypasses locked files, in-use files, and SIP-protected items that prevent normal Trash deletion.
Your Mac’s Trash won’t always cooperate. Locked files, apps running in the background, and System Integrity Protection (SIP) can all block the standard “Empty Trash” action. When the normal path fails, you’ll need to force the deletion through a command line, a keyboard shortcut, or a different boot mode. This guide walks through four methods for clearing a stuck Trash folder.
Before changing these settings, use the steps only on your own device, computer, or account, or with explicit permission from the owner. Unauthorized access can violate law, privacy rights, and platform terms, so don’t use this guide to bypass someone else’s controls. When available, start with the official support option, built-in settings menu, or vendor documentation before trying manual fixes, especially if the device or account belongs to work, school, or another person.
- The Terminal command sudo rm -rf ~/.Trash/* bypasses most Trash deletion blocks on macOS
- Locked files are the most common reason Trash won’t empty, fixable through Get Info or Terminal
- Holding Option while clicking Empty Trash skips file-in-use warnings on older macOS versions
- Safe Mode disables background processes that hold files open and prevent deletion
- System Integrity Protection blocks deletion of certain system files even with admin privileges
#Why Won’t Your Mac Trash Empty?
Before jumping to fixes, it helps to know what’s blocking the deletion. The common blockers are:
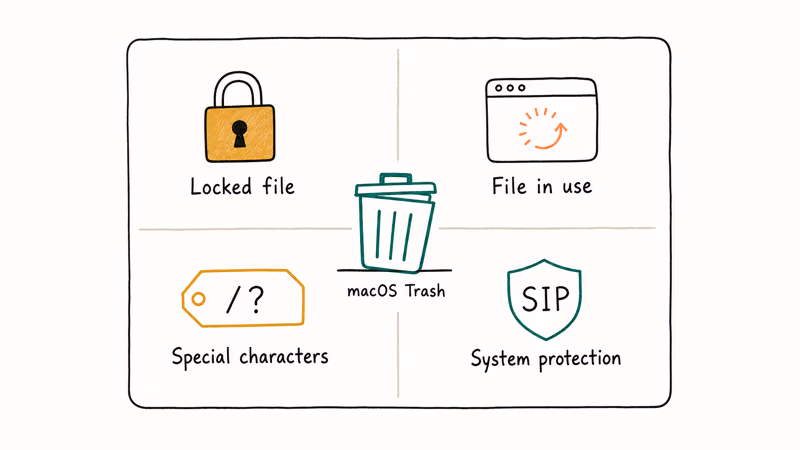
- Locked files: A file marked as locked won’t delete without unlocking it first.
- Files in use: An app or background process still has the file open, usually Spotlight or iCloud sync.
- Special characters in filenames: Unusual characters like slashes or null bytes confuse Finder.
SIP is the fourth blocker. System Integrity Protection shields certain system files from modification, and even admin access won’t override it. You’ll see a “Operation not permitted” error when this is the cause, which tells you the file is protected rather than simply locked or in use. Apple’s macOS storage support page recommends keeping Trash cleared so macOS has room for swap and temporary caches.
If your storage is already tight, how to delete downloads on Mac pairs well with this guide because Downloads and Trash together often hold a large recoverable chunk.
#How to Force Empty Trash Using Terminal
Terminal gives you direct control over file deletion and bypasses most of the restrictions Finder can’t handle. The command below targets the contents of your user Trash folder directly, so it’s the strongest option when Finder can’t empty locked or stuck items.
Open Terminal by pressing Command + Space, typing “Terminal,” and hitting Return. Type the command below and press Return:
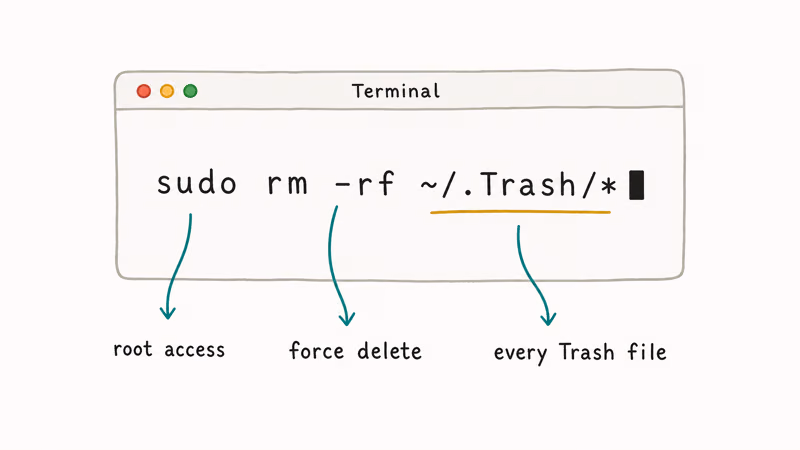
sudo rm -rf ~/.Trash/*You’ll be asked for your admin password. Characters won’t appear as you type.
Here’s what each part does: sudo grants root privileges, rm -rf forces recursive deletion without prompts, and ~/.Trash/* targets every file in your Trash folder. The deletion starts the moment you authenticate, with no confirmation prompt.
Double-check the path before pressing Return. A typo here could delete the wrong files permanently.
If Terminal returns “Operation not permitted,” the fix is almost always Full Disk Access. Go to System Settings > Privacy & Security > Full Disk Access, toggle Terminal on, and rerun the command.
#How to Use the Option Key to Force Empty Trash
Apple removed the “Secure Empty Trash” feature in OS X El Capitan 10.11, citing security concerns with flash storage that made the secure overwrite unreliable. The Option key shortcut is what remains, and it still helps on older macOS builds where “file in use” dialogs pile up.
Click the Trash icon in your Dock, hold the Option key, and go to Finder > Empty Trash while still holding Option.
This tells macOS to skip confirmation dialogs and file-in-use checks, though it won’t override SIP or permission blocks. It may clear file-in-use blocks, but use Terminal for items that remain stuck. Pair this with our how to clear cache on Mac walkthrough if you are also chasing storage that Finder reports but can’t show you.
#Emptying Trash in Safe Mode
Safe Mode disables login items, non-essential system extensions, and most background processes, which often releases files that were locked by running apps. Shut down your Mac completely before proceeding, because Safe Mode requires a fresh boot and won’t activate from a simple restart on Apple Silicon.
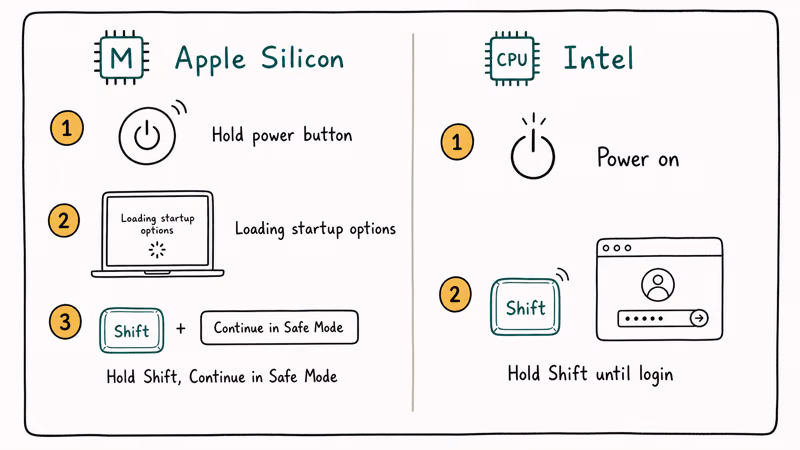
Apple Silicon Macs (M1/M2/M3/M4): Hold the power button until “Loading startup options” appears. Select your startup disk, hold Shift, and click “Continue in Safe Mode.”
Intel Macs: Power on and hold the Shift key until the login screen shows up.
Log in, right-click the Trash icon, and select Empty Trash. The files that were stuck before should now delete without resistance. Restart your Mac normally when you’re done to exit Safe Mode and return to the standard boot configuration.
According to Apple’s Safe Mode documentation, Safe Mode runs a basic check of your startup disk on boot. That startup check can resolve filesystem issues contributing to Trash problems, including “in use” errors from orphaned locks. If Safe Mode empties Trash on the first try, the culprit was a background process, not a permission wall or SIP.
#Unlocking Files That Block Trash Deletion
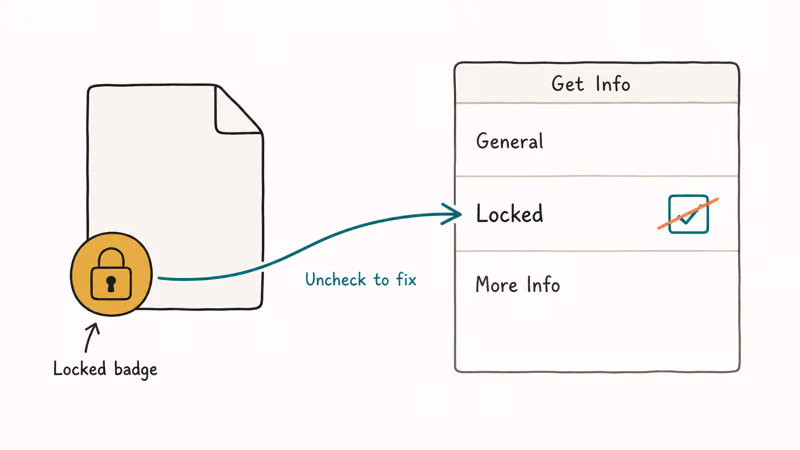
Sometimes the fix is just unlocking a single file. macOS locks files to prevent accidental deletion, which also means you can’t Trash them without removing the lock first. A locked file shows a small padlock icon overlaid on the file’s thumbnail in Finder, usually in the lower-left corner of the icon.
Through Finder:
Open Trash by clicking its Dock icon, right-click the locked file, and select Get Info (or press Command + I). Uncheck the Locked checkbox near the bottom of the info panel, then try emptying Trash again. This takes about 10 seconds per file.
Through Terminal:
Got dozens of locked files? Run this command instead:
chflags -R nouchg ~/.Trash/*This strips the “user immutable” flag from every file in your Trash. It finishes in under a second on modern SSDs. The erase process has failed on Mac guide covers related permission errors on external drives.
If you hit permission errors on network-mounted volumes, the file lives outside your user Trash and a single Terminal command on ~/.Trash won’t reach it. In that case, unmount the volume, reconnect, and retry.
#What About Recovering Accidentally Deleted Files?
Once you force-empty Trash, those files are gone permanently.
Your best protection is a backup strategy you set up before you need it. Time Machine is the go-to option here. Apple’s Time Machine guide states that Time Machine keeps 24 hours of hourly snapshots, daily backups for the past month, and weekly backups for all previous months until the backup drive runs out of room. If you accidentally Trash something, you can restore it from a snapshot.
iCloud Drive also keeps recently deleted files. Apple’s iCloud support page confirms that items in Recently Deleted stay recoverable for 30 days before they’re purged. Check iCloud.com > iCloud Drive > Recently Deleted if the file was in a synced folder.
For files that were never backed up, third-party data recovery tools remain an option. Results depend on how much new data has been written to the disk since deletion, so act fast and stop using the drive right away. Users also running into copy and paste not working on Mac or Bluetooth not available on Mac often find the same background-process culprits behind Trash refusing to empty.
#Bottom Line
A stubborn Trash folder is annoying but fixable. Start with the Option key method for quick file-in-use warnings, move to Terminal’s sudo rm -rf ~/.Trash/* when Finder can’t handle it, unlock stubborn files with chflags -R nouchg ~/.Trash/*, and reach for Safe Mode when background processes are the real blocker. Keep Time Machine running so the one file you delete by mistake is never the one you can’t get back.
Mac Tips & Tricks
#Frequently Asked Questions
Can I recover files after force emptying Trash on Mac?
No. Force-emptied files are permanently gone, and macOS has no built-in undelete feature. Time Machine and iCloud’s Recently Deleted folder are your only recovery paths.
Is the sudo rm -rf command safe to use?
Yes, as long as you target the correct path. Always verify the command reads ~/.Trash/* before pressing Return. There’s no undo, no confirmation prompt, and no way to recover deleted files through built-in macOS tools once the command runs.
Why does my Mac say a file is in use when nothing is open?
Background processes hold files open without any visible window. Spotlight indexing, Time Machine, iCloud sync, and antivirus scanners are common culprits. Safe Mode fixes this by loading only the minimum services macOS needs to boot, which releases file locks that those background processes were holding.
Does force emptying Trash affect my Mac’s performance?
It can help when the startup disk is nearly full. macOS needs free space for swap files, caches, and temporary data. Clearing Trash gives macOS more room to juggle memory pages when RAM runs low, which can improve app launches and general responsiveness.
Will emptying Trash in Safe Mode delete system files?
No. The Empty Trash action targets only files you’ve explicitly moved to Trash. System-protected files stay untouched no matter how you boot your Mac or which method you use to empty the Trash.
What if Terminal says “Operation not permitted” when I try to delete Trash?
Terminal probably doesn’t have Full Disk Access. Go to System Settings > Privacy & Security > Full Disk Access and add Terminal to the list. If that doesn’t fix it, the files are likely protected by SIP, and Apple strongly discourages disabling SIP for security reasons.
How do I prevent files from getting stuck in Trash?
Close all apps using the file before deleting it, and unlock files through Get Info before moving them to Trash. Keep macOS updated so Apple’s filesystem patches reach you. Running Disk Utility’s First Aid on your startup disk once a month catches small errors before they grow into bigger problems. Combined with regular Time Machine backups, these habits keep Trash deletion smooth and give you a safety net when you accidentally delete something you need later.
Does the Option key trick still work on macOS Sonoma and Sequoia?
It still bypasses certain confirmation dialogs, but Terminal commands are more reliable on recent macOS versions. The Option method works best for files blocked by “in use” warnings rather than SIP or permission issues.

macOS 27 Golden Gate: Release Date and Compatible Macs
macOS 27 Golden Gate was announced at WWDC 2026. Here is the release date, the Apple Silicon-only compatible Mac list, and every confirmed new feature.
How to Copy and Paste on a Mac: Shortcuts and Fixes
Copy and paste on a Mac with Command-C and Command-V. Learn the cut shortcut, paste without formatting, Universal Clipboard, and fixes when it breaks.

How to Use the Phone App on Mac: macOS Tahoe Setup Guide
Set up the Phone app on macOS Tahoe to relay iPhone cellular calls. Covers requirements, FaceTime setup, Call Screening, and common firewall fixes.
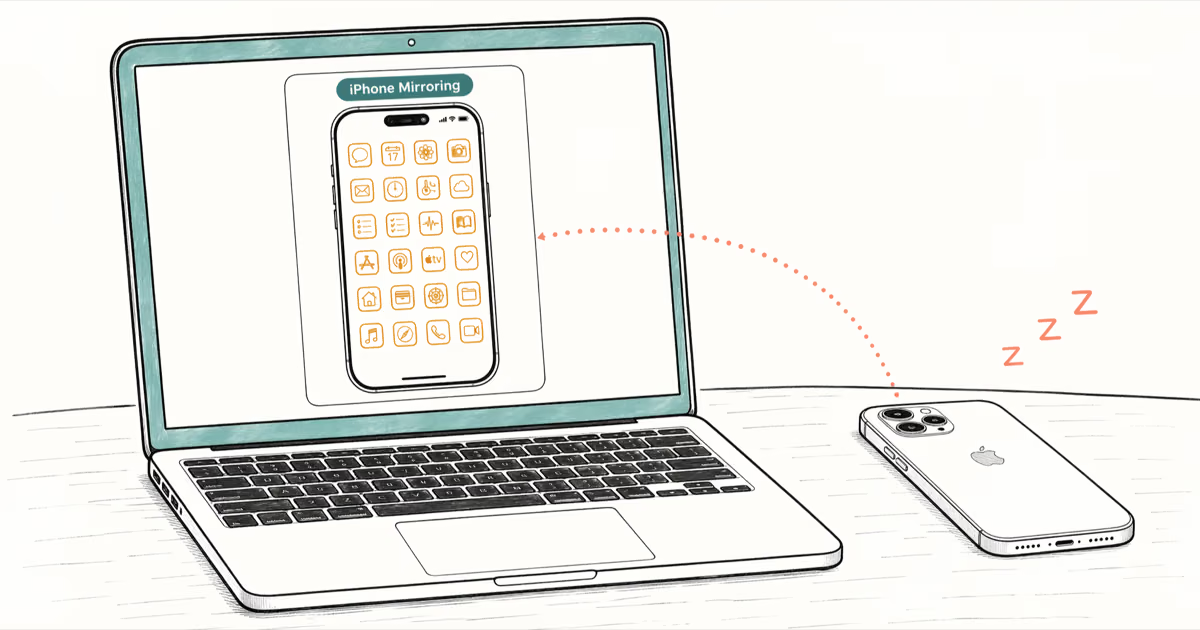
How to Use iPhone Mirroring on Mac: Full 2026 Setup Guide
Set up iPhone Mirroring on macOS Sequoia with iOS 18. Covers hardware requirements, the six common error messages, EU limits, and a shared-Mac privacy fix.