How to Screen Record on a Mac With Audio (2026 Guide)
Record your Mac screen with the built-in toolbar or QuickTime, capture microphone audio, record just a region, and find where recordings save.
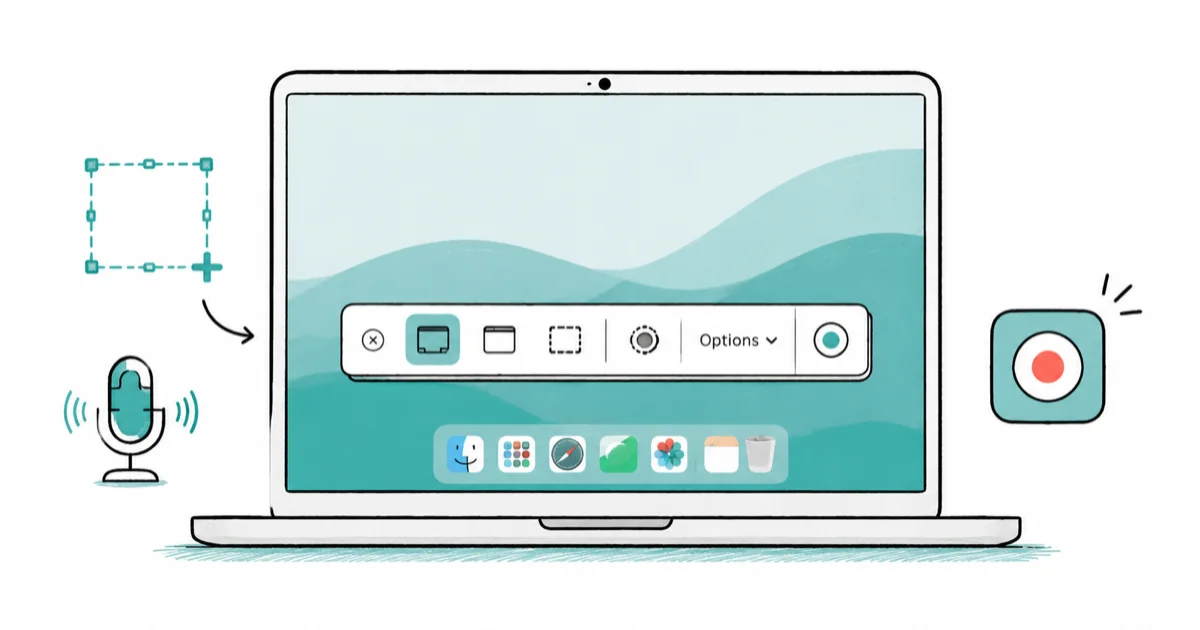
Quick AnswerPress Shift-Command-5 to open the recording toolbar, pick the whole screen or a region, then click Record. Open Options first to choose a microphone before you start.
You can screen record on a Mac without extra apps, using the built-in toolbar that opens with Shift-Command-5. It captures the full screen or a region, records your microphone, and saves to your desktop. The catch: macOS won’t grab system audio on its own.
- Shift-Command-5 opens the recording toolbar; Shift-Command-3 and 4 are for still screenshots.
- You can record the entire screen or drag to select just a portion before recording.
- The Options menu sets the microphone, save location, timer, and whether clicks appear.
- macOS records microphone audio but not internal system audio without a virtual audio tool.
- Recordings save to the desktop as .mov files, and the floating thumbnail lets you trim instantly.
#How Do You Start a Screen Recording on Mac?
The fastest route is the keyboard. Apple’s screen recording guide confirms that pressing Shift-Command-5 opens the recording toolbar, which is the same Screenshot app you use for still captures, so one shortcut covers both jobs.
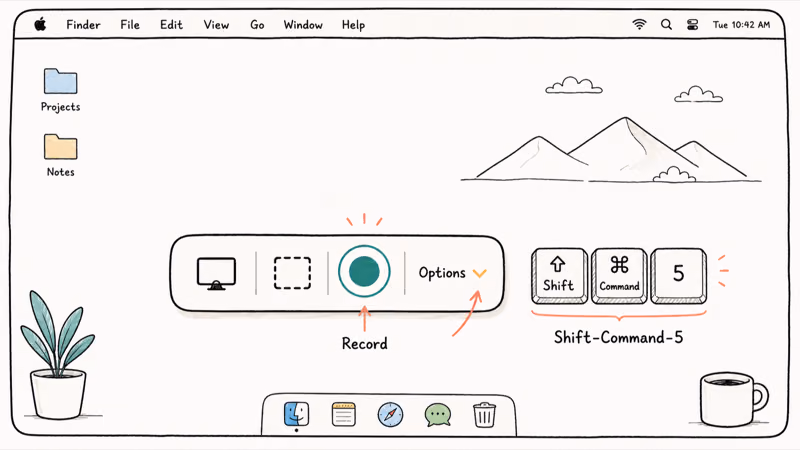
A small control bar appears near the bottom. Pick the whole-screen or selected-portion button, then click Record.
The toolbar includes separate buttons for full-screen and selected-portion recording, so the next choice is simply what area to capture.
To stop, click the small Stop button in the menu bar, or press Shift-Command-5 again and hit stop. Heavy recordings fill a drive quickly, so it pays to free up space on your Mac before a long session and watch storage as the file grows.
#Recording the Whole Screen or Just a Region
Whole-screen recording suits tutorials where the dock and menu bar matter. Click the full-screen button, then click anywhere to begin.
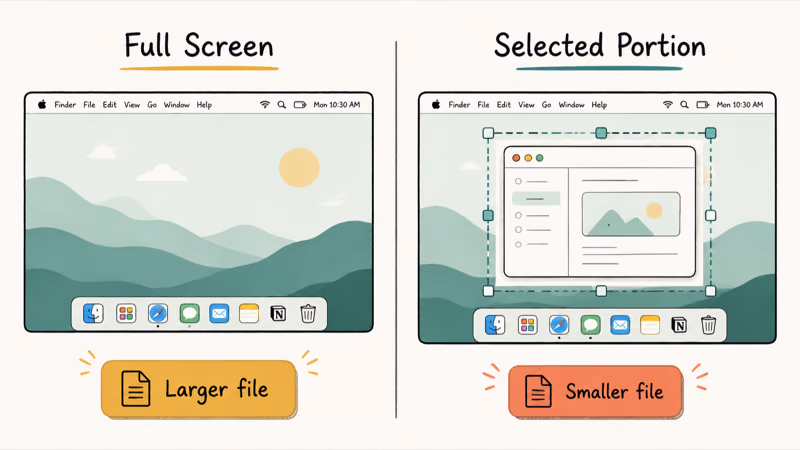
Region recording is the tidier option for shareable clips. Choose Record Selected Portion and a dotted rectangle appears, which you drag and resize to frame only the part you want, leaving everything outside the box out of the final file completely.
A tight region clip usually creates a smaller file than a full-screen capture because it records less of the display.
That makes it the better pick for sharing over email or chat. You can also reposition the box by dragging from the middle, and the framing sticks until you change it again. Need still images rather than video? The guide to take a screenshot on your Mac covers those shortcuts.
#Can You Record System and Microphone Audio?
Microphone audio is built right in. Open Options on the toolbar, pick a microphone under the Microphone heading, and your narration records alongside the video, which is exactly what you want for a spoken walkthrough.
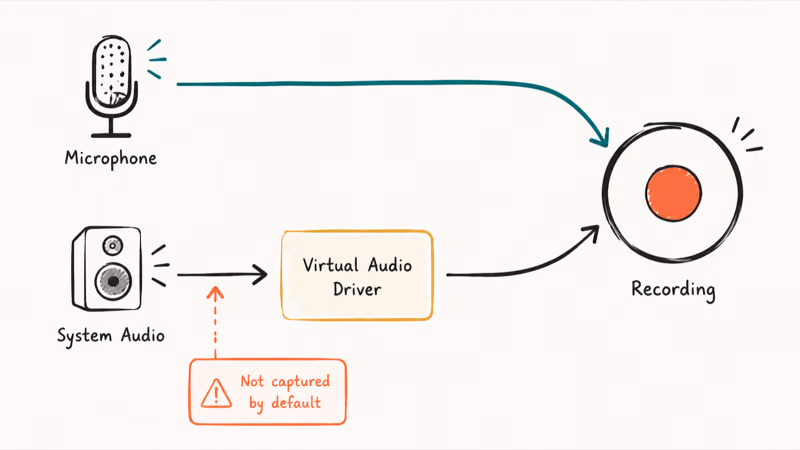
System audio is the honest gap here.
The built-in tools capture your voice, but they don’t record the sound coming out of the Mac itself, like a video’s audio or a call. There’s no native toggle for it.
The fix is a free virtual audio driver. It routes system sound into a recordable input that then appears in the Options microphone list, and setup takes only a few minutes the first time. Handle that step before your demo, not after a silent playback.
#Using QuickTime Player for More Control
QuickTime Player offers a second path with the same engine underneath. Apple’s QuickTime Player screen recording guide states that you choose File, then New Screen Recording, which opens that same familiar toolbar one more time.
The Options menu does the heavy lifting.
It sets where the file saves, whether the pointer shows, and whether clicks get highlighted for viewers.
That one-window flow makes QuickTime ideal for record, trim, and export jobs. It also pairs nicely with Handoff between your Mac and iPhone when you want the finished clip on another device.
#Where Recordings Save and How to Trim Them
By default, recordings land on your desktop. According to Apple’s Mac screenshot and recording guide, the files begin with “Screen Recording” plus the date and time, and they save in the .mov format every time.

Want them somewhere else? Open the toolbar’s Options menu and pick a folder under Save to, such as Documents.
That choice sticks until you change it, which keeps your desktop tidy. Trimming is just as fast.
A thumbnail floats in the corner when a recording ends. Click it, drag the yellow handles to cut the start and finish, then click Done. If old clips pile up and drag performance down, it helps to clear the cache on your Mac.
#Quick Fixes When Screen Recording Won’t Work
Permissions trip people up most often. Go to System Settings, then Privacy & Security, then Screen & System Audio Recording, and confirm your recorder is allowed before you blame the app itself for a blank file.
Silent recording? Check the input first.
Reopen Options and confirm the right microphone is selected, because a connected headset can quietly steal the default and leave your clip without any narration at all. A quick restart clears most stuck-recorder states when the toolbar freezes mid-session.
When playback stutters, close heavy background apps and check free storage. For slowdowns tied to multitasking, the notes on Mac and iPad multitasking cover related fixes.
#Bottom Line
For most recordings, the Shift-Command-5 toolbar with a microphone selected is all you need, and QuickTime Player adds trim-and-export control in one window. Just go in knowing macOS records mic audio but not system audio by itself, so set up a virtual audio driver ahead of time when your demo needs the Mac’s own sound, rather than ending up with a silent clip.
#Frequently Asked Questions
What is the shortcut to screen record on a Mac?
Press Shift-Command-5. That opens the recording toolbar, where you pick full-screen or region recording and click Record.
How do I record my voice while screen recording?
Open the Options menu on the recording toolbar before you start, then select your microphone under the Microphone heading. Your voice then records alongside the video. If the audio is missing afterward, the wrong input was almost always selected, often a connected headset that quietly grabbed the default instead of the built-in mic you expected to use.
Can a Mac record internal system audio?
Not on its own. The built-in tools record your microphone but not the sound the Mac plays back, such as a video’s audio track. The common fix is a free virtual audio driver that routes system sound into an input the recorder can see, which then shows up in the Options microphone list like any other source.
How do I record only part of the screen?
Open the toolbar with Shift-Command-5 and choose Record Selected Portion. Drag the dotted box to frame the area you want, then click Record. Only what sits inside the box ends up in the file.
Where do my screen recordings save?
By default they save to the desktop as .mov files named with the date and time. You can change the destination folder under the Options menu’s Save to setting.
How do I trim a screen recording?
When the recording stops, a small thumbnail appears in the corner of the screen. Click it to open a preview, drag the yellow handles at each end to cut the start and finish, then click Done. For finer edits, open the clip in QuickTime Player and trim from the Edit menu instead, where you can also export at a smaller size.

macOS 27 Compatible Macs: Every Supported Model (2026)
macOS 27 Golden Gate runs only on Apple Silicon Macs. Here is the full list of supported M-series models and the four Intel Macs that lose support.

macOS 27 Golden Gate: Every Major New Feature Confirmed
macOS 27 Golden Gate goes Apple Silicon only, adds a Gemini-powered Siri, refines Liquid Glass, and rebuilds Spotlight. Here is every confirmed change.

macOS 27 Liquid Glass: Every Readability Fix Explained
macOS 27 Golden Gate refines Liquid Glass with an intensity slider, better contrast, cleaner window corners, and edge-to-edge sidebars to fix readability.
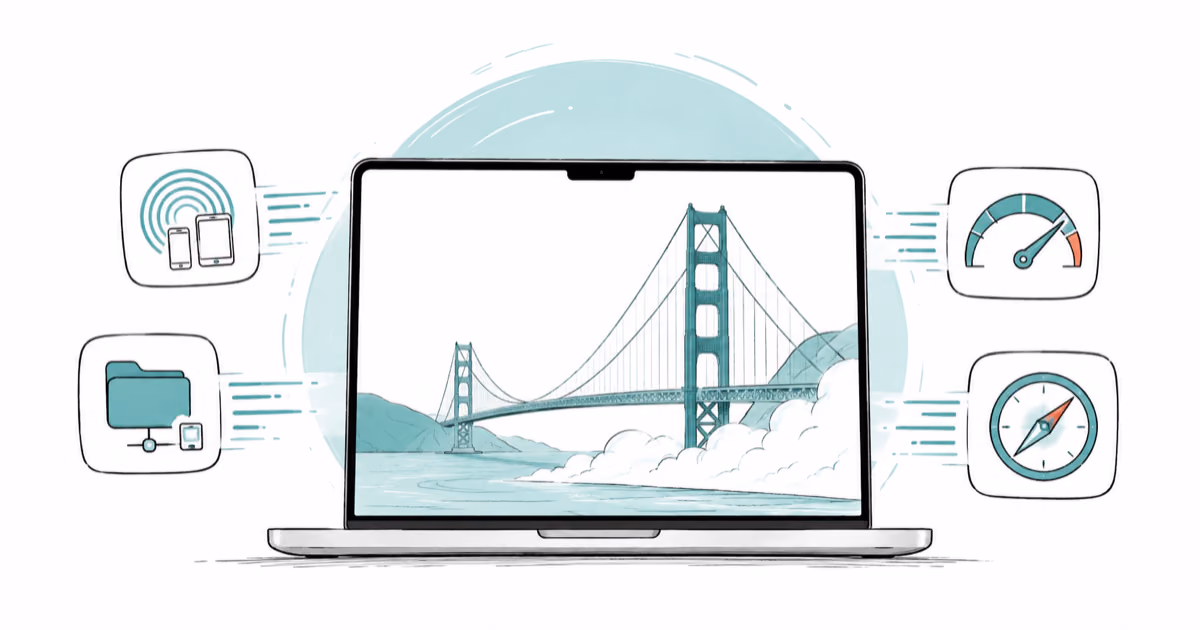
macOS 27 Performance: What Golden Gate Makes Faster
macOS 27 Golden Gate speeds up AirDrop, network file browsing, Safari, and Spotlight, with core system improvements on the Apple Silicon-only release.