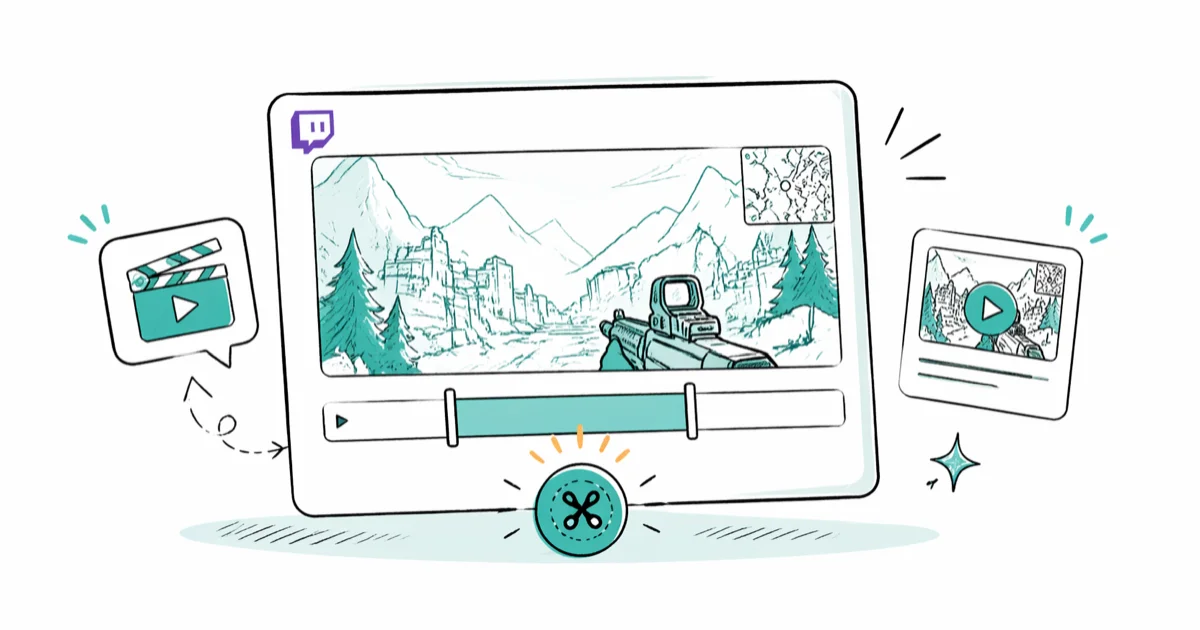
How to Clip on Twitch (Desktop, Mobile, and Xbox) in 2026
Clip on Twitch using the desktop Clip icon, the Alt + X shortcut, the mobile app, or Xbox One. This guide covers every path plus trims and titles.
Quick AnswerTo clip on Twitch desktop, pause the stream and press Alt + X on Windows or CMD + X on Mac, drag the blue markers to set length, then add a title and hit Publish. On mobile, tap the stream, open the share menu, and pick Create Clip to grab the last 30 seconds.
Twitch clips capture 5- to 60-second snippets from a live stream or VOD, and they’re the quickest way to share a clutch play, a streamer reaction, or a wild chat moment. Use desktop browser, mobile, or console capture depending on where you’re watching; desktop gives the most trim control, while mobile and Xbox use shorter capture windows.
- Desktop creators pause the stream, hover the player, then press Alt + X on Windows or CMD + X on macOS to open the Clip editor.
- Clip length is locked between 5 and 60 seconds, and titles are capped at 100 characters including spaces.
- The Twitch mobile app on iOS and Android auto-saves the last 30 seconds; tap Create Clip from the share menu, then trim before publishing.
- Xbox One streamers press the Xbox button and then X to capture the last 30 seconds straight to their channel.
- Every clip you make lives under Creator Dashboard then Content then Clips, where you can rename, copy URLs, or delete in bulk.
#How Do You Create a Twitch Clip on a Desktop Browser?
The browser is the most-used clip path. Twitch confirms that clips run between 5 and 60 seconds, with titles capped at 100 characters. It gives you exact trim control instead of a forced 30-second window. Per Twitch’s official Clips help article, any logged-in viewer can create one on a public stream, and the URL plays for anyone afterward.
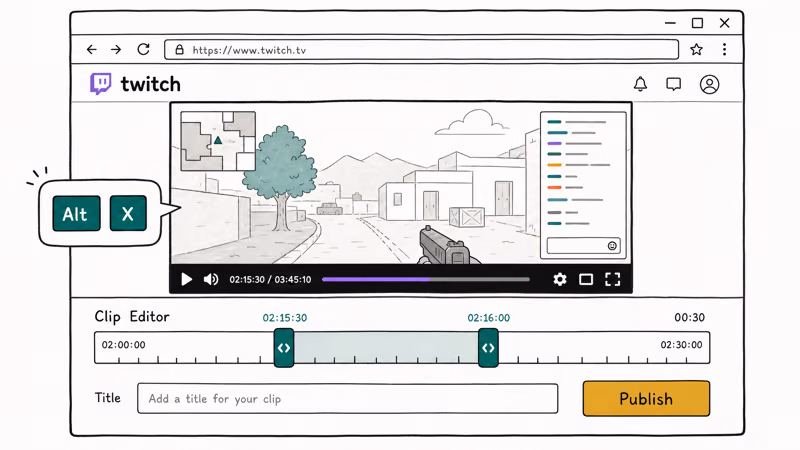
The Alt + X shortcut opens the Clip editor as long as the chat input is unfocused.
#Step 1: Pause the stream and place the seeker
Open the stream or VOD you want to clip. Pause it. Drag the playback seeker to the second just before the moment you want to capture. Twitch builds the clip window backwards from where you press the button, so you don’t need to be pixel-precise on the seeker.
#Step 2: Open the Clip editor
Hover your cursor over the video. A row of icons appears in the bottom-right of the player. Click the Clip icon (it looks like a film clapper), or use the keyboard shortcut: Alt + X on Windows, CMD + X on macOS. Twitch’s keyboard shortcuts reference confirms that Alt + X opens the clip creator from any channel page when chat doesn’t hold keyboard focus.
A 30-second window opens with two blue markers along the bottom. Drag the markers to set start and end. Clips can run from a minimum of 5 seconds up to a maximum of 60 seconds.
#Step 3: Add a title and publish
Type a title in the field at the bottom of the editor; the 100-character limit covers the title only. A specific title (like “Caedrel aces from spawn in 0.4s”) gets more clicks than a vague one. Click Publish, and Twitch generates a shareable URL within a few seconds. The clip stays attached to the original broadcaster’s channel.
#How to Clip on Twitch Mobile for iOS and Android
The mobile app handles clipping a little differently. There’s no scrubbing slider. The app always grabs the last 30 seconds automatically. You can trim, but you can’t push the start point earlier than 30 seconds before the tap.
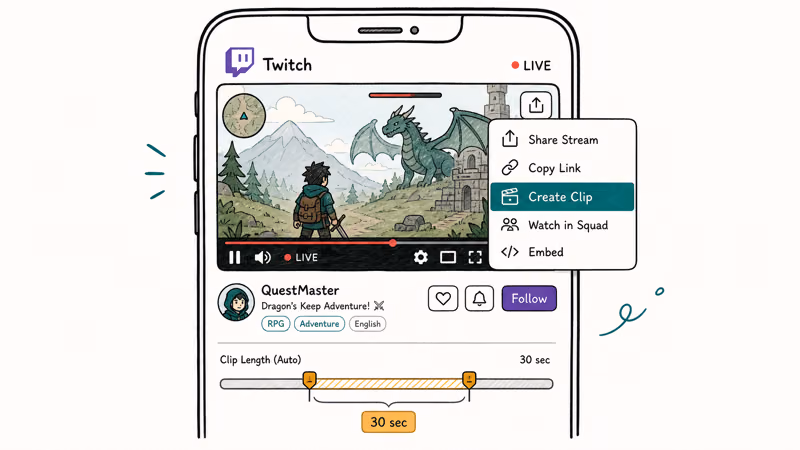
On iOS, Create Clip sits in the Share menu. On Android, it appears under the player.
- Open the Twitch app and tap into a live stream.
- Tap once on the video so the player controls appear.
- On iOS, tap the Share icon at the top-right and pick Create Clip. On Android, tap Create Clip at the bottom of the player.
- Twitch grabs the last 30 seconds and drops you into a trim editor. Drag the markers to cut anything you don’t want.
- Tap Done, type a title, and hit Publish.
The clip lives on the streamer’s channel and on your own activity feed; to DM it to a friend, tap Share inside the published clip and pick Send via Whisper. For more on Twitch DMs, the Twitch whisper guide walks through every path including the /w slash command. If the streamer ever toggles VOD storage off, the original broadcast disappears in 14 days even though your clip URL stays. Keep a download if you want the raw footage.
#How to Make a Twitch Clip on Xbox One
Xbox creators can capture straight from the console without alt-tabbing into a browser. According to Microsoft’s Xbox capture and share documentation, the system continuously buffers the last 30 seconds of gameplay so you can capture at any time. The capture lands in your Captures library, ready to upload.
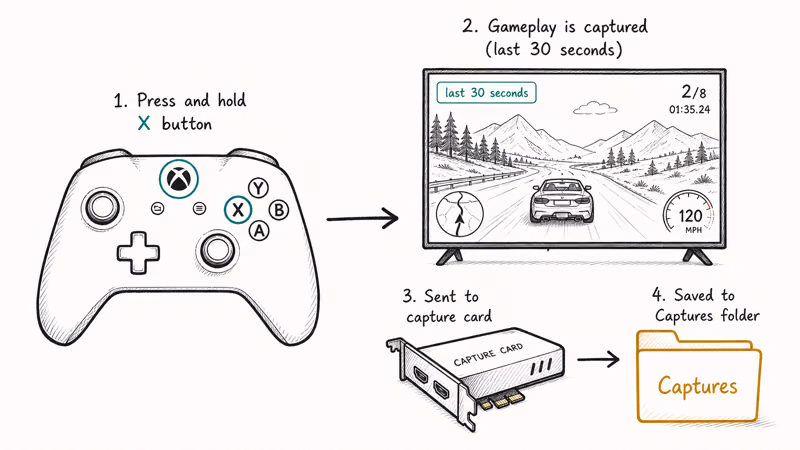
- Double-tap the Xbox button on your controller to open the guide overlay.
- Press X to record the last 30 seconds straight to your Captures library.
- To capture more than 30 seconds, scroll to Capture options inside the guide and pick a longer length (up to several minutes, depending on internal storage).
- After your stream ends, open the Twitch app on Xbox, head to your channel, and the capture appears under your channel’s clips section once uploaded.
Xbox captures save to the Captures app first, then can upload to Twitch after the stream ends.
#Stream Types That Allow (and Block) Clipping
Not every stream lets you hit the Clip button. Most live broadcasts on public channels are fair game.
Wikipedia’s overview of Twitch reports that the platform hosts roughly 3 million unique broadcasters per month, and clipping is enabled by default for almost all of them. The exceptions are channels where the streamer has manually disabled clipping in Creator Dashboard settings, sub-only streams when you aren’t subscribed, and offline channels with no available VOD. For full context on the platform, see Wikipedia’s Twitch entry.
VODs follow a separate clock. Twitch recommends storing broadcasts as VODs to make later clipping easier. Standard accounts keep VODs for 14 days; partners, affiliates, and Turbo users get 60 days.
#Can You Edit a Twitch Clip After Publishing?
Only the title. Twitch’s built-in editor lets you rename a clip from Creator Dashboard, but it won’t let you re-trim the start and end after Publish. To shorten the clip further, add subtitles, drop in an overlay, or burn in a watermark, you need an external editor.
Kapwing is a free browser-based option that pulls Twitch clip URLs directly:
- Paste the clip URL into the Studio canvas.
- Trim, resize (9 for Reels and Shorts, 16 for YouTube), and crop.
- Use Auto-Generate to add subtitles in seconds, then proofread.
- Export as MP4 and re-upload anywhere.
CapCut on mobile and DaVinci Resolve on desktop are solid free alternatives. If you only need the raw MP4 first, the guide on downloading Twitch clips walks through every method, from the Creator Dashboard download button to third-party tools.
#How to Manage, Share, and Delete Your Twitch Clips
Every clip you’ve ever created lives in one place: Creator Dashboard then Content then Clips. Twitch’s clips manager states that clips can be sorted by views, creator, date, or category. Moderators with the Edit Clip permission can also delete clips made by anyone on the channel.
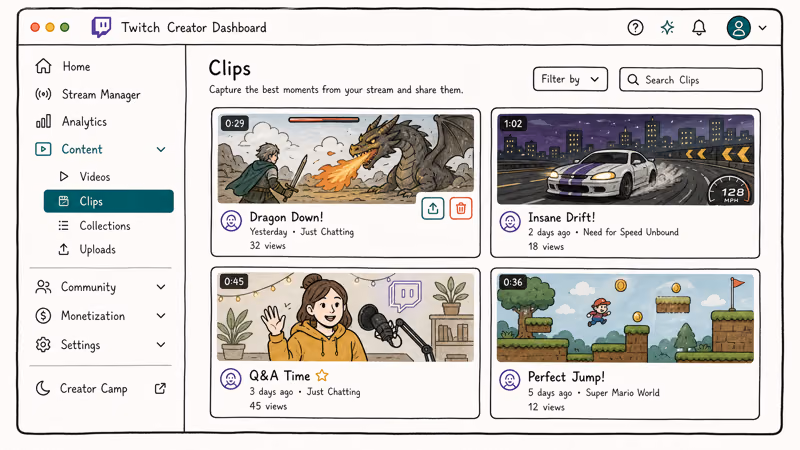
#View your clip library
- Click your profile icon in the top-right of any Twitch page.
- Pick Creator Dashboard from the dropdown.
- In the left sidebar, expand Content and click Clips.
- Toggle between Clips of My Channel and Clips I’ve Made to filter by creator.
#Share a clip
- Open the clip’s page or hover over its thumbnail in the Clips Manager.
- Copy the URL with the Share icon, or use the one-tap buttons for X, Facebook, and Reddit.
- To send the clip privately, paste the URL into chat or into a Twitch whisper.
#Delete a clip
- From Creator Dashboard, go to Content then Clips.
- Hover over the clip and click the trash icon at the top-right of the thumbnail.
- Confirm Delete Selected. Twitch removes the clip and the URL stops working within a minute.
If you ever need to pull a clip plus the surrounding chat for evidence or a highlight reel, the walkthrough on checking Twitch chat logs covers the archival tools that grab chat history alongside clips. Streamers turning a viral clip into a recurring brand should also browse the Twitch overlay makers roundup for templates that match the clip’s vibe.
#Bottom Line
Use the Alt + X shortcut on desktop for almost every clip; it’s the shortest path from “moment” to “shareable URL,” and the trim control beats the mobile auto-grab. Drop to the mobile Create Clip flow on phones, and lean on the Xbox controller capture for console gameplay. Run clips through Kapwing or CapCut before uploading to YouTube Shorts or TikTok. If lag is killing your clip moments mid-stream, the Twitch lagging fixes handle the playback side.
#Frequently Asked Questions
How long can a Twitch clip be?
A Twitch clip runs from 5 seconds at the shortest to 60 seconds at the longest. The Twitch help center confirms that there’s no way to extend that limit even for partners or affiliates.
Can you clip a Twitch stream without an account?
No. You need to be logged into a Twitch account to use the Clip button or the Alt + X shortcut. Watching and sharing clips works fine without an account: anyone with the clip’s URL can play it.
Why can’t I clip on Twitch?
A few things can block the Clip button. The streamer may have disabled clipping in their channel settings, or you’re trying to clip a sub-only stream without a sub. Browser extensions that block JavaScript on Twitch can also hide the Clip icon entirely. Disable any extensions, refresh, and try again.
Do clips expire on Twitch?
Clips don’t expire on their own. Twitch recommends keeping a local backup if a clip is important, because the streamer or a moderator can delete it at any time and the URL will stop working.
Can streamers see who clipped them?
Yes. In the Clips Manager under Creator Dashboard, the streamer sees the username of whoever created each clip. They can sort by creator, filter to specific users, and delete clips from accounts they’ve banned.
How do you clip a past stream on Twitch?
You can clip a VOD the same way you clip a live stream, as long as the streamer enabled VOD storage and the broadcast is still within the storage window. Twitch stores VODs for 14 days on standard accounts and 60 days for partners, affiliates, and Turbo subscribers. Open the VOD from the streamer’s channel, scrub to the moment you want, then press Alt + X. The Clip editor opens just like it does on a live stream.
What’s the keyboard shortcut to clip on Twitch?
Alt + X on Windows and CMD + X on macOS. The shortcut only fires when the chat input is unfocused, so click the video player first if nothing happens.
Fortnite Stuck on the Loading Screen? Fix It in 2026
Fortnite stuck on the loading screen? Check server status, fix the Windows N Media Pack and DirectX 11 on PC, clear the console cache, and verify files.
Minecraft Keeps Crashing? Java and Bedrock Fixes (2026)
Minecraft keeps crashing on startup or mid-game? Update your GPU driver, remove mods on Java, and reinstall Gaming Services on Bedrock. Fixes for both.
Pokemon GO Not Loading? Fix the Loading Screen 2026
Pokemon GO not loading or stuck on the Pokeball? Check server status, fix automatic date and time, grant location permission, clear the cache, and update.
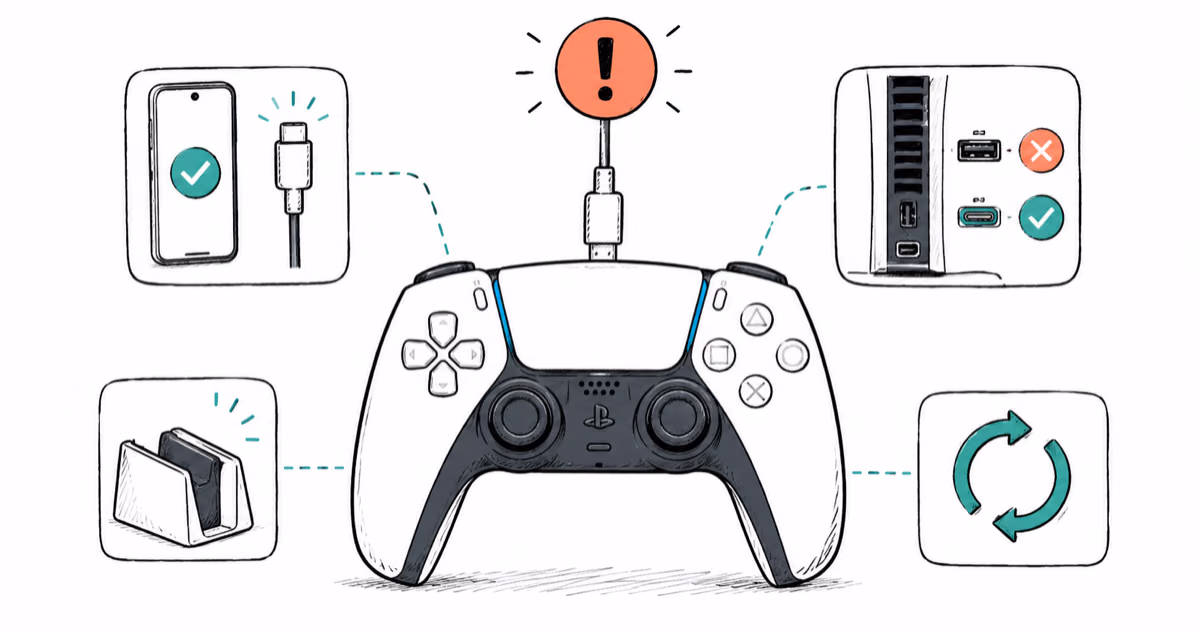
PS5 Controller Not Charging? 9 Fixes That Work (2026)
DualSense not charging? Swap the cable, use a rear port in Rest Mode, clean the USB-C port, and check power settings. 9 fixes for a dead PS5 controller.