Converting RAW to JPEG: Methods, Tools, and Best Practices
Learn the best methods, tools, and practices for converting RAW photos to JPEG format, including online converters and desktop software options.
Quick AnswerTo convert RAW to JPEG, use Adobe Lightroom (File > Export > JPEG), free online tools like ILoveIMG or CloudConvert, or your camera's built-in RAW processing. Lightroom and Photoshop offer the most control over quality and settings during conversion.
Converting RAW to JPEG is a daily task for photographers who shoot in RAW but need shareable files. The method that works best depends on how much control you need over the final output, with Lightroom, Preview, and free online tools each suited to different workflows.
- Adobe Lightroom’s Export dialog gives the most control over JPEG quality, color profiles, and batch size when converting large libraries.
- Free online tools like CloudConvert and iLoveIMG handle RAW-to-JPEG conversion without software installation, though file sizes above 100 MB may hit limits.
- Your camera’s built-in RAW processing produces a JPEG that matches the in-camera picture profile, useful for quick, predictable results.
- Setting JPEG quality to 85-90% retains visually lossless detail while cutting file size by roughly 60% compared to maximum quality.
- macOS Preview converts RAW to JPEG in 3 clicks with no software required, making it the fastest option for one-off conversions on a Mac.
#What’s the Difference Between RAW and JPEG?
RAW files contain every bit of data your camera sensor captured. No in-camera processing happens: white balance, sharpening, and color profiles remain fully editable after the fact. The tradeoff is file size: a RAW file from a 24 MP camera typically runs 25-30 MB, compared to 5-8 MB for the same shot as JPEG.
JPEG applies lossy compression and bakes in those processing decisions at capture. A RAW file shot in a flat log profile and processed in Lightroom can recover several stops of shadow detail that would be irretrievably clipped in the same JPEG. That’s the core reason photographers shoot RAW: flexibility in post.
The downside is compatibility. Most social platforms, email clients, and photo printing services require JPEG. RAW files also take 4-5x longer to open in standard viewers.
#Converting RAW to JPEG in Adobe Lightroom
Lightroom’s Export dialog is the most feature-rich conversion path. Batch exports of a few hundred CR3 files complete in minutes on a modern machine with GPU acceleration enabled.
- Select the photos you want to export in the Library module. Use Ctrl/Cmd+A to select all.
- Go to
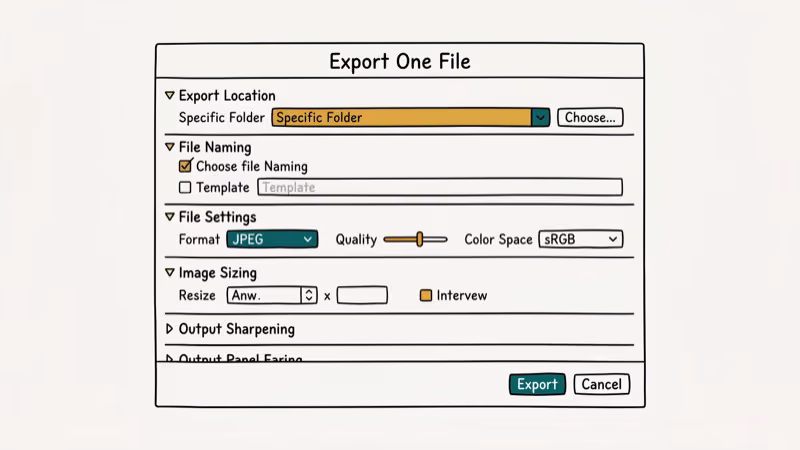
File>Export(or press Shift+Ctrl/Cmd+E). - Under File Settings, set Format to JPEG and adjust Quality. We recommend 85-90 for most uses.
- Set Color Space to sRGB for web or AdobeRGB for print.
- Choose your output folder and click Export.
According to Adobe’s Lightroom documentation, export presets let you save these settings and apply them to future batches in 1 click, which is a significant time saver for recurring workflows.
#Free Online Tools for RAW to JPEG Conversion
Yes. Online converters handle the conversion in your browser without any software.

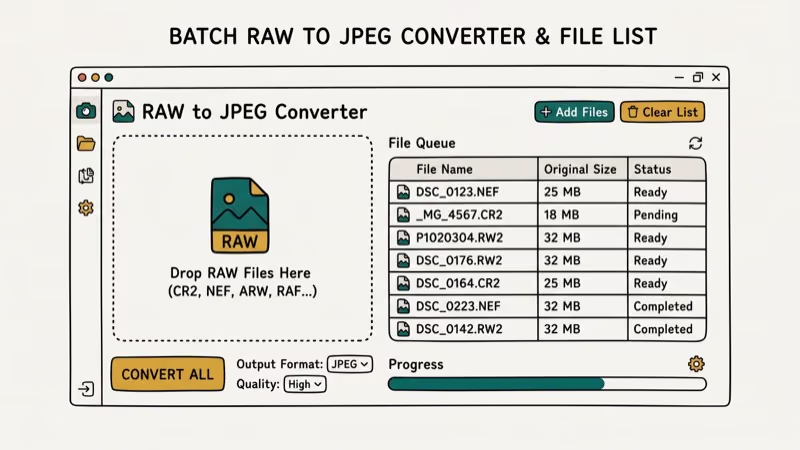
CloudConvert supports over 200 camera RAW formats including CR2, CR3, NEF, ARW, and DNG. A typical CR3 file converts to JPEG in seconds. The free tier allows 25 conversions per day.
iLoveIMG supports files up to 100 MB.
The tradeoff with online tools is quality control. PCMag’s photo editing roundup confirms that browser-based converters apply default sharpening and color profiles that you can’t adjust, which matters for professional work.
For related conversion tasks, see our guides on converting video to MP4 and how to compress MP4.
If you also work with iPhone photos, our walkthrough on how to convert HEIC to JPEG covers the same export logic for Apple’s default format.
#How Do You Convert RAW to JPEG on Mac Without Lightroom?
macOS Preview handles RAW conversion natively for most Canon, Nikon, Sony, and Fuji formats.
- Open the RAW file in Preview.
- Go to
File>Export. - Set Format to JPEG and adjust the Quality slider.
- Click Save.
Preview processes each file quickly on current macOS versions. The JPEG output matches the camera’s standard picture profile, which is predictable but gives you no latitude to adjust highlights or shadows.
For batch conversions on Mac, Automator can apply this Export action to an entire folder. According to Apple’s Automator documentation, you can create a workflow that processes every RAW file in a watched folder automatically, with no repeated manual steps.
#JPEG Quality Settings: Which One to Use
JPEG quality is a 0-100 scale (or 1-12 in Photoshop). Higher values keep more data but produce larger files.
| Use case | Recommended quality | Typical file size (24 MP) |
|---|---|---|
| Social media | 70-80% | 2-4 MB |
| Email sharing | 80-85% | 4-6 MB |
| Print (local shop) | 90-95% | 8-12 MB |
| Archive/backup | 95-100% | 12-20 MB |
The visual difference between 85% and 100% quality JPEG is usually indistinguishable at 100% zoom on a high-resolution display, while the file size difference is large. For most photographers, 85-90% is the sweet spot.
#Quality Loss When Converting RAW to JPEG
Yes, but how much depends on settings and the content.
JPEG uses lossy compression that discards some pixel data to reduce file size. The loss is most visible in areas with fine detail (grass, hair, fabric texture) and in high-contrast edges.
Gradient areas like clear sky show banding more readily in low-quality JPEGs. With landscape photos, lower quality settings tend to introduce visible sky banding, especially in files that needed aggressive exposure correction during RAW processing.
The key rule: convert from a fully edited RAW file, not from a flat or log profile. Every recompression cycle in JPEG introduces additional loss. If you’re working with Lightroom, also check our guide on how to add a watermark in Lightroom and how to blur background in Lightroom.
#Bottom Line
For most photographers, the right tool depends on volume and control. Use Lightroom or Capture One for professional batch work where color accuracy matters. Use Mac’s Preview or Windows Photos for quick one-off conversions. Use CloudConvert when you need to convert on a device without photo editing software installed.
Set quality to 85-90% for sharing and 95% for print. Keep your original RAW files: you can always re-export with different settings later, but you can’t recover RAW data from a JPEG.
#Frequently Asked Questions
Does converting RAW to JPEG reduce photo quality?
Yes, JPEG applies lossy compression that discards some image data. At quality settings of 85% or higher, the loss is visually imperceptible for most subjects. Gradients and fine textures show artifacts sooner at lower quality settings.
What’s the best free software for RAW to JPEG conversion?
For Mac, Preview handles it natively. For Windows, RawTherapee is free and offers professional-grade control including exposure adjustment, color grading, and noise reduction before export. Both are zero cost.
Can I convert RAW to JPEG on my phone?
Yes. Adobe Lightroom Mobile converts RAW files on both iOS and Android, including files shot with dedicated cameras and transferred via SD card reader. Snapseed handles RAW imports for free.
Why are my converted JPEGs darker than the RAW preview in camera?
Your camera’s LCD shows a JPEG preview rendered with the camera’s picture profile. When you open the RAW file in editing software, it shows the flat, unprocessed data, which looks darker and less contrasty. Apply your camera’s default picture profile in your editing software to match the in-camera look.
How do I batch convert RAW to JPEG in Lightroom?
Select all photos in Library view, go to File > Export, configure your JPEG settings, and click Export. Lightroom processes all selected files with those settings. Save the configuration as a preset for future use.
What’s the difference between exporting at sRGB vs. AdobeRGB?
sRGB covers the color range most monitors and web browsers display. AdobeRGB has a wider gamut suited for print workflows where the printer can reproduce those extended colors. For online sharing, always export as sRGB. AdobeRGB images look desaturated in browsers that don’t support color management.
Can I convert RAW to JPEG without losing the EXIF data?
Yes. Both Lightroom and Preview preserve EXIF metadata including camera model, shutter speed, aperture, ISO, and GPS coordinates during JPEG export. Some online converters strip EXIF by default, so check the settings before exporting sensitive location data.
How long does it take to convert 1000 RAW files to JPEG?
On a modern machine with GPU acceleration, 1000 24 MP CR3 files with standard export settings finish in well under an hour. An older Intel system takes considerably longer for the same batch. GPU acceleration in Lightroom Classic significantly cuts export time on newer machines.

Apps Crashing After iOS 27 Update? Fix Order (2026)
Apps crashing after the iOS 27 update? Update the app in the App Store first, then offload and reinstall to clear stale cache, then restart. The fix order.

Do AI Translation Earbuds Work Offline? What to Know
Do AI translation earbuds work offline? A few do with downloaded language packs, but most need the cloud. Here's what works offline and what you give up.

How to Set Up Translation Earbuds (Pairing and Modes)
How to set up translation earbuds: charge, install the app, pair over Bluetooth, pick two languages, and choose a mode. A step-by-step first-use guide.

Translation Earbuds Not Translating? How to Fix Them
Translation earbuds not translating? Usually it's the app, the internet, or the language settings. Here's how to fix pairing, sound, and lag fast.