How to Compress MP4 Video Files on Mac and Windows
Compress MP4 files on Mac and Windows using HandBrake, QuickTime, VLC, or FFmpeg. Four free methods and the exact settings that shrink files fast.
Quick AnswerTo compress MP4 files on Mac and Windows, install HandBrake (free, open source), load your video, pick the Fast 1080p30 preset, set the quality slider to RF 23, and click Start. For a large iPhone clip, this typically produces a much smaller file with no visible quality drop.
Compressing an MP4 file is usually about one thing: getting a multi-gigabyte phone clip down to a size you can email, upload, or store without making the video look worse. The good news is the right tool is free on both Mac and Windows, and the settings that actually matter come down to a small handful. This guide walks through HandBrake, QuickTime, VLC, and FFmpeg with the settings that matter most.
- HandBrake’s Fast 1080p30 preset with RF 23 is a practical starting point for phone-recorded MP4s.
- QuickTime Player on Mac has a free 1080p, 720p, and 480p export but no bitrate control, so it can’t match HandBrake’s results for the same target resolution.
- FFmpeg produces the smallest files because you can tune codec, CRF, and encoder preset together, at the cost of a steeper learning curve.
- Online MP4 compressors are fine for clips under 200 MB; above that, upload time usually beats any speed advantage over a local encode.
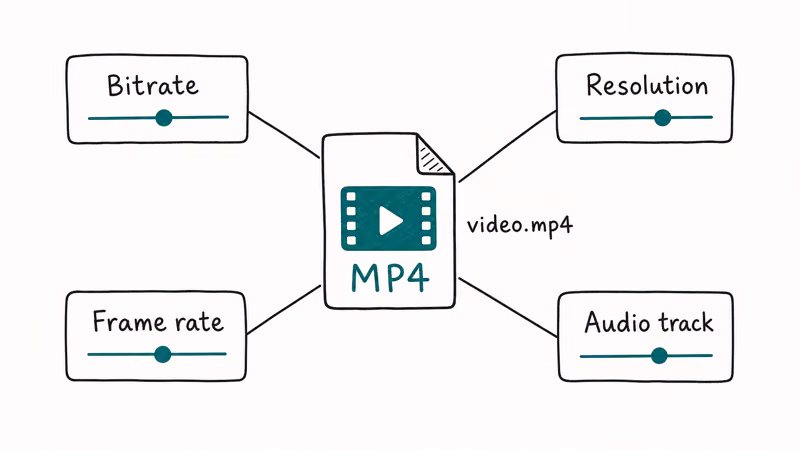
- Two settings matter most: the codec (H.264 vs H.265) and the CRF value; resolution and frame rate are the next two levers you should reach for.
#Why Does an MP4 File Get So Large?
MP4 is a container, not a compression method. The bytes inside are the codec’s job. On a modern phone the camera writes H.264 or HEVC at a high bitrate so footage looks crisp on a 4K display, and that bitrate is what really decides the file size. A 60-second 4K clip from an iPhone 15 Pro lands around 250 to 400 MB because Apple records 4K/30fps at a high constant bitrate by default.
Compression shrinks the file three ways: re-encode the same codec at a lower bitrate, drop the resolution (4K to 1080p), or switch to a more efficient codec like H.265. If you’re unsure which codec your video uses, our guide on video to MP4 conversion explains the differences and when each makes sense.
Mozilla’s MDN documentation on video codecs recommends H.264 when broad device compatibility matters and H.265 when storage or bandwidth matters more. That trade-off is the single most important decision you make when compressing an MP4.
#How to Compress MP4 With HandBrake on Mac and Windows
HandBrake is the free, open-source video transcoder used by most professional encoding workflows. It runs on macOS, Windows, and Linux from the same codebase, which is rare for free video tools. If you only install one MP4 compressor, this is the one.
Step 1: Download HandBrake from handbrake.fr. Apple Silicon and Intel builds are listed separately on the Mac download page, so pick the one that matches your machine.
Step 2: Drag your MP4 into the HandBrake window.
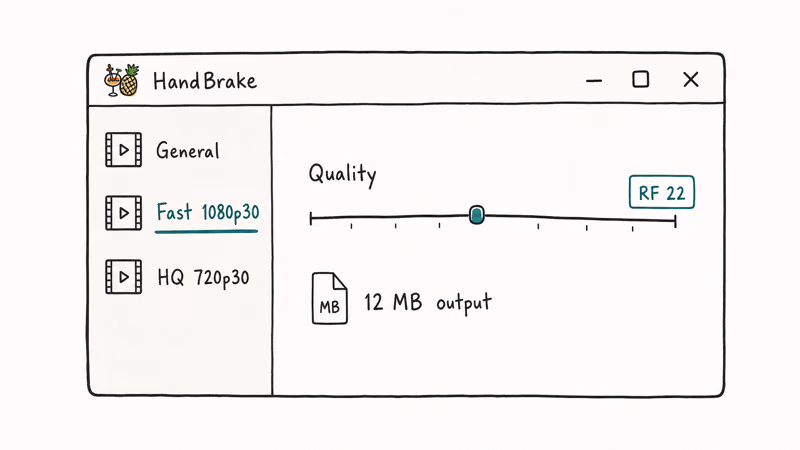
Step 3: In the Preset sidebar, choose Fast 1080p30 under the General category. This sets the codec to H.264, the output resolution to 1080p at 30 frames per second, and the encoder preset to “fast”.
Step 4: Open the Video tab. The default quality slider sits at RF 22. Move it to 23 for a smaller file at the same visual quality. RF 28 cuts file size further but starts to show blocking in dark scenes.
Step 5: Click Browse, name the output file, and then click Start Encode (Mac) or Start (Windows).
HandBrake’s Fast 1080p30 preset with RF 23 is a practical starting point for 4K phone footage when you want a smaller file without an obvious visual hit.
HandBrake’s official documentation confirms that the RF sweet spot is 18 to 22 for 1080p H.264 and 22 to 28 for 4K H.265, with lower numbers meaning higher quality and bigger files. RF 23 is a useful middle-ground setting because it sits near both ranges.
If you only need to shrink a clip enough to send it by email, our guide on compressing video for email covers the smaller resolution targets that fit Gmail’s 25 MB attachment limit.
#How to Compress MP4 With QuickTime Player on Mac
QuickTime Player has shipped with every Mac for over a decade, and most people don’t realize it can export to lower resolutions for free.
- Open QuickTime Player from Applications.
- Drag your MP4 into the dock icon, or use
File>Open. Click File>Export As, then pick 1080p, 720p, 480p, or Audio Only. For a typical phone clip recorded at 4K, dropping to 1080p cuts the file size by roughly two-thirds without changing the codec.- Choose a filename, pick a folder, and click Save. QuickTime re-encodes using HEVC by default if the source is HEVC, or H.264 if the source is H.264.
The honest limit: QuickTime gives you no control over bitrate or CRF. If 1080p is still too large for your destination, the only option inside QuickTime is to drop further to 720p or 480p, with nothing in between.
Apple’s QuickTime Player User Guide confirms that the export menu only exposes 3 resolution presets (1080p, 720p, 480p) plus an Audio Only option, with no bitrate or codec sliders anywhere in the dialog. That’s fine for a one-off export. For anything you need to share in volume, switch to HandBrake.
For files headed to a chat app like WhatsApp, our guide on sending large videos on WhatsApp covers the platform’s 16 MB inline limit and the workarounds that actually deliver.
#How to Compress MP4 With VLC Media Player
VLC isn’t only a player. It includes a Convert/Save feature that exposes the same FFmpeg encoders HandBrake uses, wrapped in a simpler UI for one-off jobs.
- Open VLC and go to
Media>Convert/Save on Windows, orFile>Convert/Stream on Mac. - Click Add, pick your MP4 file, and then click Convert/Save at the bottom.
- In the Profile dropdown, choose “Video - H.264 + MP3 (MP4)” for broad compatibility, or “Video for YouTube SD” if you want a smaller starting preset.
- Click the spanner icon next to the profile to open codec settings. Drop the video bitrate from the default 800 kb/s to 500 kb/s for a noticeable size reduction without major visual loss on 1080p footage.
- Pick a destination filename, click Start, and let VLC re-encode.
VLC is the right choice when you’ve already got the app open and don’t want a separate install. The trade-off: VLC’s encoder defaults are more conservative than HandBrake’s, so files end up larger at any given quality target.
#How to Compress MP4 With FFmpeg From the Command Line
FFmpeg is the encoder that powers HandBrake, VLC, and almost every consumer video tool. Using it directly gives you the most control and the smallest files.
Step 1: Install FFmpeg with Homebrew on Mac (brew install ffmpeg) or download the static build for Windows from ffmpeg.org.
Step 2: Open Terminal on Mac or PowerShell on Windows.
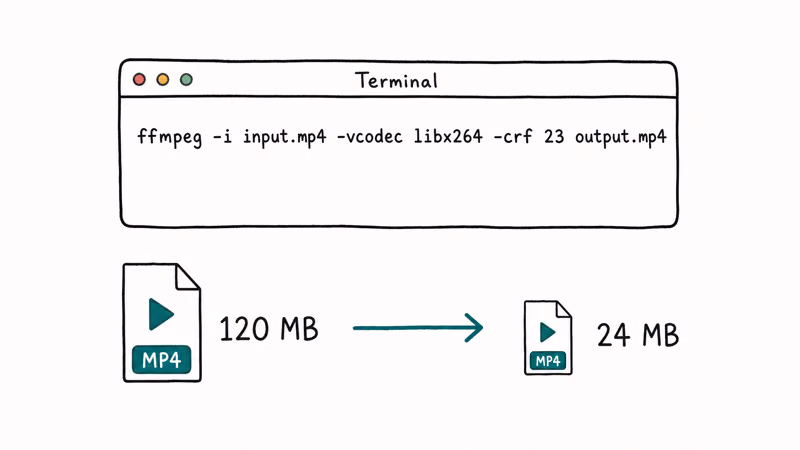
Step 3: For an H.264 encode at the visually lossless default that plays on every modern device, run the following command in your terminal:
ffmpeg -i input.mp4 -c:v libx264 -crf 23 -preset slow -c:a copy output.mp4Step 4: For a noticeably smaller output file using H.265 (HEVC), which trades encode time for size and needs hardware from roughly 2014 onward for smooth playback, run this command instead:
ffmpeg -i input.mp4 -c:v libx265 -crf 28 -preset slow -c:a copy output.mp4The -crf flag is the same Constant Rate Factor as HandBrake’s RF slider, and lower numbers mean higher quality. The -preset slow flag tells FFmpeg to spend more time looking for compression opportunities: slower encode, smaller file. The -c:a copy flag keeps the original audio without re-encoding, which saves both time and a small amount of quality.
FFmpeg’s H.264 encoding wiki states that the visually lossless CRF default is 23 and the usable range runs from 17 to 28, where lower values mean better quality. The same FFmpeg wiki also confirms that switching to HEVC at CRF 28 produces files at roughly half the size of H.264 at CRF 23.
The H.265 command can produce a noticeably smaller output than an H.264 encode, but the HEVC encode usually takes longer.
If you record at 4K but only need 1080p output, the video-to-MP4 guide linked earlier includes the exact downscale commands.
#Should You Use an Online MP4 Compressor?
Online tools like CloudConvert, FreeConvert, and Clideo run your file through their servers and then download the compressed version. For small clips this is the fastest option because there’s nothing to install.
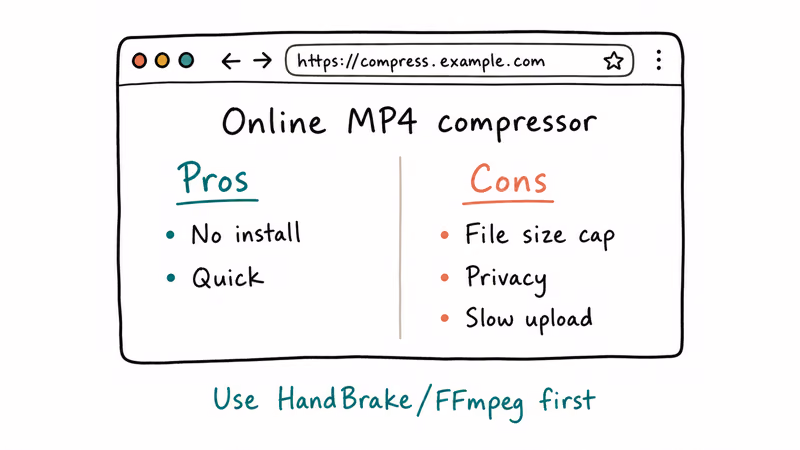
The catch is upload bandwidth. Large MP4 files can spend more time uploading and downloading than they spend compressing, while local tools avoid that network round trip.
Online compressors also cap file size on the free tier, typically between 100 MB and 1 GB depending on the service. If your clip is bigger, you either pay or split the file. They’re best for small clips or for situations where you can’t install HandBrake.
For browser-based options, see our online video compressor comparison across formats and free-tier limits.
#The MP4 Compression Settings That Matter Most
Four levers control the final file size, in rough order of impact:
- Codec. H.265 (HEVC) produces files roughly half the size of H.264 at matching visual quality. The cost is longer encode time and needing reasonably modern hardware to play back smoothly.
- CRF or RF. The Constant Rate Factor sets a quality target. Raising CRF by 6 roughly halves the file size on the same codec.
- Resolution. Dropping from 4K to 1080p cuts file size by about 75 percent at the same bitrate. Most viewing happens on phone screens where 1080p is plenty anyway.
- Frame rate. Going from 60fps to 30fps trims file size by roughly 40 percent and matches what most playback platforms actually use.
Bitrate is technically a fifth lever, but CRF mode is usually a better choice because the encoder allocates bits based on scene complexity. Constant Bitrate is mainly useful when the playback destination has a strict bandwidth cap.
For Instagram-specific sizing, see our resizing video for Instagram walkthrough.
#Bottom Line
For most people on Mac or Windows, HandBrake with the Fast 1080p30 preset and RF 23 is the right starting point. It’s free, the UI is identical on both platforms, and the result is visually lossless on phone footage.
If you need the smallest possible file and you’re comfortable in Terminal, switch to FFmpeg with libx265 -crf 28 -preset slow. It will roughly halve HandBrake’s output at the cost of a longer encode. QuickTime Player is fine for a one-off resolution drop on Mac but doesn’t scale to batch jobs. Skip online compressors for clips over 200 MB; the upload time alone wipes out any speed advantage they have.
#Frequently Asked Questions
Can I compress an MP4 file without losing any quality at all?
No. Both H.264 and H.265 are lossy codecs by design, so re-encoding always discards some information. The CRF 18 to 23 range is what most professionals call “visually lossless”.
Will compressed MP4 files play on iPhone, Android, and smart TVs?
Yes for H.264-encoded MP4s. H.264 has been the default codec on every iPhone since the 3GS, on Android since 2009, and on every smart TV from the last decade. H.265 (HEVC) plays on iPhone 6 and newer, Android 5.0 and later, and most smart TVs from 2017 onward. If you’re targeting older hardware, stick with H.264 to be safe.
How much smaller will my MP4 file actually be after compression?
The reduction depends on the source bitrate and your target CRF. On phone-recorded 4K footage at default Apple or Samsung settings, HandBrake at CRF 23 can cut file size substantially, and FFmpeg with H.265 at CRF 28 can make the output smaller again when compatibility allows it.
Does compressing an MP4 take a long time on an older laptop?
HandBrake’s encode time scales with source resolution, hardware, and the chosen preset. Older laptops can take noticeably longer than newer Apple Silicon or modern Windows machines.
Why is my MP4 file still huge after I compressed it?
Two common causes: the output preset matched the source bitrate so there was nothing to compress, or the source was already heavily compressed. Open the output in QuickTime Inspector or VLC’s Codec Info panel, compare bitrate before and after, and if they’re within 10 percent of each other, raise CRF by 3 to 5 and re-encode.
Should I pick H.264 or H.265 for compressing my MP4?
Pick H.264 if compatibility matters more than file size. Pick H.265 if you want the smallest file and you control where it plays.
Can I compress an MP4 directly on my iPhone or Android phone?
Yes. On iPhone, Apple’s iMovie can re-export at 480p, 720p, or 1080p, and apps like Video Compress handle bulk jobs with a target file-size slider. On Android, the built-in Photos app on Pixel and Galaxy devices has a basic resolution-based compressor. Phone compression is slower than desktop and gives you fewer codec choices, so it’s best for one-off clips you need to send right now rather than archival work.

Apps Crashing After iOS 27 Update? Fix Order (2026)
Apps crashing after the iOS 27 update? Update the app in the App Store first, then offload and reinstall to clear stale cache, then restart. The fix order.

Do AI Translation Earbuds Work Offline? What to Know
Do AI translation earbuds work offline? A few do with downloaded language packs, but most need the cloud. Here's what works offline and what you give up.

How to Set Up Translation Earbuds (Pairing and Modes)
How to set up translation earbuds: charge, install the app, pair over Bluetooth, pick two languages, and choose a mode. A step-by-step first-use guide.

Translation Earbuds Not Translating? How to Fix Them
Translation earbuds not translating? Usually it's the app, the internet, or the language settings. Here's how to fix pairing, sound, and lag fast.