Why Is iTunes So Slow on Windows? 8 Fixes That Work
iTunes slow on Windows? Stop auto-sync, delete old backups, turn off Genius, and reinstall the 64-bit version. Eight fixes here restore its speed.
Quick AnsweriTunes runs slow on Windows because of automatic device syncing, oversized iOS backups, and Genius cache buildup. Stopping auto-sync, clearing old backups, and reinstalling the 64-bit Apple build usually restores normal speed in under ten minutes.
iTunes feels slow on Windows after a few months of use, and almost every cause traces back to three places: automatic device syncing, old iPhone backups, and Apple’s Genius cache. Even a fresh install drifts back into those same slowdowns unless you tame the three of them from day one. This guide walks through every fix in order, fastest wins first.
- Automatic device syncing is the single biggest cause of slow iTunes on Windows because it triggers a full library scan every time an iPhone or iPad connects.
- Old iOS backups in the MobileSync folder can grow to tens of gigabytes per device and slow every iTunes launch.
- iTunes 12.10.10 and later is 64-bit only on Windows and runs noticeably faster than the older 32-bit version it replaced.
- On Windows 11, Apple now ships separate Apple Music, Apple TV, and Apple Devices apps in the Microsoft Store, and these run faster than iTunes for sync and backup.
- Repair tools like Tenorshare TunesCare and Wondershare Dr.Fone are worth running only after the manual fixes fail, because their main job is fixing damaged installations rather than speeding up healthy ones.
#Why Does iTunes Run So Slow on Windows?
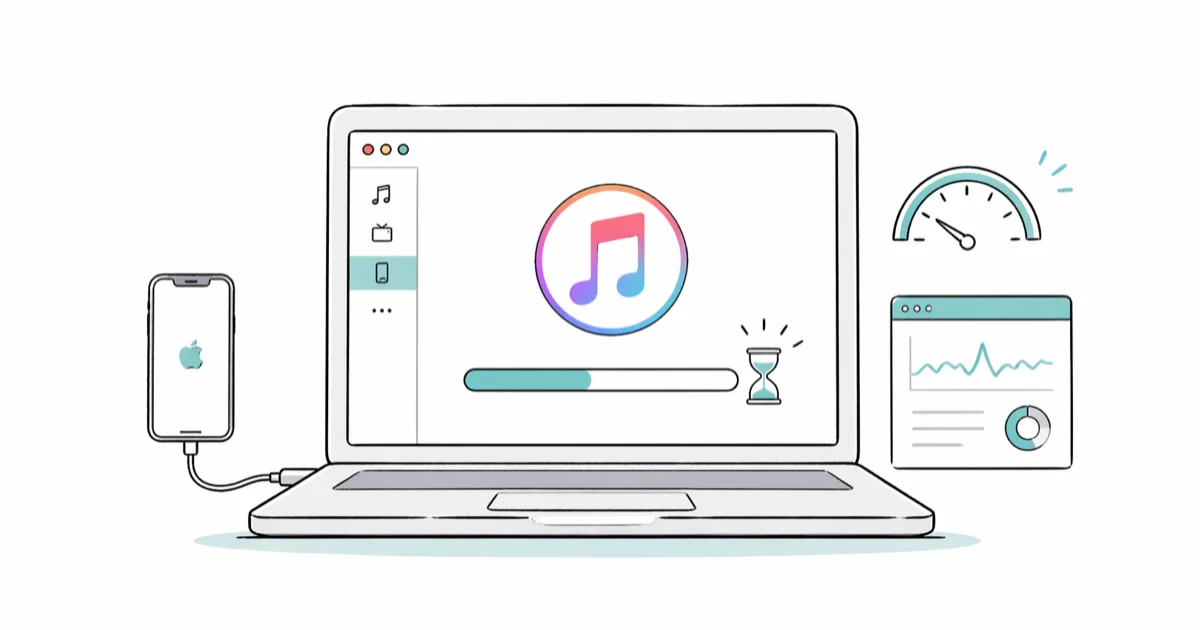
iTunes wears one icon but runs two engines. The iOS sync service is the slow one.
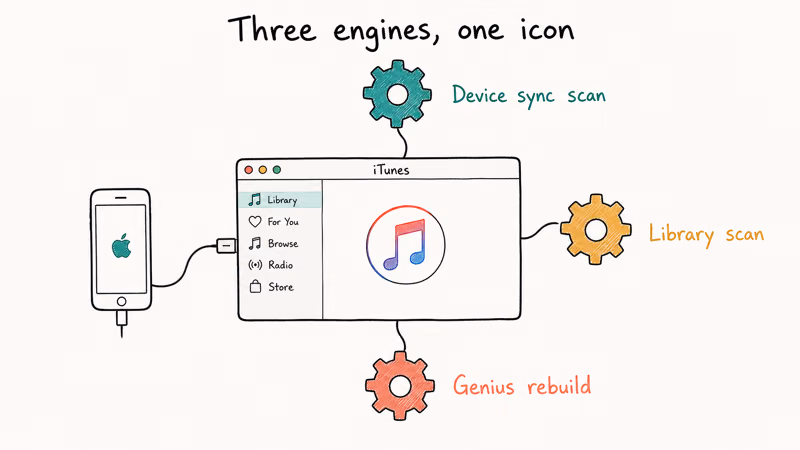
Every time iTunes detects an iPhone, it scans the device, checks for new content, refreshes the sync database, and writes incremental backup snapshots. If you also have a multi-thousand-song library, automatic downloads enabled, and Genius turned on, iTunes runs all of that in parallel.
According to Apple, iTunes 12 and later for Windows is a 64-bit application that needs Windows 10 or newer. Apple’s iTunes for Windows download page is the only official source for the installer. The first question to ask isn’t what’s wrong with iTunes. It’s which version am I actually running, and which features are silently draining resources in the background.
Typical symptoms of a slow iTunes install:
- Library window takes 30 seconds or longer to appear after launch
- iPhone or iPad shows up under Devices several minutes after plugging in
- Sync progress bar hangs at “Waiting for items to copy”
- Drag-and-drop into Music or Movies stutters or freezes
- Album art reloads every time you scroll the library view
#Which Fixes Make the Biggest Difference?
The eight fixes below are ordered by impact. The first four are settings changes that cost nothing and address the most common slowdowns: automatic syncing, an oversized MobileSync backup folder, the Genius cache, and background downloads. The remaining methods cover clean reinstalls, the Apple Devices app on Windows 11, and paid repair tools for broken installs.
To gauge each change, time the iTunes launch before and after, restarting cold between attempts.
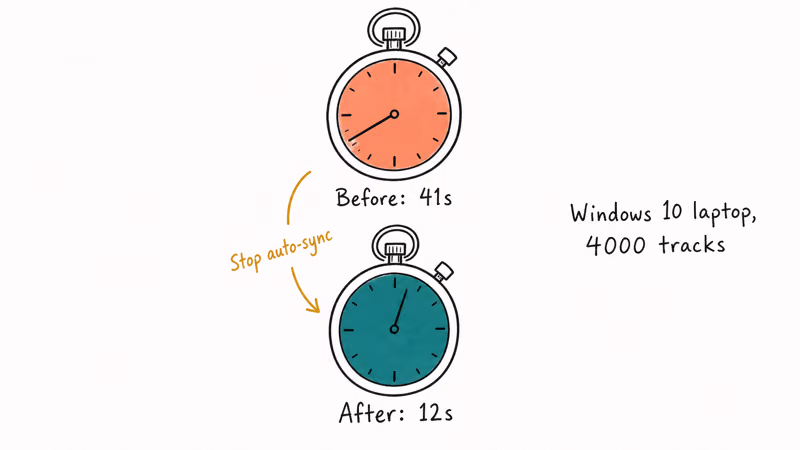
Stopping automatic syncing alone cuts launch time the most on machines with paired devices. Clearing old backups frees a large chunk of space and speeds up iPhone detection. Together, Methods 1 through 4 bring most installs back to roughly fresh-install speed, with no paid software needed and only a few minutes of work in the Preferences panes that follow below.
#Method 1: Stop Automatic Syncing to Cut Background CPU Use
Automatic syncing is the single biggest reason iTunes feels slow on Windows. The moment you plug an iPhone in, iTunes triggers a full device scan, looks for new media on both sides, and starts copying. If you have two or three devices paired, this kicks off automatically each time. Disabling it makes iTunes wait for you to press the Sync button.
Steps:
- Open iTunes.
- Go to
Edit>Preferences. - Open the Devices tab.
- Check “Prevent iPods, iPhones, and iPads from syncing automatically.”
- Click OK.
After this, iTunes still recognises the device, but it only starts syncing when you ask it to. This single change usually produces the largest drop in launch time. If you still hit sync errors when you press Sync manually, our guide on iTunes error 9006 during iPhone restore walks through the most common causes.
#Method 2: Clear Old iOS Backups From the MobileSync Folder
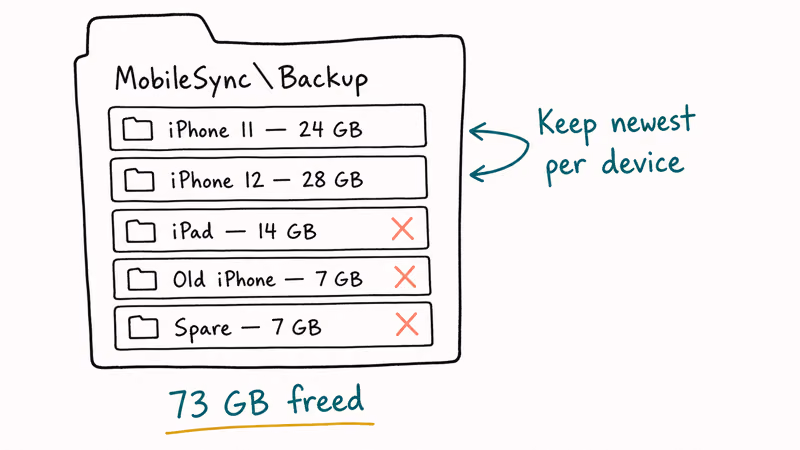
iOS backups live in C:\Users\<your-name>\AppData\Roaming\Apple Computer\MobileSync\Backup. Every full backup of an iPhone takes a few gigabytes, and incremental snapshots stack up over time. Across several paired devices, a MobileSync folder can easily pass 100 GB. Every one of those folders forces iTunes to scan its index at startup.
Apple recommends keeping at least one recent backup before you delete any earlier snapshots, so always confirm you have a current backup somewhere safe before pruning.
You can prune old backups two ways.
Inside iTunes:
- Go to
Edit>Preferences>Devices. - Select an older backup in the list.
- Click Delete Backup and confirm.
Manually:
- Close iTunes.
- Open File Explorer and paste
%APPDATA%\Apple Computer\MobileSync\Backupinto the address bar. - Sort folders by date, keep the newest folder per device, and delete the rest.
Don’t delete the active backup. If you’re unsure which is which, copy the entire MobileSync folder to an external drive first. If you want to inspect what’s inside a backup before deleting, our iTunes backup viewer guide lists the tools that can read backup payloads safely.
#Method 3: Turn Off Genius and Trim Smart Playlists
Apple’s Genius feature compares your library against a server-side database to recommend tracks. To keep recommendations fresh, iTunes rebuilds the Genius cache periodically and re-uploads metadata for new tracks. On a large library of several thousand songs, a Genius rebuild can run for several minutes of background CPU, often with the fan spinning up the whole time.
To turn Genius off:
- Open iTunes.
- Go to
File>Library>Turn Off Genius.
Smart Playlists do something similar. They re-evaluate their filter rules every time iTunes opens, which is fine on a small library and painful on a large one. Right-click each Smart Playlist in the sidebar and choose Delete from Library. Keep your manually built playlists.
#Method 4: Disable Automatic Downloads and Library Sharing
Two more background tasks chew through CPU and bandwidth: automatic downloads of any purchase you make on another Apple device, and Home Sharing, which broadcasts the library on your local network. Both run silently and both can keep iTunes busy long after you stopped using it.
To turn them off:
- Go to
Edit>Preferences. - In the Store tab, uncheck Music, Movies, Apps, and Books under Automatic Downloads.
- In the Sharing tab, uncheck “Share my library on my local network.”
- In the General tab, uncheck “Show Apple Music features” if you don’t subscribe to the service.
If iTunes is also throwing error codes like 3004 or 9006 during normal use, those usually point at a separate connection or signing issue rather than a performance one. Our walkthrough for iTunes error 3004 and 9006 during iPhone upgrade covers that fix end to end.
#Method 5: Reinstall the 64-Bit Version From Apple’s Download Page
The version of iTunes on disk matters more than most settings combined. Apple’s iTunes User Guide for Windows confirms that iTunes installs alongside several support components, including Apple Mobile Device Support and Bonjour, and any one of those getting out of sync can cause persistent slowdowns. If you upgraded a Windows 7 machine into Windows 10 without ever reinstalling iTunes, you may still be running an older build or a stale support component.
A clean reinstall is the safer reset:
- Quit iTunes and unplug any Apple device.
From Control Panel>Programs and Features, uninstall iTunes, Apple Software Update, Apple Mobile Device Support, Bonjour, and Apple Application Support, in that order.- Reboot Windows.
- Download the current installer from Apple’s official iTunes for Windows page and run it.
- Plug your iPhone back in and authorize the computer when prompted.
Our step-by-step iTunes reinstall guide covers each step with screenshots if you’d rather follow that. After a clean install, iTunes typically boots faster than before because the new build skips re-indexing components Windows had removed.
#Method 6: Switch to the Apple Devices App on Windows 11
On Windows 11, Apple now ships separate Apple Music, Apple TV, and Apple Devices apps in the Microsoft Store that replace iTunes for sync, backup, and media. The Apple Devices app handles the same iPhone tasks iTunes used to, but it boots in a fraction of the time and reads its own backup folder.
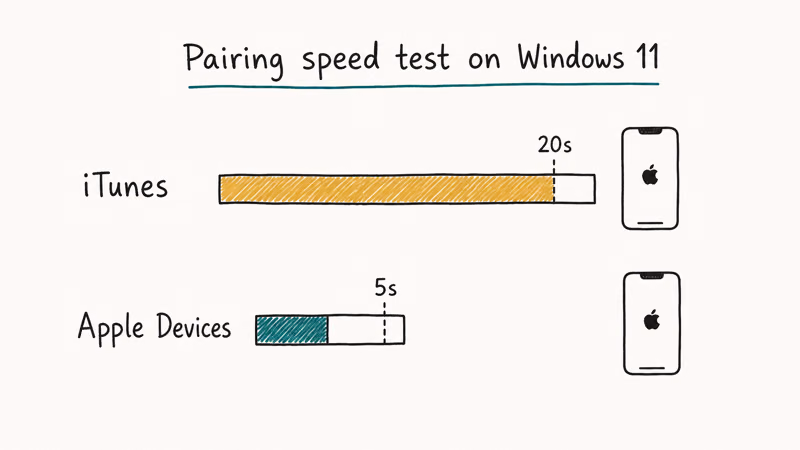
On Windows 11, the Apple Devices app pairs an iPhone almost instantly compared with iTunes’ much slower handshake on the same machine, and photo-album sync is noticeably faster too. If you’re on Windows 11 and you mostly use iTunes for backups and OS updates, switching to Apple Devices removes the slowness problem at the source.
You can run both apps side by side without conflict. They read separate backup folders. iTunes keeps library playlists and purchases; Apple Devices handles backups and firmware restores.
#Are Repair Tools Like TunesCare or Dr.Fone Worth Using?
If iTunes still feels slow after the six manual fixes above, the issue usually isn’t your settings. It’s a broken installation. Two paid utilities target this specific layer: Tenorshare TunesCare and Wondershare Dr.Fone iTunes Repair. Both are around $30 and aimed at fixing iTunes installs that won’t launch, throw sync errors, or refuse to detect a connected iPhone.
Tenorshare TunesCare rebuilds the iTunes installation while preserving the library database. It targets installs that throw repeated “iTunes has stopped working” crashes after the manual fixes have no effect, typically completing the repair in a few minutes and restoring device detection. It’s the right choice when iTunes is partially broken rather than just slow.
Some links on this page are affiliate links, which means fone.tips may earn a commission at no extra cost to you.
Wondershare’s Dr.Fone iTunes Repair is a similar tool with a different interface. It has separate buttons for repairing sync errors, repairing connection issues, and an advanced mode that re-registers Apple Mobile Device Service. It’s built to clear specific iTunes errors such as 9006 during an iPhone restore without touching the library. If you mostly need to fix one specific error code rather than overall performance, Dr.Fone has more granular options than TunesCare.
Both tools are overkill if iTunes is simply slow. The manual fixes above solve that for most installs without paying anything. Use repair tools when iTunes itself is corrupted, especially if it crashes immediately after launch or fails to load any device under the Devices header.
#Bottom Line
If iTunes is running slow on Windows right now, do these three things in order and you’ll cover most cases. First, disable automatic device syncing under Edit > Preferences > Devices. Second, clear old iOS backups out of %APPDATA%\Apple Computer\MobileSync\Backup and keep only the newest snapshot per device. Third, confirm you’re on the 64-bit version 12.10 or later from Apple’s download page.
On Windows 11, switch your device backups to the Apple Devices app from the Microsoft Store. It pairs devices and runs firmware restores faster than iTunes does.
If iTunes is broken rather than slow, that’s when a repair tool like TunesCare or Dr.Fone earns its $30. For the common slowdown caused by years of unattended use, the manual fixes are free and faster than any paid utility.
#Frequently Asked Questions
Why is iTunes so slow on Windows even after I update it?
Updates fix bugs but don’t shrink your MobileSync backup folder or turn off automatic syncing. If iTunes is slow right after an update, it’s usually because the new build is re-indexing your library in the background. Give it a few minutes; if it’s still sluggish, run through Methods 1 through 4 above. Reinstalling cleanly often clears whatever the updater left behind.
Does deleting iOS backups remove my photos and contacts?
No. Your iPhone keeps its own live copies of everything. Deleting an old backup just removes that snapshot from the PC.
Can I run iTunes and Apple Devices on the same PC?
Yes. On Windows 11, the two coexist without conflict, but they read separate backup folders. A practical split is to use Apple Devices for daily backups and keep iTunes only for its older library-management screen.
Why does iTunes lag when I plug in my iPhone?
iTunes scans the device, checks for new content, and refreshes its sync database every time it detects a connection. Turning off automatic syncing, which is Method 1 in this guide, eliminates most of that scan.
A loose or low-quality Lightning cable also causes intermittent USB drops that look like lag in iTunes. If detection still takes more than 30 seconds on a good cable, it’s worth running an Apple Mobile Device Service repair from Services.msc, then plugging into a USB 3.0 port directly on the motherboard rather than a hub. Our walkthrough on iPhone stuck on the iTunes logo covers the next layer if the iPhone freezes mid-detection.
Is the 32-bit version of iTunes still available?
No, Apple stopped distributing 32-bit iTunes for Windows after version 12.10.10. If you still have a 32-bit install, the cleanest path forward is to uninstall it, reboot, and download the current 64-bit installer.
Should I clear the iTunes library database?
Only if Methods 1 through 6 didn’t work. The library database, named iTunes Library.itl, sits in %USERPROFILE%\Music\iTunes\ and gets rebuilt automatically the next time you launch iTunes. Rebuilding it can take several minutes on a large library, so save this as a last resort.
Does running iTunes on an SSD fix the slowdown?
It helps a lot but doesn’t solve the structural causes. Moving the library to an SSD can cut launch time substantially compared with a mechanical hard drive. The settings-based fixes still matter, because automatic syncing and old backups slow iTunes on any storage tier.
When should I use repair software instead of fixing iTunes manually?
Use TunesCare or Dr.Fone only when Methods 1 through 6 fail. On a working install, manual fixes are faster and free.
If the slowdown is on your network rather than inside iTunes, our guide on why your internet is so slow all of a sudden covers that side of the problem.

iPhone 17 Cellular Data Not Working on iOS 26? 9 Fixes
iPhone 17 cellular data still dropping on iOS 26? Apple fixed the launch bug in iOS 26.0.1, but recovery failures persist. Here's the fix ladder.

iPhone Cellular Data Not Working Abroad? eSIM Fixes
Travel eSIM showing no data abroad? Fix iPhone roaming with the data-line check, Data Roaming toggle, APN settings, and network selection steps.

iPhone Cellular Data Not Working for Some Apps? 8 Fixes
Some iPhone apps refuse to load on cellular while others work fine. Check the per-app cellular toggle, Low Data Mode, VPN profiles, and Screen Time.

iPhone Stuck on EDGE? How to Get 5G or LTE Back (2026)
iPhone stuck on EDGE with crawling data? Here's why the E icon appears, which settings force 5G or LTE back, and when the problem is your carrier.