How to Fix the "support.apple.com/iPhone/Restore" Screen
Fix the support.apple.com/iPhone/restore screen with 5 proven methods: force restart, ReiBoot, Finder/iTunes, and DFU mode. Covers iOS 17 and iOS 18.
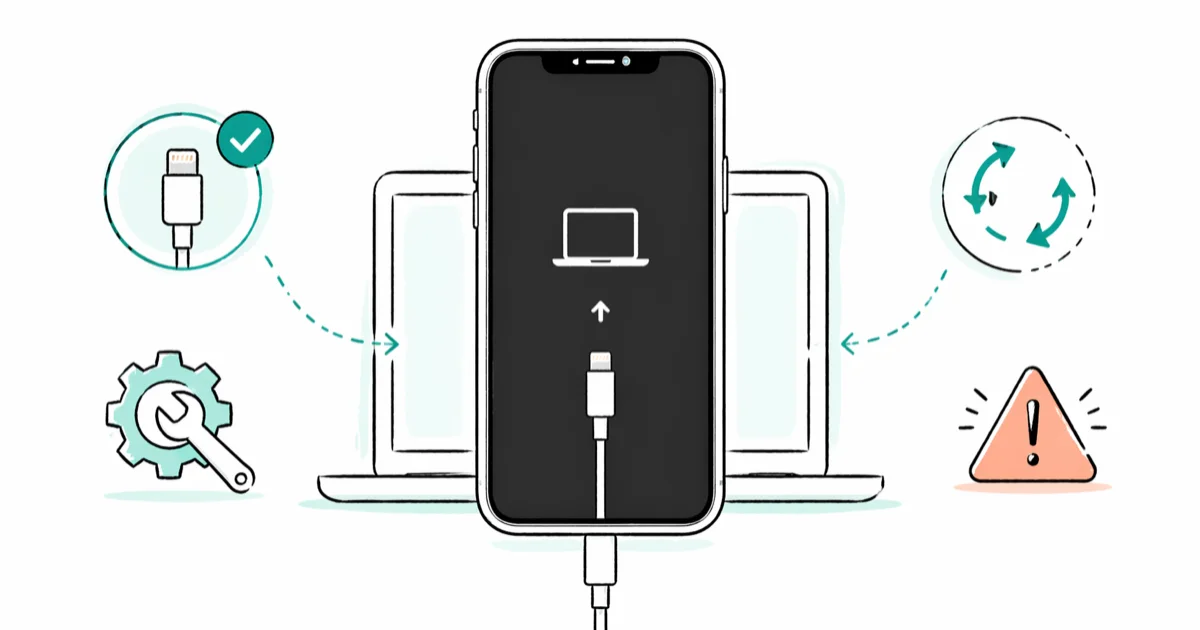
Quick AnswerYour iPhone is stuck in recovery mode. Connect it to a computer, open Finder on macOS or iTunes on Windows, and click Restore. To keep your data, run Tenorshare ReiBoot first to exit recovery mode without erasing the device.
Your iPhone is showing the Connect to iTunes screen with the URL support.apple.com/iPhone/restore. That means it’s stuck in recovery mode and can’t boot iOS on its own. Start with no-data methods, then move to official restore or DFU only when you’re ready to erase the phone.
- Recovery mode is almost always software-related; physical damage is rarely the cause
- A force restart is the fastest no-data-loss attempt and finishes in under 30 seconds
- Tenorshare ReiBoot’s Standard Repair exits recovery mode without erasing data on iOS 15 through iOS 18
- A Finder or iTunes restore wipes the device and reinstalls iOS from Apple’s servers
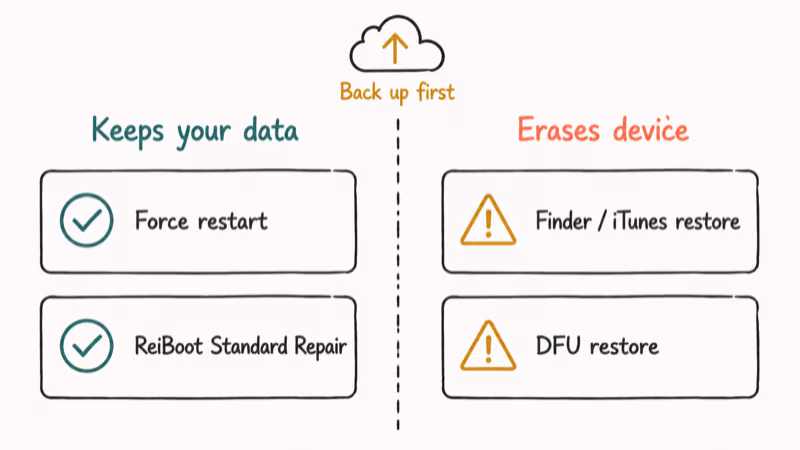
- Back up to iCloud or Finder before any destructive method on your own device
#What Causes the support.apple.com/iPhone/Restore Screen?
The screen means your iPhone is stuck in recovery mode because iOS failed to boot. Common triggers are a failed update, corrupted firmware, or an aborted jailbreak.
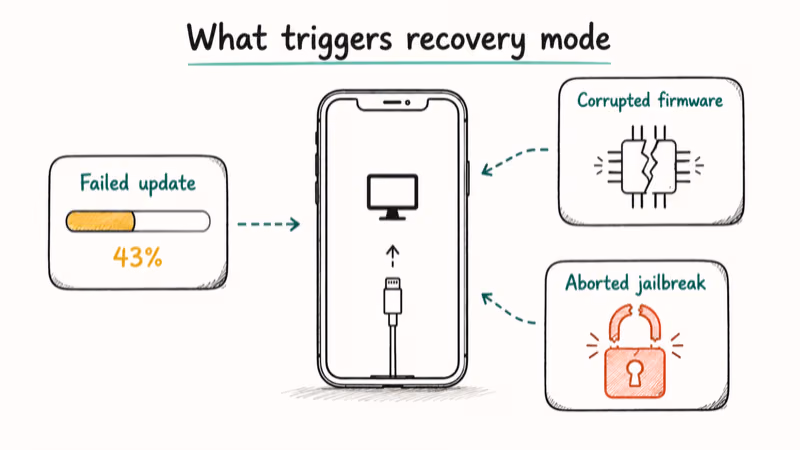
Software issues drive the vast majority of cases. A failed downgrade, an interrupted restore, or an aborted jailbreak can reboot the phone into recovery mode and leave it there until a recovery-mode tool or a full restore repairs iOS. Failed iOS updates, restore-from-backup failures, and aborted jailbreaks all push the device into this state.
Hardware damage is rare. A drop or water exposure can corrupt the storage chip and stop iOS from booting. If the screen appeared after physical impact, head to the Genius Bar.
#Will You Lose Your Data?
Not all fixes erase your phone. Methods 1 and 3 below exit recovery mode without touching your data, while Methods 2 and 5 wipe the device entirely. If you have a recent iCloud or Finder backup confirmed within the past week, any method is safe. If your last backup is months old, start with the no-data-loss methods first.
Check your iCloud backup before anything destructive. Go to Settings > [Your Name] > iCloud > iCloud Backup and read the Last Backup timestamp.
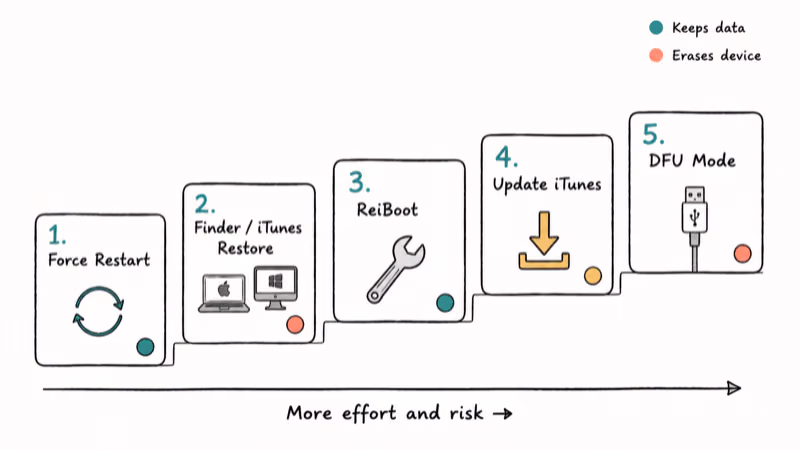
#5 Ways to Fix the Restore Screen
Five methods, ordered by effort and risk. Start at the top. Each one is more involved than the last.
#Method 1: Force Restart Your iPhone
A force restart cuts power to the processor without going through the normal shutdown routine. It takes under 30 seconds and can resolve recovery mode when the boot process is stuck but iOS isn’t corrupted.
iPhone 8, X, XS, XR, 11, 12, 13, 14, 15, 16: Press and quickly release Volume Up, then Volume Down, then hold the Side button until the Apple logo appears.
iPhone 7 and 7 Plus: Hold Volume Down and the Side button together for 10 seconds until the Apple logo appears.
iPhone 6s and earlier: Hold Home and the Top button together for 10 seconds.
If the phone boots normally, you’re done. If it returns to the Connect-to-iTunes screen, continue to Method 2 or skip ahead to Method 3 if you want to keep your data.
#Method 2: Restore via Finder or iTunes (Official Apple Method)
According to Apple’s support documentation, Finder or iTunes can update or restore an iPhone that shows the recovery screen. The Restore path erases the device and reinstalls iOS from Apple’s servers.
You need a Mac running macOS Catalina 10.15 or later, or a Windows PC with iTunes installed. Connect the iPhone directly to the computer with a Lightning or USB-C cable. USB hubs can cause dropped connections during a restore, so plug directly into the computer.
- Connect your iPhone to the computer (it should already show in recovery mode).
- Open Finder on Mac and click your iPhone in the sidebar, or open iTunes on Windows.
- Click Restore when prompted and don’t unplug during the 15-30 minute reinstall.
- Once finished, set up as new or restore from your iCloud backup.
If the restore fails with a numeric error, our guide on fixing iTunes restore errors walks through the full set of error-specific steps.
#Method 3: Tenorshare ReiBoot to Exit Without Data Loss
Tenorshare ReiBoot is an iOS repair tool that offers a Standard Repair path for recovery mode without erasing user data.
Some links on this page are affiliate links, which means fone.tips may earn a commission at no extra cost to you.
- Install Tenorshare ReiBoot on your Mac or Windows PC and connect your iPhone via USB.
- Click Exit Recovery Mode for a one-click fix, or
Fix Now>Standard Repairif that fails. - Standard Repair downloads a firmware package and reinstalls iOS without wiping user data. Expect 10-15 minutes.
- Your iPhone reboots normally once the repair finishes.
Deep Repair mode handles cases where Standard Repair falls short, but it erases data the same way DFU mode does, so try Standard Repair first.
#Method 4: Update iTunes on Windows
An outdated iTunes version on Windows can cause the restore process to fail mid-way and sometimes leaves the iPhone stuck in recovery mode. This doesn’t apply to macOS, which uses Finder and receives iOS firmware updates separately.
Open iTunes and go to Help > Check for Updates. Install any available update and restart iTunes before retrying the restore.
According to Apple’s iTunes for Windows page, the standalone iTunes installer is also available there if the in-app update fails. Download it, uninstall the current version first, install fresh, and retry.
If iTunes still won’t see the device after updating, our guide on the iTunes could not connect to this iPhone error covers the connection-specific fixes.
#Method 5: DFU Mode Restore (Last Resort)
DFU (Device Firmware Update) mode is a deeper recovery state than standard recovery mode. It bypasses the bootloader entirely and lets Finder or iTunes flash new firmware directly to the hardware. This erases everything on your own device, so use DFU only when all other methods have failed.
DFU on iPhone 8 and later:
- Connect to your computer and open Finder or iTunes.
- Quickly press and release Volume Up, then quickly press and release Volume Down.
- Hold the Side button until the screen goes black (about 3 seconds), then also hold Volume Down for 5 more seconds.
- Release Side but keep holding Volume Down for 5 seconds more. The screen stays black and Finder/iTunes shows a recovery prompt.
DFU on iPhone 7 and earlier: On iPhone 7, hold Side and Volume Down together for 10 seconds, then release Side while keeping Volume Down held until iTunes/Finder detects the device. On iPhone 6s and earlier, hold Home and Power for 10 seconds instead, then release Power while keeping Home held until detection.
Once detected, click Restore in Finder or iTunes. The process downloads a full firmware image (around 6GB for recent iPhones) and flashes it directly to the device.
#Recurring Recovery Mode Loops
If your iPhone exits recovery mode but returns within minutes or after the next reboot, the iOS installation is corrupted and needs a clean reinstall. A standard Finder or iTunes restore (Method 2) sometimes fixes it, but a DFU flash (Method 5) is more reliable. Tenorshare ReiBoot’s Deep Repair handles the same scenario without the manual button-timing routine.
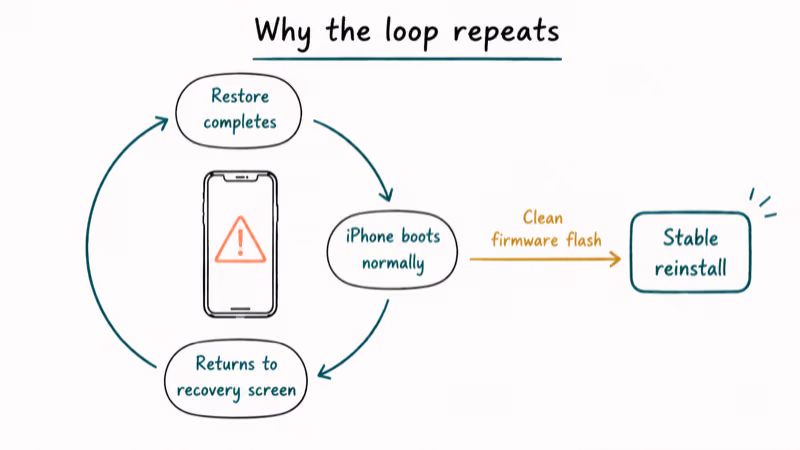
Recurring loops are almost never a hardware problem. They mean the original restore or firmware update wrote bad data to the storage partition, and only a clean firmware flash overwrites it.
After the reinstall, set the phone up as new rather than restoring from an iCloud backup. If the backup itself is corrupted, restoring from it reproduces the same problem. Add your accounts manually, then test stability for a day or two before trusting a full backup restore.
For phones that loop on the iTunes logo screen without ever advancing to the home screen, our guide on the iPhone stuck on iTunes logo screen walks through the full diagnostic flow.
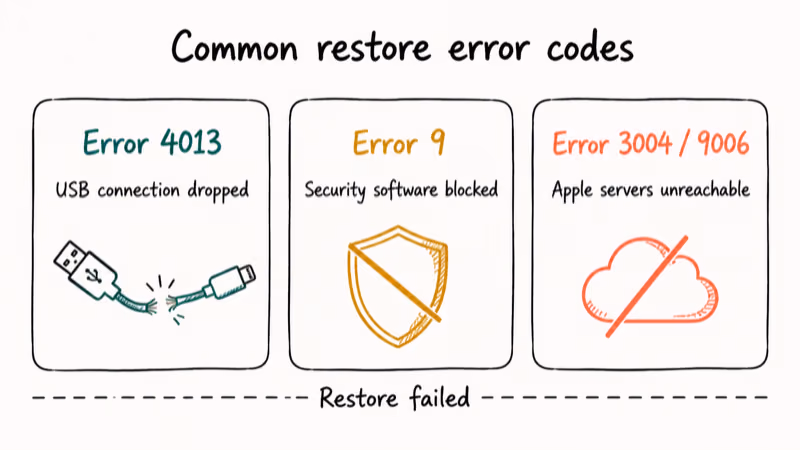
#Common Restore Error Codes
A failed restore can produce a numeric error code. These three are common:
| Error Code | Cause | Fix |
|---|---|---|
| Error 4013 | USB connection dropped mid-restore | Try a different cable and USB port |
| Error 9 | Security software blocked the restore | Temporarily disable antivirus |
| Error 3004/9006 | Apple’s servers couldn’t be reached | Check internet; disable VPN |
Our deeper guides on iPhone error 4013 and iPhone error 9 cover the full step-by-step for each code.
#When to Visit an Apple Store
If none of the methods above work and the phone is still stuck after multiple restore attempts, the problem is likely hardware. A failing NAND storage chip or a logic-board issue requires in-person diagnostics that can’t run remotely. Book a Genius Bar appointment for any device that won’t complete a restore, especially if the recovery screen appeared after water exposure or a drop. A technician runs a hardware diagnostic and advises on repair versus replacement.
#Bottom Line
Start with a force restart. It takes 30 seconds and is the fastest no-data path. If that fails and you want to keep your data, try Tenorshare ReiBoot’s Standard Repair before any method that erases the phone.
Save the Finder or iTunes restore for when your iCloud backup is confirmed recent. Reach for DFU last, and always set up as new after a clean flash.
#Frequently Asked Questions
What does the support.apple.com/iPhone/restore screen mean?
It means your iPhone is in recovery mode and can’t boot iOS normally. The screen appears when iOS fails to load, usually after a failed update, an interrupted restore, or a corrupted firmware install. The device is asking for a tethered computer to supply replacement firmware. You can’t move past this screen without connecting to Finder or iTunes.
Can I fix this without losing data?
Yes, in many cases. A force restart (Method 1) and Tenorshare ReiBoot’s Standard Repair (Method 3) both exit recovery mode without erasing the device. Apple’s standard restore through Finder or iTunes does erase everything, so check your iCloud backup status before choosing that route.
How long does an iTunes restore take?
Expect 15 to 30 minutes on a standard broadband connection. The process downloads a full iOS firmware file, around 6GB, and flashes it to the device.
My iPhone won’t connect to iTunes during the restore. What should I do?
Try a different USB cable first, since damaged cables cause a surprising share of restore failures. If that doesn’t help, switch to a different USB port on the computer and confirm iTunes has the latest update installed via Help > Check for Updates on Windows. Plug directly into the computer rather than through a hub, and avoid USB-C-to-Lightning adapters when possible.
Is DFU mode safe for your device?
DFU mode won’t damage your hardware. It erases all data and reinstalls iOS, so treat it as a last resort and only use it on your own device.
Can Apple Support fix this remotely?
No. The restore needs a physical computer connection. An Apple Store can do it for you if you don’t have a computer at home, and Apple Support can talk you through the steps over the phone.
What if the recovery mode screen appears after a drop or water exposure?
That points to possible hardware damage, not a software glitch. Try a force restart first, but if the screen persists after a physical impact, book a Genius Bar appointment as soon as you can. Apple technicians run a hardware diagnostic that checks the storage chip, logic board, NAND, and battery to identify which component failed before quoting a repair, and they’ll usually offer a replacement quote on the spot if the device is past the warranty window.
Does restoring through iTunes fix activation lock?
No. Activation Lock is tied to the Apple ID on the device and survives any restore. After reinstalling iOS, the phone asks for the original Apple ID password during setup. According to Apple’s account recovery process, you can regain access through identity verification if you’ve forgotten those credentials.

iPhone 17 Cellular Data Not Working on iOS 26? 9 Fixes
iPhone 17 cellular data still dropping on iOS 26? Apple fixed the launch bug in iOS 26.0.1, but recovery failures persist. Here's the fix ladder.

iPhone Cellular Data Not Working Abroad? eSIM Fixes
Travel eSIM showing no data abroad? Fix iPhone roaming with the data-line check, Data Roaming toggle, APN settings, and network selection steps.

iPhone Cellular Data Not Working for Some Apps? 8 Fixes
Some iPhone apps refuse to load on cellular while others work fine. Check the per-app cellular toggle, Low Data Mode, VPN profiles, and Screen Time.

iPhone Stuck on EDGE? How to Get 5G or LTE Back (2026)
iPhone stuck on EDGE with crawling data? Here's why the E icon appears, which settings force 5G or LTE back, and when the problem is your carrier.