How to Take a Screenshot on a Mac: Every Way (2026)
Capture your Mac screen with keyboard shortcuts for full screen, a region, or a single window, change where files save, and copy straight to the clipboard.
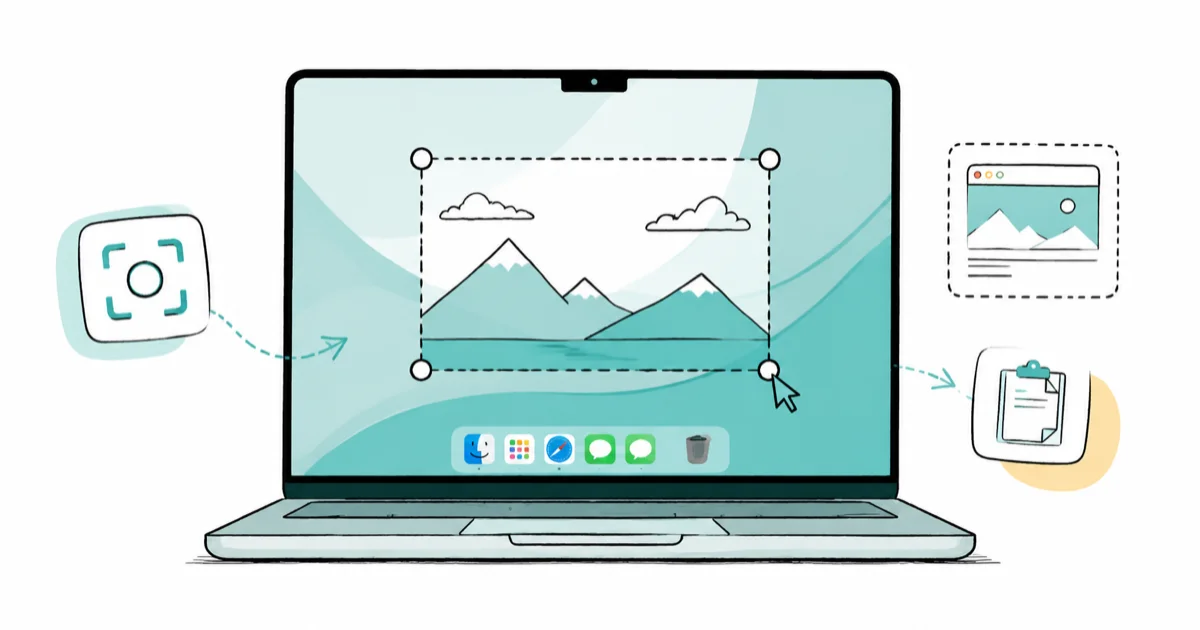
Quick AnswerPress Shift-Command-3 for the whole screen, or Shift-Command-4 to drag a region. Add the Control key to copy a screenshot to the clipboard instead of the desktop.
Taking a screenshot on a Mac comes down to three keyboard shortcuts, plus a few hidden tricks most guides skip. There’s no Print Screen key like on Windows. Once you know the three core ones, you can grab the full screen, a region, or a window.
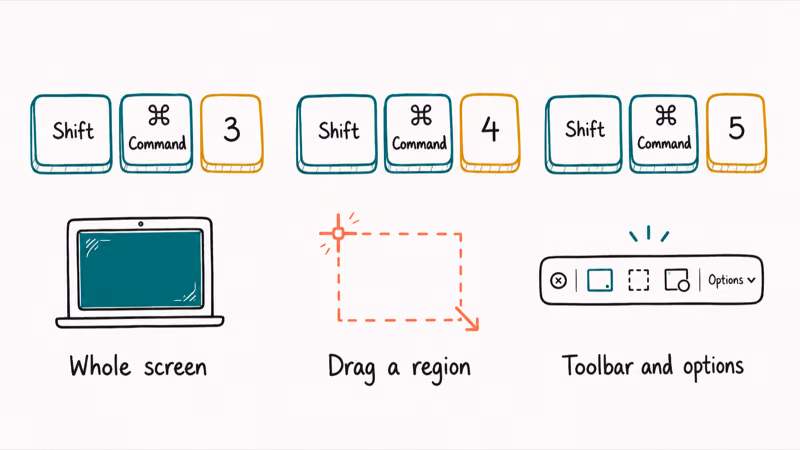
- Shift-Command-3 captures the entire screen; Shift-Command-4 captures a region you drag.
- Shift-Command-4 then the Space bar captures one window with a clean drop shadow.
- Shift-Command-5 opens the Screenshot app for timers, options, and recording.
- Add the Control key to any shortcut to copy to the clipboard instead of saving a file.
- Screenshots save to the desktop as .png files by default, but you can change that folder.
#What Are the Core Screenshot Shortcuts?
Three shortcuts cover almost everything. Apple’s Mac screenshot guide confirms that pressing Shift-Command-3 captures the entire screen in one shot.
Need just part of it? Press Shift-Command-4 instead.
Your pointer turns into a crosshair, and you drag a box around the area you want, then release to capture it. The third shortcut, Shift-Command-5, opens a small toolbar with more options covered below. Memorize 3 and 4 first, since they handle the daily grind, and the rest builds from there.
#Capturing a Region, a Window, or a Menu
Region capture is the workhorse, but the window trick is the one people love once they find it. Apple’s Screenshot app guide states that pressing Shift-Command-4, then the Space bar, switches to a camera pointer that captures a single window with a tidy shadow.
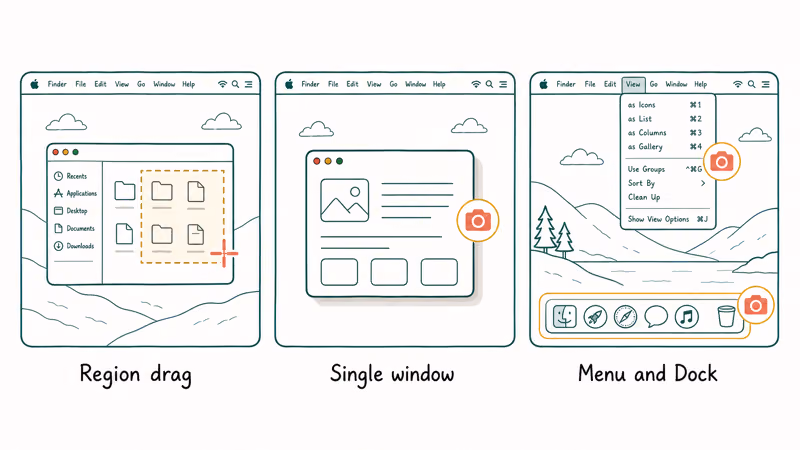
Hover the camera over any window and click. It captures cleanly, no cropping needed.
The same Space-bar trick works on menus and the Dock, which is handy for documentation. Window captures include a soft drop shadow by default, and you can drop it by holding Option while you click. If your desktop fills up with these, it pays to free up space on your Mac now and then.
#Using the Screenshot App and Toolbar
Shift-Command-5 is the power-user route. It opens a control bar with buttons for full screen, a window, a selected portion, and two recording modes, plus an Options menu.
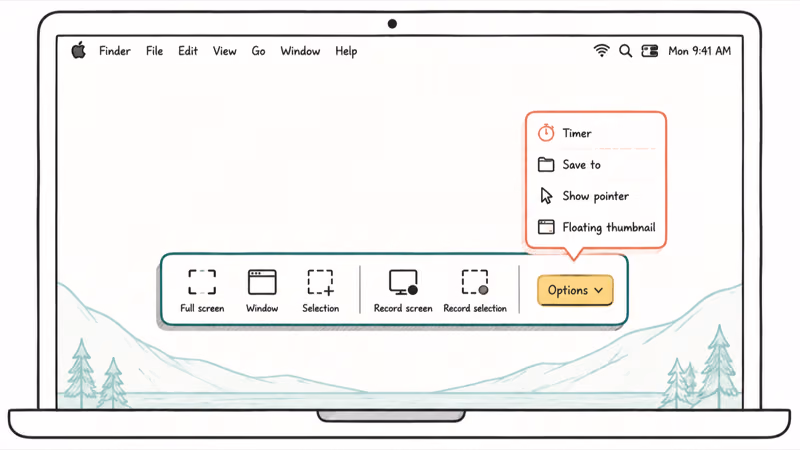
Options is where the good settings hide.
From there you set a 5- or 10-second timer, choose where files save, decide whether the pointer shows, and toggle the floating thumbnail. The toolbar is the same one used for screen recording, so it’s worth learning once. If you want video instead of stills, the guide to screen record on a Mac picks up from here.
#Where Do Screenshots Save and How to Change It?
By default, every screenshot lands on the desktop. According to Apple’s screen recording guide, the same Shift-Command-5 toolbar that records video also sets where captures save, so stills and recordings share one Save to setting.
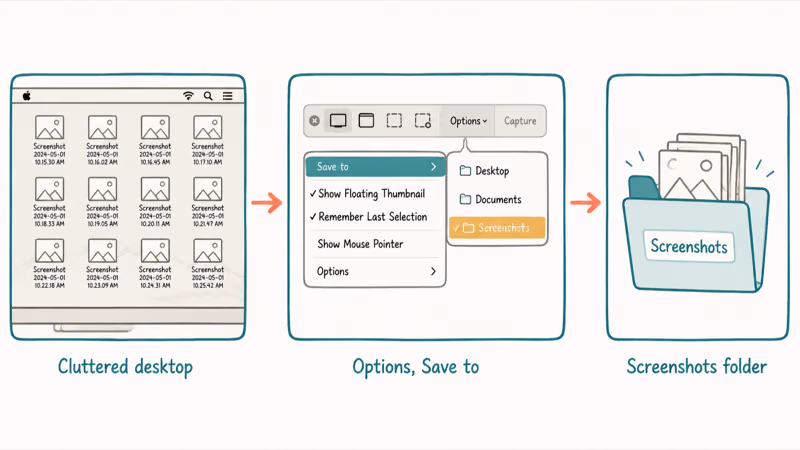
Open the toolbar, click Options, and pick a folder under Save to, such as Documents or a dedicated Screenshots folder.
That single change is the fix for a cluttered desktop, and it sticks until you adjust it again. Files are named “Screenshot” plus the date and time, saved as .png. A tidy folder also makes screenshots easier to find later, the way a clean system does after you clear the cache on your Mac.
#Copying to the Clipboard and Quick Markup
Sometimes you don’t want a file at all, just something to paste. Hold the Control key while you press any screenshot shortcut, and the image goes straight to the clipboard.
So Control-Shift-Command-4 grabs a region and copies it.
You can then paste it into a message, document, or chat without leaving a stray .png on the desktop. For light editing, click the floating thumbnail that appears after a capture: it opens Markup, where you can crop, draw arrows, add text, or highlight before saving. This is faster than opening a separate image editor for a quick annotation.
#Common Screenshot Problems and Fixes
A few snags come up often. If the floating thumbnail annoys you, turn it off in the Shift-Command-5 Options menu under Show Floating Thumbnail.
Screenshots not saving? Check the folder.
A custom Save to location set long ago can send files somewhere you forgot, so reopen Options and confirm the destination. If a shortcut does nothing, another app may have claimed it, which you can check under System Settings, then Keyboard, then Keyboard Shortcuts, then Screenshots. For stranger storage or reset behavior, the Mac reset issues notes cover related fixes, and Handoff between your Mac and iPhone helps move a screenshot to your phone fast.
#Bottom Line
Memorize Shift-Command-4 for region captures and Shift-Command-5 for everything else, and those two cover nearly every need. If screenshots clutter your desktop, change the save folder in the Screenshot app once and the problem disappears for good. The Control-key clipboard trick is the upgrade most people miss, and it’s worth building into your habits.
#Frequently Asked Questions
What is the keyboard shortcut for a Mac screenshot?
Press Shift-Command-3 for the whole screen, or Shift-Command-4 to drag a region. Both save a .png to the desktop by default.
How do I capture just one window?
Press Shift-Command-4, then tap the Space bar. The crosshair becomes a camera icon, and you hover over the window you want and click. The result is a clean capture of that single window, complete with a drop shadow. Hold the Option key while clicking if you’d rather skip the shadow for a flat image.
Where do my Mac screenshots save by default?
They save to the desktop as .png files, named with the date and time. You can change the destination in the Shift-Command-5 toolbar’s Options menu under Save to.
How do I change the screenshot save folder?
Press Shift-Command-5 to open the toolbar, click Options, and choose a new folder under the Save to heading. Pick something like Documents or a dedicated Screenshots folder. The setting stays put until you change it again, which is the single best fix for a desktop buried in captures.
How do I copy a screenshot to the clipboard?
Hold the Control key while you press your usual screenshot shortcut. For example, Control-Shift-Command-4 copies a region straight to the clipboard, ready to paste, without leaving a file behind.
How do I screenshot with a timer?
Open the Screenshot app with Shift-Command-5 and click Options. Under the Timer heading, choose a 5-second or 10-second delay, then take your capture as usual. The delay gives you time to open a menu or arrange the screen before the shot fires, which is useful for capturing things that vanish when you click away.

macOS 27 Compatible Macs: Every Supported Model (2026)
macOS 27 Golden Gate runs only on Apple Silicon Macs. Here is the full list of supported M-series models and the four Intel Macs that lose support.

macOS 27 Golden Gate: Every Major New Feature Confirmed
macOS 27 Golden Gate goes Apple Silicon only, adds a Gemini-powered Siri, refines Liquid Glass, and rebuilds Spotlight. Here is every confirmed change.

macOS 27 Liquid Glass: Every Readability Fix Explained
macOS 27 Golden Gate refines Liquid Glass with an intensity slider, better contrast, cleaner window corners, and edge-to-edge sidebars to fix readability.

macOS 27 Performance: What Golden Gate Makes Faster
macOS 27 Golden Gate speeds up AirDrop, network file browsing, Safari, and Spotlight, with core system improvements on the Apple Silicon-only release.