How to Add Subtitles in iMovie on Mac, iPhone, and iPad
Add subtitles in iMovie on Mac, iPhone, or iPad using the built-in Titles browser. A step-by-step guide for the iMovie 10.4 and iMovie 3.0 builds.
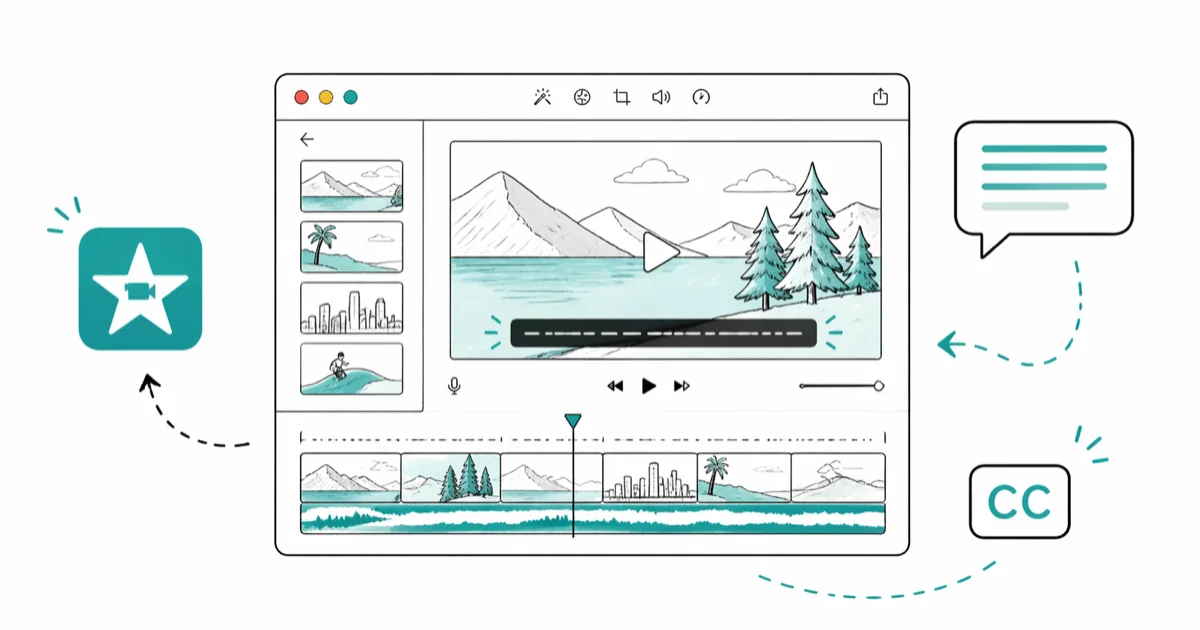
Quick AnswerOpen your project in iMovie, tap the Titles browser (the T icon), drag a title style onto a clip, then type your subtitle text in the viewer and stretch the title clip in the timeline to match the dialogue. iMovie has no SRT import, so every caption is typed by hand.
You add subtitles in iMovie by dragging a Title style from the Titles browser onto a clip in your timeline, then typing your caption in the viewer. There’s no SRT import and no transcription engine. Every line is a separate title clip you place by hand. The same title-overlay workflow applies on Mac, iPhone, and iPad.
- Open the Titles browser (the T icon above the viewer on Mac, or the T icon inside the project view on iPhone and iPad), then drag a style onto a clip to start your first subtitle.
- Double-click the title clip in the viewer to type your caption, then stretch the right edge in the timeline so the clip covers the matching dialogue.
- iMovie on iPhone and iPad uses the same Titles workflow as macOS, with the same drag-onto-clip pattern but a smaller style set.
- iMovie can’t import SRT, VTT, ASS, or any other caption file. Every subtitle must be typed inside iMovie, one title clip at a time.
- For SRT import or automatic captions, switch to Final Cut Pro, DaVinci Resolve, Premiere Pro, or a tool like Filmora.
#How Do You Add Subtitles in iMovie?
The Titles browser is the only path to subtitles in iMovie. There’s no separate captions track, no closed-caption import, and no auto-transcribe button. You stack title clips above your video clips, and each one becomes one line of subtitle text.
According to Apple’s iMovie support page, iMovie ships free on every new Mac, iPhone, and iPad and uses the same project file across all three platforms. So the steps below work on whichever device has your project open.
#iMovie on Mac (Version 10 and Later)
This is the workflow for iMovie on Mac. The steps are the same across current Version 10 builds.
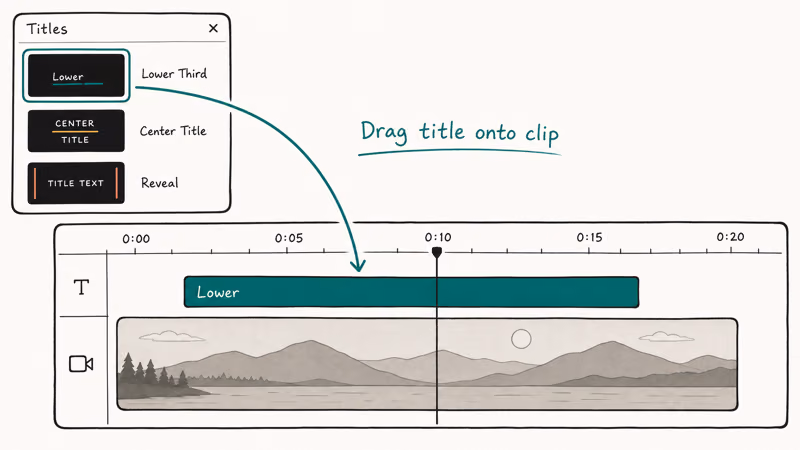
- Open your project, then click Titles above the viewer. The library on the left flips to show every title style.
- Hover any style to preview it. Lower Third, Reveal, and Gradient are the cleanest fits for subtitles. They sit at the bottom of the frame and don’t fight the dialogue, unlike the centered animated styles that pull the viewer’s eye toward the wrong spot.
- Drag your chosen style onto the video clip in the timeline. The title locks to that footage.
- Double-click the title in the viewer, type your caption, and press Enter. The text commits and the clip turns yellow in the timeline, ready for timing adjustments. If you fat-finger a key, the viewer’s edit field accepts arrow-key navigation and standard Cmd-Z undo without losing the style settings you already picked.
- In the timeline, drag the right edge of the title clip so its length matches the spoken line. Most title clips default to about four seconds, too long for short lines and too short for full sentences.
- Repeat for every line.
You’ll build a stack of small title clips, one per subtitle, marching across the timeline. The slowest part is usually step 5 because timing-trim is one clip at a time.
#iMovie on iPhone and iPad
Apple’s mobile build is leaner than the Mac version but uses the same title-on-clip pattern.
- Open your project in the iMovie app, then tap the clip in the timeline you want to subtitle. A yellow border appears around it.
- Tap the T icon in the toolbar at the bottom of the screen. The title style strip slides up.
- Tap a style to apply it. The mobile version commits the title to the selected clip immediately, so you don’t drag.
- Tap Title Text Here in the viewer to type your caption, then tap outside the keyboard to commit.
- To adjust timing, tap the clip in the timeline and drag the yellow trim handles.
There is no separate title trim on mobile, so the title runs as long as the clip it’s attached to. If you want subtitles to appear and disappear mid-clip, split the clip first (tap, then Split in the action menu), and apply one title per split segment.
#iMovie 8, 9, and 11 (Legacy macOS Versions)
If you’re maintaining an older Mac, the menu is in a different spot but the idea is the same. Click Titles in the top toolbar above the event browser, drag a style onto the project timeline, choose a background color when the picker opens, and double-click the highlighted text in the viewer to edit. The classic Show Fonts panel lets you change typeface, size, and color independently from the title style.
Most users on this path are running iMovie 9 on macOS Mavericks or older. If your iMovie build is acting up before you even reach the titles step, the fixes in the iMovie problems and solutions guide cover the most common crashes and export errors.
#Pick the Right Title Style for Subtitles
Not every title style in iMovie works as a subtitle. The animated centered styles (like Pixie Dust and Pop-Up) pull focus away from the video. The bottom-anchored styles read as captions to the viewer’s eye.
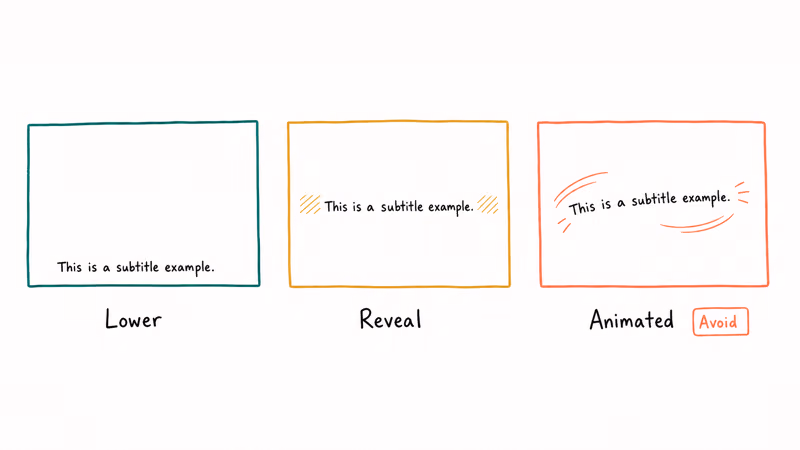
Three styles do the job well:
- Lower Third is the closest match to a traditional subtitle. White text, bottom-left, no animation, no background panel.
- Reveal fades the text in over half a second, then holds. Useful for narrative dialogue where a hard pop-in feels harsh.
- Gradient adds a subtle dark gradient under the text, which helps when scenes flip between bright and dark backgrounds.
Stay away from Counter, Date, Roller, and Drifting for dialogue subtitles. They were built for credits and lower-thirds branding, not running speech.
#Customize Subtitle Font, Color, and Timing
A title clip in iMovie is two layers: the style (font, layout, animation) and the content (your text). You edit them in different panels.
#Change Font, Color, and Size
Select the title clip in the timeline, then click Show Fonts in the upper-right of the viewer. The font panel lets you switch typeface, point size, color, and outline weight. Use larger type for high-resolution exports so subtitles stay legible on a TV.
For color, Apple recommends white or pale-yellow text with a black drop shadow.
#Adjust Duration and Position
The fastest way to retime a subtitle is to drag the right edge of the title clip in the timeline. For finer control, double-click the clip to open the Inspector, then type an exact duration in seconds. Frame-accurate trimming requires Final Cut Pro or DaVinci Resolve, since iMovie rounds to tenths of a second.
Fix the aspect ratio before you subtitle. The change aspect ratio in iMovie guide covers 9
, 1, and 16 presets.#Why Won’t iMovie Import SRT Files?
iMovie does not parse caption files of any kind. Not SRT, not WebVTT, not SSA, not embedded MOV captions, not Final Cut Pro XML caption tracks. Apple’s iMovie team has kept the app strictly inside the title-overlay model for over a decade, and there’s no extension or plug-in path to add SRT support.
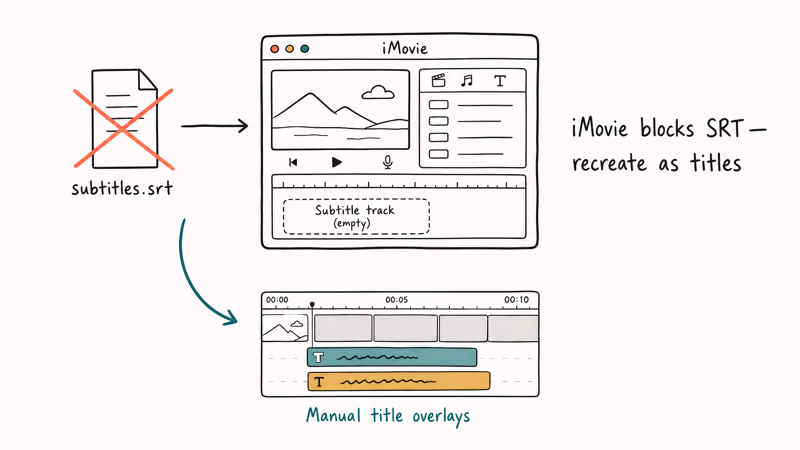
This is the single biggest reason power subtitlers leave iMovie. A 20-minute interview with 200 SRT lines is unrealistic to retype by hand. If you’ve already created an SRT and need to keep using iMovie, you have three options:
- Burn the subtitles into the video upstream using Handbrake or FFmpeg, then import the rendered file with subtitles baked in. iMovie treats it as a regular video.
- Use HitFilm Express, DaVinci Resolve, or Final Cut Pro to merge the SRT, export, and bring the result back into iMovie if you want to keep editing in iMovie.
- Copy each SRT line into iMovie by hand. Works for under 30 lines.
If you have an MKV source with embedded subtitles, you can pull the SRT out first and then choose option 1 or 2. The walkthrough on how to extract subtitles from MKV files covers three working methods, including MKVToolNix.
#Workflow Tips for Long Subtitle Projects
A handful of habits cut hours off a long subtitle session in iMovie.
Work in 30-second chunks. Subtitle, scrub, fix timing, move on.
Duplicate a finished title clip with Cmd-C and Cmd-V instead of dragging a fresh one from the Titles browser. The duplicate inherits font, color, and shadow settings, so you only edit the text.
Lock your audio levels before subtitling. If you re-mix the audio after captions are placed, you’ll catch timing drift when peaks shift. The notes on how to fade audio in iMovie walk through the audio-first workflow.
Save often. Cmd-S.
#Alternative Editors for SRT and Auto-Captions
iMovie is great for short-form video with under a dozen titles. Past that, the manual workflow becomes the bottleneck. Three alternatives accept SRT files directly and handle subtitle workflows that iMovie can’t.
- Final Cut Pro (Mac only). Apple’s Final Cut Pro product page states that the editor costs $299.99 as a one-time purchase and has native caption editing, SRT and iTT import, and roles-based caption tracks. Project files open in iMovie’s lineage, so if you’ve outgrown iMovie this is the simplest step up.
- DaVinci Resolve (free version on Mac, Windows, Linux). Blackmagic Design states that the free version handles SRT import, automated subtitle generation in the Studio version, and frame-accurate caption trimming. The learning curve is steep, but the free tier matches paid editors for subtitle work.
- Wondershare Filmora. A consumer-facing editor that imports SRT, auto-generates captions on supported plans, and supports MKV, WMV, VOB, AVI, and other formats iMovie won’t open. There’s a quick comparison link to Filmora if you want to try it.
Some links on this page are affiliate links, which means fone.tips may earn a commission at no extra cost to you.
For a deeper feature comparison between Apple’s two editors, the iMovie vs Final Cut Pro breakdown covers price, timeline behavior, and learning curve side by side.
#Bottom Line
If your project has fewer than 15 lines of dialogue and you’re staying inside the Apple ecosystem, iMovie’s manual Titles workflow is the right call. Drag a Lower Third or Reveal style onto each clip, type the line, trim the title’s right edge to match the audio, and move on.
For SRT import or batch captions, drop iMovie for DaVinci Resolve free or Final Cut Pro instead.
#Frequently Asked Questions
Can I auto-generate subtitles in iMovie?
No. iMovie has no built-in speech-to-text or auto-caption feature on Mac, iPhone, or iPad. If you want automatic subtitles, use DaVinci Resolve Studio, CapCut, or Premiere Pro’s Speech to Text feature, then export the captions to SRT and burn them into your video before bringing it back to iMovie.
Can I import SRT files into iMovie?
No. iMovie ignores SRT, VTT, SSA, and every other caption file format. Each subtitle line has to be entered as a title clip by hand.
Why are my subtitles not syncing with the dialogue?
The most common cause is that the title clip’s duration doesn’t match the spoken line. Drag the right edge of the title clip in the timeline so it starts and ends with the audio. For finer timing, double-click the title clip, open the Inspector, and type an exact duration in seconds.
Can I change the color of subtitles in iMovie?
Yes. Select the title clip, click Show Fonts in the upper-right of the viewer, then pick a color from the swatch. You can also change typeface, size, and toggle a drop shadow from the same panel.
What video formats can I export with my subtitled video?
iMovie exports to MOV, MP4, and HEVC on Mac, with options for 720p, 1080p, and 4K. On iPhone and iPad, the export options are 540p, 720p, 1080p, and 4K depending on the device. Subtitles are burned into the video on export, so the result plays anywhere the video plays.
Does iMovie support closed captions or SDH?
No. iMovie’s title clips are open captions that get baked into the final video. There’s no closed-caption track, no SDH metadata, and no toggle for viewers to turn captions on or off. For closed-caption support, use Final Cut Pro, which has dedicated caption tracks with iTT, CEA-608, and SRT export.
Can I edit subtitles after exporting from iMovie?
No. Once exported, subtitles are baked into the file. Save your iMovie project before export so you can re-edit the title clips later.
Will subtitles show up if I share my iMovie project to another device?
Yes, as long as both devices have the same fonts installed and the project file syncs through iCloud. If a font is missing, iMovie substitutes a system default, which can shift the layout. Stick to system fonts like Helvetica, Avenir, and SF Pro if you plan to move projects between Mac, iPhone, and iPad.

iPhone 17 Cellular Data Not Working on iOS 26? 9 Fixes
iPhone 17 cellular data still dropping on iOS 26? Apple fixed the launch bug in iOS 26.0.1, but recovery failures persist. Here's the fix ladder.

iPhone Cellular Data Not Working Abroad? eSIM Fixes
Travel eSIM showing no data abroad? Fix iPhone roaming with the data-line check, Data Roaming toggle, APN settings, and network selection steps.

iPhone Cellular Data Not Working for Some Apps? 8 Fixes
Some iPhone apps refuse to load on cellular while others work fine. Check the per-app cellular toggle, Low Data Mode, VPN profiles, and Screen Time.

iPhone Stuck on EDGE? How to Get 5G or LTE Back (2026)
iPhone stuck on EDGE with crawling data? Here's why the E icon appears, which settings force 5G or LTE back, and when the problem is your carrier.