How to Add Roles in Discord: A Comprehensive Guide
Open Server Settings > Roles in Discord to create roles, set permissions, and assign them to members on a server you own or where you hold Manage Roles.
Quick AnswerTo add roles in Discord, open Server Settings, go to the Roles tab, click Create Role, name the role, set its color and permissions, then save. Assign it to members by right-clicking their name and selecting the role.
Discord has become an essential platform for online communities, and roles play a crucial part in managing these digital spaces effectively. Whether you’re running a gaming server, a study group, or a professional community, understanding how to add and manage roles is key to maintaining order and enhancing user experience. This guide walks you through the official Discord workflow for adding roles, along with best practices and advanced techniques.
Scope and authorization: these steps only apply to your own server or one where the rightful owner has granted you Manage Roles with explicit permission. Changing roles on another community without consent is a violation of Discord’s Community Guidelines and may be unlawful under computer-misuse laws. Always use the official Server Settings flow described below; never use third-party “permission bypass” tools, and never attempt to seize admin from the legitimate owner.
- Create a new role by going to
Server Settings>Roles, clicking the ”+” button, naming the role, and saving - Assign roles to members via
Server Settings>Members, then click the ”+” next to a member’s name and select the role - The “Administrator” permission grants all possible permissions, so assign it only to fully trusted members
- Roles higher in the hierarchy take priority, and members can only manage roles ranked below their own highest role
- Discord Nitro-boosted servers can add custom icons to roles for additional visual distinction
#Introduction to Discord Roles
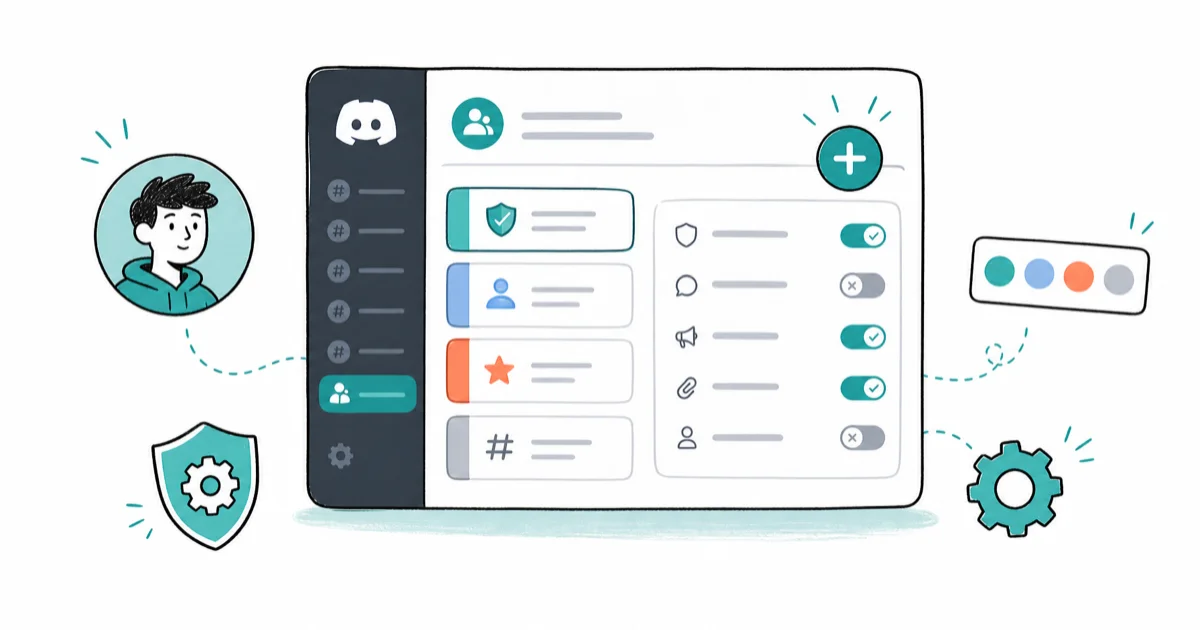
Discord roles are sets of permissions and display settings that can be assigned to server members. They serve several important functions:
- Access Control: Roles determine what actions members can perform within a server.
- Organization: They help categorize members based on their responsibilities or status.
- Customization: Roles allow for visual distinction between different types of members.
Discord’s broader platform background is covered in the Discord Wikipedia entry, but role setup should come from Discord’s own documentation. Discord’s permissions FAQ says permissions are based on roles assigned to users and can be assigned per role at both the server and channel levels.
While Discord is primarily used for community building, some people use Discord for dating, making role management even more crucial for maintaining appropriate boundaries.
#Accessing Role Settings in Discord
Before you can add roles, you need to open the Server Settings menu on the desktop, web, or mobile client:
- Open your Discord server
- Click on the server name in the top-left corner
- Select “Server Settings” from the dropdown menu
- In the left sidebar, click on “Roles”
Open Roles to create, edit, and delete roles. Mobile users use the server’s three-dot menu.
#Creating a New Role
Adding a new role is straightforward. Discord’s permissions FAQ gives the official path as Server Settings > Roles > Create Role, then customizing the new role’s permissions and saving changes.
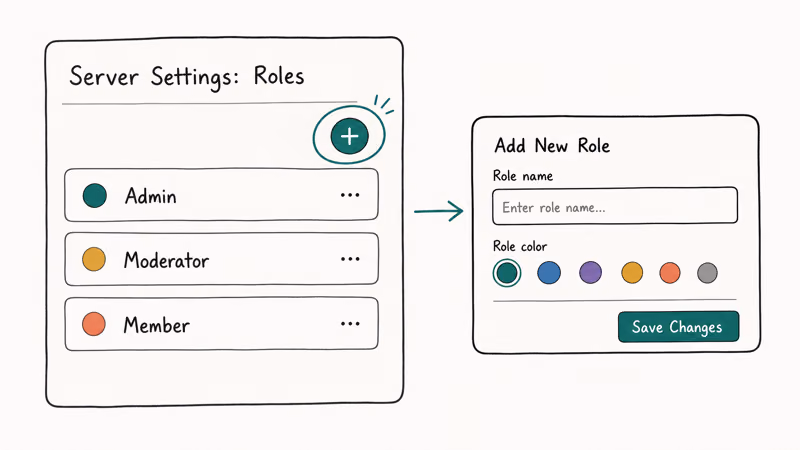
- On the Roles page, click the ”+” button next to “Roles”
- Enter a name for your new role
- Choose a display color for the role
- Click “Save Changes”
Remember to choose a clear, descriptive name for your role that reflects its purpose within your server. If you’re managing an age-restricted server, you might want to learn how to change your age on Discord to ensure proper access.
#How Should You Configure Role Permissions?
After creating a role, it’s crucial to set up the correct permissions:
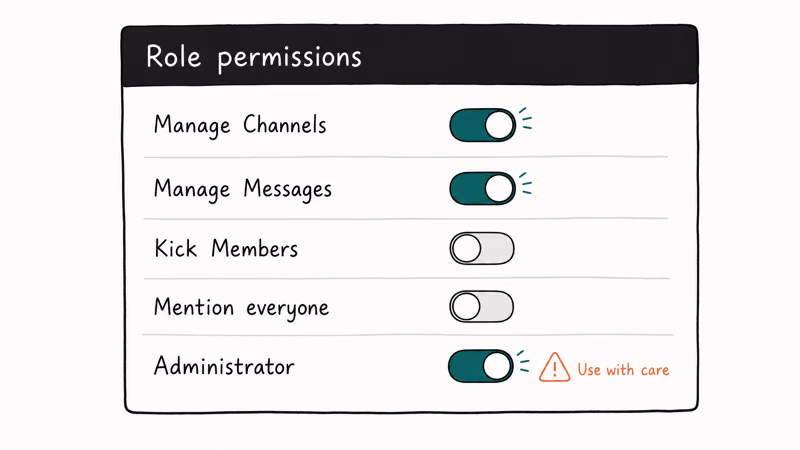
- Click on the role you just created
- Scroll through the list of permissions
- Toggle on/off the permissions you want to grant or restrict
Key permissions to consider include:
- Manage Channels
- Manage Messages
- Kick/Ban Members
- Mention @everyone
According to Discord’s Role Management 101 support article, each server supports up to 250 distinct roles in the role list, so plan your permission tiers before the cap forces consolidation. Be cautious when assigning powerful permissions like “Administrator,” which grants every possible permission to a role and effectively makes that member a co-owner.
#Assigning Roles to Members
Once your role is set up, you can assign it to members:
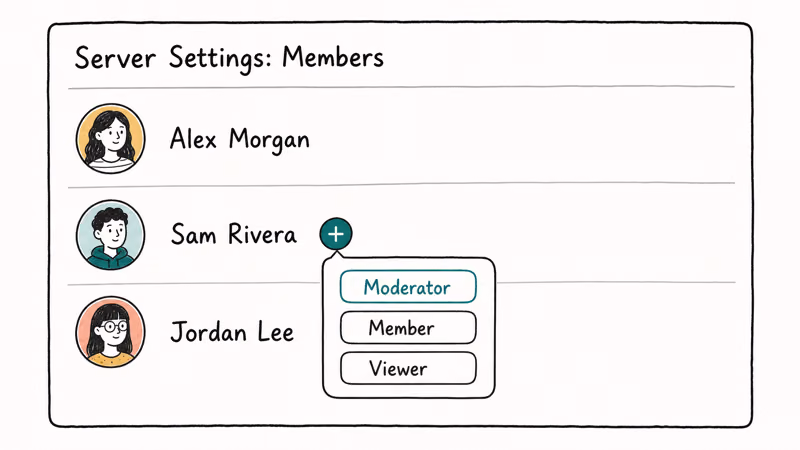
- Go to “Server Settings” > “Members”
- Find the member you want to assign the role to
- Click the ”+” next to their name
- Select the role from the dropdown menu
For larger servers, consider using Discord bots that can automate role assignments based on specific criteria or user actions.
#How Does Discord’s Role Hierarchy Work?
Discord uses a strict hierarchical system for roles:
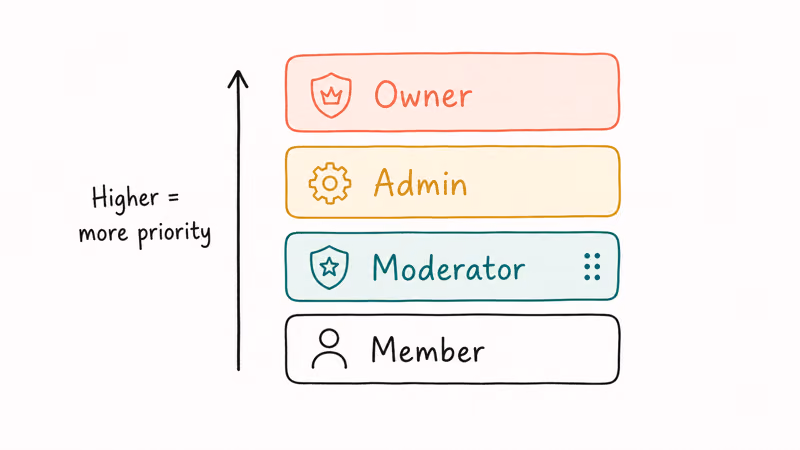
- Roles higher in the list have priority over lower roles
- Members can only manage roles below their highest role
- To change role order, drag and drop roles in the Roles list
Carefully consider your role hierarchy to ensure proper permission management across your server. Discord’s roles and permissions guide says roles follow a top-down structure, members can only affect users with lower roles, and the Administrator permission grants all permissions while bypassing channel restrictions.
Placing moderator roles above bot roles helps preserve staff authority when bots have moderation commands. Granular role hierarchy is one feature that sets Discord apart from competitors like Zoom, and it shapes how communities enforce moderation at scale.
For broader platform context, our comparisons of Discord and Skype and Discord and Telegram cover how each handles community permissions and member roles.
#Role Icons and Display Options
For servers with Discord Nitro boosts, you can add custom icons to roles:
- Click on a role in the Roles settings
- Next to the role name, click the icon placeholder
- Upload or select an icon for the role
You can also adjust how roles are displayed in the member list through the “Display role members separately” option.
#Best Practices for Role Management
To maintain an organized and efficient server:
- Use a clear naming convention for roles
- Regularly audit roles and permissions
- Document your role structure and purpose
- Limit the number of roles to avoid confusion
- Use color coding to visually differentiate role types
Remember, if you ever need to leave a Discord server without anyone knowing, you can do so discreetly without disrupting the role structure.
#Troubleshooting Common Role Issues
If you encounter problems with roles:
- Ensure the role is properly placed in the hierarchy
- Check that the correct permissions are enabled
- Verify that the role has been correctly assigned to members
- Restart the Discord client or clear cache if changes aren’t appearing
In case of severe issues, such as accidental deletion of your account, know that you can recover a deleted Discord account within a certain timeframe.
#Advanced Role Techniques
For more complex server management:
- Explore linked roles to integrate with external platforms
- Utilize bots for advanced role management and automation
- Consider creating temporary roles for events or specific projects
#Bottom Line
For most servers under 100 members, three core roles (Owner, Moderator, and Member) cover roughly 90% of permission needs without adding hierarchy complexity. Discord’s documentation states that the role list is evaluated top-down at every permission decision, so keep your most powerful roles at the top, lock the Administrator permission to a single trusted tier, and restrict @everyone to read-only access on announcement channels.
Audit your roles every quarter and remove any role with zero assigned members. Discord recommends granting Administrator only to people you would trust with the keys to the entire community; for anyone else, build a custom role with the specific permissions they need, and review Discord’s Community Guidelines whenever you add new moderators so they understand the platform’s enforcement expectations.
#Frequently Asked Questions
How many roles can a Discord server have?
Free Discord servers support up to 250 roles. Most healthy communities stick to 5 to 15 well-scoped roles.
Can a member have multiple roles in Discord?
Yes. Every member can hold any number of roles, and Discord stacks permissions cumulatively, so a member with two roles gets the union of every permission either role grants. The exception is the role color and display section, which uses the highest role in the member’s stack.
Why aren’t my role changes showing up?
Discord clients cache role data aggressively. Restart the desktop or mobile app, sign out and back in, or press Ctrl+R on desktop to force a refresh. If a member still shows the wrong permissions, confirm the role hierarchy ordering is correct and that no higher role explicitly denies the permission you intended to grant.
What’s the difference between role permissions and channel permissions?
Role permissions are server-wide defaults; channel permissions override them inside specific text or voice channels.
Can I assign roles in bulk?
The native Discord client doesn’t offer a bulk-assign UI. For large servers, admins typically rely on a verified Discord bot like MEE6, Carl-bot, or Dyno, which can assign roles based on reactions, joins, or member criteria. Always review a bot’s permissions before adding it.
Is it safe to give someone the Administrator permission?
The Administrator permission grants every possible permission, including the ability to delete channels, ban members, and change server settings. Only assign it to people you would trust with full control of the server, and never to a bot you don’t manage directly.

Apps Crashing After iOS 27 Update? Fix Order (2026)
Apps crashing after the iOS 27 update? Update the app in the App Store first, then offload and reinstall to clear stale cache, then restart. The fix order.

Do AI Translation Earbuds Work Offline? What to Know
Do AI translation earbuds work offline? A few do with downloaded language packs, but most need the cloud. Here's what works offline and what you give up.

How to Set Up Translation Earbuds (Pairing and Modes)
How to set up translation earbuds: charge, install the app, pair over Bluetooth, pick two languages, and choose a mode. A step-by-step first-use guide.

Translation Earbuds Not Translating? How to Fix Them
Translation earbuds not translating? Usually it's the app, the internet, or the language settings. Here's how to fix pairing, sound, and lag fast.