How to Set Up and Use Screen Sharing on Mac (2026 Guide)
Set up Mac Screen Sharing in under 2 minutes. Step-by-step guide for macOS Sonoma and Ventura, plus free cross-platform alternatives that work.
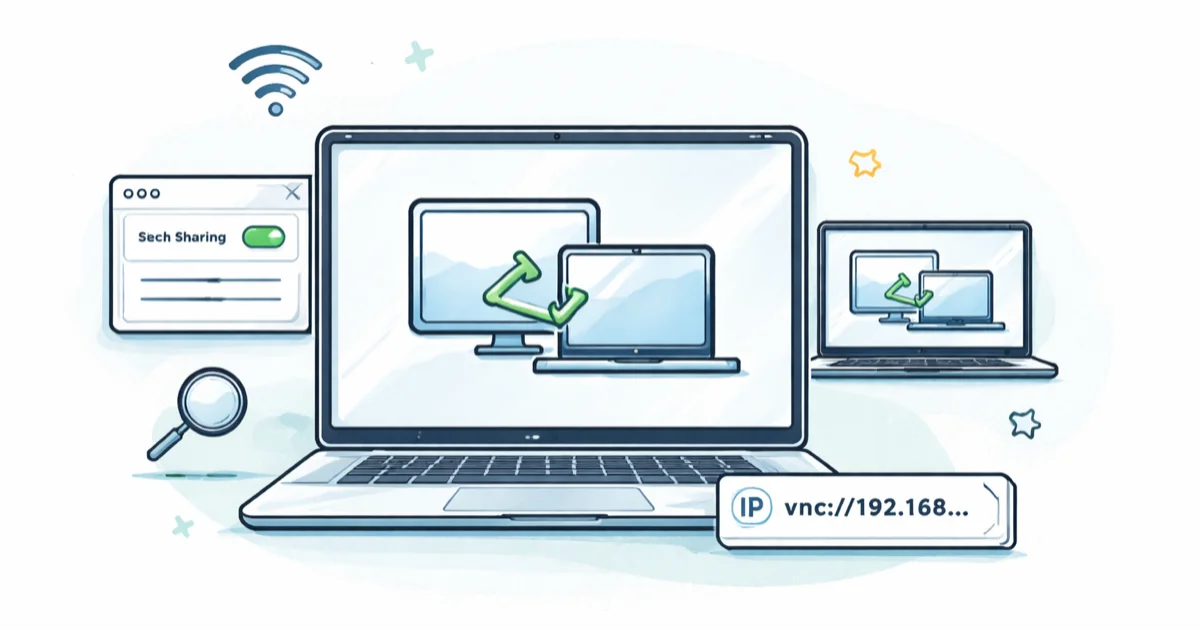
Quick AnswerTurn on Screen Sharing in System Settings > General > Sharing on the host Mac, then connect from another Mac through Finder's Network sidebar or by typing a vnc:// address into Connect to Server.
Screen sharing on Mac lets you view and control another Mac’s desktop from your own keyboard, but Apple ships the feature off by default. On macOS Sonoma and Ventura, a Mac is ready to share within a couple of minutes of flipping the toggle. This guide covers the System Settings toggle, the Finder and VNC connection paths, the four most common reasons connections fail, and the cross-platform alternatives worth using.
- Screen Sharing is off by default; toggle it in
System Settings>General>Sharingon macOS Ventura 13 and later - Finder’s Network sidebar finds nearby Macs in seconds; the vnc:// address method works when discovery is blocked
- Both Macs must sit on the same local network unless a VPN tunnel connects them
- The built-in viewer supports clipboard sharing, Adaptive or Full quality, and multi-monitor switching
- Chrome Remote Desktop works cross-platform and installs in roughly 90 seconds on both Mac and Windows
#How Do You Enable Screen Sharing on Mac?
The setting location depends on your macOS version. On macOS Ventura (13) and later, Apple moved sharing options into System Settings instead of the older System Preferences panel.
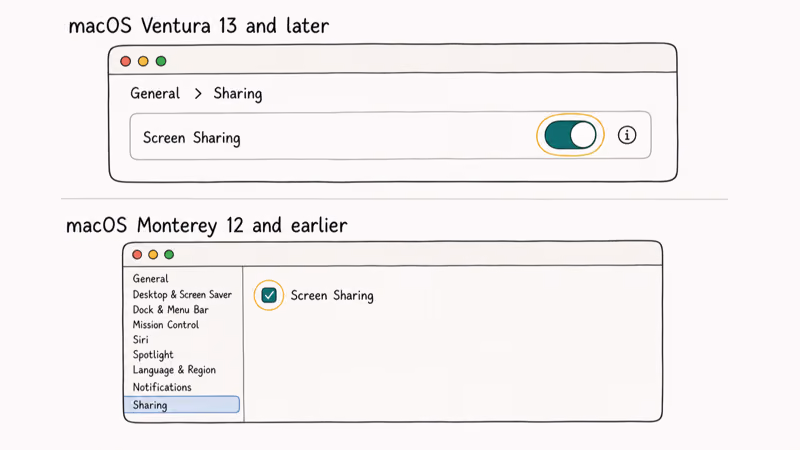
For macOS Sonoma and Ventura (13+): Open System Settings from the Apple menu, go to General > Sharing, and toggle Screen Sharing on. Click the info button next to it to choose which users can access your Mac. The toggle takes about 30 seconds end-to-end.
For macOS Monterey (12) and earlier: Open System Preferences, click Sharing, and check the box next to Screen Sharing.
According to Apple, port 5900 carries both Screen Sharing and Remote Management traffic on the VNC protocol, so the two can’t be on at the same time. Apple’s screen sharing guide walks through the user permissions you can grant. The conflict is visible in practice: turning Screen Sharing on automatically disables Remote Management. Anyone you grant access to can see, click, type, and open apps, so only add people you trust.
#Connecting to Another Mac’s Shared Screen
Once the host Mac has screen sharing on, you can connect from any other Mac on the same network. The Finder approach is faster than the VNC method when both machines sit on the same Wi-Fi.
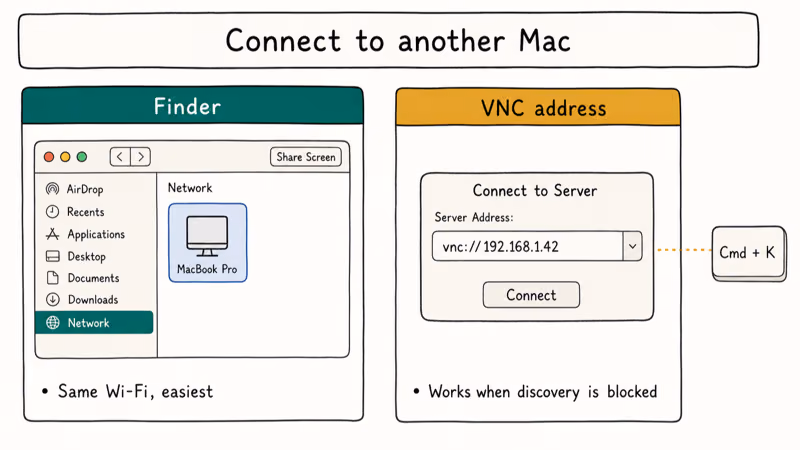
Method 1: Connect through Finder
Open a Finder window and look for Network in the left sidebar. If you don’t see it, go to Finder > Settings > Sidebar and check “Network.” Click the host Mac’s name, then click Share Screen in the upper-right corner. Enter a username and password for an authorized account on that Mac.
When both Macs are signed into the same Apple ID, Finder skips the login prompt entirely. On two Macs sharing one iCloud account, the connection starts almost instantly.
Method 2: Connect using a VNC address
Use this method when the host Mac doesn’t appear in Finder. On larger corporate networks, or when Bonjour discovery is blocked, the Finder list comes up empty. On the host Mac, look up the IP shown in System Settings > General > Sharing next to Screen Sharing. On your Mac, press Command + K in Finder (or go to Go > Connect to Server), type vnc://[IP-address], and click Connect.
According to Apple’s VNC connections documentation, the macOS viewer speaks standard VNC, so it can also reach Linux desktops running x11vnc and Windows machines running TightVNC or RealVNC, as long as you have the listening IP and password.
IP addresses on home routers shift periodically. For a permanent connection, assign a static IP through your router or use the Mac’s hostname (such as vnc://MacBook-Pro.local). If you’re tracking down why a session stalls before login, our guide on why you can’t screen share on FaceTime covers the same network-level issues that block built-in screen sharing.
#Features Available During a Screen Sharing Session
The built-in viewer has more features than people realize. Here is what each one does on a recent macOS version.
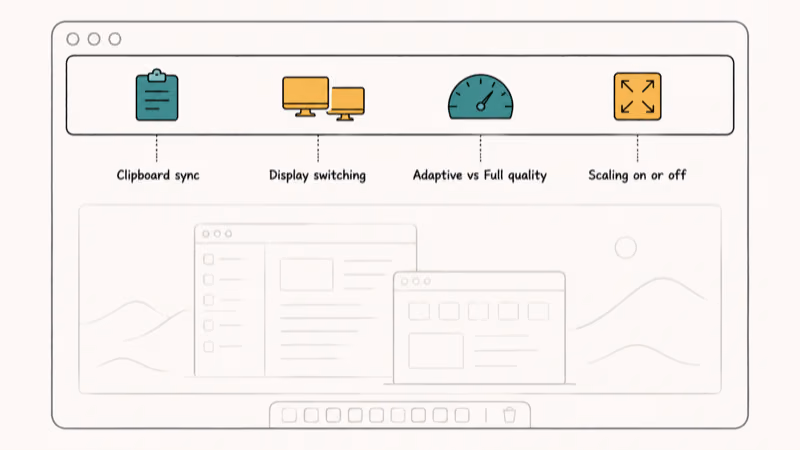
Clipboard sharing lets you copy text or files on your Mac and paste them on the remote Mac. Plain text and small images transfer instantly. Files larger than about 50 MB can lag the clipboard sync, so dragging the file into the viewer window works better for big transfers. If copy and paste stops working on your Mac during a session, end and restart the connection.
Display switching comes in handy when the host Mac drives multiple monitors. Click the display icon in the toolbar to choose which screen you view. Pairing peripherals over Bluetooth on the host Mac during the same session can interrupt the video stream, so connect Bluetooth devices before you start.
Quality adjustment matters on slower networks. Open the View menu and choose between Adaptive Quality (drops resolution on slow links) and Full Quality (sharp image but needs roughly 50 Mbps to stay smooth). On fast home Wi-Fi, Full Quality shows no visible lag. Switch to Adaptive on hotel Wi-Fi or a tethered phone hotspot, where it keeps mouse and keyboard responsive even when bandwidth drops below 5 Mbps and the connection looks shaky.
Scaling stretches or shrinks the host display to fit your viewer window. Turn it on for cleaner sessions on a smaller laptop screen. Turn it off if you want a one-to-one view, but expect to scroll around on a smaller monitor.
#Why Is Screen Sharing Not Working on Your Mac?
Try these checks in order. Most connection failures come from network or firewall issues, not the Mac itself.
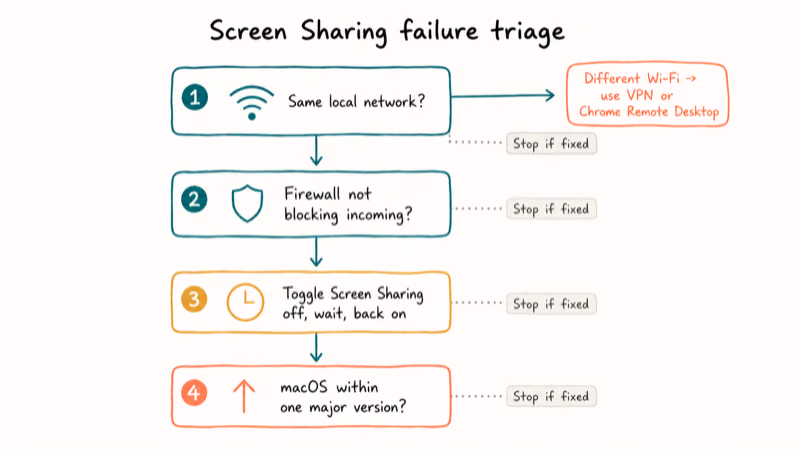
Verify the network. Both Macs must be on the same local network. Start here. The built-in tool won’t reach across two different Wi-Fi networks unless you have a VPN linking them. If you need to share across the internet, jump to Chrome Remote Desktop.
Check the firewall. Go to System Settings > Network > Firewall > Options and verify “Block all incoming connections” is off. Apple recommends allowing inbound connections for any service you actively use, since the firewall otherwise drops VNC traffic on port 5900 even when Screen Sharing looks turned on. The toggle stays green, but nothing comes through. This is a common trap on a host running stealth mode.
Restart the sharing service. Toggle Screen Sharing off, wait 10 seconds, then turn it back on. This often clears a stuck session right after a macOS point update. It’s the fastest first step before deeper debugging.
Update macOS. Screen sharing across very different macOS versions can hit compatibility quirks. Apple confirms that Remote Desktop and Screen Sharing rely on VNC primitives shared since Mac OS X Leopard, so keeping both Macs within one major version of each other makes the protocol negotiation cleaner. Updating to a newer major release often fixes a recurring black-screen issue.
If none of these clear the issue, switch to the VNC address method instead of Finder, or hop to a cross-platform alternative.
#Cross-Platform Alternatives Worth Considering
The built-in macOS Screen Sharing only works between Macs on the same network. If you need to reach a Windows PC, share across the internet, or run group sessions, a third-party tool fits better.
| Tool | Cross-Platform | Free Tier | Best For |
|---|---|---|---|
| Zoom | Yes | 40-min meetings | Quick screen shares inside meetings |
| Apple Remote Desktop | Mac only | No ($79.99) | IT admins managing multiple Macs |
| Chrome Remote Desktop | Yes | Yes | Free remote access over the internet |
| AnyDesk | Yes | Personal use free | Low-latency remote control |
Chrome Remote Desktop deserves a closer look. It’s free, runs through any Chrome browser, and installs in roughly 90 seconds. Google recommends the official Chrome Remote Desktop page as the only safe install path; you install the helper on both ends, pick a 6-digit PIN, and start sharing right after. Between a Mac and a Windows laptop on a typical cable connection, the lag is barely noticeable.
Want more options beyond these four? A few related guides cover adjacent use cases:
- Our review of the best screen mirroring apps breaks down what each one charges and what platforms they cover.
- If you want media to play from your Mac on a TV instead, our AirPlay without Wi-Fi guide shows the offline path.
- For a one-off classroom or webinar where everyone joins a browser call, Google Hangouts screen share is a lighter option that needs no install on the viewer side.
#Security Tips for Mac Screen Sharing
Screen sharing opens a direct window into your Mac, so take precautions. Turn the toggle off when you aren’t actively using it.
Set a strong, unique password on every user account that has screen-sharing permission. On a public or office network, restrict access to specific accounts rather than “All Users.” That single change blocks unauthorized people on the same network from even attempting a connection.
For remote use over the internet, route through a VPN. Port forwarding exposes VNC port 5900 to the open internet, and automated scanners find it within hours. Never expose VNC directly to the internet.
#Bottom Line
Start with the built-in Screen Sharing toggle. It costs nothing, takes about 2 minutes to enable, and works on every Mac since macOS 10.14 Mojave. Reach for Chrome Remote Desktop when you need to connect to a Windows machine or work over the open internet without router configuration. If you manage a fleet of Macs in an office or lab, the $79.99 Apple Remote Desktop adds task automation and software push that the free tools can’t match.
Mac Tips & Tricks
#Frequently Asked Questions
Can you screen share between a Mac and a Windows PC?
Not with Apple’s built-in tool. Use Chrome Remote Desktop, AnyDesk, Zoom, or TeamViewer. All four are free for personal use and run on both macOS and Windows.
Does screen sharing on Mac work over the internet?
The built-in feature is local-network only out of the box. To use it across the internet, you need a VPN bridging both networks, or you can route the connection through a service like Chrome Remote Desktop, which proxies traffic through Google’s servers and skips router configuration entirely.
Will the other person be able to control my Mac?
Yes. The connected user gets full mouse and keyboard control by default. To restrict that, go to System Settings > General > Sharing, click the info button next to Screen Sharing, and set the user’s permission to “Can observe” instead of “Can control.” Observe-only lets them watch your screen without interacting with it.
How do you stop a screen sharing session?
Close the viewer window on either Mac and the session ends on both sides. You can also flip the Screen Sharing toggle off in System Settings if you want the host Mac to refuse new connections.
Is Mac screen sharing encrypted?
Yes. macOS encrypts the screen sharing stream during transit using standard VNC encryption, but encryption alone won’t stop someone who guesses a weak password. Use a long unique password on any account allowed to share, and turn the feature off when it’s not in use. For internet-facing setups, route through a VPN rather than exposing VNC directly to the open network.
Can you share just one app window instead of the full screen?
The built-in macOS Screen Sharing tool only shares the full desktop. To share a single app window or one browser tab, switch to Zoom or FaceTime instead.
What macOS versions support screen sharing?
Every release since Mac OS X 10.5 Leopard from 2007. The biggest difference between versions is where the toggle lives: System Preferences on Monterey and earlier, System Settings on Ventura and later. Connections work most reliably when both Macs run the same macOS major version, or are at most one major version apart.
Does screen sharing affect Mac performance?
Screen sharing uses minimal CPU. On a modern Apple Silicon Mac, the screensharingd process uses only a tiny share of CPU during an active session. Older Macs or networks slower than 10 Mbps may see lag, but the feature is lightweight and runs fine alongside everyday workloads.
macOS 27 Golden Gate: Release Date and Compatible Macs
macOS 27 Golden Gate was announced at WWDC 2026. Here is the release date, the Apple Silicon-only compatible Mac list, and every confirmed new feature.
How to Copy and Paste on a Mac: Shortcuts and Fixes
Copy and paste on a Mac with Command-C and Command-V. Learn the cut shortcut, paste without formatting, Universal Clipboard, and fixes when it breaks.
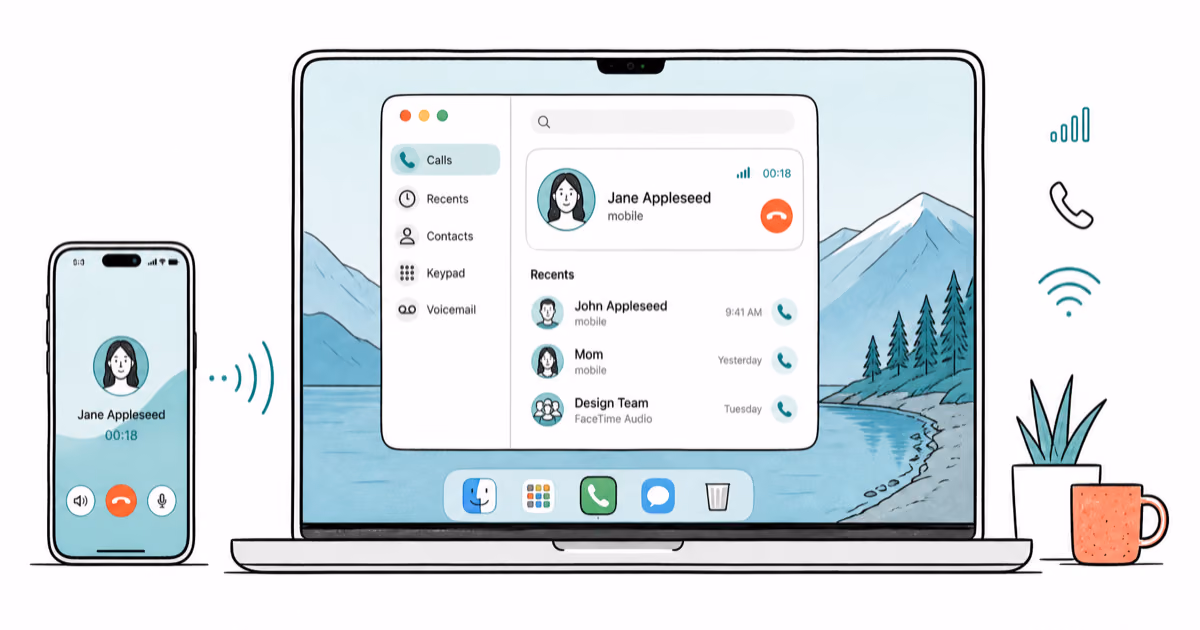
How to Use the Phone App on Mac: macOS Tahoe Setup Guide
Set up the Phone app on macOS Tahoe to relay iPhone cellular calls. Covers requirements, FaceTime setup, Call Screening, and common firewall fixes.
How to Use iPhone Mirroring on Mac: Full 2026 Setup Guide
Set up iPhone Mirroring on macOS Sequoia with iOS 18. Covers hardware requirements, the six common error messages, EU limits, and a shared-Mac privacy fix.