iPhone Attempting Data Recovery: How to Fix It Fast
iPhone stuck on Attempting Data Recovery? Here's how to fix it after a failed iOS update. Force restart, Recovery Mode, and DFU steps included.
Quick AnswerWait 10 minutes for the recovery to finish on its own. If it fails, force restart your iPhone by pressing Volume Up, Volume Down, then holding the Side button until the Apple logo appears. Use Recovery Mode through iTunes or Finder if the problem continues.
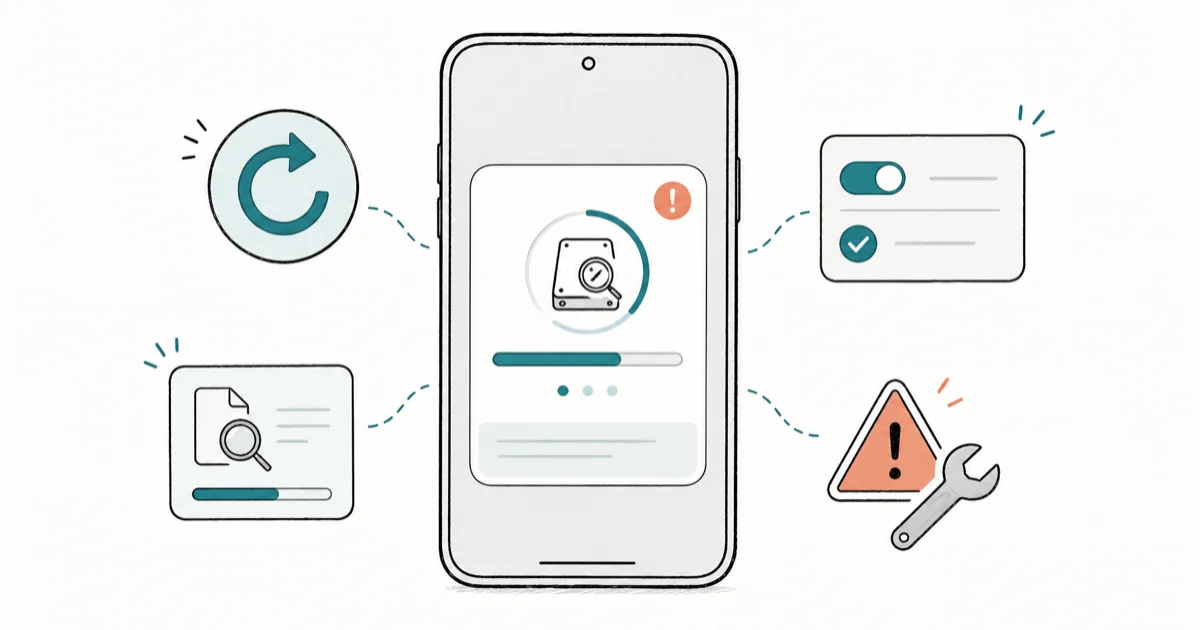
Your iPhone is stuck on the “Attempting Data Recovery” screen, and you’re worried about losing everything. This message shows up when an iOS update goes wrong, and the phone tries to salvage your files before starting fresh. The fixes below cover every modern iPhone, from the iPhone SE through the latest Pro models.
- The Attempting Data Recovery screen appears when an iOS update fails mid-install due to power loss, low storage, or unstable connection
- Force restarting your iPhone (Volume Up, Volume Down, hold Side button) resolves the issue in most cases within 2 minutes
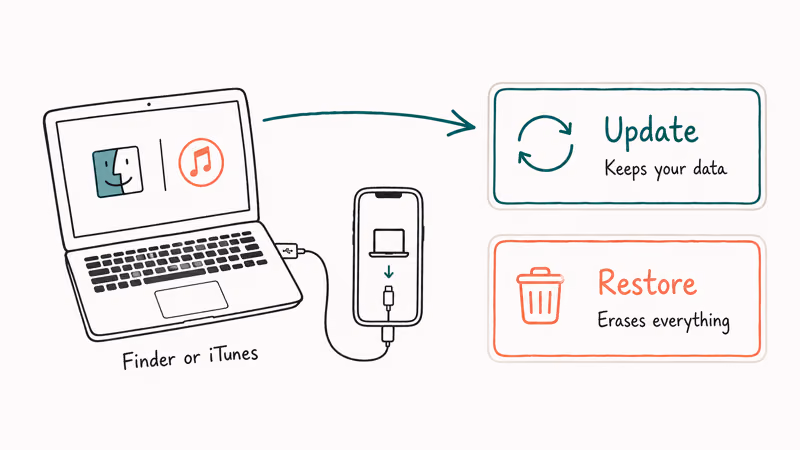
- Recovery Mode through iTunes or Finder lets you reinstall iOS without erasing personal data if you choose Update instead of Restore
- DFU Mode is the last resort and will erase all data, so an iCloud or computer backup beforehand is essential
- Keeping at least 5 GB of free storage and using a stable Wi-Fi connection prevents this problem during future updates
#What Causes the Attempting Data Recovery Screen?
The “Attempting Data Recovery” message means your iPhone’s update process crashed partway through. iOS detected incomplete system files and triggered an automatic recovery attempt. Disconnecting the USB cable in the middle of an update is one reliable way to trigger this screen.
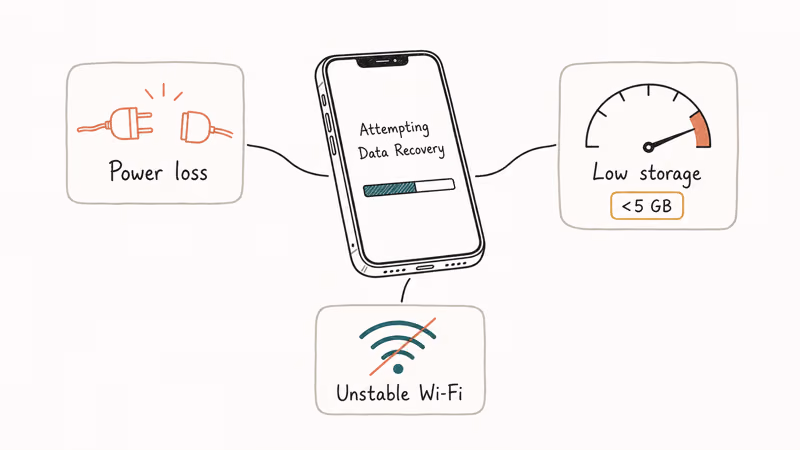
Power loss during an update kills the process mid-write. Low storage forces iOS to juggle files it can’t fit, and an unstable Wi-Fi connection can corrupt the download package before installation finishes.
Apple’s iOS update support page states that iOS updates require at least 50% battery and a Wi-Fi connection to complete successfully. Older iPhones with slower NAND storage chips are especially vulnerable because they take significantly longer to write update files, giving more time for something to go wrong during the process.
#How Do You Force Restart to Fix It?
A force restart clears the stuck recovery loop and lets iOS boot normally. It works for most people.
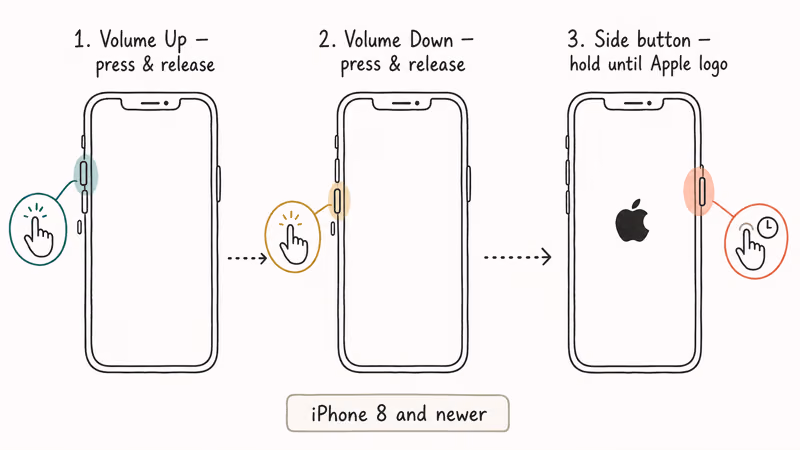
For iPhone 8 and newer (including the 14, 15, and 16 series), press and release Volume Up, press and release Volume Down, then hold the Side button until the Apple logo shows up. The whole sequence takes about 10-15 seconds.
For iPhone 7, hold Volume Down and Power together. For iPhone 6s and earlier, hold Home and Power together. Keep holding until the Apple logo appears.
On a stuck phone, the force restart usually reboots to the home screen within a minute or two, data intact.
#Recovery Mode Through iTunes or Finder
If your iPhone keeps looping back to the Attempting Data Recovery screen after a force restart, Recovery Mode is your next step. You’ll need a Mac or Windows PC with a USB cable.
- Open Finder on macOS Catalina or later (or iTunes on Windows)
- Connect your iPhone while holding the Side button
- Keep holding until the Recovery Mode screen appears
- Your computer will show two options: Update or Restore
Pick Update first. According to Apple’s Recovery Mode documentation, the Update option reinstalls iOS while preserving all user data, apps, and settings. Restore erases everything and installs a clean copy. Only use Restore if Update fails twice.
The process takes 15 minutes to an hour depending on internet speed. Don’t disconnect the cable.
#DFU Mode: The Nuclear Option
DFU (Device Firmware Update) Mode communicates with the iPhone’s bootloader directly, bypassing normal iOS startup. This erases everything on the device.
Back up your data first if at all possible.
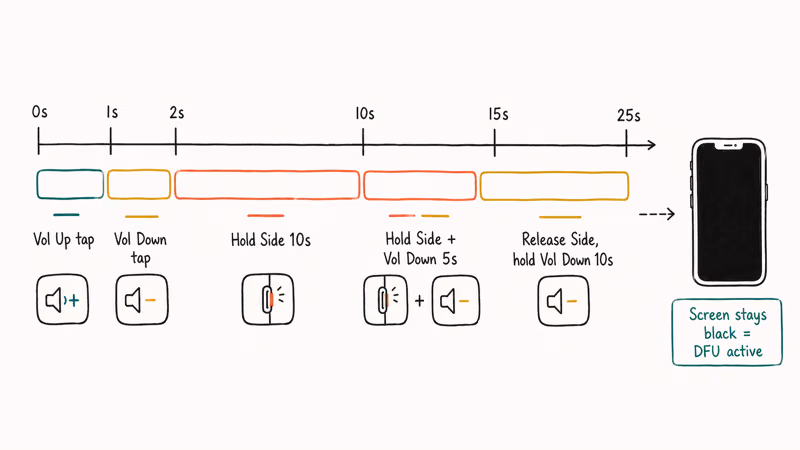
To enter DFU Mode on an iPhone that won’t turn on:
- Connect to your computer and open Finder or iTunes
- Press and release Volume Up, then Volume Down
- Hold the Side button for 10 seconds
- While holding Side, also press Volume Down for 5 seconds
- Release Side but keep holding Volume Down for 10 more seconds
The screen stays completely black if you’re in DFU Mode. Your computer detects the device. If the Apple logo appears, start over.
According to iFixit’s DFU Mode guide, this mode allows firmware-level repairs that Recovery Mode can’t reach, including reflashing the baseband and restoring corrupted system partitions.
#Preventing Future Update Failures
Prevention takes about 5 minutes before any iOS update.
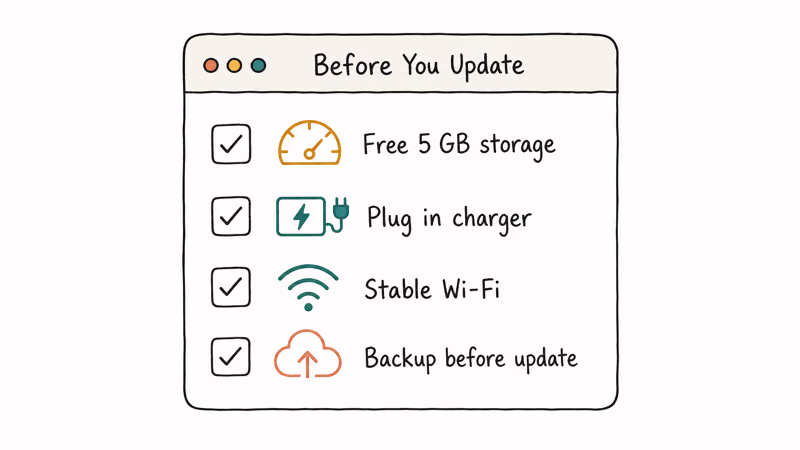
Free up storage. Go to Settings > General > iPhone Storage and delete old videos, clear the Recently Deleted album in Photos, then offload unused apps. Keep at least 5 GB free. If your iPhone battery is dying fast, that storage cleanup helps with both issues.
Use a charger and stable Wi-Fi. Apple’s software update documentation recommends connecting to power and using a Wi-Fi network with at least 50% battery remaining. Don’t start an update on cellular data.
Back up before updating. Force an iCloud backup through Settings > [Your Name] > iCloud > iCloud Backup > Back Up Now. For a complete backup that includes app data and health records, connect to your computer and use Finder or iTunes.
Leave the phone alone during the update. Once the progress bar appears, no force restarts, no unplugging, no switching networks. Updates take 10-30 minutes.
#What to Do if Data Is Missing After Recovery
If your iPhone finished recovering but files are gone, check iCloud first. Go to Settings > [Your Name] > iCloud and make sure Photos, Contacts, and Messages are toggled on. Data syncs back within minutes on a decent connection.
If you had a computer backup, connect your phone and select Restore Backup in Finder or iTunes. Choose the backup dated before the failed update.
For vanished photos, check the Recently Deleted album. Apple keeps deleted photos for 30 days.
If you’re dealing with ghost touch problems or a white screen after recovery, those are separate hardware issues needing different fixes.
Third-party tools like Dr.Fone or Tenorshare ReiBoot can scan for recoverable fragments that iOS missed. How much they recover depends on how much of the storage was overwritten during the failed update, so results vary from one device to the next.
Some links on this page are affiliate links, which means fone.tips may earn a commission at no extra cost to you.
#When to Visit Apple for Repair
Some situations need hands-on help. If your iPhone loops between the Attempting Data Recovery screen and the Apple logo for more than an hour after trying Recovery Mode, the storage chip itself might be failing.
Schedule a Genius Bar appointment if you see error codes 4013 or 4014 during recovery, if the recovery screen appears every time you update iOS, or if the phone overheats during the process. Error 4013 points to a hardware disconnection between the logic board and storage that no software fix can address.
Under warranty or AppleCare+, the repair is free. Out-of-warranty logic board repairs cost $300-$600 depending on the model. For phones older than iPhone 12, a replacement device is often cheaper.
Before visiting, know your Apple ID password and disable Find My iPhone from iCloud.com if the phone won’t boot.
#Bottom Line
Start with a force restart: Volume Up, Volume Down, then hold Side until the Apple logo appears. That fixes most Attempting Data Recovery loops in under 2 minutes. If the screen returns, use Recovery Mode and pick Update. DFU Mode erases everything but fixes deeper firmware corruption, and error codes 4013 or 4014 mean you need Apple’s help because the storage hardware requires physical repair.
#Frequently Asked Questions
How long should I wait before force restarting?
Give the recovery screen at least 10 minutes. Watch the progress bar underneath to check if the phone is actually working. If the bar hasn’t moved at all in 10 minutes, the process is stuck and a force restart is safe. Don’t wait longer than 30 minutes because a frozen recovery won’t fix itself.
Will Attempting Data Recovery erase my files?
No. The recovery process preserves your data. Only DFU Mode and the Restore option in Recovery Mode wipe the phone.
Can this happen with any iOS update?
Major version updates (iOS 17 to iOS 18) carry higher risk because they rewrite more system files and take longer to install, which creates a wider window for interruptions. Point updates like 18.3 to 18.4 involve smaller changes and rarely trigger this screen.
Does a factory reset fix the recovery loop?
A factory reset through Recovery Mode (Restore option) does fix the loop, but it wipes all content and settings. Use it only after Update has failed twice, and only if you have a recent backup to restore your iPhone from.
Is data recovery possible without any backup?
Third-party tools like Dr.Fone and Tenorshare ReiBoot scan iPhone storage for recoverable file fragments that iOS can’t access normally, though success depends on how much data was overwritten during the failed update. Professional services like DriveSavers are expensive but can recover data from physically damaged storage chips that consumer tools can’t read. Try a consumer tool first and escalate to a professional service if it falls short.
What does error code 4013 mean?
Error 4013 signals a hardware-level communication failure between the logic board and the storage chip. Apple Store technicians diagnose whether it needs resoldering or a full board replacement.
Should I update through a computer instead of over the air?
Updating through Finder or iTunes downloads the complete firmware file before installing, which eliminates corrupted-download risks. Over-the-air updates download and install at the same time, making them vulnerable to connection drops. For major version updates, a computer is the safer choice.
Does this screen void my iPhone warranty?
No. Attempting Data Recovery is a built-in iOS process. Apple covers repair under the standard one-year warranty or AppleCare+, and a failed update doesn’t count as user damage. Only jailbreaking or unauthorized hardware modifications void your coverage.

iPhone 17 Cellular Data Not Working on iOS 26? 9 Fixes
iPhone 17 cellular data still dropping on iOS 26? Apple fixed the launch bug in iOS 26.0.1, but recovery failures persist. Here's the fix ladder.

iPhone Cellular Data Not Working Abroad? eSIM Fixes
Travel eSIM showing no data abroad? Fix iPhone roaming with the data-line check, Data Roaming toggle, APN settings, and network selection steps.

iPhone Cellular Data Not Working for Some Apps? 8 Fixes
Some iPhone apps refuse to load on cellular while others work fine. Check the per-app cellular toggle, Low Data Mode, VPN profiles, and Screen Time.

iPhone Stuck on EDGE? How to Get 5G or LTE Back (2026)
iPhone stuck on EDGE with crawling data? Here's why the E icon appears, which settings force 5G or LTE back, and when the problem is your carrier.