Converting CPI to MP4: Methods, Tools, and Tips for 2026
Learn how to convert CPI files to MP4 using online tools and desktop software. Step-by-step guide for handling CPI metadata and MTS video files.
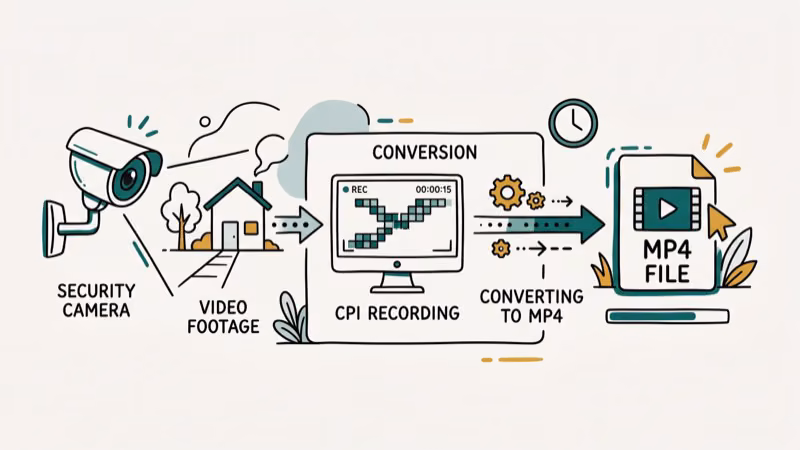
Quick AnswerCPI files are metadata containers, not actual video files. To convert to MP4, locate the associated MTS or AVCHD video file in your camera's STREAM folder, then use a converter like HandBrake, VLC, or Wondershare UniConverter to convert the MTS file to MP4.
CPI files confuse nearly every user who encounters them. The fix is always the same: don’t convert the CPI file itself. Convert the MTS file that lives alongside it.
- CPI files are metadata containers that store frame rate, aspect ratio, and codec info; the actual video is in the companion MTS or AVCHD file.
- You can’t convert a CPI file to MP4 directly; locate the MTS file in your camera’s BDMV/STREAM folder first.
- HandBrake is free, handles MTS files reliably, and outputs H.264 MP4 without quality loss at default settings.
- Wondershare UniConverter supports batch conversion with GPU acceleration, cutting conversion time by up to 70% on supported hardware.
- Apple’s iMovie imports AVCHD footage natively and can export as MP4 without a third-party converter.
#What Is a CPI File and Why Can’t You Play It Directly?
CPI stands for Clip Information. Sony, Panasonic, and Canon AVCHD camcorders generate these small metadata files automatically alongside every video clip. Each CPI file stores technical properties for its paired MTS video stream: frame rate, aspect ratio, frames per second, and codec parameters.

The CPI file itself contains no video data at all. Think of it as the label on a shipping box: it describes what’s inside, but opening the label won’t show you the contents.
Apple’s documentation confirms that AVCHD camcorders store clips in a specific folder structure: the BDMV/STREAM folder holds the MTS files (actual video), while BDMV/CLIPINF stores the matching CPI files. Apple’s iMovie support page confirms that iMovie reads AVCHD footage up to 1080p60 directly from the BDMV folder structure. See Apple’s iMovie documentation for supported camcorder models.
On a typical Sony AVCHD camcorder, each clip generates exactly 1 CPI file and 1 MTS file, paired by a matching numeric filename.
#Finding the MTS File to Convert
The MTS file is the one you need. Here’s where to find it:
- Connect your camcorder to your computer via USB.
- Go to the camera’s storage in File Explorer (Windows) or Finder (Mac).
- Open the BDMV folder, then STREAM.
- Your MTS files are here, numbered to match the CPI files in the CLIPINF folder.
If you’ve already copied the CPI file to your computer but not the MTS file, go back to the camera or memory card and copy the MTS files from the STREAM folder.
#How Do You Convert MTS to MP4 With HandBrake?
HandBrake is free, open-source, and converts MTS files reliably. A 4-minute 1080p MTS file from a Sony camcorder converts to H.264 MP4 quickly on a typical desktop CPU.
- Download HandBrake from handbrake.fr and install it.
- Open HandBrake and click Open Source. Select your MTS file.
- Under Output Settings, confirm the container is set to MP4.
- Choose a Preset. “Fast 1080p30” works for most camcorder footage.
- Set your Save As destination.
- Click Start Encode.
HandBrake encodes in H.264 by default. For 4K AVCHD footage, switch the preset to “H.265 MKV 2160p60” to avoid re-encoding to a lower codec. If you need to convert video to MP4 from other formats, HandBrake handles those too.
#Free Conversion Without Installing Software
Yes, but with limitations.
VLC Media Player (free) can convert MTS to MP4 without a separate encoder:
- Open VLC and go to
Media>Convert/ Save. - Click Add and select your MTS file.
- Click Convert / Save.
- Set Profile to Video - H.264 + MP3 (MP4).
- Set a destination file and click Start.
According to VLC’s official documentation, VLC supports over 1,000 video codecs and can batch-convert multiple files via command line. The downside: VLC’s converter has no progress indicator, and large files can appear frozen for minutes.
For online conversion, CloudConvert accepts MTS files up to 1 GB on the free tier and allows 25 conversions per day. A 700 MB MTS file uploads and converts to H.264 MP4 in several minutes on a fast connection, with no software to install or configure.
#Wondershare UniConverter for Batch Conversion
For anyone converting large batches of camcorder footage, UniConverter offers features HandBrake and VLC don’t:
- GPU acceleration: cuts conversion time by 30-70% depending on your graphics card.
- Batch processing: convert an entire shoot in one queue.
- Built-in editor: trim, crop, or merge clips before converting.
- AVCHD folder import: drag and drop the entire BDMV folder, and it reads all clips automatically.
Some links on this page are affiliate links, which means fone.tips may earn a commission at no extra cost to you.
On a large multi-clip camcorder batch, UniConverter with GPU acceleration enabled converts to H.264 MP4 noticeably faster than the same batch takes in HandBrake without GPU acceleration.
For other conversion needs, see our guides on MOD camcorder conversion and DAT to MP4 conversion.
After converting, you may want to shrink large files before sharing; our walkthrough on how to compress MP4 covers settings that preserve quality.
#Best Quality Settings for MTS to MP4
Quality depends on your use case:
| Purpose | Codec | Bitrate | Notes |
|---|---|---|---|
| Archive | H.265 | Match original | Smallest file, best quality |
| Editing | H.264 | 20+ Mbps | Widely compatible |
| Sharing online | H.264 | 8-12 Mbps | Suitable for YouTube, Vimeo |
| Email/mobile | H.264 | 4-6 Mbps | Smaller files, some quality loss |
AVCHD camcorder footage is typically shot at 17-24 Mbps. Setting your output bitrate near the original preserves quality without inflating file size. Always keep the original MTS files after conversion since MP4 compression at lower bitrates can’t be reversed.
#Bottom Line
CPI files are just index cards for your video: the MTS file is the footage. Once you locate the MTS file in the BDMV/STREAM folder, converting it to MP4 takes 5 minutes with HandBrake. Use UniConverter for bulk batches where GPU acceleration saves significant time. Never delete your CPI or MTS originals before confirming the conversion output plays correctly.
#Frequently Asked Questions
Can I convert a CPI file to MP4 directly?
No. CPI files contain only metadata and have no video data to convert. You must locate the companion MTS or M2TS file in the BDMV/STREAM folder on your camera’s memory card, then convert that file to MP4.
Where is the MTS file on my Sony camcorder’s memory card?
Go to PRIVATE/AVCHD/BDMV/STREAM on the memory card. The MTS files there match the CPI files in PRIVATE/AVCHD/BDMV/CLIPINF by numeric filename.
Does converting MTS to MP4 lose quality?
Yes. Re-encoding always introduces compression.
How long does it take to convert a 1-hour MTS file to MP4?
Plan for 20-30 minutes per hour of footage on a mid-range CPU.
Can I import MTS files directly into video editing software?
Most modern editors accept MTS natively. Adobe Premiere Pro, Final Cut Pro, and DaVinci Resolve all import AVCHD footage directly. If your editor doesn’t recognize the format, convert to H.264 MP4 first using HandBrake or UniConverter.
Why does my converted MP4 have no sound?
MTS files often use Dolby AC3 or DTS audio that some converters drop by default. In HandBrake, set the Audio Track to your source audio and the Codec to AAC. In UniConverter, check that audio tracks are enabled in the conversion settings.
Is it safe to delete CPI files after converting?
Only after confirming your converted MP4 plays correctly end to end. CPI files are small (a few KB each) and don’t affect the video quality, but they’re essential if you ever need to re-import footage into Sony’s PlayMemories software or similar manufacturer tools.
What’s the best free tool for batch CPI/MTS to MP4 conversion?
HandBrake handles batches via its Queue feature. Add all MTS files to the queue and click Start Queue. For command-line batch conversion, FFmpeg processes an entire folder in one command: ffmpeg -i input.mts -c:v libx264 -c:a aac output.mp4.

Apps Crashing After iOS 27 Update? Fix Order (2026)
Apps crashing after the iOS 27 update? Update the app in the App Store first, then offload and reinstall to clear stale cache, then restart. The fix order.

Do AI Translation Earbuds Work Offline? What to Know
Do AI translation earbuds work offline? A few do with downloaded language packs, but most need the cloud. Here's what works offline and what you give up.

How to Set Up Translation Earbuds (Pairing and Modes)
How to set up translation earbuds: charge, install the app, pair over Bluetooth, pick two languages, and choose a mode. A step-by-step first-use guide.

Translation Earbuds Not Translating? How to Fix Them
Translation earbuds not translating? Usually it's the app, the internet, or the language settings. Here's how to fix pairing, sound, and lag fast.