Trust This Computer Keeps Popping Up: Fixes That Stick
Stop the Trust This Computer popup from looping. Reset Location and Privacy, swap your USB cable, then rebuild the lockdownd trust store on Mac or PC.
Quick AnswerOpen Settings, General, Transfer or Reset iPhone, then Reset Location and Privacy to clear stored trust certificates. Reconnect with a certified cable and tap Trust on your own Mac or PC to rebuild the pairing record once.
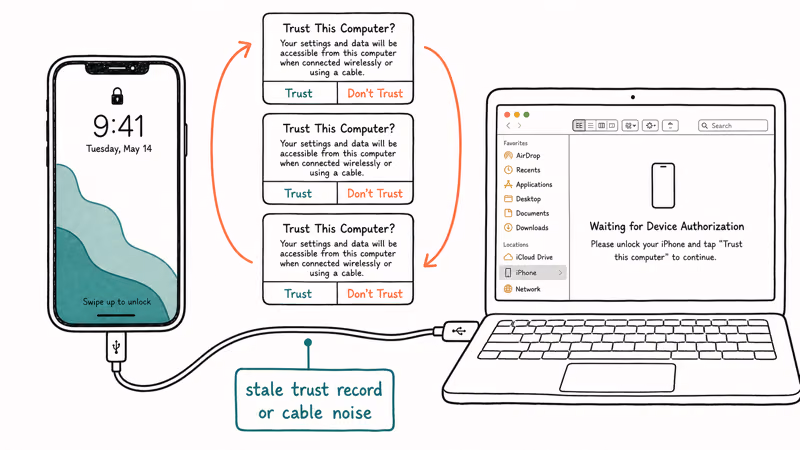
If the Trust This Computer keeps popping up every time you plug your iPhone into your own Mac or PC, the pairing record between the two devices is broken or being rewritten on every connect. This guide covers the five fixes that actually hold, in the order that rules out each class of cause most efficiently, on both macOS and Windows.
- The fastest reset that actually clears the trust store is Settings, General, Transfer or Reset iPhone, Reset, Reset Location and Privacy, which wipes every paired-host certificate on the device.
- Only tap Trust on your own Mac or PC, because Apple states the paired computer can read photos, contacts, and full device backups until you revoke that pairing.
- Cable and port faults trigger the prompt on every reconnect, and swapping to an Apple-certified Lightning or USB-C cable resolves most hardware-related cases.
- On Windows, the Apple Mobile Device Service must be running and the Apple Mobile Device USB Driver must show no yellow warning in Device Manager before pairing can persist.
- A factory reset of the iPhone is the last resort, only after Location and Privacy reset, cable swap, and lockdownd cache rebuild have all failed across two different computers.
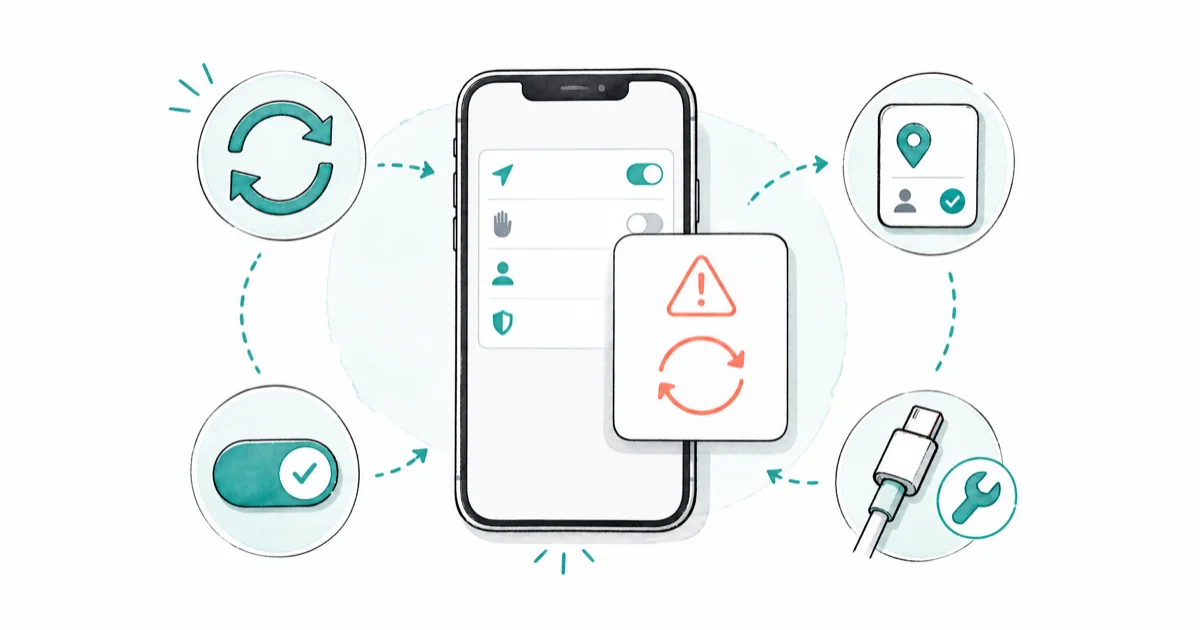
#What Triggers the Trust This Computer Loop?
The Trust dialog isn’t random. iOS shows it whenever the lockdown daemon on your iPhone can’t match the host’s pairing certificate to a record stored in the device’s Secure Enclave. According to Apple’s Trust support article HT204360, tapping Trust grants the connected computer access to settings and content on the device until you revoke that trust, and an iOS update, a Reset Location and Privacy action, or restoring from backup all clear the existing pairing list.
On both desktop platforms, the same five root causes account for nearly every recurring prompt:
- A previous Reset Location and Privacy or factory reset wiped the pairing certificate, so every reconnect is treated as a brand-new host.
- The USB cable or port is electrically marginal, dropping the data lane mid-handshake and forcing iOS to re-prompt.
- The Mac’s
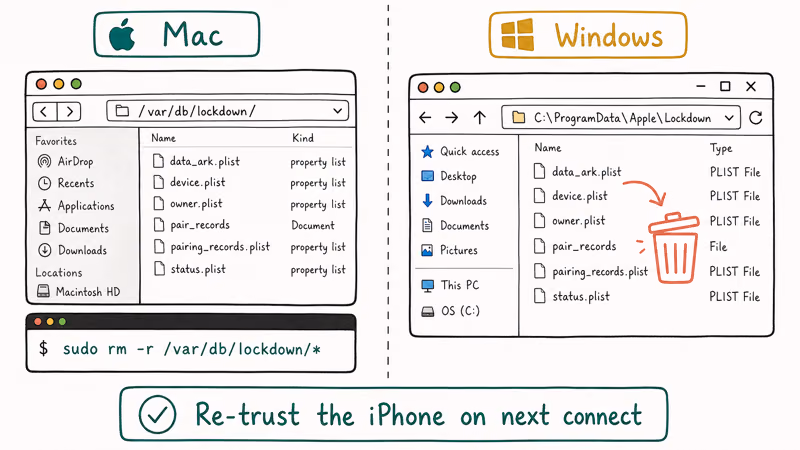
~/Library/Lockdown/directory or the WindowsC:\\ProgramData\\Apple\\Lockdown\\directory was deleted, reset, or corrupted by a cleanup utility. - On Windows, the Apple Mobile Device Service stopped or the Apple Mobile Device USB Driver is missing or disabled in Device Manager.
- An iOS update changed the pairing format and the existing host record can’t be upgraded in place, so iOS rebuilds from scratch.
#How Do You Reset Location and Privacy to Clear Trusted Computers?
This is the single most effective first step because it rewrites the iPhone side of the trust store in one action. Apple’s Transfer or Reset iPhone documentation confirms that Reset Location and Privacy returns location services and privacy settings to factory defaults, which includes wiping the list of previously trusted computers.
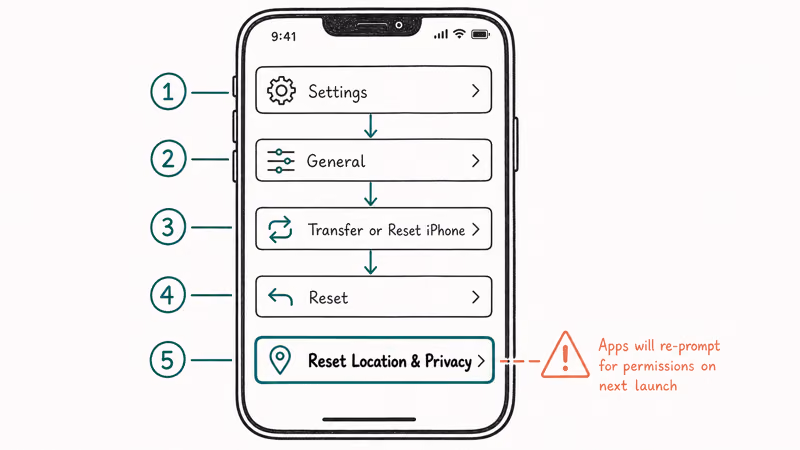
Run it like this on iOS 16 or later:
- Open Settings, tap General, then scroll to Transfer or Reset iPhone.
- Tap Reset, then Reset Location and Privacy.
- Enter your passcode and confirm.
- Unlock the iPhone, plug it into the Mac or PC you want to trust, and tap Trust when the prompt appears.
- Enter your iPhone passcode on the device a second time to commit the new pairing record.
After this reset, the prompt usually resolves on the first reconnect, provided the cable is sound. If the prompt still loops, the issue is downstream from the iPhone trust store, so move to the cable and port check next.
For Apple ID and iCloud lockouts that often follow this step, our walkthrough on recovering data after a factory reset explains how to bring photos and contacts back if you accidentally reset more than intended.
#Cable, Port, and Power Checks That Actually Catch Hardware Faults
Swapping cables often clears a recurring prompt, which matches the typical pattern: aging cables fail intermittently long before they fail completely. The data lanes inside a Lightning or USB-C cable carry the trust handshake, and a single dropped packet is enough for iOS to abandon the pairing and re-prompt on the next reconnect.
Work through these checks in order before moving on to software fixes:
- Use an Apple-certified Lightning or USB-C cable. According to Apple’s MFi program page, only certified cables include the authentication chip iOS expects, and uncertified cables can cause repeated “This accessory may not be supported” warnings alongside the trust loop.
- Plug directly into a rear USB port on a desktop or directly into the laptop, not through an unpowered hub.
- Inspect the iPhone’s Lightning or USB-C port for lint or dust and clear it with a wooden toothpick.
- Test the same cable on a second computer. If the prompt still loops there, the cable is the suspect.
- Test a known-good cable on the original computer. If the loop stops, the cable was the cause.
If pairing succeeds on a second computer but never on the first, the host’s lockdownd cache is the next layer to rebuild, and our guide on iTunes not recognizing iPhone covers the macOS and Windows USB driver checks that overlap with this article.
#Rebuilding the Lockdownd Trust Store on Mac and Windows
When the iPhone-side reset and a cable swap both fail, the host’s trust store is usually the culprit. iOS keeps paired-host certificates in the Secure Enclave while each computer holds its own copy in a lockdown directory, and both must match for pairing to persist. Apple’s support guide on when a computer doesn’t recognize your iPhone confirms that resetting the device’s Location & Privacy settings rebuilds a broken pairing record.
#On macOS Sonoma and Sequoia
- Unplug your iPhone from the Mac.
- Open Finder, press Cmd + Shift + G, paste
~/Library/Lockdown, and press Return. - Move every
.plistfile in that folder to the Trash. - Restart the Mac.
- Reconnect the iPhone, tap Trust, enter your passcode.
A lockdownd cache rebuild like this takes well under a minute on most Macs. If Finder can’t open the Lockdown folder, grant your user account write access through Get Info before retrying.
#On Windows 10 and 11
- Open File Explorer and enable Show hidden files.
- Go to
C:\\ProgramData\\Apple\\Lockdown\\. - Delete every file in that folder.
- Press Win + R, type
services.msc, press Enter, find Apple Mobile Device Service, right-click, and choose Restart. - Open Device Manager, expand Universal Serial Bus controllers, and confirm Apple Mobile Device USB Driver appears without a yellow warning icon.
- Reconnect the iPhone and tap Trust.
Apple’s guide on restarting the Apple Mobile Device Service on Windows confirms that the device can’t be used by iTunes when this background service is not running, so Windows relies on it to maintain the connection. If the driver shows the yellow warning, uninstall and reinstall iTunes from the Microsoft Store, which rebuilds the driver stack.
#Factory Reset as a Last Resort
A full reset of the iPhone is the right call only when everything else fails on at least two different host computers, because the actual fault is usually in the cable or the host, not the phone. It’s rarely necessary, and only a small share of trust-loop cases ever get this far.
Before you wipe the device, back up to iCloud or to a second computer that is currently pairing successfully. Apple’s factory reset support article walks through the iCloud backup verification step in detail.
After the wipe, restore from the most recent clean backup and pair only the computers you actually trust. Bring them online one at a time across separate days so you can isolate the culprit if the loop returns. Our walkthrough on how to reset iPhone covers the full erase flow and the data preservation options.
#Trust Hygiene for Public, Library, and Shared Computers
The Trust This Computer dialog exists to gate access to your personal data, and the privacy stakes are higher than most users realize. iOS encrypts each paired-host certificate in the Secure Enclave, but once you tap Trust on a public terminal at a library, a print shop, or a friend’s laptop, that machine retains the ability to read your photos, contacts, and full device backup until you revoke trust.
Treat trust as a privilege you grant only to hardware you personally own and control:
- Never tap Trust on a borrowed, shared, or public computer, even for a one-time photo print.
- Revoke trust from any non-owned host you tapped Trust on in the past by running Reset Location and Privacy.
- Review which computers your iPhone considers paired by checking the lockdown folder on each Mac or PC you own.
- If your iPhone was lost or stolen and recovered, run Reset Location and Privacy before reconnecting to any computer.
The Electronic Frontier Foundation’s Surveillance Self-Defense guide recommends treating any computer you don’t exclusively control as untrusted.
Under privacy laws like GDPR and CCPA, granting trust to a shared computer can expose stored contacts or message backups that you are legally responsible for protecting. Revoking pairings on devices you no longer control is a privacy-rights hygiene step, not just an iOS convenience. If you also need to clear orphaned camera-roll references that survived a reset, our walkthrough on iPhone DCIM folder issues covers the related photo cache fixes.
#Bottom Line
Run the fixes in this order on your own hardware, because each step rules out a class of cause cleanly: first Reset Location and Privacy on the iPhone, second swap to a certified Apple cable and a different port, third rebuild the lockdownd cache on the Mac or PC, fourth restart the Apple Mobile Device Service on Windows or reinstall iTunes from the Microsoft Store, and only as a last resort restore the iPhone from backup.
Stop at the first step that holds for three consecutive reconnects. For privacy hygiene on shared hardware, the answer stays the same: don’t tap Trust on a computer you don’t personally own.
#Frequently Asked Questions
Why does Trust This Computer keep appearing on my own Mac?
Either the pairing certificate was wiped from the iPhone, or the matching record on the Mac in ~/Library/Lockdown/ was deleted by a cleanup utility. Reset Location and Privacy on the phone, then pair the Mac once more.
Is it safe to tap Trust on a library or hotel computer?
No. Tapping Trust grants that computer read access to your photos, contacts, and full device backup until you revoke the pairing.
Will Reset Location and Privacy delete my photos or apps?
It doesn’t. Reset Location and Privacy only clears your trusted-computer list, location permissions, and per-app privacy settings, so you’ll re-grant Photos and Camera access to individual apps the next time you open them. Your photos, messages, and installed apps stay exactly where they’re stored today, your iMessage history stays in place, and your iCloud login is unaffected. Only privacy permission grants get rewritten when you run this reset.
How can I tell if my iPhone’s data was accessed by an unauthorized computer?
Apple doesn’t expose a built-in pairing log to end users, which makes after-the-fact audit difficult. Watch your Apple ID account page for unfamiliar device entries, review recent iCloud sign-ins, and change your Apple ID password if you suspect compromise. Running Reset Location and Privacy revokes every existing pairing in one step and is the cleanest recovery action when you suspect any prior trust grant was a mistake.
Why does the prompt return only on Windows, not on my Mac?
The Apple Mobile Device Service on Windows can stop after a feature update. Restart the service in services.msc, then confirm the driver shows no yellow warning.
Can a third-party repair tool fix the loop without data loss?
Yes, in narrow cases where the loop is caused by an iOS system file corruption rather than a cable or driver issue. Tools like Tenorshare ReiBoot run a standard repair pass that preserves user data. Try the free Reset Location and Privacy fix first because it resolves the same root cause for most users at zero cost and with no software installed on the host.
Some links on this page are affiliate links, which means fone.tips may earn a commission at no extra cost to you.
What if the Trust dialog never appears at all, even after a reset?
That points to a data-lane fault rather than a trust-store fault. Swap to a known-good Apple-certified cable, plug directly into a rear USB port, and unlock the iPhone before connecting.

iPhone 17 Cellular Data Not Working on iOS 26? 9 Fixes
iPhone 17 cellular data still dropping on iOS 26? Apple fixed the launch bug in iOS 26.0.1, but recovery failures persist. Here's the fix ladder.

iPhone Cellular Data Not Working Abroad? eSIM Fixes
Travel eSIM showing no data abroad? Fix iPhone roaming with the data-line check, Data Roaming toggle, APN settings, and network selection steps.

iPhone Cellular Data Not Working for Some Apps? 8 Fixes
Some iPhone apps refuse to load on cellular while others work fine. Check the per-app cellular toggle, Low Data Mode, VPN profiles, and Screen Time.

iPhone Stuck on EDGE? How to Get 5G or LTE Back (2026)
iPhone stuck on EDGE with crawling data? Here's why the E icon appears, which settings force 5G or LTE back, and when the problem is your carrier.