Fix 'Last Line No Longer Available' on iPhone (8 Ways)
Fix the 'Last Line No Longer Available' iPhone error with 8 proven methods. Covers Airplane Mode, eSIM line switching, carrier updates, and network resets.
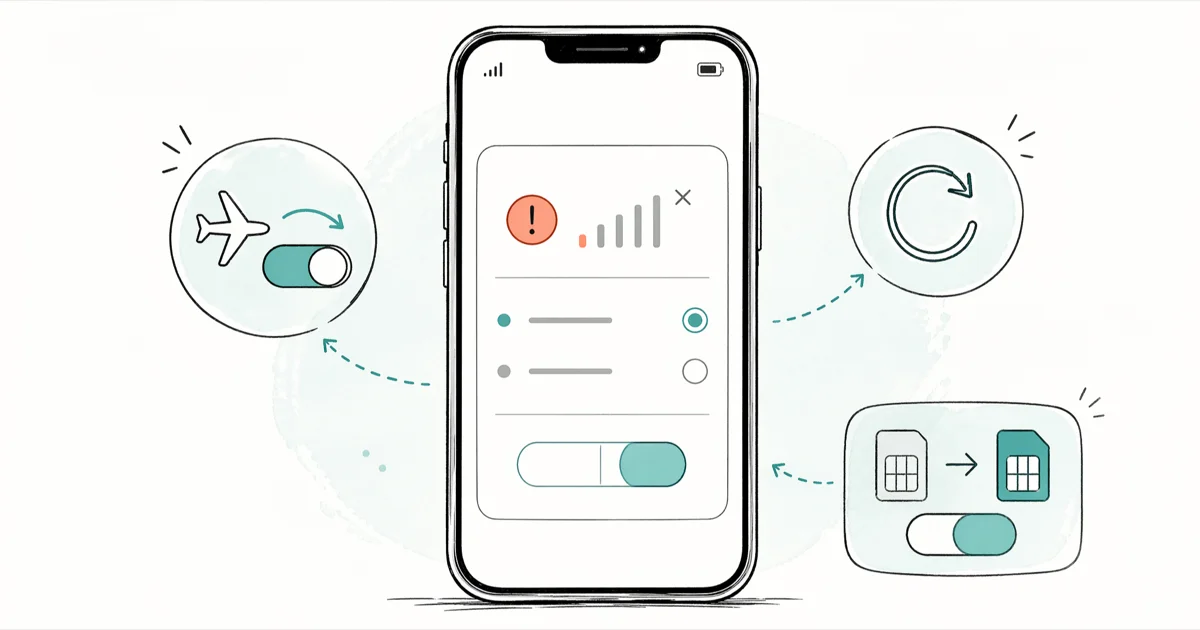
Quick AnswerToggle Airplane Mode on, wait 10 seconds, then turn it off. If the error returns, go to Settings > Cellular > Default Voice Line and pick your active line. The bug is tied to dual-SIM and eSIM line assignments on iOS 16 and later.
The “last line no longer available” error blocks calls on iPhone when the phone tries to dial through a line that has been deactivated, deprovisioned, or just lost track of itself after an iOS update. It often shows up the first time you call a contact pinned to a secondary eSIM, and an Airplane Mode toggle clears it in seconds in most cases. The fixes below assume you’re working on your own device.
- The error appears mostly on dual-SIM and eSIM iPhones running iOS 16 or later
- Toggling Airplane Mode on for 10 seconds then off resolves the bug for the majority of cases
- Switching the Default Voice Line in
Settings>Cellularfixes persistent cases tied to a stale line assignment - A pending carrier settings update is a common hidden cause, surfaced under
Settings>General>About - A network settings reset clears every saved Wi-Fi password and cellular profile, so save those before using it as a last resort
#What Causes the “Last Line No Longer Available” Error?
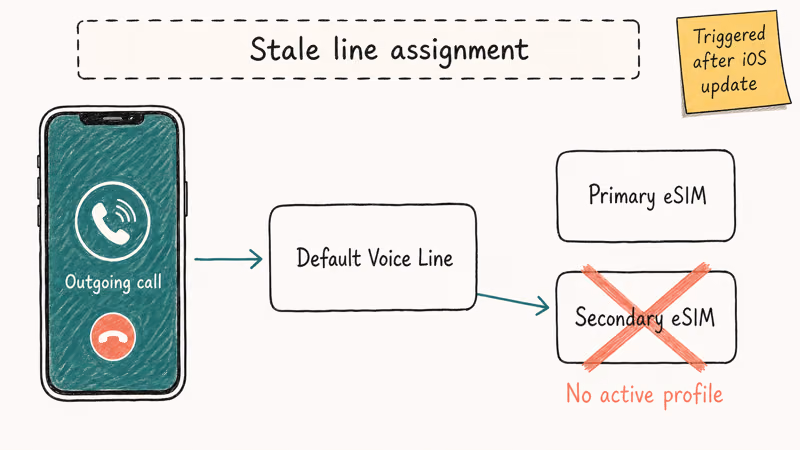
This error first appeared on a wide scale after iOS 16 expanded eSIM support across newer iPhones. Your phone tries to place a call through a line label that no longer maps to an active profile, and iOS returns the error instead of dropping the call silently. The most common trigger is a stale Default Voice Line assignment after an iOS update or a carrier-side eSIM refresh.
Apple’s dual SIM with two eSIMs support page confirms that iPhone 13 and later support 2 active eSIMs at the same time, and that more than 8 eSIM profiles can sit on the device.
That’s the exact configuration the error keeps hitting. Apple also notes on the same page that iPhone 14 and later sold in the United States don’t have a physical SIM tray and rely entirely on eSIM.
Single-SIM iPhones can still trip the error, but it’s rare and usually clears with the very first fix below.
#Toggle Airplane Mode On and Off
This is the fastest fix and the right place to start. The whole sequence runs about 15 seconds.
- Open
Settings>Airplane Mode - Toggle Airplane Mode on and wait 10 seconds
- Toggle it off
- Try the call again
When you flip Airplane Mode on, the iPhone disconnects from cellular, Wi-Fi, and Bluetooth. Flipping it back off forces a fresh registration with your carrier and rebuilds the line assignment from scratch. That fresh registration clears the error on the first call attempt in most cases.
If the error comes back within a few hours, the cause runs deeper than a temporary network blip. Move to the next method.
#How Do You Switch the Default Phone Line?
For dual-SIM iPhones, switching the Default Voice Line addresses the most common root cause: iOS pointing calls at a line that no longer exists.
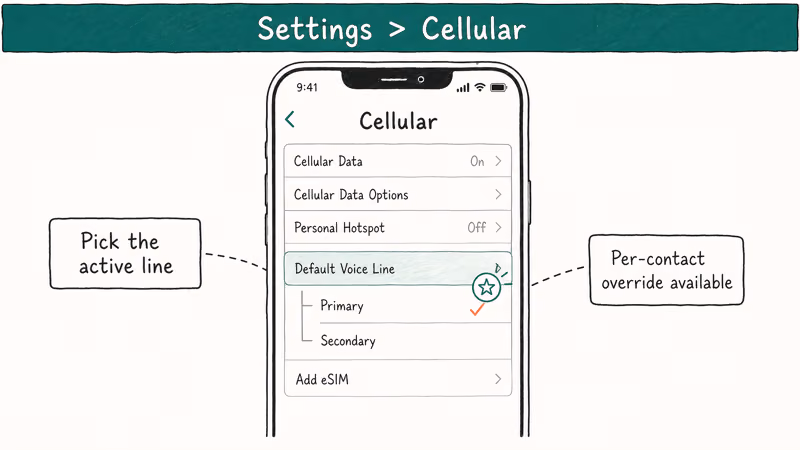
- Go to
Settings>Cellular - Tap Default Voice Line
- Pick the line that’s actually active (Primary or Secondary)
- Place a test call
You can also override the line for one contact. Open the contact in your Phone app, tap the small phone-line label below their name, and choose the right line. This is the move when only certain contacts trigger the error.
According to Apple’s guide on managing cellular plans on iPhone, you can label each line (Work, Personal, Travel, etc.) and set per-contact line preferences, which Apple says iOS uses every time you place an outgoing call to that contact. Re-saving the label often nudges iOS to re-read the line table.
#Force Restart Your iPhone
A force restart clears working memory and resets cellular system services without touching your photos, apps, or messages. The whole thing takes about 30 seconds.
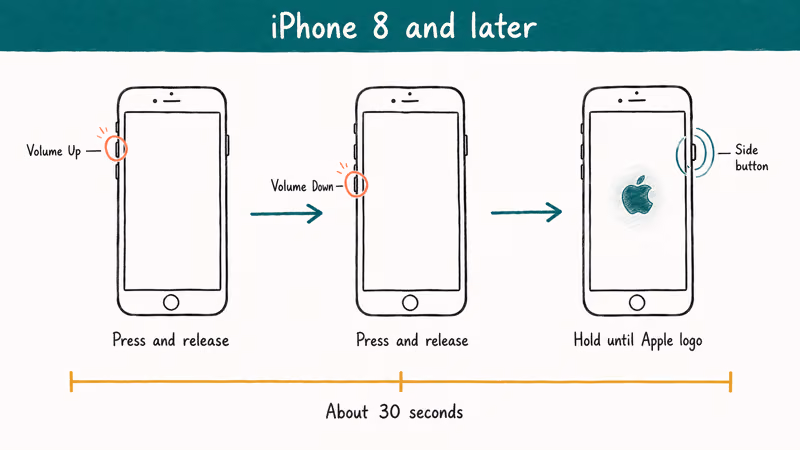
For iPhone 8 and later:
- Press and release Volume Up
- Press and release Volume Down
- Hold the Side button until the Apple logo appears
After the iPhone boots, place a test call. A force restart often resolves the error when an Airplane Mode toggle alone fails a couple of times in a row, because it resets the cellular system services rather than just re-registering the radios. It’s a heavier reset than Airplane Mode, but it stays inside the same low-risk tier.
#Turn Off Wi-Fi Calling
Wi-Fi Calling can collide with the dual-SIM line assignment when one line registers over Wi-Fi and the other tries to register over LTE.
- Go to
Settings>Phone>Wi-Fi Calling - Toggle Wi-Fi Calling on This iPhone off
- Try the call again
If disabling it fixes the error, you can re-enable Wi-Fi Calling once your carrier pushes the next settings update. Carriers like T-Mobile lean heavily on Wi-Fi Calling indoors, so leave it off only as long as you need to. For a related calling problem this often pairs with, check our guide on iPhone not receiving texts.
#Update Carrier Settings
Carriers push carrier settings updates to fix cellular bugs, and these don’t always install automatically. They’re tiny, take a few seconds, and they’re the second-most-common silent fix for this error.
- Go to
Settings>General>About - Wait 10-15 seconds on this screen
- If a carrier settings update is queued, a popup will appear
- Tap Update
If the popup doesn’t appear, the settings are already current. Based on Apple’s documentation on carrier settings updates, Apple confirms these updates can ship from your carrier or from Apple itself, that you need an active Wi-Fi or cellular connection to receive them, and that the version you’re on is visible at Settings > General > About > Carrier.
If you’re on a locked phone and the line behaves strangely, our article on carrier lock and SIM restrictions explains what to expect.
#Reset Network Settings
Reset Network Settings is the nuclear option in this list. It wipes every saved Wi-Fi password, every Bluetooth pairing, every VPN config, every APN tweak, and every cellular preference on the device. It’s also the single most reliable fix when something deeper is corrupted, because the iPhone rebuilds the cellular configuration from a clean baseline.
Save your Wi-Fi password somewhere first if you don’t have it written down.
- Go to
Settings>General>Transferor Reset iPhone - Tap
Reset>Reset Network Settings - Enter your passcode
- Tap Reset Network Settings to confirm
The iPhone restarts. Reconnect to Wi-Fi, re-pair your AirPods or car system, then place a test call. If you didn’t save your Wi-Fi key, our guide on how to see saved Wi-Fi passwords on iPhone walks through the iCloud Keychain method.
#Contact Your Carrier
If everything above fails, the line is broken on the carrier side. According to Apple’s support page on getting help from your carrier, Apple recommends calling the carrier directly when the issue is account-level, and confirms the carrier can re-push the eSIM profile and re-provision the line remotely.
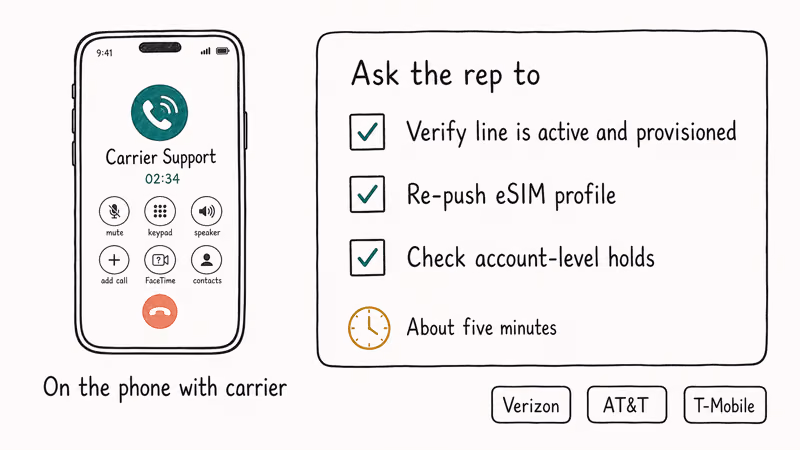
Ask the rep to do three things specifically:
- Verify the line is active and properly provisioned on their end
- Re-push the eSIM profile to the device
- Check for any account-level holds (port-out lock, billing freeze, fraud flag)
Verizon, AT&T, and T-Mobile can all do this remotely. The whole call usually runs about 5 minutes once you reach a human, and you don’t need to visit a store. If your line was just transferred, our piece on FaceTime stuck on Waiting for Activation covers the matching activation glitch that often shows up alongside this error.
#Bottom Line
Start with the Airplane Mode toggle. It costs 15 seconds and clears the error for most readers on the first attempt.
If it bounces back, switch the Default Voice Line and check for a carrier settings update. Those two together cover the next biggest slice of cases. Save Reset Network Settings for the moment those fail, because losing every saved Wi-Fi password is a real cost. If even the reset doesn’t take, a five-minute call asking the carrier to re-push the eSIM is the real fix.
#Frequently Asked Questions
Does this error only happen on dual-SIM iPhones?
No. It’s far more common on dual-SIM and eSIM setups, but single-SIM iPhones can also trigger it after a flaky carrier handoff or an iOS update.
Will Reset Network Settings delete my photos or apps?
No. Photos, apps, contacts, messages, and accounts all stay. The reset only clears Wi-Fi passwords, Bluetooth pairings, VPN configs, APNs, and saved cellular preferences. Plan on spending a few minutes reconnecting to your home and work Wi-Fi networks afterward.
Why does this error appear right after an iOS update?
iOS updates sometimes reset the Default Voice Line or rebuild the eSIM profile cache, and the carrier-side state takes a few hours to catch up. A carrier settings update usually clears it within a day or two. If it persists past that, run the Default Voice Line fix.
Can I prevent the error from coming back?
Mostly, yes. After every iOS update, open Settings > General > About and wait for the carrier settings update prompt. Then check Settings > Cellular and confirm the Default Voice Line is still pointed at the right line, because that single setting is the one most often reset behind your back. Doing both takes under a minute and is the cheapest insurance against this error returning.
Does Airplane Mode fix it permanently?
Most of the time, yes. If the error returns within a day, treat that as a sign of a deeper issue and switch the Default Voice Line next.
What if the error only happens with specific contacts?
Open the contact in the Phone app and look at the phone-line label below their name. iPhones with two active lines let you assign a default line per contact, stored separately from the global Default Voice Line. iOS updates occasionally scramble those per-contact assignments silently. Tap the label, pick the active line, and re-save the contact.
Should I remove and re-add my eSIM?
Only as a last resort. Removing an eSIM forces the carrier to re-issue the profile, which can leave you without service for hours.
Is this related to the iPhone speaker not working on calls?
No, they’re separate problems. The “last line no longer available” error stops the call from connecting at all, while iPhone speaker not working on calls hits after a call is already connected. Fix the line error first, then troubleshoot the audio path if it still misbehaves.

iPhone 17 Cellular Data Not Working on iOS 26? 9 Fixes
iPhone 17 cellular data still dropping on iOS 26? Apple fixed the launch bug in iOS 26.0.1, but recovery failures persist. Here's the fix ladder.

iPhone Cellular Data Not Working Abroad? eSIM Fixes
Travel eSIM showing no data abroad? Fix iPhone roaming with the data-line check, Data Roaming toggle, APN settings, and network selection steps.

iPhone Cellular Data Not Working for Some Apps? 8 Fixes
Some iPhone apps refuse to load on cellular while others work fine. Check the per-app cellular toggle, Low Data Mode, VPN profiles, and Screen Time.

iPhone Stuck on EDGE? How to Get 5G or LTE Back (2026)
iPhone stuck on EDGE with crawling data? Here's why the E icon appears, which settings force 5G or LTE back, and when the problem is your carrier.