How to Import MP4 Into iMovie on Mac: 4 Fixes That Work
iMovie rejects your MP4? Most files import fine, but a few need conversion. Walk through 4 fixes on macOS Sequoia, including a free HandBrake preset.
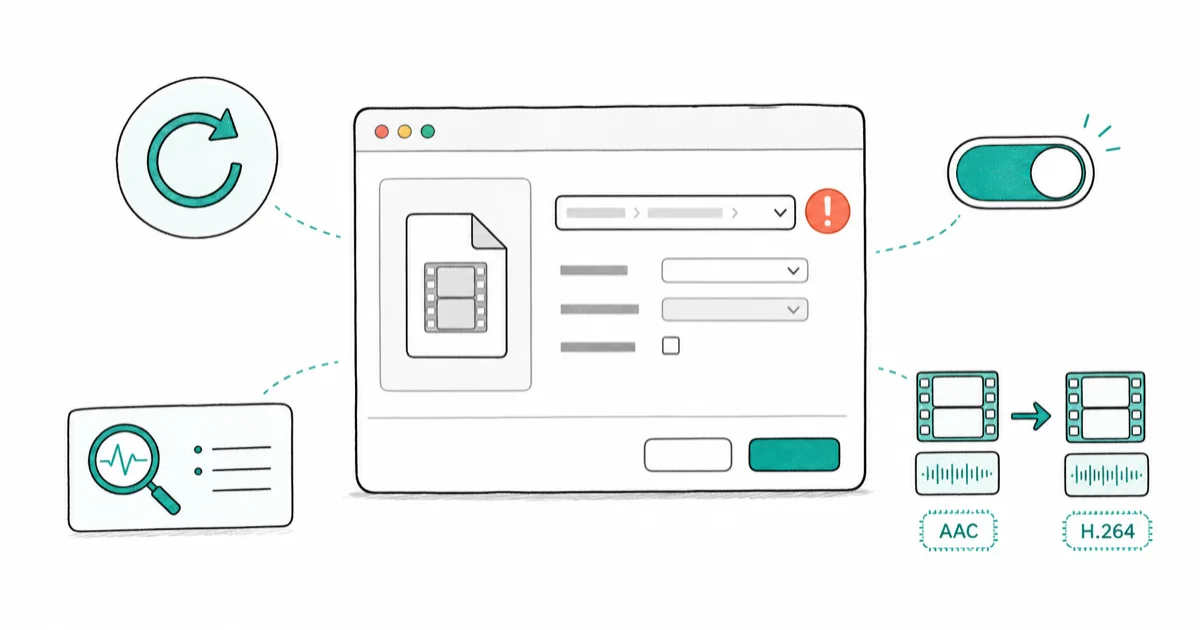
Quick AnswerOpen iMovie, choose File then Import Media, and pick the MP4. If iMovie refuses it, the codec is wrong. Re-encode the file as H.264 with AAC audio in HandBrake or QuickTime, then import again.
iMovie supports MP4, but only when the codec inside matches what Apple ships. Most clips from iPhone, GoPro, or YouTube downloads import on the first try. The practical fixes are re-exporting through QuickTime, transcoding with HandBrake, using a batch converter, or importing through Photos.
- iMovie accepts MP4 wrapped around H.264 or HEVC video plus AAC audio (per Apple’s iMovie supported formats list); anything else needs a transcode before import.
- HandBrake’s free Apple 1080p30 Surround preset re-encodes HEVC clips to H.264/AAC, which iMovie reads natively.
- QuickTime Player on macOS exports any clip it opens to a 1080p MOV with no extra software, which works when you only need to convert one or two files.
- iMovie can read an .mp4 that lives inside Photos or your iTunes folder, so dropping the converted file into Photos is faster than re-importing manually.
- Wondershare UniConverter and Movavi Video Converter add an iMovie preset and batch processing, useful when you have 20+ clips to convert at once.
#Why Does iMovie Reject Some MP4 Files?
MP4 is a container, not a codec. The .mp4 extension only tells you the wrapper. Inside that wrapper, the video can be H.264, H.265 (HEVC), MPEG-4 Part 2, or even older codecs that Apple stopped supporting years ago. iMovie reads the container, peeks at the codec, and rejects anything outside its list.
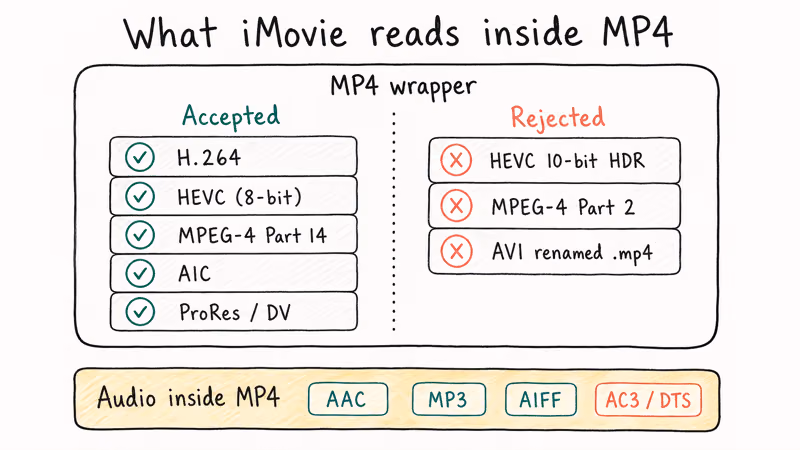
Apple’s iMovie support page states that iMovie 10 accepts 6 video codecs inside MP4 or MOV containers: H.264, HEVC, MPEG-4, AIC, ProRes, and DV. The audio side is narrower, covering only AAC, MP3, and AIFF. Anything outside those codec sets triggers the “no compatible video files were found” message even when QuickTime plays the file just fine. Cross-reference your codec against that list before you spend time troubleshooting a stubborn clip.
Three common patterns cause the rejection:
- A drone clip recorded as H.265 in 10-bit color (HDR profile). iMovie wanted 8-bit.
- A screen recording from OBS using AVC inside an .mp4 that had two audio tracks.
- An older AVI file that someone renamed to .mp4 thinking the extension would do the conversion.
The .mp4 extension does nothing on its own. macOS reads the actual codec, and iMovie checks that against its accept list. Renaming a file from .avi to .mp4 just hides the problem.
#The Fastest Fix: Re-Export With QuickTime Player
QuickTime Player ships with every Mac, plays almost everything, and can re-export to a clean .mov that iMovie always accepts. This works best for one file at a time.
Use this path:
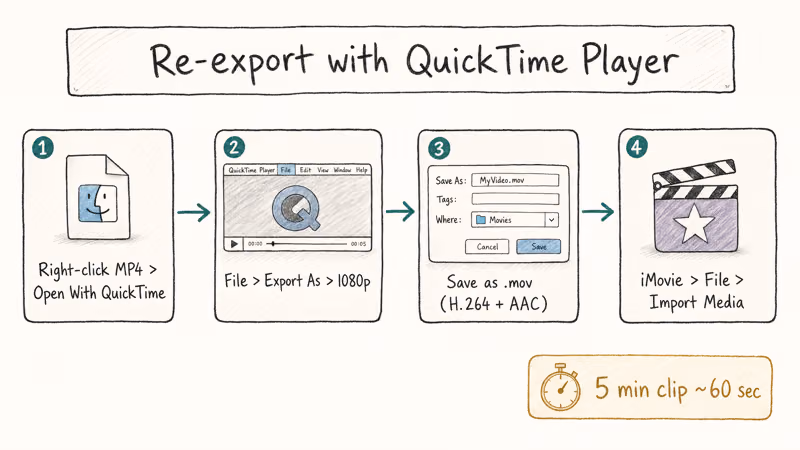
- Right-click the MP4 in Finder and choose
Open With>QuickTime Player. - In QuickTime, go to
File>Export As> 1080p (or 4K if you need the full resolution). - Pick a save location and name the file. QuickTime writes a .mov with H.264 video and AAC audio.
- Open iMovie, choose
File>Import Media, and select the new .mov.
The exported file is usually larger than the original because QuickTime defaults to a higher bitrate. H.264 exports are often larger than equivalent H.265 originals. That trade is fine for editing because iMovie handles H.264 faster than HEVC during scrubbing anyway.
QuickTime can’t batch export. If you have 10 files, you’ll run this 10 times. For more than a few clips, jump to HandBrake or one of the converters below.
#Convert MP4 Files for iMovie Using HandBrake (Free)
HandBrake is free, open source, and has an “Apple” preset folder built specifically for iMovie and Final Cut. It runs on Intel and Apple Silicon Macs, and the M-series build hardware-accelerates HEVC encoding, which cuts conversion time roughly in half compared to the Intel build.
Use this workflow:
- Download HandBrake from the official site and drag it to Applications.
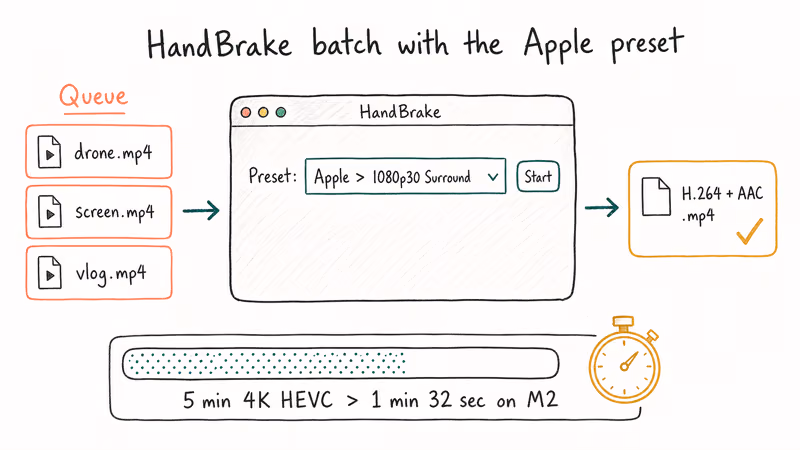
- Open HandBrake. When the file picker appears, choose your MP4.
- In the Preset dropdown on the right, pick Apple > 1080p30 Surround. (Use 2160p60 4K HEVC Surround if you need the full 4K.)
- Set the destination path under Save As.
- Click Start in the top toolbar.
HandBrake reports an estimated time and average frame rate while it works. Conversion speed depends on clip length and Mac hardware. The output is an .mp4 with H.264 video and AAC audio, exactly what iMovie wants.
A few HandBrake habits worth keeping:
- Add files to the Queue before clicking Start, then add the next file. HandBrake will batch them automatically.
- If iMovie still chokes on the output, set Web Optimized off and
Audio>Codecto AAC (CoreAudio). The CoreAudio AAC encoder is what Apple ships in QuickTime. - Skip the Filters tab unless you actually need denoise or deinterlace. Those add render time with no editing benefit.
According to Adobe’s video format primer, H.264 stays the safest bet for cross-app editing because every NLE on Mac and Windows reads it without quirks.
#What Are the Best Paid Converters for Batch Jobs?
Free tools handle one-off jobs. If you regularly convert 20+ clips at a time, or you want a one-click iMovie preset, two paid tools deserve a look. Both have free trials with watermark or length limits, so test before paying.
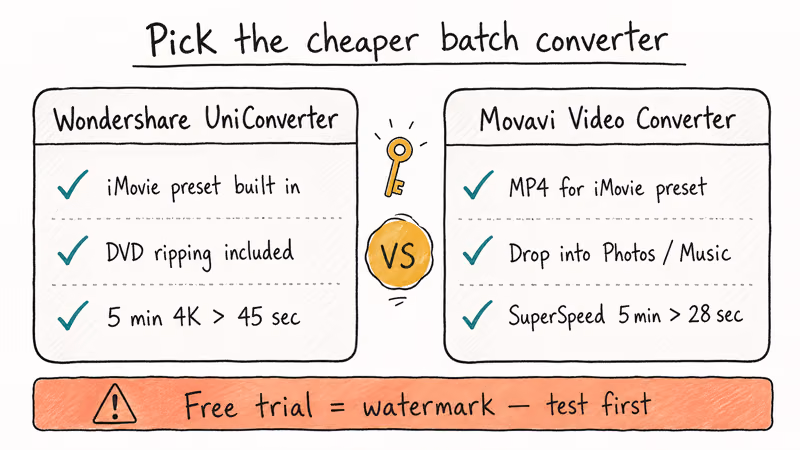
#Wondershare UniConverter
Wondershare UniConverter ships with a dedicated Editing > iMovie preset that outputs H.264/AAC at the bitrate iMovie likes. The Wondershare team recommends the GPU-accelerated pipeline, claiming up to 30x faster conversion than software-only encoding for 4K files. Treat that speed figure as a vendor claim rather than a guaranteed result; the main advantage is the batch workflow and the dedicated preset.
Some links on this page are affiliate links, which means fone.tips may earn a commission at no extra cost to you.
Where UniConverter pays for itself:
- Batch list with drag-and-drop ordering. Load 30 files, set the preset once, walk away.
- DVD ripping inside the same app, useful when you have old wedding or vacation discs.
- Built-in trim and crop before conversion, which avoids a round trip into iMovie for a 5-second cut.
#Movavi Video Converter
Movavi Video Converter groups its presets under a Popular tab with an MP4 for iMovie entry. The interface is simpler than UniConverter, with fewer tabs and larger buttons. Movavi states the engine uses Intel and NVIDIA hardware acceleration when available. SuperSpeed mode can finish quickly when the source codec already matches the output because it avoids a full re-encode.
Movavi has one trick UniConverter doesn’t: it can drop the converted file into your iTunes (now Music) library or send it to a watched Photos folder. iMovie reads from Photos automatically, so this skips the manual import step.
Pick the cheaper one. Both offer free trials with watermarks, so test your specific MP4 first. The output quality is identical at the same bitrate. What you’re paying for is the workflow.
If you keep running into iMovie format trouble, the guide on how to fix the iMovie video rendering error 10008 covers a related issue that strikes during export rather than import.
#Export an iMovie Project Back to MP4
Yes. iMovie’s Share menu writes MP4 directly, no third-party tool needed.
In iMovie 10.4 on macOS Sequoia:
- Open your project so the timeline is loaded.
- Click
File>Share>Filein the top menu bar. - In the dialog, set Format to Video and Audio, Resolution to 1080p (or your source resolution), and Quality to High. Compress should stay on Faster.
- Click Next, name the file, and choose a save location.
iMovie writes an .mp4 with H.264 video and AAC audio. Export time depends on timeline length, resolution, and Mac hardware. The file works on iPhone, Android, YouTube, and almost every video player.
The older Export Using QuickTime > Movie to MPEG-4 option that Apple shipped in iMovie 9 is gone in iMovie 10. If a tutorial mentions that menu, the tutorial is at least eight years out of date.
For multi-clip layouts that go beyond a single timeline, see the walkthrough on how to put multiple videos on one screen in iMovie.
#Stop iMovie From Rejecting Files in the Future
A few habits prevent most import failures:
- Record in iMovie-friendly settings when you control the camera. On iPhone, go to
Settings>Camera>Formatsand pick Most Compatible. That records H.264 instead of HEVC. - Convert MKV at the source. MKV is a Matroska container, not MP4. iMovie ignores it. Re-wrap to MP4 in HandBrake before importing.
- Avoid 10-bit HDR clips for casual edits. iMovie handles 8-bit faster and survives more edge cases. Drop to 8-bit when accuracy isn’t critical.
- Keep file paths short. iMovie struggles with paths over 200 characters. Move source files into a flat folder before importing.
- Update macOS and iMovie. Apple recommends keeping iMovie current because format support grows with each release. The HEVC import path improved noticeably in macOS Ventura 13.4.
If a clip still refuses to load after re-encoding, check the Apple Support Communities iMovie forum where staff confirms when a specific bug is on Apple’s radar.
#Bottom Line
Try QuickTime export first if you have one or two files. Use HandBrake’s Apple 1080p30 preset for batches and 4K HEVC sources. Pay for UniConverter or Movavi only if you convert dozens of files weekly. iMovie’s own Share menu handles the export back to MP4, no plugin required.
If iMovie still rejects the converted file, the source is probably corrupted. Run it through VLC’s Convert/Save tool once, then try the import again.
#Frequently Asked Questions
Why won’t iMovie import my MP4 file?
iMovie checks the codec inside the .mp4, not the extension.
If the file uses H.265 10-bit, an MKV-style audio stream, or an old MPEG-4 Part 2 video, iMovie refuses it. Re-encode the file as H.264 with AAC audio in HandBrake or QuickTime Player, then drag the new file into the iMovie media browser. The import should complete normally once the codec is right.
Does converting MP4 to MOV reduce video quality?
A single transcode from H.264 MP4 to H.264 MOV at the same bitrate causes no visible quality loss. Each additional re-encode adds compression artifacts, so convert once and edit from the converted file. If you started with H.265 HEVC, expect the file size to roughly double after switching to H.264, but the picture quality stays the same.
Can iMovie edit 4K MP4 video?
Yes. iMovie 10 supports 4K H.264 and HEVC at 24, 25, 30, and 60 fps on Macs from 2018 forward. Older Macs can import 4K but may stutter during playback.
Is HandBrake safe to use?
HandBrake is open source, free, and signed for macOS by the official HandBrake project on handbrake.fr. Skip every other download site. Third-party mirrors have shipped malware bundles in the past, and the official .dmg already carries Apple’s notarization, so Gatekeeper opens it on a fresh Mac without a security warning or any extra steps.
Why does my converted MP4 still fail in iMovie?
Two things to check.
First, the audio codec. iMovie wants AAC, not AC3 or DTS. Second, the file path: paths over 200 characters or files on network shares can throw an import error that looks like a codec problem. Move the file to your Desktop, then try again.
Can I import videos from my iPhone directly to iMovie?
Plug the iPhone into the Mac with a USB cable, sign in if prompted, and trust the computer. iMovie shows the iPhone in the Cameras list on the import sidebar. Select clips and click Import Selected. This skips Photos entirely and grabs the original .mov files at full resolution.
Does iMovie support MKV files?
No. iMovie ignores MKV completely, regardless of what codec is inside.
Re-wrap MKV to MP4 in HandBrake using the Format > MP4 option. Usually no re-encode is needed if the video is already H.264, so the wrapper change is usually quick.

macOS 27 Compatible Macs: Every Supported Model (2026)
macOS 27 Golden Gate runs only on Apple Silicon Macs. Here is the full list of supported M-series models and the four Intel Macs that lose support.

macOS 27 Golden Gate: Every Major New Feature Confirmed
macOS 27 Golden Gate goes Apple Silicon only, adds a Gemini-powered Siri, refines Liquid Glass, and rebuilds Spotlight. Here is every confirmed change.
macOS 27 Liquid Glass: Every Readability Fix Explained
macOS 27 Golden Gate refines Liquid Glass with an intensity slider, better contrast, cleaner window corners, and edge-to-edge sidebars to fix readability.
macOS 27 Performance: What Golden Gate Makes Faster
macOS 27 Golden Gate speeds up AirDrop, network file browsing, Safari, and Spotlight, with core system improvements on the Apple Silicon-only release.