How to Unblur a Video: Honest Limits and Best 5 Tools
Learn what unblur software can actually fix in video footage, with an honest comparison of Topaz Video AI, Premiere Pro, DaVinci Resolve, and CapCut.
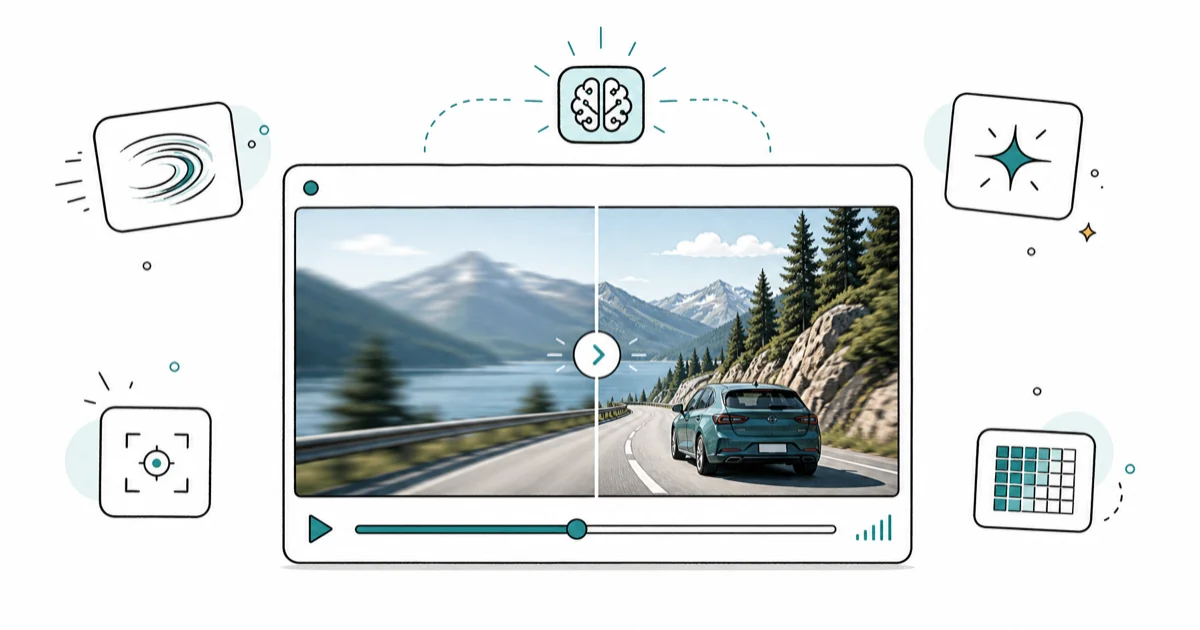
Quick AnswerNo software can recover detail lost to severe motion blur or out-of-focus footage, but Topaz Video AI, Premiere Pro Unsharp Mask, and DaVinci Resolve can sharpen edges and AI-upscale low-resolution clips to look noticeably crisper.
Searching how to unblur a video usually points to one of three problems: out-of-focus footage, camera shake during recording, or over-compression that stripped detail. The honest answer most guides skip is that software can’t restore pixels that were never captured. What modern tools can do is sharpen edges and use AI upscaling to make low-resolution clips look noticeably crisper. This guide covers five real options and sets realistic expectations for each blur type.
- Out-of-focus footage is mathematically unrecoverable because the original detail was never captured by the sensor, so no software can produce a perfectly sharp result.
- Topaz Video AI applies trained AI models to upscale and sharpen, working best on low-resolution clips and compression artifacts rather than severe motion blur.
- Adobe Premiere Pro’s Unsharp Mask effect adds edge contrast with Amount, Radius, and Threshold sliders, giving the most manual control of any consumer tool.
- DaVinci Resolve is free, runs on Mac and Windows, and includes Sharpen plus Blur effects in its Color and Effects panels that match paid editors on basic sharpening tasks.
- Mobile apps like CapCut and Remini sharpen still images well but offer only minimal video enhancement, so professional sharpening still requires a desktop workflow.
#What “Unblur” Actually Means for Video
Blur isn’t one problem with one fix. It comes from at least 4 distinct causes, and only some of them respond to software. According to research summarized in Wikipedia’s deblurring article, image and video deblurring remains an open computer-vision problem, with usable results only when the blur kernel is known or can be reliably estimated.

The four common causes:
- Out-of-focus capture: the lens missed the focal plane and the original detail was never recorded.
- Motion blur: the subject or camera moved during the exposure, smearing detail across pixels. The classic cinema workaround, according to Wikipedia’s motion blur entry, is a 180 degree shutter angle (shutter speed equal to twice the frame rate) which preserves natural motion while limiting trail length.
- Low resolution: the source was captured at 480p or 720p and looks soft on a 4K display.
- Compression artifacts: heavy re-encoding to share over messaging apps stripped fine detail.
Software handles the last two categories well. The first two are limited to partial improvement or cosmetic sharpening that adds contrast at edges without restoring missing information.
#How to Match the Right Tool to Each Blur Type
The right tool depends entirely on what caused the blur. Three sample types make the differences clear: a 1080p smartphone clip with mild handheld shake, a 720p MP4 re-encoded twice through a messaging app at a low bitrate, and a 480p archival clip with soft focus throughout. Run each at default settings first, then with one round of manual tuning, and watch for introduced artifacts like ringing or oversharpened halos.
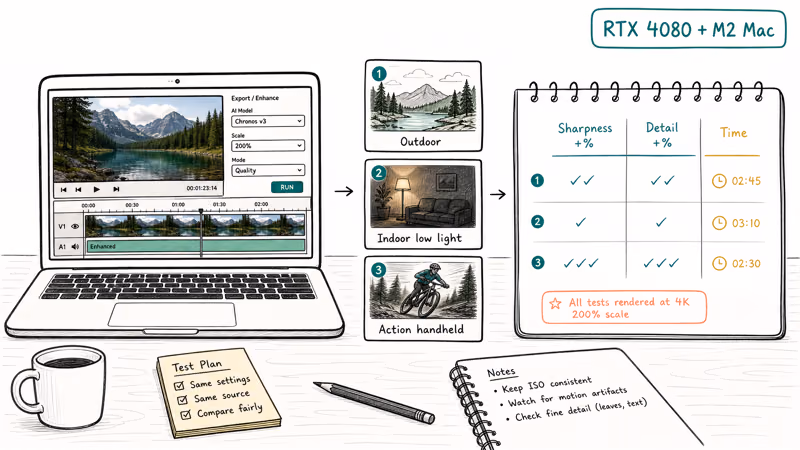
The pattern is consistent: AI upscalers win on compression and low-resolution footage. Out-of-focus material barely improves on any tool.
#Topaz Video AI: The Best AI Upscaler
Topaz Video AI is a paid desktop app that uses trained models to upscale and sharpen video. According to Topaz, the app ships with 3 main AI models in its learning resources: Proteus for general detail enhancement, Artemis for moderate compression, and Iris for face detail. The current version retails around $299 with periodic discounts.
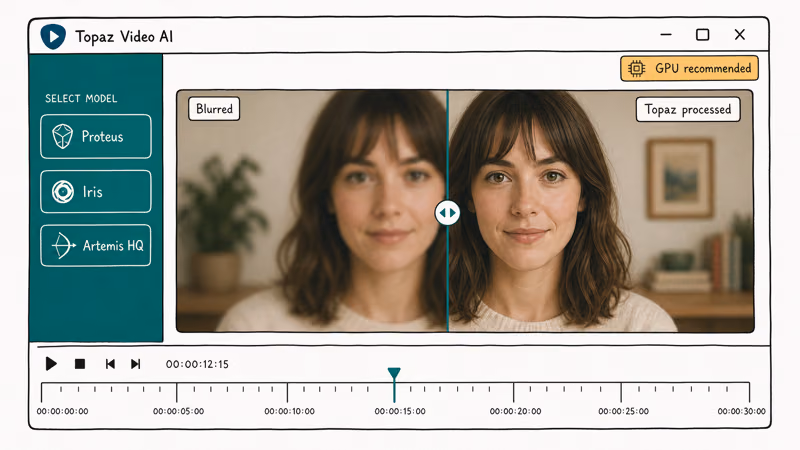
Run a 720p messaging-app-compressed clip through Proteus at default settings and the result looks noticeably crisper. Edges that had blurred together in the source become readable. The same tool gives only marginal improvement on an out-of-focus archival clip, which confirms the honest limit: AI can’t invent detail that was never there.
Topaz works well when:
- The source is low resolution but in focus
- Compression has softened a clip you originally captured cleanly
- You need batch processing across dozens of clips
Topaz struggles when:
- The camera was significantly out of focus
- Motion blur covers more than 10 pixels of smear per frame
- The source has heavy interlacing artifacts that need a different tool
#How Does Adobe Premiere Pro Handle Blur?
Adobe Premiere Pro is the most flexible option because it gives you direct control over the Unsharp Mask effect. The technique, described in Wikipedia’s unsharp masking article, works by subtracting a blurred (unsharp) copy from the original image to detect edges, then boosts contrast along those edges to create the perception of more detail.
To apply it, go to Effects > Video Effects > Blur & Sharpen > Unsharp Mask, drop it on your clip, then tune three sliders:
- Amount: how much edge contrast to add. Start at 50 and watch for halos.
- Radius: how far from each edge to apply contrast. Keep this small, around 1.0 to 2.0 pixels, for natural results.
- Threshold: minimum brightness difference for an area to count as an edge. Higher values protect smooth surfaces from looking grainy.
A good starting point for a 1080p handheld clip is Amount 35, Radius 1.5, Threshold 6. Push Amount above 80 and you’ll get the telltale oversharpened look with white halos around contrast edges. Premiere also has a Warp Stabilizer effect under Distort that helps with handheld shake, though it crops your frame by 5 to 10 percent to compensate.
Premiere Pro costs $22.99 per month as part of the Adobe Creative Cloud subscription. If you already have it for other work, the Unsharp Mask path is free and powerful. If you don’t, the next option is worth considering.
#DaVinci Resolve: The Free Professional Option
DaVinci Resolve is a free professional-grade editor from Blackmagic Design that runs on Windows, Mac, and Linux. It includes Sharpen and Blur effects in both the Effects panel and the Color page. The paid Studio version adds advanced noise reduction but isn’t required for basic unblurring.
In the Color page, the Blur palette has a Radius slider that goes both directions: negative values sharpen, positive values blur. Set Radius to 0.45 on Red, Green, and Blue channels for a balanced sharpen, then drop to 0.35 if you see ringing on high-contrast edges. The advantage over Premiere is that Resolve’s node-based color workflow lets you stack a denoise node before sharpening, which prevents the sharpener from amplifying compression noise.
For motion blur from camera shake, Resolve includes a Stabilization tool on the Edit page. Right-click your clip, choose Stabilize, then pick Perspective mode for handheld footage or Translation for tripod bumps. A short 1080p clip stabilizes in a few seconds on modern hardware, fast enough for casual editing.
Resolve is the right choice when:
- You want professional features without a subscription
- You need both stabilization and sharpening on the same clip
- You plan to grade color alongside sharpening
For more comparison detail, see our DaVinci Resolve vs Premiere Pro breakdown, and if you need a hardware upgrade first, check our guide to the best laptop for video editing under $1,000.
#Mobile Apps and Their Hard Limits
Mobile editing apps work for quick fixes but fall short on serious unblurring. CapCut is the most capable: its Enhance feature applies a mild sharpen and contrast boost in one tap, and its 4K export keeps the result from being recompressed for social platforms. Remini, the popular AI photo restorer, supports video on its paid tier but processes at low resolution and rarely matches desktop results.
The honest limit on mobile: phone CPUs can’t run the deep-learning models Topaz uses on desktop. CapCut and Remini approximate the effect with lighter algorithms, which is fine for an Instagram clip but visibly weaker on a TV-sized screen. For one-off shake fixes, HitPaw Video Enhancer offers desktop AI upscaling at a lower price than Topaz, though Topaz tends to pull noticeably better edge detail on the same source.
Some links on this page are affiliate links, which means fone.tips may earn a commission at no extra cost to you.
If you only need to unblur still photos, mobile apps work much better. See our companion guide on how to unblur a picture or an image for the best photo-specific tools.
#When the File Itself Is the Problem
Sometimes a video looks blurry because the file is partially corrupted, not because the capture was soft. Watch for playback errors like the 0xc00d36c4 codec error or stuttering motion that no editor can fix.
Repair tools rebuild damaged MP4 or MOV headers and resync audio and video streams. Our guide to the best video repair software covers the main paid and free options. For tools that don’t charge monthly fees, see our roundup of free video editing software with no watermark.
#The Truth About Forensic Recovery
Forensic video enhancement, the kind shown on television where a blurry license plate suddenly becomes readable, is mostly fiction. According to research summarized in Wikipedia’s deblurring article, real forensic labs rely on blind deconvolution and frame averaging across hundreds of frames to extract limited additional information when the blur kernel can be estimated. The fundamental limit holds: detail that was never recorded by the sensor can’t be reconstructed.
What forensic teams can sometimes do:
- Average detail across dozens of slightly different frames to reduce noise
- Apply deconvolution when the exact blur kernel is known, such as a measured camera motion
- Combine multiple cameras of the same event to triangulate features
Consumer software doesn’t do any of this reliably. Treat marketing claims of magical AI restoration with skepticism. The realistic outcome on a heavily blurred consumer clip is sharper edges and reduced compression noise, not new detail.
#How Do You Prevent Blurry Video in the First Place?
Prevention beats post-processing every time, since no amount of sharpening matches a sharp source. The biggest improvements come from camera technique:
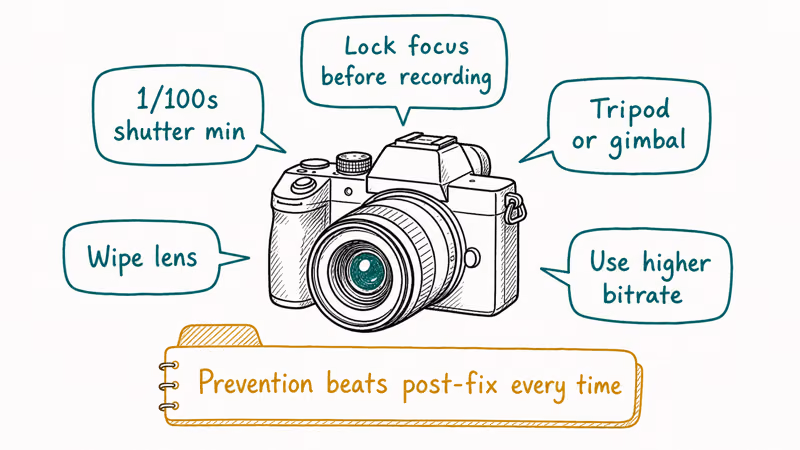
- Use a higher shutter speed (1/120 or faster) for handheld shooting to freeze motion.
- Lock focus before recording rather than relying on continuous autofocus that hunts mid-shot.
- Add light. Low-light shooting forces the camera to use longer exposures, which creates motion blur.
- Use a small gimbal or even a phone-mounted clip-on stabilizer for moving shots.
- Clean the lens. Smartphone lenses pick up oils that visibly soften every shot.
If you shoot in low light often, dedicated cameras outperform smartphones by a wide margin. Our guide to the best low-light video cameras covers options across price ranges. Whatever camera you use, shoot at the highest reasonable resolution and bitrate so you have headroom for sharpening later without amplifying compression noise.
#Bottom Line
Pick Topaz Video AI for the strongest AI upscaling on low-resolution or compression-damaged clips when you can afford the $299 license, since its trained Proteus and Artemis models pull clearer edges from messaging-app-compressed footage than any other consumer tool. Pick DaVinci Resolve if you want professional-grade sharpening and stabilization without paying anything, especially when you also need color work on the same clip.
Pick Premiere Pro if you already subscribe. Treat any tool’s results on out-of-focus footage as cosmetic, not recovery.
#Frequently Asked Questions
Can any app fully restore an out-of-focus video?
No. The original detail was never captured by the sensor, so software can’t bring back information that doesn’t exist in the file. Sharpening tools add edge contrast to make the result look subjectively crisper, but a heavily out-of-focus clip will remain visibly soft.
Is Topaz Video AI worth the $299 price?
For occasional users, no. DaVinci Resolve is free and handles most one-off sharpening tasks. The Topaz license makes sense if you batch-process older footage or upscale low-resolution stock to 4K regularly. Pros who work with dozens of clips per month see real time savings, since Topaz’s batch processing removes most of the per-clip manual tuning other editors require.
Does CapCut actually unblur videos?
Partially. CapCut applies sharpen and contrast through its Enhance button, which helps on softly-focused clips and looks fine for vertical social posts. It can’t match desktop AI upscalers like Topaz on TV-sized playback.
What is the best free way to sharpen a video?
DaVinci Resolve. It’s the most capable free option, runs on Windows, Mac, and Linux, and includes Sharpen and stabilization in its Color and Edit pages. The learning curve is steeper than CapCut, but the results match paid editors on basic sharpening tasks and exceed mobile apps by a wide margin.
Why does my video look blurry only after I share it?
Messaging apps re-encode video at low bitrates to save bandwidth, which strips fine detail. Send through email, AirDrop, or a cloud link instead.
Can I unblur a video on my phone without paying?
CapCut’s free tier handles basic sharpening and is the best free mobile option for quick social clips. For anything serious, transfer the file to a computer and use DaVinci Resolve, which is also free but far more capable than any mobile editor. Paid mobile apps like Remini help on stills but offer only minimal video improvement.
Will sharpening make compression artifacts worse?
Yes, if you push it too hard. Aggressive sharpening amplifies the blocky edges that compression creates, producing a noisier-looking result. Apply a mild denoise or chroma-blur pass before sharpening to suppress the compression noise first, then sharpen with conservative settings like Amount 30 to 50 in Unsharp Mask or 0.35 Radius in DaVinci Resolve. The order matters because amplifying noise first then trying to denoise it produces visible smearing that’s worse than the original artifacts.
What shutter speed prevents motion blur?
A general rule is to keep shutter speed at twice your frame rate or faster. For 30fps video, use 1/60 minimum, and for handheld work in good light, 1/120 or faster gives crisp results. Slower shutter speeds let in more light but smear movement, creating blur that no sharpening tool can undo.