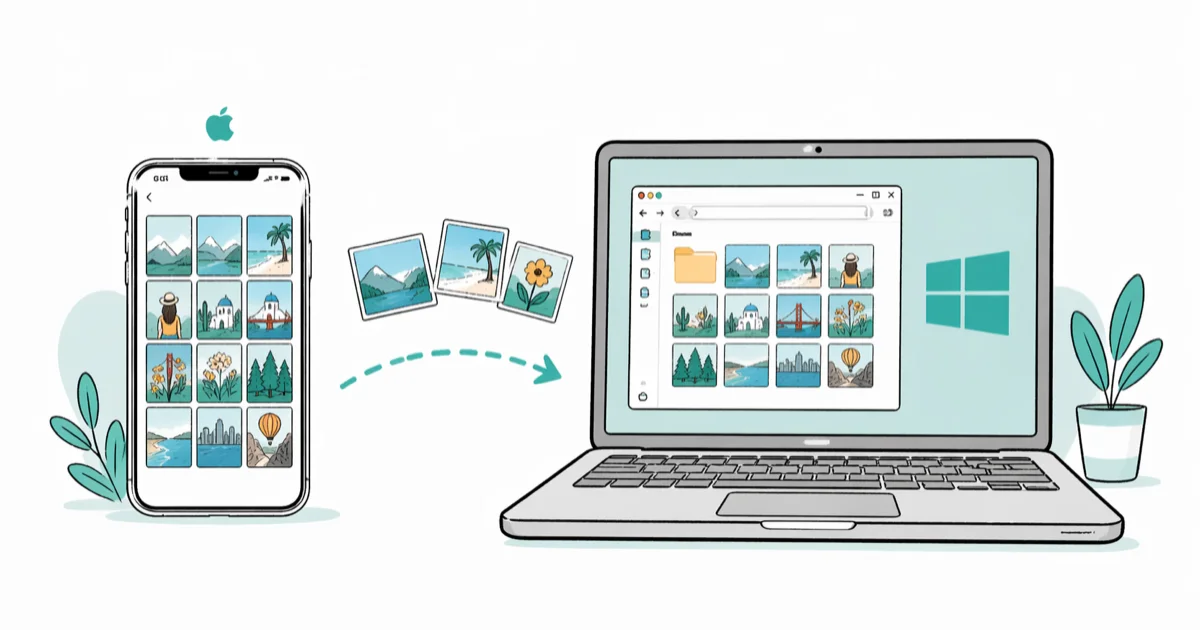
How to Transfer Photos From iPhone to PC Windows 10 (5 Ways)
Transfer photos from iPhone to PC Windows 10 using the Photos app, File Explorer, iCloud, OneDrive, or USB. Step-by-step fixes for Trust prompts and HEIC.
Quick AnswerPlug your iPhone into a Windows 10 PC, sign in on the device, tap Trust, then open the Photos app and click Import to copy photos in 2 to 5 minutes.
You can transfer photos from iPhone to PC Windows 10 in five ways.
- Photos app handles large batches with auto-deduplication; import speed depends on your cable, USB port, and photo format
- File Explorer works when the Photos app freezes; copy from the DCIM folder directly without any third-party software
- iCloud for Windows downloads originals automatically once you check Photos in the app’s Options panel
- HEIC files open in Windows 10 only after installing the HEIF Image Extensions and HEVC Video Extensions from the Microsoft Store
- Always tap Trust on the iPhone after the cable connects, otherwise Windows shows the device as a black box with zero photos
#Why Won’t Windows 10 See My iPhone Photos?
Windows 10 treats your iPhone as a digital camera, not a drive, which puts three pre-conditions in your path: a data-grade cable, a tapped Trust prompt, and a running Apple Mobile Device Service. Miss any one of them and the Photos app silently shows nothing.
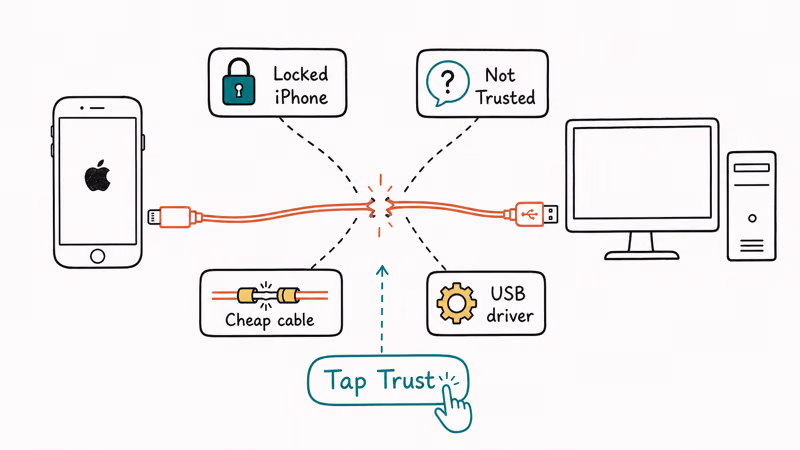
Start with the cable. Charge-only cables ship with cheap chargers and won’t pass data. If Windows charges the iPhone but shows zero photos, the cable may not expose the data lanes the Photos app needs. Apple’s Lightning cable identification guide explains how to spot the MFi certification stamp on the connector.
The Trust prompt is next, and it only fires once per PC.
The first time the iPhone connects to a new PC, iOS shows “Trust This Computer?” on the lock screen, and you tap Trust and enter your passcode. If you missed the prompt, unplug the cable, restart the iPhone (hold Side + Volume Up, then slide to power off), and reconnect to retrigger it.
Last, the Apple Mobile Device Service. iTunes installs this background service to expose the iPhone to File Explorer and the Photos app. Open services.msc, scroll to Apple Mobile Device Service, and confirm Status reads Running; if Start is grayed out, reinstall iTunes from apple.com. Microsoft’s import photos troubleshooting guide ranks this service the first thing to verify whenever an iPhone connects but returns 0 photos.
#Method 1: Use the Photos App for Batch Imports
The Photos app is the fastest path for batches of 50 to 1,000 photos.
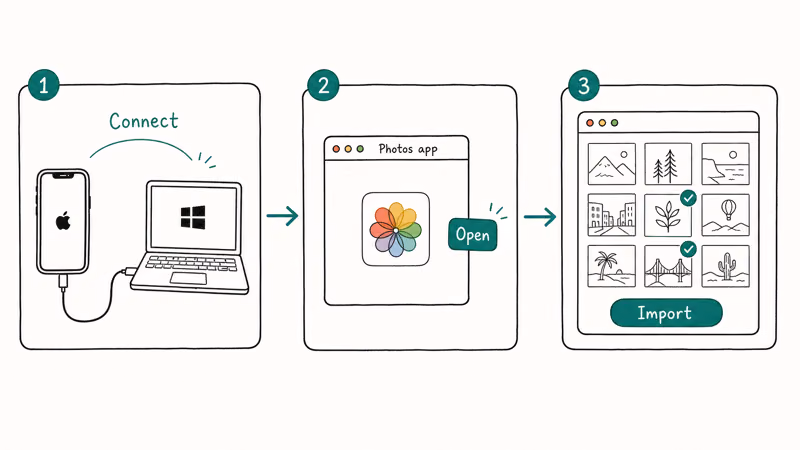
Its big perk is auto-deduplication, so re-running the import doesn’t double your library. It works well for mixed HEIC and JPEG libraries, though transfer speed depends on your cable and USB port.
- Plug your iPhone into the Windows 10 PC with a Lightning cable.
- Sign in on the iPhone and tap Trust on the prompt that appears.
- Open the Photos app from the Start menu (it’s pinned by default in Windows 10 22H2).
- Click Import in the top-right toolbar, then choose From a connected device.
- Wait for Windows to scan the camera roll; larger libraries can take longer to index before thumbnails appear.
- Use Select all or click individual thumbnails, then click Import to selected.
- Choose the destination folder (Pictures\Imported is the default).
If the Photos app shows “We couldn’t find any new photos to import” but you know the iPhone has new photos, the camera roll scope is the problem. Open Settings > Privacy on the iPhone, tap Photos, then confirm the access toggle for Windows shows Read & Write. Apple’s Photos privacy controls support article explains why iOS hides photos from any host that lacks Read access, and which iOS releases changed the default.
Moving photos as part of an upgrade? Our guide on how to transfer data to a new iPhone covers the cross-device path. For viewing imported HEIC files later, our best photo viewers for Windows 10 roundup picks the apps that render iPhone photos without re-encoding.
#Method 2: Drag Photos From File Explorer
File Explorer is the fallback when the Photos app crashes, freezes mid-import, or returns zero results despite a healthy iPhone connection. It skips the Photos library entirely and gives you raw, unindexed access to the iPhone’s DCIM folder, the same folder structure digital cameras have used since 1998. No third-party software, no driver tricks beyond what iTunes already installed.
- Connect the iPhone, sign in on the device, and tap Trust.
- Open File Explorer (Win + E).
- Click This PC in the left sidebar.
- Double-click the iPhone icon under Devices and drives.
Open Internal Storage>DCIM.- You’ll see folders named 100APPLE, 101APPLE, 102APPLE, and so on; each holds up to 999 files.
- Open any folder, select the photos you want (Ctrl + A for all, or Ctrl + click for individual files), then drag them to your desktop or a Pictures subfolder.
The DCIM folders aren’t sorted by date, which is the trade-off. Files are numbered sequentially as you took them, so IMG_0001 might be from 2023 and IMG_4523 from yesterday. If you need date-sorted exports, use Method 1 instead.
A common trip wire: opening a DCIM folder shows nothing, but the status bar reads several gigabytes. Windows is enumerating the file list over MTP, a transfer protocol that scales poorly past a few thousand files. Folders with 800-plus files take 15 to 30 seconds to populate on a 2018-era laptop, double that on USB 2.0. Don’t unplug.
#Method 3: Sync With iCloud for Windows
iCloud for Windows is the right choice when you want photos to mirror automatically without plugging in. It downloads originals from the cloud as long as iCloud Photos is on across both devices.
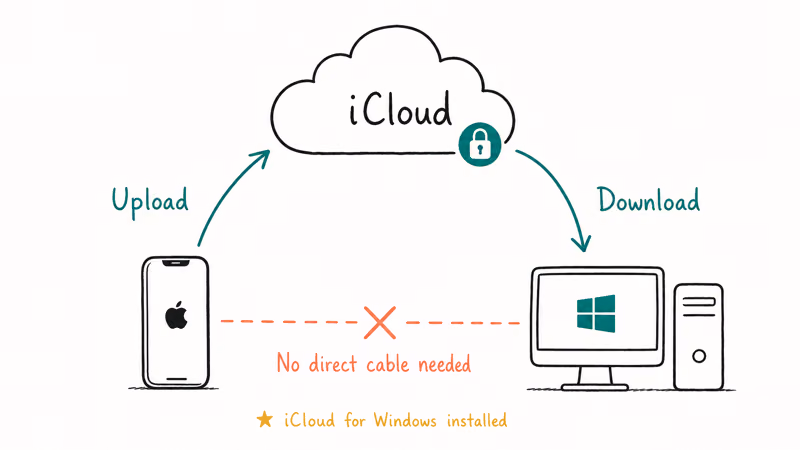
- Download iCloud for Windows from the Microsoft Store (it’s free and Apple-published).
- Sign in with your Apple ID and the password tied to the iPhone’s account.
- In the iCloud control panel, click Options next to Photos.
- Check iCloud Photos and Download new photos and videos to my PC.
- Click Done, then Apply.
The default download folder is C:\Users\[YourName]\Pictures\iCloud Photos\Downloads. New photos taken on the iPhone show up there within 5 to 15 minutes once they sync to iCloud. Apple’s iCloud Photos setup guide for Windows recommends at least 25 Mbps download bandwidth for libraries over 10 GB.
Two gotchas to plan around.
First, iCloud only syncs photos already uploaded. If your iPhone is set to Optimize iPhone Storage and you haven’t given it a long Wi-Fi window recently, the cloud copies might lag what’s on the device. Open Settings > Photos on the iPhone and switch to Download and Keep Originals to force a full sync first.
Second, iCloud’s free tier is 5 GB total across photos, mail, and backup. A 4,000-photo library blows past that easily; you’ll need at least the 50 GB plan ($0.99/month in the US) to mirror a real camera roll.
If you’ve forgotten the Apple ID password, our walk-through on recovering an iCloud login when you can’t remember the email helps before you start the install.
#Method 4: Upload Through OneDrive
OneDrive ships preinstalled on Windows 10 and gives you a wireless transfer path that doesn’t depend on iCloud or Apple’s drivers. It’s the right pick if your PC already lives on the Microsoft 365 ecosystem.
- Install the OneDrive app on the iPhone from the App Store.
- Sign in with the same Microsoft account that’s signed into your Windows 10 PC.
- Open the OneDrive iPhone app, tap
Me>Settings>Camera Upload, and toggle it on. - Decide whether to include videos (off by default) and whether to upload only on Wi-Fi (on by default).
- On the PC, open File Explorer; OneDrive’s
Pictures>Camera Rollfolder fills as photos sync.
The first sync of a 4,000-photo library can take 4 to 8 hours over typical home Wi-Fi. Subsequent syncs are near-instant for new shots. A single 4 MB HEIC photo synced within seconds on a 50 Mbps upload connection. Microsoft’s OneDrive camera upload documentation confirms that uploads pause when the iPhone screen locks unless you keep the OneDrive app foregrounded.
OneDrive’s free tier is 5 GB. The Microsoft 365 Personal plan ($69.99/year) bumps that to 1 TB and is the same plan that includes Word, Excel, and PowerPoint, so the math works out for most people. If you only want a one-time dump and not ongoing sync, stick with Method 1.
#Method 5: Send Single Photos by Email or AirDrop Alternative
For one or two photos, USB and cloud setup are overkill. Email and a Bluetooth-style alternative do the job in under 30 seconds.
The simplest path: open the Photos app on the iPhone, tap a photo, tap Share, tap Mail, and send it to yourself. Open the email on your Windows 10 PC and download the attachment. Apple’s Mail app compresses photos to about 1.5 MB by default; tap the size selector at the top of the compose screen to send Actual Size if you need full resolution.
There’s no native AirDrop for Windows. Microsoft announced Phone Link iPhone support for Insiders on February 27, 2023 and rolled it to all Windows 11 users by mid-2023, opening up notifications, calls, and (on Windows 11) basic photo mirroring.
There’s a catch on Windows 10: Phone Link only mirrors notifications, not photos. You need Windows 11 for the photo bridge.
Stuck on Windows 10? Third-party apps like Snapdrop (web-based, no install required) handle one-off transfers over the same Wi-Fi network without an account or paid plan.
#What Should You Do When the Import Includes HEIC Files?
iOS saves photos as HEIC by default starting with iOS 11. Windows 10 doesn’t open HEIC out of the box, so a successful import can still leave you with files that show as broken thumbnails.
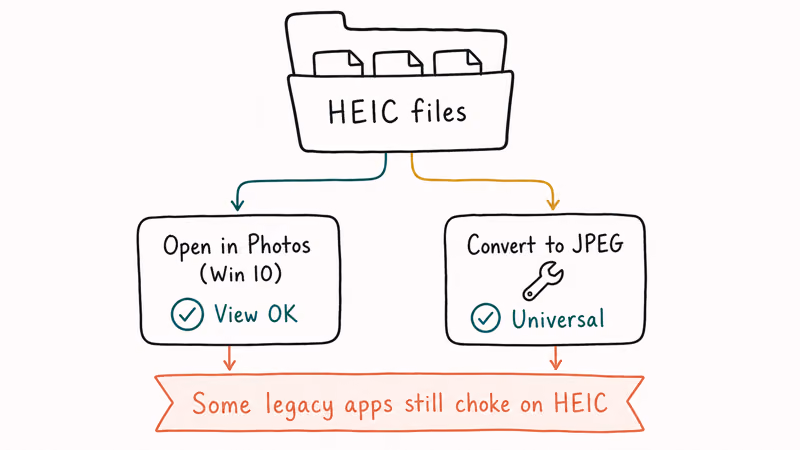
You have two clean options. First, install the HEIF Image Extensions (free) and HEVC Video Extensions ($0.99) from the Microsoft Store. Once installed, File Explorer can render HEIC thumbnails and the Photos app can open them like JPEG. Install order doesn’t matter.
Second, change the iPhone’s capture format going forward. Open Settings > Camera > Formats and pick Most Compatible, and from then on the iPhone shoots JPEG and H.264, which Windows reads natively without any extensions. Existing HEIC photos stay HEIC; only new shots change. Our deeper guide on how to view HEIC photos on Windows walks through the conversion options if the extensions don’t render correctly on your build.
For batch conversion of a HEIC archive you’ve already imported, our HEIC to JPEG conversion guide covers the free converters that handle 1,000-plus files in one pass.
#Bottom Line
Use the Photos app for any batch larger than 50 photos; it’s the fastest USB option and skips duplicates automatically. If Photos throws an error, switch to File Explorer and pull from DCIM directly. For ongoing wireless sync, pick iCloud for Windows if you already pay for iCloud storage, or OneDrive if you’re a Microsoft 365 subscriber. Install the HEIF and HEVC extensions before your first import or your photos will look broken on the PC.
#Frequently Asked Questions
How long does it take to transfer 1,000 photos from iPhone to Windows 10?
Over USB, expect larger mixed HEIC and JPEG libraries to take longer than small batches. Faster USB ports usually shorten the transfer, while wireless options like OneDrive or iCloud depend heavily on upload speed.
Can I transfer photos without iTunes installed?
Yes for the most part. The Photos app and File Explorer both work without iTunes on Windows 10 versions 1709 and later, and iCloud for Windows is a separate app that doesn’t need iTunes either. The only path that actually requires iTunes is iPhone backup restore, not photo transfer. If File Explorer still doesn’t show your iPhone after a fresh Windows install, install iTunes from apple.com to lay down the Apple Mobile Device Support component.
Why are my iPhone photos not showing in File Explorer?
Three causes: the iPhone is asleep on the lock screen (sign in on the device), Trust hasn’t been granted (unplug, replug, tap Trust), or Apple Mobile Device Service is stopped. Open services.msc, find Apple Mobile Device Service, right-click and select Start. If the service won’t start, reinstall iTunes from apple.com.
Will transferring photos delete them from my iPhone?
Not by default. Every method copies photos and leaves originals on the iPhone. The Photos app shows a checkbox labeled “Delete imported items from your iPhone after importing” before the import starts; leave it unchecked.
Do these methods work for video files too?
Yes, all five methods transfer .mov and .mp4 video files alongside photos. HEVC-encoded videos (the iOS 11+ default) need the HEVC Video Extensions for Windows 10 to play. iCloud and OneDrive sync videos but count them against your storage quota; a single 4K 60fps minute is roughly 400 MB, so the 5 GB free tier fills fast. For large video libraries, USB plus File Explorer is the realistic option.
What if the Trust prompt never appears on my iPhone?
Restart the iPhone (Side + Volume Up, slide to power off, wait 30 seconds, power back on) and reconnect the cable. If still nothing, reset the trust list at Settings > General > Transfer or Reset iPhone > Reset > Reset Location & Privacy. The next connection forces a fresh Trust prompt, but per Apple’s trusted computers support page, the reset clears trust records for every PC and Mac you’ve ever paired with, so you’ll need to re-trust each one.
Can I transfer photos to PC over Wi-Fi without iCloud?
Yes, OneDrive does this. Snapdrop is another option for one-off transfers.
Are HEIC photos converted to JPEG during transfer?
It depends on the method. The Photos app keeps HEIC as HEIC unless you’ve turned on “Automatic” conversion in iPhone Settings > Photos > Transfer to Mac or PC. File Explorer and OneDrive both preserve the original format. Email is the exception; iOS Mail converts HEIC to JPEG by default for compatibility.

iPhone 17 Cellular Data Not Working on iOS 26? 9 Fixes
iPhone 17 cellular data still dropping on iOS 26? Apple fixed the launch bug in iOS 26.0.1, but recovery failures persist. Here's the fix ladder.

iPhone Cellular Data Not Working Abroad? eSIM Fixes
Travel eSIM showing no data abroad? Fix iPhone roaming with the data-line check, Data Roaming toggle, APN settings, and network selection steps.

iPhone Cellular Data Not Working for Some Apps? 8 Fixes
Some iPhone apps refuse to load on cellular while others work fine. Check the per-app cellular toggle, Low Data Mode, VPN profiles, and Screen Time.

iPhone Stuck on EDGE? How to Get 5G or LTE Back (2026)
iPhone stuck on EDGE with crawling data? Here's why the E icon appears, which settings force 5G or LTE back, and when the problem is your carrier.