How to Slow Down a Video on iPhone: 3 Methods (2026)
Learn how to slow down a video on iPhone with Photos, iMovie, and CapCut. Step-by-step methods for slo-mo, time-lapse, and standard clips alike.
Quick AnswerTo slow down a video on iPhone, open the Photos app, tap Edit on a slo-mo clip, then drag the vertical bars under the timeline to set the slow section. For non-slo-mo footage, import the clip into iMovie, tap Speed, and slide left to play it back at as low as one-eighth speed.
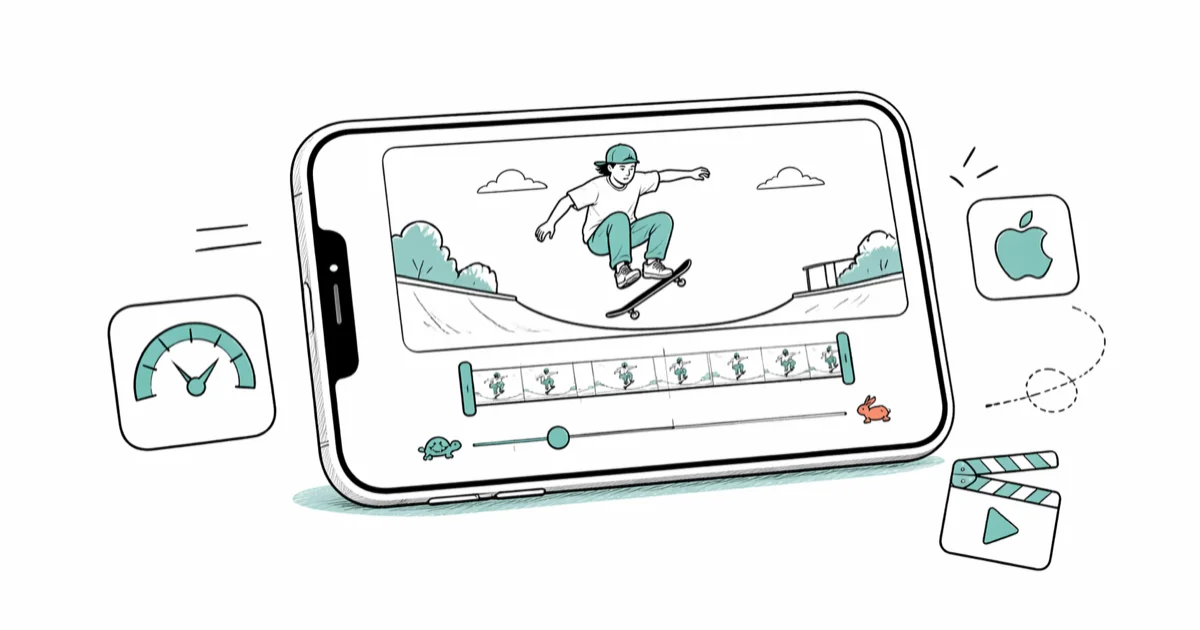
Knowing how to slow down a video on iPhone turns an ordinary clip into a frame-by-frame replay you can study, share, or repurpose for social posts. Apple ships three free tools that handle the job: the Photos app for slo-mo footage, iMovie for regular and time-lapse clips, and the new project sliders in iOS 17 and later. This guide walks through each method, when to use it, and what tradeoffs to expect on quality.
- Photos app handles slo-mo clips only. Drag the two vertical bars under the editing timeline to set where the slow section starts and ends.
- iMovie slows any clip down to one-eighth of its original speed. A 16-second video becomes a 2-minute, 8-second playback.
- Slo-mo recording at 240 fps preserves smoother motion when slowed than 120 fps does, since each second contains twice as many frames.
- iOS 16 and later let you change clip speed inside the Photos editor for standard footage too, not just slo-mo, with a long-press on the timeline.
- Free third-party apps like CapCut add curve-based speed ramping that built-in tools can’t match, useful for sports highlights or dance edits.
#What Are the Built-In Ways to Slow Down a Video on iPhone?
iPhones give you two free, official paths to slow video down: the Photos app and iMovie. Both ship with iOS. You don’t need anything from the App Store if you’ve kept the defaults.
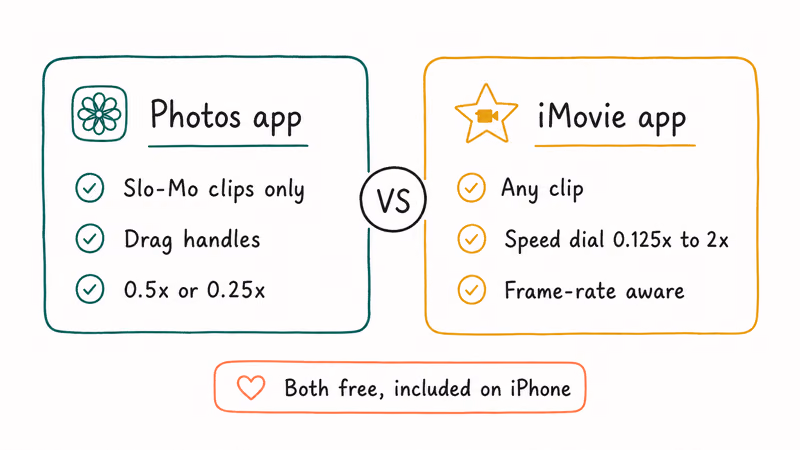
The Photos app is the fastest route, but it has one big limitation. It can only slow down clips that were recorded with the Slo-Mo camera mode. Tap Edit on a regular video shot in standard Video mode and you won’t see speed controls at all.
Why? The slo-mo speed bars only appear for footage flagged as 120 fps or 240 fps recording.
iMovie covers everything Photos misses. It accepts any video in your library, including time-lapses, screen recordings, AirDropped clips, and footage from other phones. The trade-off is a slightly longer workflow, since you have to create a project, drop the clip onto the timeline, and then export when you’re done.
That’s the headline difference between the two apps.
According to Apple’s iMovie for iPhone and iPad user guide, the app lets you adjust playback speed between one-eighth and twice the original, with finer increments available through the speed slider in the inspector. That range covers almost every practical use case, from emphasizing a golf swing to compressing a long-winded screen recording.
#Slowing Down a Slo-Mo Clip in the Photos App
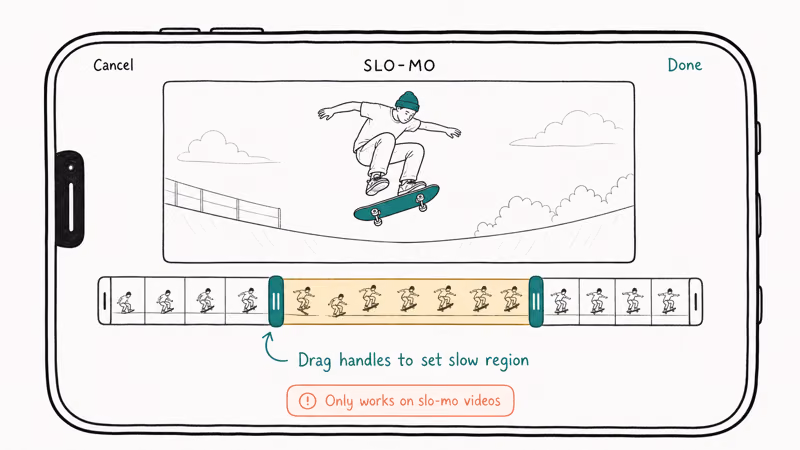
The Photos app keeps things simple if your video is already a slo-mo recording because the speed handles are built into the edit screen.
Here’s the exact sequence:
- Open the Photos app and tap the slo-mo clip you want to adjust.
- Tap Edit in the top-right corner.
- Look beneath the video frame for a row of evenly spaced vertical lines. This is the speed scrubber.
- Find the two taller vertical bars on the scrubber. They mark where the slow section begins and ends.
- Drag the left bar to where you want the slowdown to start, and the right bar to where it should end. Lines spaced farther apart play at normal speed; tightly grouped lines play in slow motion.
- Tap Done to save your edit.
The original clip stays intact under the hood. Tap Revert in the Edit view to undo the change. This non-destructive behavior is also how the Photos app handles cropping and color edits, so you can experiment without losing the source, and your changes propagate across every device signed into the same iCloud Photos account within a few minutes of saving.
According to Apple’s edit videos in Photos support page, the slo-mo bars can be repositioned as many times as you want, since each adjustment writes a new set of timing markers without re-encoding the underlying file.
If your video isn’t a slo-mo recording but you still want to use Photos, iOS 16 and later added a Speed icon to the standard video editor.
The catch: this control is buried. Tap Edit, then the small speedometer icon next to the crop tool. Half speed is the slowest preset.
#How to Slow Down Any Video on iPhone With iMovie
iMovie is the right tool when Photos won’t cooperate. It handles regular Video mode clips, time-lapses, AirDropped footage, and even videos imported from a GoPro transferred to your iPhone. If you’ve removed iMovie at some point to save storage, grab it free from the App Store; the install is around 700 MB.
At one-eighth speed, iMovie stretches a standard clip to eight times its original duration. Motion blur becomes more noticeable in handheld footage because each original frame stays on screen longer, while tripod-shot video usually looks steadier.
Follow these steps:
- Launch iMovie and tap Start New Project on the main screen.
- Choose Movie, then select the clip from your library and tap Create Movie.
- Tap the clip on the timeline so it gets a yellow outline.
- Look at the bottom of the screen for the speed icon, which looks like a small speedometer.
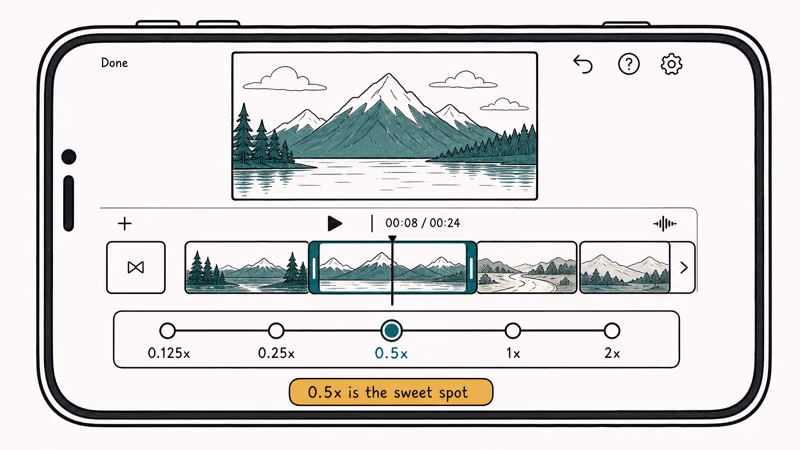
- Tap the icon. A slider appears with a turtle on the left and a rabbit on the right.
- Drag the slider toward the turtle. You’ll see the speed multiplier change as you move (0.5x, 0.25x, 0.125x).
- Watch the duration field above the slider to confirm the new clip length.
- Tap Done in the top-left when you’re satisfied.
- Tap the Share icon at the bottom of the project view to export. Save Video sends the slowed clip back to your camera roll at the highest quality iMovie supports.
If iMovie quits during export, our walkthrough on how to fix the iMovie video rendering error covers the storage and codec causes.
#Trim Before You Slow
iMovie applies the speed change to the entire selected clip, so trimming first saves time and storage. Drag the yellow handles on either side of the clip on the timeline, then apply the speed change to the shortened version. This shaves down a 4-minute file to something you’ll actually want to share, since one-eighth speed on a 30-second clip otherwise turns into a 4-minute monster nobody wants to watch end to end.
This matters more than you’d expect. A 30-second clip at one-eighth speed becomes a 4-minute file. If you only need the moment your dog jumps, isolate those two seconds first; the resulting slowdown will be 16 seconds instead of an unwieldy 4 minutes.
#How to Slow Down a Time-Lapse Clip Step by Step
Time-Lapse mode records at roughly two frames per second. A 10-minute session compresses into about a 20-second clip on playback.
The Photos app can’t slow time-lapses down, so iMovie is the workaround. Apple confirms that time-lapse files save as standard-format video that any editor can re-time. Drop your clip into a new Movie project, tap the speed icon, and slide left.
Half-speed playback is usually the gentlest option for a short time-lapse. It roughly doubles the clip length so playback still feels brisk but lets viewers actually see the changes. Going slower than that often results in choppy motion, since the source already has a low frame rate.
If you frequently combine time-lapses with regular footage, our guide on how to put multiple videos on one screen with iMovie covers the picture-in-picture layout that pairs well with re-timed clips.
#When Should You Use a Third-Party Editor Instead?
The built-in tools cover most use cases. You’ll want a third-party app when you need any of these:
- Speed ramping with curves, where the slowdown gradually eases in instead of switching abruptly at a single point.
- Optical-flow frame interpolation, which generates synthetic in-between frames to smooth out heavy slowdowns. This is the technique used in dramatic sports replays.
- Frame rates beyond 240 fps, which require external camera apps or post-processing.
- Project-level audio control, including pitch-preserved audio at slowed speeds.
CapCut and InShot both offer free curve-based speed editing on the iPhone. The downside is the ads and the watermark on the free tier, though both can be removed with a quick in-app toggle in CapCut’s settings.
If you need to boost audio in your slowed clip, our guide on how to make a video louder walks through both iPhone and desktop options that pair well with iMovie exports.
#The Frame Rate and Quality Trade-off
It depends on the frame rate of the source and how far you push the slowdown. iPhones from the iPhone 6s onward can record slo-mo at 240 fps, while standard Video mode records at either 30 or 60 fps. Apple’s documentation states that 240 fps slo-mo provides smoother motion when slowed because each second of footage contains four times as many frames as 60 fps capture.
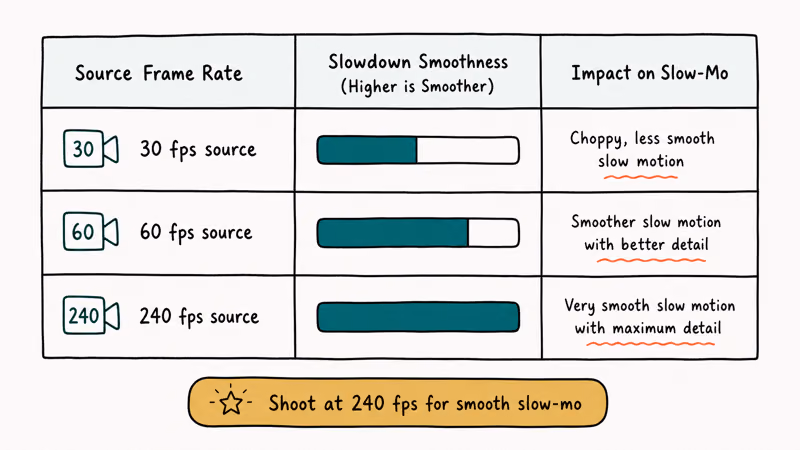
Slowing a 240 fps clip down to one-eighth speed still gives you a playback equivalent of 30 fps, which is the standard for cinema. Slowing a 30 fps clip the same amount results in only 3.75 effective frames per second, which looks visibly stuttery.
A practical rule of thumb: shoot in slo-mo from the start if you know you’ll want to slow the footage in editing. The frame rate buffer you get from 240 fps recording is hard to replicate later, even with frame interpolation tools.
Storage is the other tradeoff. Apple notes that one minute of 1080p slo-mo footage at 240 fps consumes roughly 480 MB, compared to 60 MB for the same minute of 1080p video at 30 fps. If you’re running low on space, record slo-mo only when you actually need it, and offload finished slow-motion exports to iCloud or a computer to free up local storage.
#Bottom Line
For most iPhone users, the Photos app is the first stop for any slo-mo clip that’s already in your camera roll. Drag the bars, tap Done, and you’re finished.
When the video wasn’t shot in Slo-Mo mode or you want a slowdown more aggressive than half speed, switch to iMovie’s speed slider for full one-eighth speed control. Reach for CapCut or another third-party editor only when you specifically need curve-based ramping or frame interpolation, since those features go beyond what the free Apple tools offer.
Sharing the finished clip is easy. The standard Photos share sheet handles AirDrop, Messages, Mail, and most social apps. For another camera-roll workflow, see our screen record FaceTime with sound walkthrough.
#Frequently Asked Questions
Which iPhones can record slo-mo video?
Every iPhone since the 5s supports slo-mo. The iPhone 6 added 240 fps capture, the iPhone 8 brought 1080p at 240 fps, and modern Pro models extend the feature with cinematic mode and better low-light performance.
Can I slow down a regular video without using iMovie?
Yes. On iOS 16 and later, open Photos, tap Edit, then the speedometer icon.
Does slowing down a video reduce its resolution?
No. Pixel dimensions stay the same whether you play back at full speed or one-eighth speed. What can suffer is perceived smoothness, since slowing a low-frame-rate clip stretches each frame across more display time and makes motion look choppy.
How much storage does a slo-mo video take compared to a regular video?
Slo-mo at 240 fps uses roughly eight times the storage of standard 30 fps video at the same resolution. A two-minute slo-mo clip at 1080p averages just under 1 GB, while the same length in standard mode lands closer to 120 MB.
Can I add audio to a slowed-down video on iPhone?
You can. Open the project in iMovie, tap the plus icon on the timeline, and pick from your music library, sound effects, or voiceover recordings. iMovie automatically lowers the original clip audio when you add a new track, but you can adjust the mix by tapping each audio strip and using the volume slider.
Will slowing a video down affect the audio?
Yes. iMovie slows the audio along with the video by default, so voices sound deeper. Mute the clip and add a fresh audio track for a cleaner result.
Can I share a slowed-down video at full quality?
Sharing through the Files app, AirDrop, or iCloud Drive preserves the full export quality. The original bitrate and resolution pass through unchanged. Most social platforms (Instagram, TikTok, WhatsApp) re-encode uploads at lower bitrates, so the file your viewers see ends up smaller than what you exported.

iPhone 17 Cellular Data Not Working on iOS 26? 9 Fixes
iPhone 17 cellular data still dropping on iOS 26? Apple fixed the launch bug in iOS 26.0.1, but recovery failures persist. Here's the fix ladder.

iPhone Cellular Data Not Working Abroad? eSIM Fixes
Travel eSIM showing no data abroad? Fix iPhone roaming with the data-line check, Data Roaming toggle, APN settings, and network selection steps.

iPhone Cellular Data Not Working for Some Apps? 8 Fixes
Some iPhone apps refuse to load on cellular while others work fine. Check the per-app cellular toggle, Low Data Mode, VPN profiles, and Screen Time.

iPhone Stuck on EDGE? How to Get 5G or LTE Back (2026)
iPhone stuck on EDGE with crawling data? Here's why the E icon appears, which settings force 5G or LTE back, and when the problem is your carrier.