How to Make Video Look Like Film: 6 Proven Techniques
Learn how to make your video look like film using color grading, cinematic aspect ratios, film grain overlays, and editing software like Filmora.
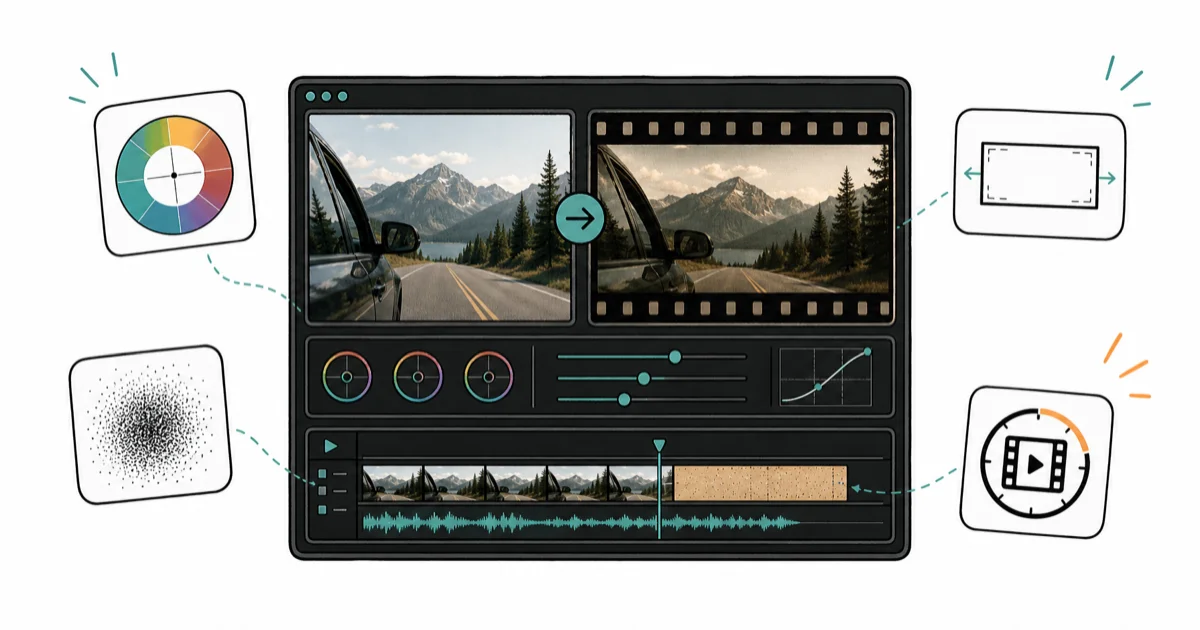
Quick AnswerUse video editing software such as Filmora or DaVinci Resolve to apply cinematic color grading, add film grain, set a 21:9 widescreen aspect ratio with letterbox bars, and adjust frame rate to 24fps for an authentic film look.
Smartphone footage can look flat and digital right out of the camera. Combining 24fps, a 21
crop, and color grading is the most direct way to make it look more like film without expensive gear.- Shooting or exporting at 24 frames per second replicates the motion blur pattern of traditional film and is the single most impactful frame rate choice.
- A 21 widescreen aspect ratio with black letterbox bars is the cinema standard and can be added in editing without re-shooting footage.
- Wondershare Filmora includes 3D LUT presets that mimic specific film looks, including styles based on Game of Thrones and Harry Potter color grades.
- DaVinci Resolve offers free, professional-grade color grading tools used in Hollywood productions.
- Film grain overlays and vignettes add texture that digital video lacks, completing the analog look at minimal cost.
#Why Does Smartphone Video Look So Different From Film?
The difference between smartphone footage and cinematic film comes down to four technical factors: frame rate, aspect ratio, color science, and grain. According to Wikipedia’s article on film formats, traditional 35mm film records at 24 frames per second and captures color through a chemical process that creates natural variations digital sensors don’t replicate.
Digital cameras capture clean, noise-free images at 30fps or higher. That clinical precision is exactly what makes them look like video rather than film. Fixing this requires intentionally adding the imperfections that make film feel cinematic.
The biggest single-change improvement usually comes from frame rate. Switching from 30fps to 24fps reduces the “soap opera effect” that makes video look like reality TV rather than cinema.
#Gear and Software You Need
You don’t need expensive equipment. A modern smartphone (iPhone 15 or Samsung Galaxy S24) records 4K footage with enough dynamic range for color grading. For software, use Filmora (beginner-friendly, paid) or DaVinci Resolve (free, more powerful). Both run on Windows and macOS.
#The 6 Techniques for a Film Look
#1. Set Your Frame Rate to 24fps
24fps is the cinema standard. It creates motion blur patterns that match how your eyes perceive film. Go to your camera settings and set video capture to 24fps before shooting. If you’ve already recorded at 30fps, export from your editing software at 24fps.
This single change can make smartphone footage look more cinematic even before any color grading.
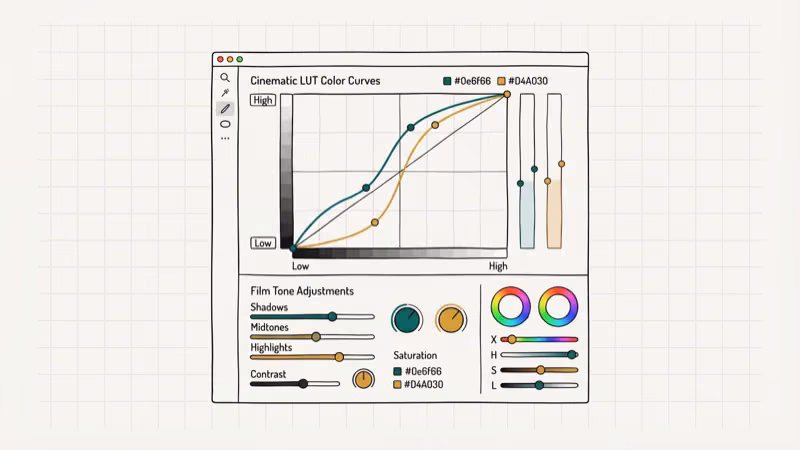
#2. Apply Cinematic Color Grading
Color grading is where most of the “film look” comes from. Films have a specific color palette: crushed blacks, slightly desaturated mids, and a warm or cool color cast in the highlights.
In Wondershare Filmora, go to Color > Advanced and apply a 3D LUT preset. Filmora includes presets that mimic styles from specific productions.
Some links on this page are affiliate links, which means fone.tips may earn a commission at no extra cost to you.
According to DaVinci Resolve background, daVinci Resolve offers the same capability for free. According to Blackmagic Design, it’s used on more feature films than any other color grading tool.
#3. Add Black Letterbox Bars (21 Aspect Ratio)
Cinema uses a 21
widescreen format. Most smartphone footage is 16. Adding black bars at the top and bottom of your video instantly communicates “film” to the viewer.In Filmora, go to Crop & Zoom and set the aspect ratio to 2.39
or 21. The black bars appear automatically. This crop also removes distortion at the frame edges that’s common in smartphone lenses.#4. Reduce the Frame Rate for Slow-Motion Shots
Shooting at 120fps or 240fps and slowing it down to 24fps creates smooth slow-motion that looks closer to high-end camera footage.
Slow sections work especially well for establishing shots and emotional moments.
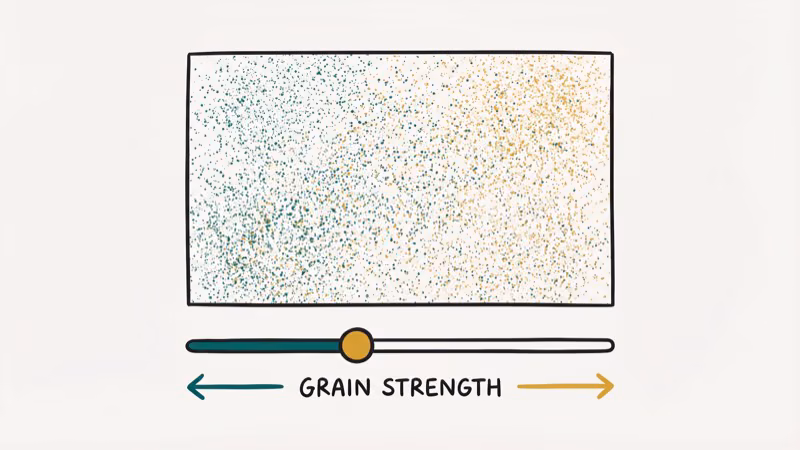
#5. Add Film Grain
Film has natural grain from the silver halide crystals in the emulsion. Digital video has none. Adding a grain overlay brings back texture that makes footage feel analog.
In DaVinci Resolve, use the Film Grain effect under the Color > Extensions panel. In Filmora, apply film grain under Effects > Filters. Set grain intensity to 10 to 20 percent — anything higher looks artificial.
#6. Apply a Vignette
A subtle vignette (darkening the edges of the frame) draws the eye to the center and mimics the lens behavior of vintage film cameras. In Filmora, find this under Color > Vignette. Keep the value between 20 and 35 for a natural result.
You can also edit TikTok videos after posting using similar color grading principles. For more editing tools, check the guide to apps for vlogging.
If you want a head-to-head professional comparison, see our breakdown of DaVinci Resolve vs Premiere Pro before picking your long-term editor.
#Why Wondershare Filmora Is the Best Starting Point
Professional tools like Adobe Premiere Pro
 and DaVinci Resolve have steep learning curves. Filmora was designed for beginners but includes the key features needed for a film look: 3D LUTs, color grading, aspect ratio control, and grain effects. It also exports in multiple formats and uploads directly to YouTube and Facebook.
For reference, here’s how the main tools compare:
| Tool | Cost | Film Look Features | Difficulty |
|---|---|---|---|
| Filmora | Paid | 3D LUTs, grain, color | Easy |
| DaVinci Resolve | Free | Full color grading, grain | Moderate |
| Adobe Premiere | Subscription | Lumetri Color, LUTs | Advanced |
| Final Cut Pro | $299 one-time | Color tools, grain | Moderate |
#How to Use Filmora for a Cinematic Look
Step 1: Import your video file
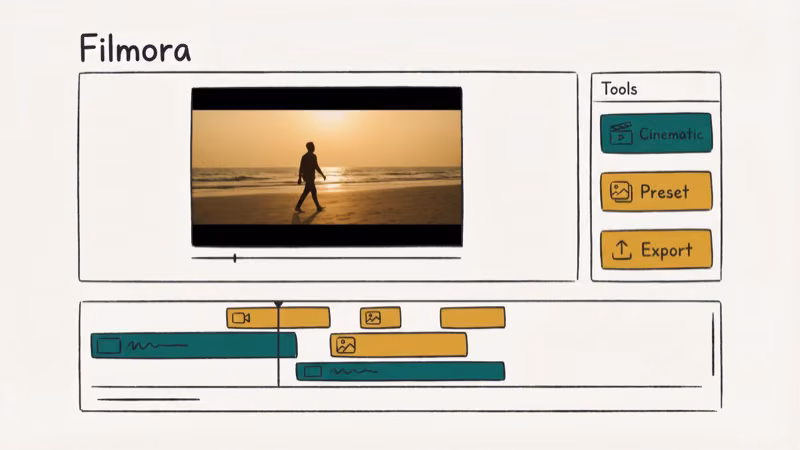 to Filmora’s media panel and drag it to the timeline.
Step 2: Double-click the clip to open the editing panel, then go to Color > Advanced.
Step 3: Browse 3D LUT presets and double-click to preview. Try Game of Thrones (desaturated, blue-green shadows) or Harry Potter (warm golden highlights) as starting points.
Step 4: Adjust the Brightness, Contrast, and Saturation sliders to refine the look.
Step 5: Add film grain from the Effects panel and set a vignette in the Color section.
Step 6: Export in a format that doesn’t compress aggressively. MP4 with H.264 at high bitrate preserves the grading quality.
#What Makes Filmora Stand Out for Film Looks?
Filmora’s 3D LUT library includes over 30 preset styles inspired by specific films and TV shows. Applying a LUT, vignette, and grain in Filmora is a beginner-friendly workflow. DaVinci Resolve offers deeper controls but has a steeper interface for first-time users.
For most people who want cinematic results without a steep learning curve, Filmora hits the right balance. See how to export Filmora without watermark or learn about removing the Filmora watermark.
#Bottom Line
Start with 24fps and 21
crop. Those two changes are free and produce the biggest visible improvement.Add color grading next using a 3D LUT in Filmora or DaVinci Resolve. Film grain and vignette complete the look, especially on short social clips.
#Frequently Asked Questions
Can I make smartphone video look like film?
Yes. Modern phones capture video with enough resolution and dynamic range to respond well to film-style color grading. The combination of 24fps, 21
crop, a cinematic 3D LUT, and subtle film grain can make smartphone footage look much more cinematic, especially on typical social media viewing conditions. The key is the post-processing workflow, not the camera hardware.What frame rate should I use for a cinematic film look?
24fps is the standard. It creates the motion blur that your brain associates with cinema. 30fps is associated with video content like news broadcasts and reality TV. If you’ve already shot at 30fps, you can still apply all other techniques, but the motion cadence will remain video-like.
Is DaVinci Resolve really free?
Yes. The free version of DaVinci Resolve includes full color grading capabilities, timeline editing, audio mixing, and effects. According to Blackmagic Design, the free version is identical to the paid Studio version except for a few AI-powered effects. For most film look work, the free version is sufficient.
Do I need an expensive camera to get a film look?
No. Technique matters more than equipment for the film look. An iPhone 15 Pro or Samsung Galaxy S24 with proper settings produces footage that responds well to cinematic color grading. The key factors are frame rate, color grading, and aspect ratio, not the sensor size.
What is a 3D LUT?
A 3D LUT (Look Up Table) is a color transformation file that maps specific input colors to specific output colors. It’s how colorists apply a consistent “look” to footage. Films often have a signature 3D LUT that defines their visual style, and editing software like Filmora and DaVinci Resolve let you apply or create these files.
How do I add black bars to my video?
In Filmora, go to Crop & Zoom and set the aspect ratio to 2.39
. Black bars appear at the top and bottom automatically. In DaVinci Resolve, change the timeline resolution to a 2.39 format. You can also add a black bar overlay as a separate video layer in any editor.What film grain intensity looks realistic?
Set it to 10 to 20 percent. Above 25 percent looks artificial.