Fix 'The Media Could Not Be Loaded' Browser Error (2026)
Fix the media could not be loaded error in Chrome, Firefox, and Edge. Covers cache clearing, extension conflicts, codec issues, and network fixes.
Quick AnswerClear your browser cache and cookies, then disable all extensions temporarily. If the error persists, try a different browser to rule out codec issues. Restarting your router and updating your browser to the latest version fix most remaining cases.
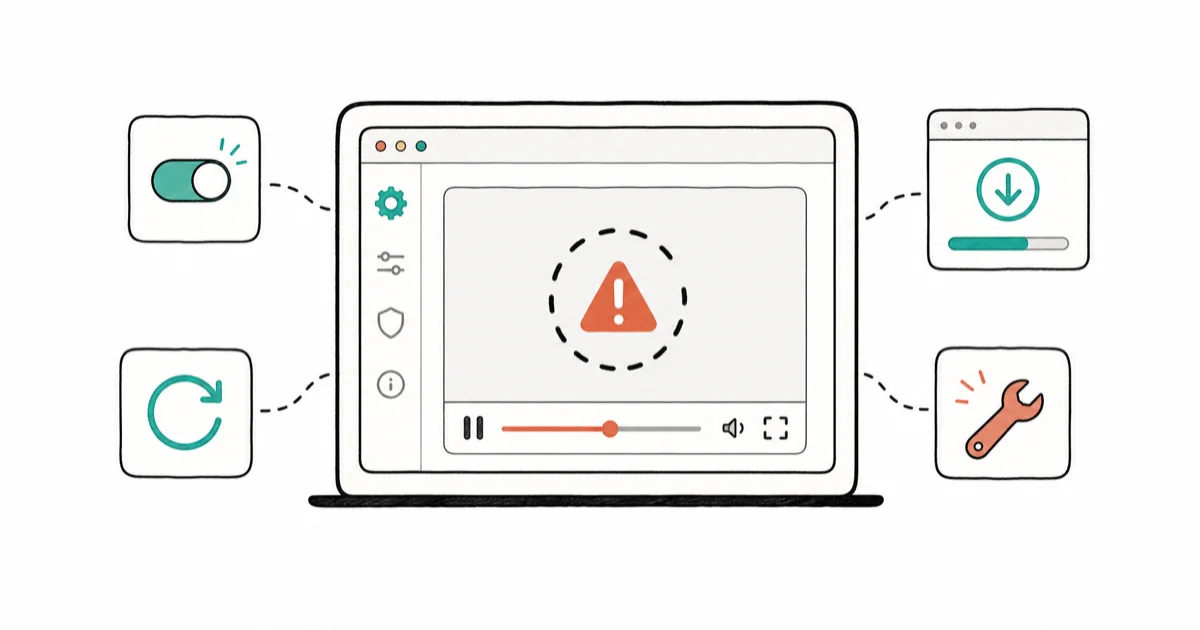
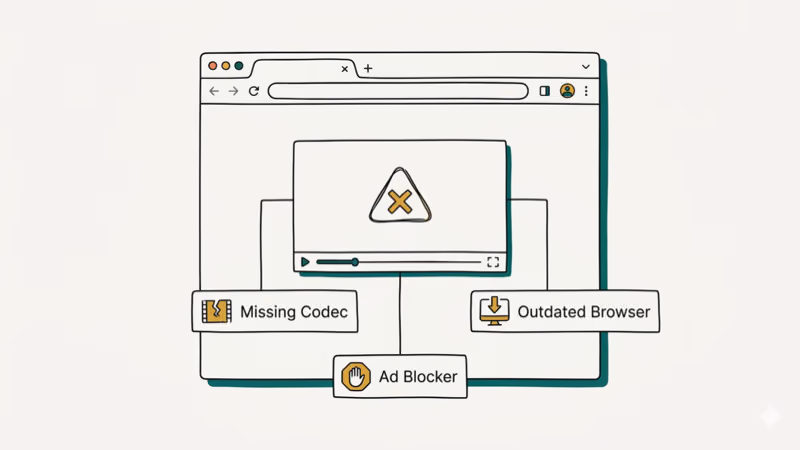
The “media could not be loaded” error stops videos from playing in your browser, usually because of cached data conflicts, extension interference, or codec support gaps.
- Clearing browser cache and cookies fixes many browser-side cases
- Ad blockers and privacy extensions are the most common culprit after cache issues
- Testing in a different browser instantly reveals whether the problem is browser-specific
- Outdated browsers can’t decode newer codecs like AV1, causing playback failures on modern sites
- Server-side issues cause a small share of cases and require waiting for the host to fix them
#What Causes the Media Could Not Be Loaded Error?
Your browser needs three things to play a video: a working network connection, a compatible codec, and uncorrupted cached data for the media source. When any of these break, the player throws this error instead of loading the video.
Corrupted cache is the most frequent cause. Your browser stores fragments of video data locally, and when those fragments become outdated or corrupted, the player can’t assemble the stream correctly. Stale cached video data can conflict with a fresh session.
Extension conflicts rank second. According to Google’s Chrome troubleshooting guide, browser extensions that modify network requests can block media streams entirely. Ad blockers are the biggest offenders because they intercept network requests that video players depend on for loading media segments.
Codec gaps cause the error on older browsers. Sites using AV1 or VP9 codecs won’t play in browsers that only support H.264. This is less common now, but it still affects users on outdated machines. If you’re also running into SSL errors on media sites, your browser version may be too old for both the encryption and codec requirements.
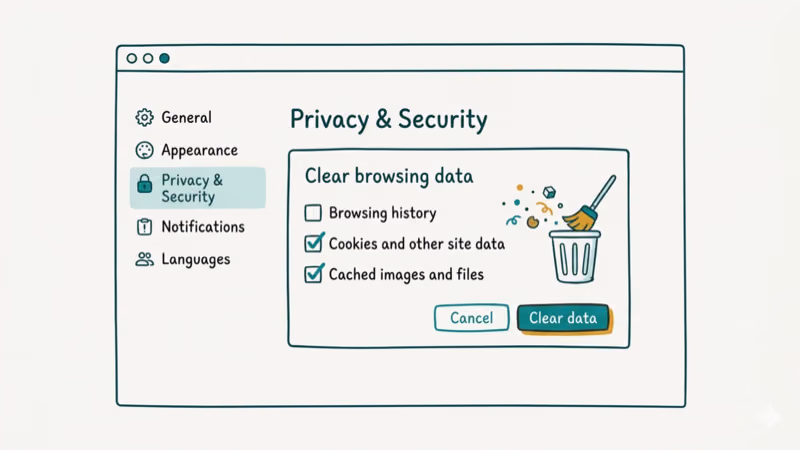
#How Do You Fix This by Clearing Cache and Cookies?
This is the fastest fix and the one you should try first.
In Chrome:
- Press Ctrl + Shift + Delete (Windows) or Cmd + Shift + Delete (Mac)
- Set time range to All time
- Check Cookies and other site data and Cached images and files
- Click Clear data
- Restart Chrome and reload the video
In Firefox:
- Press Ctrl + Shift + Delete
- Set time range to Everything
- Check Cookies and Cache
- Click Clear Now
In Edge:
- Press Ctrl + Shift + Delete
- Check Cookies and Cached images and files
- Click Clear now
Cache clearing is the right first pass. If the error continues, extension fixes are the next thing to check. If Chrome keeps crashing alongside this error, you may need a full browser reinstall.
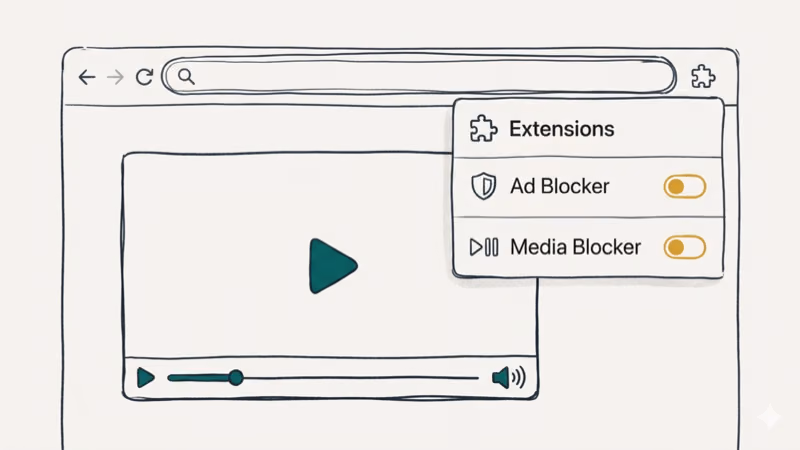
#Disabling Extensions That Block Media
Ad blockers and script blockers intercept the network requests that video players depend on. One bad filter rule can silently block the video source URL entirely.
- Type
chrome://extensions/in Chrome’s address bar (orabout:addonsin Firefox) - Toggle off every extension
- Reload the page with the video
- If the video plays, re-enable extensions one at a time until you find the one causing the problem
Custom ad-blocker filter subscriptions can block video CDN domains. According to Mozilla’s extension troubleshooting page, disabling all extensions first and then re-enabling one by one is the recommended diagnostic approach for any browser.
Whitelist the specific site in your ad blocker rather than disabling the extension entirely. That way you keep protection on other sites while allowing the video to load.
#Testing in a Different Browser
Yes, and it takes 10 seconds. If the video plays in a different browser, the problem is specific to your current browser’s cache, extensions, or codec support. If it fails in every browser, the issue is either your network or the server hosting the video.
Open the same URL in Chrome, Firefox, or Edge. If the video plays in another browser, your original browser likely has a cache, extension, or codec issue.
Plays in one browser but not another? Cache or extension issue. Fails everywhere? Network or server problem.
#Updating Your Browser and Checking Codec Support
Modern video sites use codecs like AV1, VP9, and HEVC. Browsers older than 2 years may lack support for these formats.
Check your browser version:
- Chrome: Go to
chrome://settings/help - Firefox: Go to
Menu>Help>About Firefox - Edge: Go to
edge://settings/help
If an update is available, install it and restart. Google’s web video docs confirms that VP9 has been supported since Chrome 29, Firefox 28, and Edge 79 according to the VP9 compatibility reference. AV1 support requires Chrome 70+ and Firefox 67+. If your browser version is below these thresholds, updating alone should fix the error.
For sites that use proprietary codecs, you might need to install a standalone video player that handles a wider range of formats. VLC plays virtually everything without codec issues.
#Checking Your Network Connection
If clearing cache, disabling extensions, and switching browsers all fail, your network may be blocking or throttling video streams.
Quick tests:
- Run a speed test at fast.com or speedtest.net (you need at least 5 Mbps for 1080p video)
- Restart your router by unplugging it for 30 seconds, then plugging it back in
- Disconnect from VPN if you’re using one (VPN servers sometimes block video CDNs)
- Try switching from Wi-Fi to a mobile hotspot
DNS changes can help if your ISP’s DNS server is slow or blocking certain domains. Switch to Google DNS (8.8.8.8) or Cloudflare DNS (1.1.1.1) in your network adapter settings.
A heavily throttled connection can trigger the error on high-resolution streams. If your Discord streams have no sound at the same time, bandwidth is almost certainly the bottleneck.
#Bottom Line
Clear your browser cache first since that fixes many browser-side cases. If the video still won’t load, disable extensions and test in a different browser. Update your browser if it’s more than a year old, and check your network speed if nothing else works. When the video fails in every browser on every device in your household, the hosting server is down and you just need to wait.
#Frequently Asked Questions
Why does this error only happen on certain websites?
Each site uses different video players, codecs, and CDN configurations. A site using HLS streaming with AV1 codec might fail while a site using MP4 with H.264 works fine. Your browser’s codec support and your ad blocker’s filter rules are site-specific variables.
Can a VPN cause this error?
Yes. Disconnect from your VPN and test. If the video plays, your VPN server was blocking the video CDN.
Does this error mean the video file is corrupted?
No. This error is about your browser’s ability to load the stream. A corrupted local file is a completely different problem. If you’ve downloaded a video that won’t play, try a video repair tool.
Will reinstalling my browser fix this?
It can, but clearing cache and resetting extensions does the same thing without losing your bookmarks and passwords. Only reinstall if the browser crashes constantly alongside this error.
Why does this error appear on my phone but not my computer?
Mobile browsers have less memory for caching and sometimes different codec support. Clear your mobile browser’s cache through Settings > Privacy > Clear browsing data. Also check that your phone’s date and time are correct since wrong system time breaks SSL certificates and blocks media streams. This is a surprisingly common cause on Android phones where the automatic date setting gets disabled accidentally after a factory reset or OS update.
Can I fix this error on Smart TVs?
Smart TV browsers are limited and rarely updated. If a video won’t load on your TV’s built-in browser, use the streaming service’s dedicated app instead. Most media loading errors on TVs come from the browser’s outdated codec support, and there’s no fix beyond using a different app or casting from your phone.
Does hardware acceleration affect this error?
Yes. Disabling hardware acceleration in your browser settings forces the CPU to decode video instead of the GPU. Go to Settings > System in Chrome and toggle off Use hardware acceleration when available. This fixes the error on systems with outdated GPU drivers that can’t handle hardware-accelerated video decoding.
How do I fix this error on embedded videos?
Same steps apply. Clear cache, disable extensions, and try a different browser. If only embeds fail while the platform’s own site plays fine, your ad blocker is blocking the embed iframe specifically.