How to Reduce Background Noise on Mic in Windows 10
Fix microphone background noise on Windows 10 with built-in Noise Suppression, Krisp, NVIDIA RTX Voice, and hardware tweaks. Step-by-step guide.
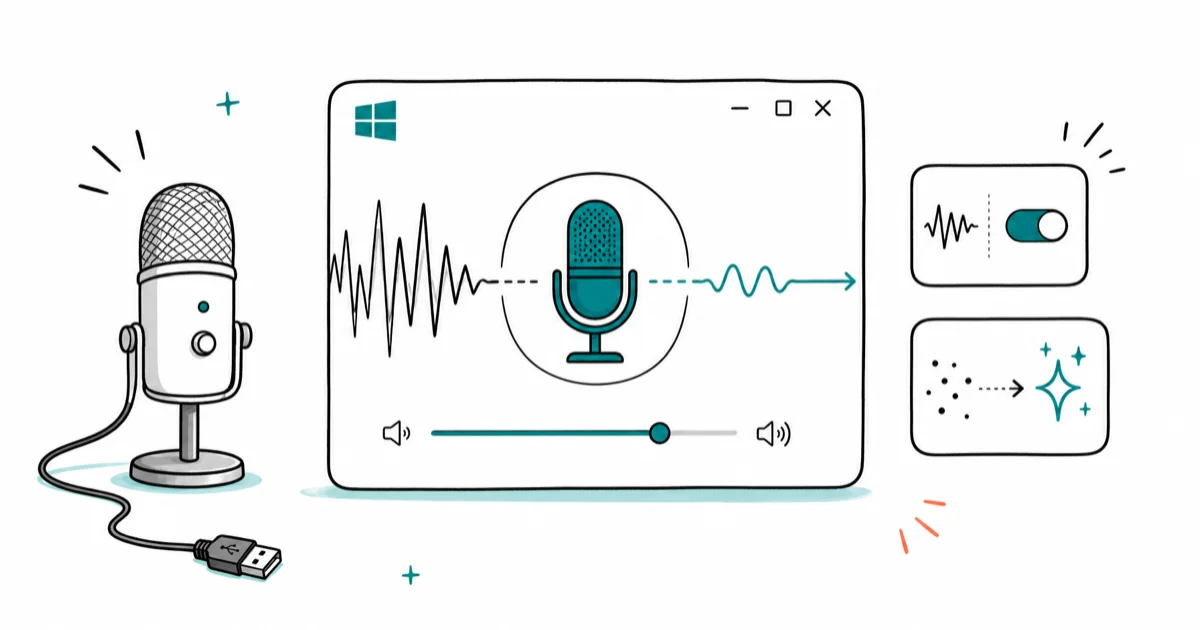
Quick AnswerOpen Control Panel > Sound > Recording, right-click your mic and select Properties, go to the Enhancements tab, and check Noise Suppression. For real-time AI removal, install Krisp or NVIDIA RTX Voice.
Background noise on your microphone ruins video calls, recordings, and podcasts. Windows 10 has built-in noise suppression tools, and free AI apps like Krisp eliminate noise in real-time without any hardware upgrades.
- Enable Noise Suppression in
Control Panel>Sound>Recording>Microphone Properties>Enhancementstab. - Set microphone boost to +10 dB and input volume to 100 for cleaner capture without amplifying background hiss.
- Krisp works across every app in real-time and removes keyboard clicks, fans, and street noise on any hardware.
- NVIDIA RTX Voice offers the same AI noise removal free for RTX card owners and requires no third-party accounts.
- Positioning your mic 6 to 8 inches from your mouth and pointing it away from speakers cuts noise before any software runs.
Windows 10 noise suppression works well for steady hum and fan noise. For voices in a noisy room or keyboard-heavy setups, AI tools like Krisp do a better job.
#How to Enable Noise Suppression in Windows 10?
Windows 10 includes a built-in Noise Suppression enhancement that works at the driver level. No extra software needed. According to Microsoft Support’s Windows audio troubleshooting guide, Windows microphone fixes should start with input-device and sound-setting checks before adding third-party noise filters.
- Open Control Panel by typing “control” in the search box and pressing Enter.
- Go to
Hardware and Sound>Sound. - Click the Recording tab, right-click your microphone, and select Properties.
- Click the Enhancements tab.
- Check Noise Suppression and optionally Acoustic Echo Cancellation.
- Click Apply, then OK.
If you don’t see an Enhancements tab, your audio driver may not support it. Update your driver from Device Manager or download it from your motherboard manufacturer’s site.
#Adjusting Input Levels for Cleaner Audio
Overly boosted microphone input amplifies background noise along with your voice. Lower the boost before adding more suppression, then listen back and increase only if your voice is too quiet.
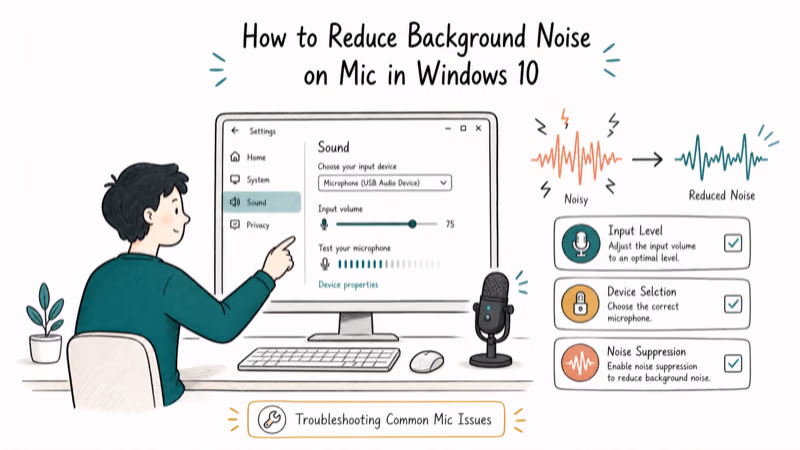
- Right-click the speaker icon in the taskbar and select Open Sound settings.
- Under Input, click Device properties.
- In the Levels tab, set Microphone Boost to +10 dB and volume to 100.
If you’re having trouble with your mic not being detected, see our guide on generic audio driver issues for driver-level fixes.
#Which Apps Remove Background Noise for Free on Windows 10?
When the built-in tools aren’t enough, these free AI noise cancellation apps work with any app: Zoom, Discord, Teams, OBS.

Krisp removes noise in real time and works as a virtual microphone that sits between your physical mic and whatever app you point at it. The free tier gives 60 minutes of noise removal per day.
NVIDIA RTX Voice is free for RTX card owners. According to NVIDIA’s RTX Voice setup guide, the feature requires driver version 410.18 or newer and removes background noise across any app. Use it for steady background sources such as fans and air conditioning before the signal reaches Zoom, Discord, or OBS.
Audacity handles post-recording noise removal. It’s not real-time, but the Noise Reduction effect works well for podcasts. Audacity’s documentation recommends a 12 to 18 dB reduction setting as a starting point to avoid over-processing. Download free from Audacity’s official site.
For Discord-specific voice processing, see our roundup of voice changers for Discord that include noise filtering options.
#How Your Recording Environment Affects Microphone Noise
Software removes noise after it enters the mic. Reducing noise at the source is always more effective.
Small rooms absorb noise better. Recording in a walk-in closet or a room with carpets, curtains, and bookshelves cuts reverb and room echo better than any plugin.
Turn off noise sources before you record. Fans, air conditioning, and refrigerators create low-frequency hum. Turning them off for the duration of a take eliminates the problem entirely. It takes 30 seconds and saves post-production time.
Microphone placement is your biggest lever. At 6 to 8 inches from your mouth, the mic picks up your voice 15 to 20 dB louder than the room. Beyond 18 inches, room noise becomes a much larger fraction of the captured signal.
#Hardware Solutions That Reduce Background Noise
Good software only goes so far. If noise persists after enabling all the above, a hardware upgrade helps.
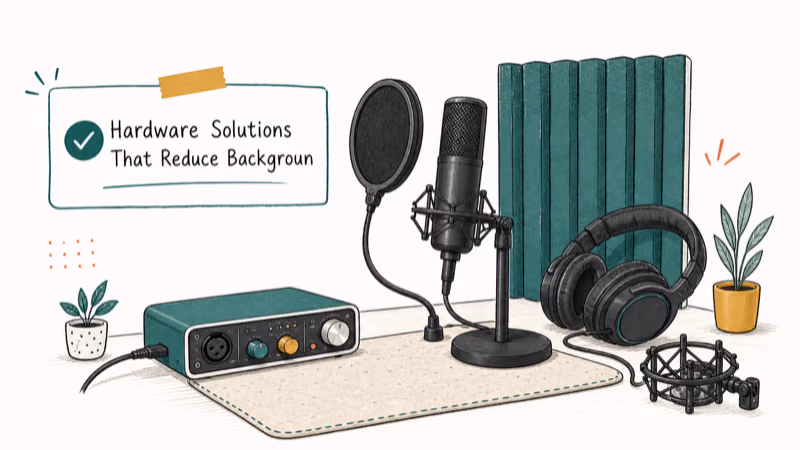
Directional microphones reject noise from the sides and rear. A Blue Yeti X in cardioid mode picks up primarily from the front, which cuts ambient noise from behind the desk. The Shure SM7B is the standard for podcasters who want the best noise rejection without acoustic treatment.
As an Amazon Associate, fone.tips earns from qualifying purchases. Some links on this page are affiliate links.
Shock mounts isolate the microphone from desk vibrations. Keyboard typing often gets transmitted through the desk and into USB mic stands. A $10 to $20 shock mount solves this completely and prevents the thudding that noise suppression can’t remove.
Pop filters prevent plosives from triggering aggressive noise processing. Without one, the letter “P” can cause the suppressor to momentarily kill your signal, making speech sound choppy.
For gaming headset microphone issues, check our guide on how to fix Astro A10 mic not working.
#Advanced Post-Processing in a DAW
For recorded audio including podcasts, voiceovers, and tutorials, a DAW gives you more control than Windows built-in tools.
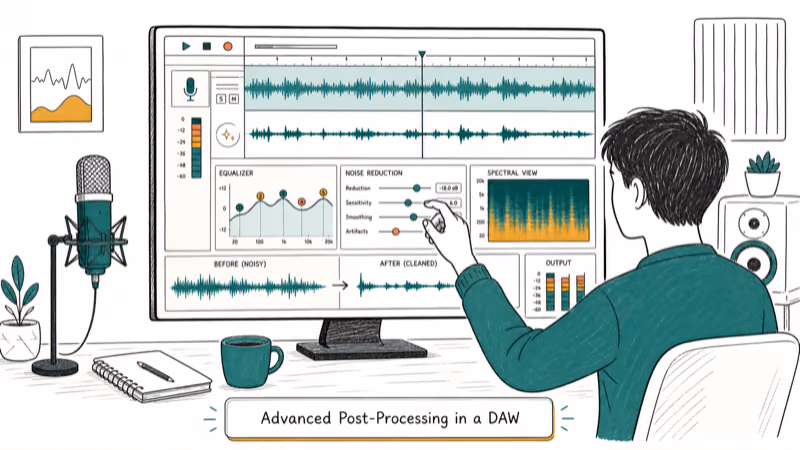
Noise Gate cuts the signal entirely when it drops below a threshold, silencing the gaps between sentences where background hum is most noticeable. Set the threshold about 6 dB above your measured noise floor.
EQ removes frequency-specific noise. Most HVAC hum sits below 200 Hz. A high-pass filter at 80 to 100 Hz removes it without touching speech frequencies.
Multi-band processing tools like the free Reaper DAW with the ReaFIR plugin let you profile and subtract specific noise frequencies. For removing reverb from recordings, see our guide on how to remove reverb from audio.
For iMovie video projects with background noise issues, see how to remove background noise in iMovie.
#Troubleshooting Common Mic Issues
Mic not detected: Check physical connections, try a different USB port, and verify the correct input device is selected under Settings > System > Sound > Input.
Noise persists after enabling suppression: The Enhancements tab only works with Microsoft drivers. If you have Realtek or AMD audio, open that driver’s control panel instead. The Realtek Audio Console has its own Noise Suppression toggle.
Noise suppression making voice sound robotic: Lower the suppression slider until speech sounds natural.
#Bottom Line
Start with Control Panel > Sound > Microphone Properties > Enhancements and enable Noise Suppression. If that is not enough, install Krisp for real-time processing across every app. Use Audacity’s Noise Reduction effect for recorded files. For persistent room noise, solve it at the source with a cardioid mic or shock mount.
#Frequently Asked Questions
Does enabling noise suppression in Windows 10 affect recording quality?
At moderate settings, the impact is minimal. Aggressive suppression can create a metallic artifact on speech. Start at a conservative level and increase only if needed. Most users find 50 to 70 percent suppression gives the best balance.
Can I use Krisp with any microphone?
Yes. Krisp works as a virtual audio device, so it’s compatible with any microphone Windows recognizes: USB mics, 3.5mm headsets, built-in laptop mics, and audio interface inputs.
Does NVIDIA RTX Voice work without an RTX graphics card?
RTX Voice was officially designed for RTX cards, but a registry workaround allows it to run on GTX 1060 and newer cards. Performance varies. NVIDIA Broadcast (the newer version) officially supports GTX 900 series and later.
How do I prevent keyboard noise from entering my mic?
A cardioid microphone positioned at 90 degrees to your keyboard reduces pickup. A shock mount eliminates vibration-transmitted clicks. Krisp and RTX Voice both remove keyboard noise effectively in real-time.
What’s the difference between Noise Suppression and Acoustic Echo Cancellation?
Noise Suppression removes ambient background noise like fans and HVAC. Acoustic Echo Cancellation removes echo from your own speakers being picked up by the microphone. Use both if you’re on calls with external speakers.
Why does the Enhancements tab not appear in my microphone settings?
Some audio drivers don’t support Windows enhancements. Update your audio driver from your motherboard manufacturer or from Device Manager > Sound, video and game controllers, then re-check. Krisp or RTX Voice work independently of drivers as alternatives.

Bluetooth Not Working on Snapdragon X? Fixes for 2026
Bluetooth not working on your Snapdragon X Copilot+ PC? Generic audio, mice, and keyboards work, but vendor apps often lack an ARM build. Fixes inside.

Docker Desktop and WSL2 Not Working on Snapdragon X? Fix It
WSL2 runs fine on Snapdragon X, but Docker Desktop ARM is Early Access and throws WSL errors. Use WSL2 plus native ARM64 Ubuntu and Docker Engine.

Does iTunes Work on Snapdragon X? ARM Windows 11 Guide
Yes, iTunes runs on Snapdragon X laptops through Prism emulation, but the Apple Devices app is the smoother route. Here is what to install on ARM.

Does OBS Studio Work on Snapdragon X? ARM64 Build Guide
Yes, OBS Studio has an experimental ARM64 build since version 31.1, but x64 plugins won't load and hardware encoding is missing. Here is what works.