How to Insert Images in InDesign: 5 Methods (2026)
Insert images in InDesign using File > Place: single, multi-select, grid layouts, premade frames, and compound paths. Updated for InDesign 2025.
Quick AnswerUse File > Place (Cmd+D on Mac, Ctrl+D on Windows) to insert images in InDesign. Click once for a single image, Shift-click for a batch, or click and drag with arrow keys for a grid layout.
The fastest way to insert images in InDesign is File > Place (Cmd+D on Mac, Ctrl+D on Windows). That single shortcut covers single images, batches, and grid layouts. All five methods below apply to InDesign 2025 (v20.0) on both macOS and Windows 11, so the keyboard paths and panel locations match what you’ll see right now.
File>Placeis the only correct way to add images. Drag-and-drop from Finder works, but it links the file the same way Place does.- Cmd+D / Ctrl+D loads the image onto your cursor. Click once for actual size, click and drag to scale on placement.
- Shift-click selects a range of files in the Place dialog. Cmd-click (Mac) or Ctrl-click (Windows) cherry-picks specific files.
- For grid layouts, hold the mouse button while dragging and tap the up, down, left, and right arrow keys to add or remove rows and columns.
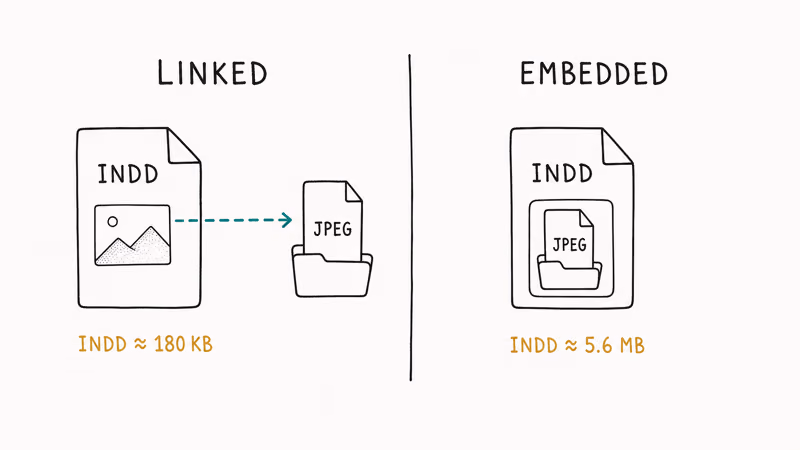
- Placed images are linked, not embedded. The .indd file stores a low-resolution preview and a path to the original file.
#What Does Place Actually Do in InDesign?
Place is the import command. When you choose File > Place, InDesign loads the chosen graphic onto your cursor and waits for a click. Adobe’s importing graphics documentation lists the supported formats: JPEG, PNG, TIFF, EPS, AI, PSD, PDF, and a handful of others.
Place links by default. It doesn’t embed. The Wikipedia entry on Adobe InDesign confirms that 1999 was the launch year.
That linking behavior is the part most beginners trip over. The .indd file doesn’t contain a copy of your photo. It stores a low-resolution preview and a pointer to the original location on disk. Move the source file to a new folder and the Links panel will show a yellow warning triangle.
A placed photo adds only a small low-resolution preview to the .indd file, not the multi-megabyte original. The full pixel data only loads at export time. That keeps documents fast to scroll, but it means you have to ship the linked files alongside the .indd whenever you hand the project off.
The five methods below are all variations on the Place command. The difference is what you do with the cursor afterward.
#Method 1: Insert a Single Image With File → Place
Use this for full control.
Step 1. Open your InDesign document and click somewhere outside any existing frame so nothing is selected.
Step 2. Press Cmd+D (Mac) or Ctrl+D (Windows). The Place dialog opens.
Step 3. Pick one image and click Open. Your cursor turns into a loaded thumbnail showing a preview of the file.
Step 4. Click once on the canvas. InDesign drops the image at its native resolution. Or click and drag to draw a frame at the size you want, and the image scales to fill that frame.
If you placed the image at full size and it overflows the page, grab a corner handle while holding Shift+Cmd (Mac) or Shift+Ctrl (Windows) to scale the frame and image together proportionally. Without those modifiers, the frame resizes but the image inside doesn’t, which is how most people end up with a tiny photo in a giant frame.
For deeper sizing controls, our walkthrough on how to resize an image in InDesign covers Fit Content Proportionally, Fill Frame Proportionally, and the Frame Fitting Options dialog.
#Method 2: Insert Multiple Images at Once
When you have a folder full of photos to add, batch-loading is faster than placing them one by one.
Step 1. Press Cmd+D or Ctrl+D to open the Place dialog.
Step 2. Click the first image, then Shift-click the last image. Everything in between is selected. To pick non-adjacent files, hold Cmd (Mac) or Ctrl (Windows) and click each one.
Step 3. Click Open. The cursor previews image 1, with a queue count next to it.
Step 4. Click once on the canvas to place the first image. The cursor advances to image #2. Click again. Keep clicking until the loaded cursor is empty.
A useful trick: while the cursor is loaded, you can press the left arrow or right arrow keys to cycle through the queued images without placing the current one. Press Esc to drop a single image from the queue, or Esc twice to discard the rest.
#Method 3: Insert Images in a Grid Layout
Grid placement is the right choice for product catalogs, contact sheets, election candidate cards, and any layout where you want a uniform array of images with even spacing. It saves the manual work of drawing matching frames.
![]()
Step 1. Press Cmd+D or Ctrl+D, select a batch of images using Shift-click or Cmd-click, and hit Open.
Step 2. Click and drag a rectangle. Hold the mouse button.
Step 3. While still holding the mouse button, tap the arrow keys to shape the grid:
- Up arrow: adds one row
- Down arrow: removes one row
- Right arrow: adds one column
- Left arrow: removes one column
Step 4. Once the grid matches your layout, release the mouse. InDesign distributes the images evenly across the cells.
If the photos look stretched or misaligned in their frames, select all the new frames, open Object > Fitting, and pick Fill Frame Proportionally. That fills each frame edge-to-edge while keeping the image aspect ratio. Adobe’s graphic frames documentation covers the four fitting modes in detail.
For row and column spacing, hold Cmd (Mac) or Ctrl (Windows) while tapping the arrow keys to adjust gutter width on the fly. A 4×3 grid on a letter-size page comes together in moments this way, much faster than drawing each frame by hand for the same layout.
#Method 4: Insert an Image Into a Premade Frame
When your layout is already designed and you just need to slot images into existing rectangles, ovals, or polygons, place into the frame directly.
Step 1. Click the empty frame you want to fill. The frame highlights in your layer color.
Step 2. Press Cmd+D or Ctrl+D to open Place.
Step 3. Choose your image and click Open. InDesign drops the image into the selected frame and applies whatever fitting option you have set as default.
Step 4. To change the default fitting behavior, open Object > Fitting > Frame Fitting Options before placing. According to Adobe’s frame fitting reference, setting Auto-Fit on a frame means future images placed inside it will scale automatically when the frame resizes.
Most magazine and book layouts use this exact workflow. Designers build the empty page grid first. A production editor drops in photos later. The setup separates layout decisions from image-selection decisions, so two people can work on the same document at different stages without overwriting each other’s frame placement, sizing, or fitting choices, and the photo team can swap candidates in and out without rebuilding the layout each time.
If you accidentally placed the image as a separate object next to the frame, undo with Cmd+Z or Ctrl+Z and make sure the frame was actually selected (look for the bounding-box handles) before pressing Cmd+D.
#Method 5: Insert an Image With a Compound Path
Compound paths let you treat several shapes as one container.
Step 1. Draw two or more shapes with the Rectangle Frame Tool, Ellipse Frame Tool, or Polygon Frame Tool. Position them where you want the image segments to appear.
Step 2. Select all the shapes with the Selection tool (V).
Step 3. Go to Object > Paths > Make Compound Path, or press Cmd+8 (Mac) or Ctrl+8 (Windows). The shapes merge into a single compound object.
Step 4. With the compound path still selected, press Cmd+D or Ctrl+D, pick your image, and click Open. The image fills all the shapes simultaneously, with each shape showing the part of the image that falls within its bounds.
To split the compound back into individual frames, press Cmd+Option+8 or Ctrl+Alt+8. Adobe’s compound path documentation covers the Pathfinder rules.
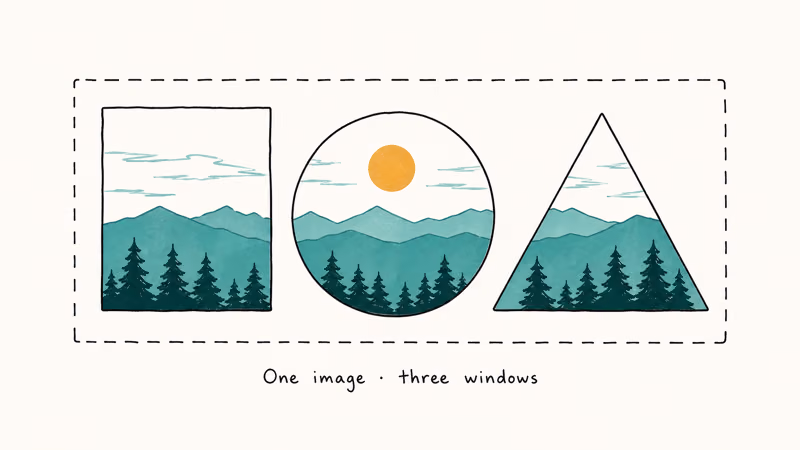
With a three-shape layout (rectangle, circle, triangle), the image positions itself based on the bounding box of the entire compound path, not each shape. So one continuous image runs across all three holes, like looking through a custom-cut stencil.
#What File Formats Does InDesign Accept?
The Place command imports a wide range of formats. Here’s what InDesign 2025 accepts:

| Format | Extension | Best For | Notes |
|---|---|---|---|
| JPEG | .jpg, .jpeg | Photos, web graphics | Lossy compression, no transparency |
| PNG | .png | Logos, screenshots | Transparency support, lossless |
| TIFF | .tif, .tiff | Print photos | Large files, supports layers and transparency |
| Photoshop | .psd | Layered photo work | Live link to PSD layers |
| Illustrator | .ai | Vector logos and icons | Scales without quality loss |
| EPS | .eps | Legacy vector files | Still common for logos |
| Multi-page imports | Choose which page to place | ||
| SVG | .svg | Web-style vectors | Supported since InDesign CC 2019 |
Adobe confirms in the supported formats list that PSD and AI files maintain their layer structure, so you can toggle visibility from inside InDesign through the Object Layer Options dialog without leaving the document. The same dialog lets you switch between saved Photoshop layer comps, which means a single placed PSD can stand in for several design variations that you flip through right on the page, rather than maintaining a separate exported file for each one.
For images that started as JPEG and need optimizing before placement, our Optimizilla review covers a free in-browser compressor for web-bound exports. For converting an existing layout into a flat PDF afterward, see our guide on converting INDD to PDF.
#Bottom Line
For most users, Method 1 (Cmd+D, click once) handles 80% of image insertions. For catalog work, Method 3 (grid placement with arrow keys) is the time-saver worth memorizing.
Skip the legacy drag-and-drop habit from Photoshop. InDesign’s Place command keeps your file linked, your document size small, and your fitting options accessible from a single panel. If you’re new to the program and want to compare it against simpler tools first, our InDesign vs. Publisher comparison and best InDesign alternatives for Mac lists give you the breakdown.
#Frequently Asked Questions
Can I crop an image inside InDesign?
Yes. Select the image frame with the Selection tool and drag the corner or edge handles inward. The frame crops the visible area without changing the image itself. To reposition the photo inside the cropped frame, use the Direct Selection tool (A) to grab the image content directly.
How do I replace an image without redoing the layout?
Select the existing image frame, press Cmd+D or Ctrl+D, and pick the new file. InDesign swaps the content while keeping the frame size, position, and fitting options. The Links panel updates automatically.
Can I resize an image without distorting the aspect ratio?
Hold Shift while dragging a corner handle. That preserves aspect ratio.
Why do my placed images look low resolution?
InDesign shows a fast preview by default. Switch to View > Display Performance > High Quality Display to see full resolution.
What happens if I move the original image file after placing it?
The Links panel flags the image with a yellow warning triangle and the on-page preview turns into a low-res placeholder. Click the warning icon, choose Relink, and point InDesign at the new file location to restore the full-resolution preview. You can also right-click the missing image on the canvas and pick Relink from the contextual menu. Adobe states that broken links won’t print or export correctly until you relink them.
Can I embed an image instead of linking it?
Yes, but it’s rarely a good idea. Select the image, open the Links panel menu, and choose Embed Link. The image becomes part of the .indd file, which inflates the file size and removes your ability to edit the original separately. Linking is the default for a reason.
How many images can I place on a single page?
There’s no hard limit set by InDesign. A single page can hold dozens of placed JPEG thumbnails and stay responsive. Performance depends on your machine’s RAM and the display performance setting, not on a fixed cap.

Apps Crashing After iOS 27 Update? Fix Order (2026)
Apps crashing after the iOS 27 update? Update the app in the App Store first, then offload and reinstall to clear stale cache, then restart. The fix order.

Do AI Translation Earbuds Work Offline? What to Know
Do AI translation earbuds work offline? A few do with downloaded language packs, but most need the cloud. Here's what works offline and what you give up.

How to Set Up Translation Earbuds (Pairing and Modes)
How to set up translation earbuds: charge, install the app, pair over Bluetooth, pick two languages, and choose a mode. A step-by-step first-use guide.

Translation Earbuds Not Translating? How to Fix Them
Translation earbuds not translating? Usually it's the app, the internet, or the language settings. Here's how to fix pairing, sound, and lag fast.