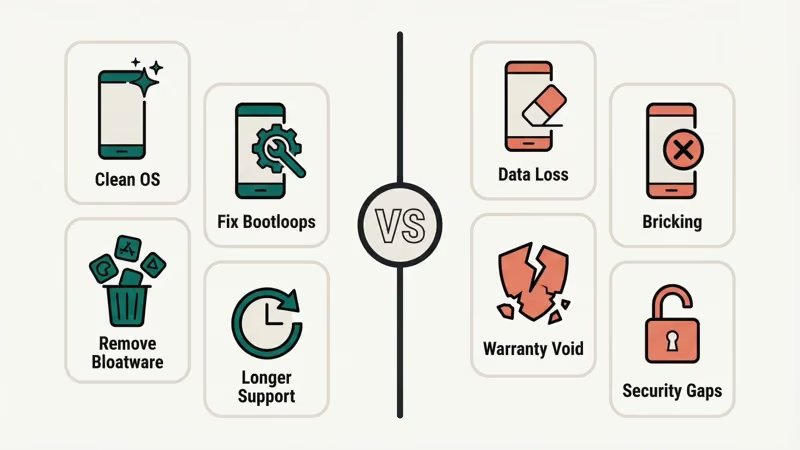
Flashing a phone is one of the most powerful things you can do with an Android device. Install a clean OS, fix a bootloop that factory reset can’t touch, or ditch bloatware for good. The catch is that the wrong firmware file or one interrupted flash will brick the device. This guide covers how to flash a phone correctly in 2026, with tool-specific steps for Samsung, MediaTek, and Pixel/Snapdragon devices.
- The tool you need depends entirely on your chipset: Odin for Samsung, SP Flash Tool for MediaTek devices, and standard Fastboot commands for Pixel and most Snapdragon phones.
- For Samsung Odin flashes, using HOME_CSC instead of plain CSC skips the data wipe and preserves existing app data, a distinction most guides fail to mention.
- Never flash the preloader.bin file in SP Flash Tool because flashing it incorrectly is one of the fastest ways to hard-brick a MediaTek device with no easy recovery path.
- A factory flash replaces the OS itself across multiple partitions, while a factory reset only wipes user data, so flashing can fix corrupted system issues that survive a factory reset.
- First boot after a flash takes 3 to 7 minutes and should not be interrupted; forcing a restart during this window can cause a bootloop requiring another full reflash.
#Before You Flash: Understand What You’re Getting Into
Flashing isn’t for everyone. Here’s the honest breakdown.
#What flashing actually does
When you flash a phone, you’re overwriting the firmware stored in the device’s internal partitions: bootloader, recovery, system, and sometimes radio/modem. Unlike a factory reset, which only wipes user data, a full flash replaces the OS itself. That’s why it can fix problems a factory reset can’t, like a corrupted system partition or a carrier-locked bootloader.
There are two common types of flashing:
- Stock ROM flash — reinstalling the official firmware from your manufacturer, usually to fix a bootloop or unbrick the phone
- Custom ROM flash — replacing the stock OS with a community-built alternative like LineageOS or GrapheneOS for more control and longer software support
#Risks you need to know
| Risk | How likely | How to avoid |
|---|---|---|
| Data loss | Certain | Back up before you start |
| Bricking | Low if you use the right file | Download firmware for your exact model number |
| Warranty void | Yes, for most brands | Check your manufacturer’s policy first |
| Security gaps | Possible with custom ROMs | Use actively maintained ROMs only |
Carrier unlocking through flashing is legal in the US under the 2014 Unlocking Consumer Choice and Wireless Competition Act, but flashing a device to a different carrier’s network without authorization can violate terms of service. Know what you’re doing before proceeding.
#Step 1: Back Up Everything Before You Flash
This step isn’t optional. A flash wipes your data: contacts, photos, app data, text messages, all of it.
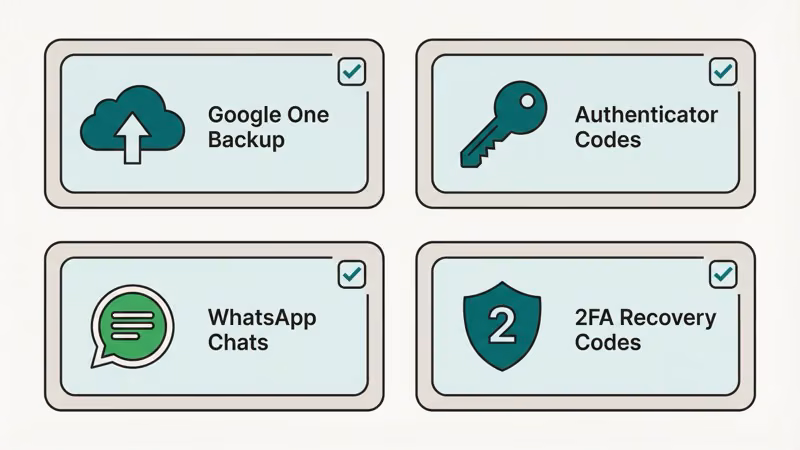
Use Google One backup (Settings > Google > Backup) and make sure it completed before you proceed. For SMS messages specifically, Google One doesn’t always capture everything. If you need those texts preserved, use a dedicated Android SMS recovery software to export them first.
Also back up:
- Authenticator app codes (export before you lose access)
- WhatsApp chats (use WhatsApp’s own backup to Google Drive)
- Any 2FA recovery codes saved in notes apps
Don’t skip this. No flash tool can recover data that’s been overwritten.
#Step 2: Unlock the Bootloader
Most Android phones ship with the bootloader locked. You can’t flash custom firmware without unlocking it first.
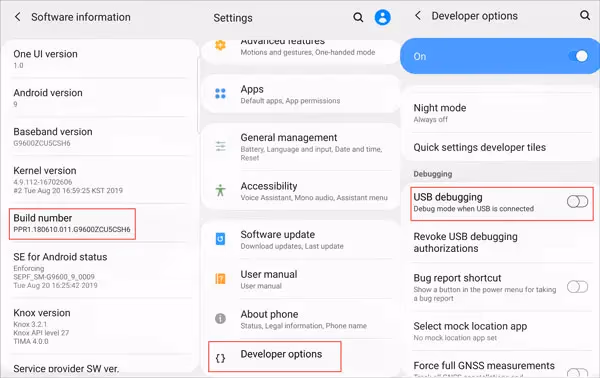
- Go to Settings > About Phone and tap Build Number seven times to enable Developer Options
- Go to Settings > System > Developer Options and enable OEM Unlocking
- Boot into fastboot mode (hold Power + Volume Down, or run
adb reboot bootloader) - Run
fastboot flashing unlock(orfastboot oem unlockon older devices) - Confirm on the phone screen
The bootloader unlock wipes all data on the device immediately. This is separate from the flash itself. It’s just the unlock that triggers the wipe.
Google Pixel devices use fastboot flashing unlock. Samsung devices don’t use this process at all. They use a different method via Odin or Download Mode. Xiaomi and some other brands require submitting an unlock request through the manufacturer’s website and waiting several days before the unlock activates.
#Step 3: Choose the Right Flash Tool for Your Device
This is where most people go wrong. Using the wrong tool for your chipset will fail at best and brick the device at worst.
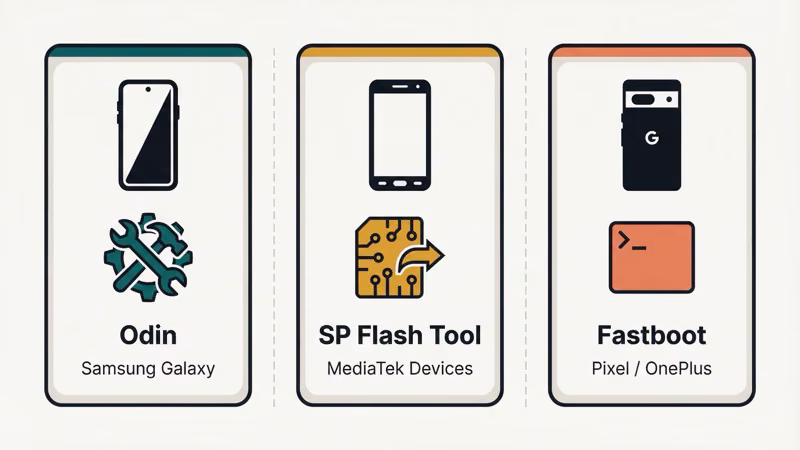
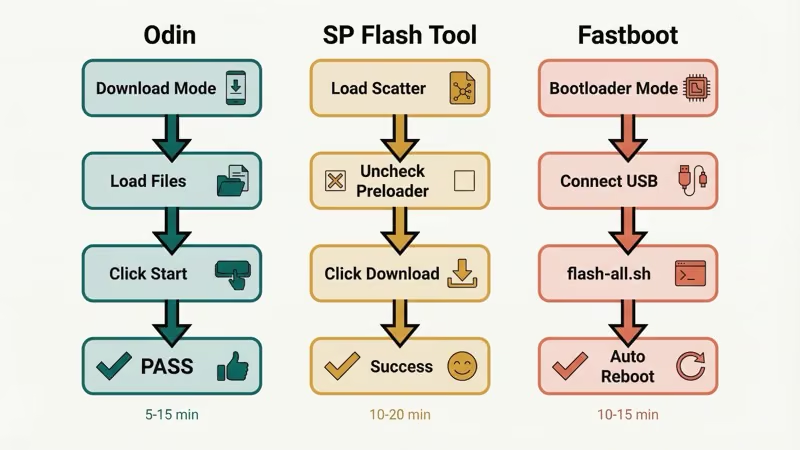
#Odin (Samsung devices only)
Odin is the tool for Samsung Galaxy phones and tablets. It’s technically an internal Samsung tool that was leaked and is now widely available. Samsung’s official firmware flashing community guide covers the basics, and XDA Developers threads for your specific model fill in the rest.
For Samsung, you download a firmware package that contains four files: BL (bootloader), AP (system), CP (modem/radio), and CSC (carrier/region settings). You load each into the corresponding slot in Odin, then click Start.
One important note: if you want to preserve your current app data, use the HOME_CSC file instead of the plain CSC file. HOME_CSC skips the data wipe; plain CSC wipes everything. Most guides don’t mention this difference clearly enough.
#SP Flash Tool (MediaTek chipsets)
SP Flash Tool handles MediaTek-based devices, including many budget and mid-range phones from brands like Tecno, Infinix, Ulefone, and some Xiaomi and Realme models. You can identify a MediaTek chipset by checking Settings > About Phone > Processor or searching your exact model on GSMArena.
The SP Flash Tool tutorial on MobiFirms is one of the cleaner guides available. The main warning: never flash the preloader.bin file. Always uncheck it before starting. Flashing the preloader incorrectly is one of the fastest ways to hard-brick a MediaTek device.
#Fastboot (Pixel, OnePlus, and most Snapdragon devices)
Google Pixel phones, most OnePlus devices, and many Qualcomm Snapdragon phones use standard Android Fastboot commands. You don’t need a third-party tool. Just ADB and Fastboot from Google’s official Platform Tools package.
The basic flash command is:
fastboot flash system system.imgOr for a full factory image from Google: flash-all.bat (Windows) or flash-all.sh (Mac/Linux) scripts are included in official Pixel factory images and handle everything automatically.
#Step 4: Flash the Firmware
With your tool selected and firmware downloaded, here’s the process for each method.
#Flashing with Odin (Samsung)
- Download the firmware for your exact model number, not just “Galaxy S23” but the specific variant (e.g., SM-S911B for international). Use SamFW or Samsung’s own servers
- Extract the downloaded zip. You’ll see BL, AP, CP, and CSC files
- Boot your Samsung into Download Mode (hold Volume Down + Volume Up while connecting USB, or use
adb reboot download) - Open Odin, click each slot (BL, AP, CP, CSC) and load the corresponding file
- Under Options, make sure Auto Reboot and F. Reset Time are checked; leave everything else at default
- Click Start. The process takes 5-15 minutes
- Odin will show a green PASS banner when complete and the phone will reboot automatically
If you see a FAIL result, the most common cause is a wrong firmware file or an interrupted USB connection. Don’t unplug the cable while flashing.
#Flashing with SP Flash Tool (MediaTek)
- Install MediaTek USB drivers first. The flash won’t work without them
- Extract your firmware package and open SP Flash Tool
- Click Scatter-loading and select the
MT****_Android_scatter.txtfile from your firmware folder - Uncheck preloader from the partition list
- Select Download Only mode (not Format+Download unless you’re trying to fix a partition issue)
- Power off your phone completely. Do not boot it
- Click Download in SP Flash Tool, then connect your phone via USB while holding Volume Down
- A green circle icon means success; a red circle means an error occurred
#Flashing with Fastboot (Pixel/OnePlus)
- Download the factory image for your device from the official Android Factory Images page (Google Pixel) or your manufacturer’s equivalent
- Extract the zip file
- Boot your device into Fastboot mode (
adb reboot bootloader) - Connect via USB and run the included flash script, or flash partitions individually
- For a full reflash: run
flash-all.bat(Windows) or./flash-all.sh(Mac/Linux) - The process takes roughly 10-15 minutes and the device will reboot when done
#Step 5: After the Flash
First boot after a flash takes longer than usual. 3-7 minutes is normal. Don’t panic and don’t force-restart the phone during this time.
Once you’re at the setup screen:
- Complete initial setup and sign into your Google account
- Let Google One restore your apps and data (this takes time, so be patient)
- Test the basics: calls, mobile data, Wi-Fi, camera, and GPS
- Check if NFC and Bluetooth are working correctly
- If you unlocked the bootloader for a custom ROM and don’t plan to modify further, consider relocking for security, but only do this with stock firmware, not a custom ROM, or you may brick the device
If the phone gets stuck in a bootloop after flashing, you may be able to rescue it by re-entering Download Mode and reflashing. For severe cases where the phone won’t respond at all, Android repair software sometimes provides additional recovery options.
If you’re seeing issues like the Samsung Galaxy S10 won’t turn on after a flash, a clean reflash with the correct stock firmware usually fixes it.
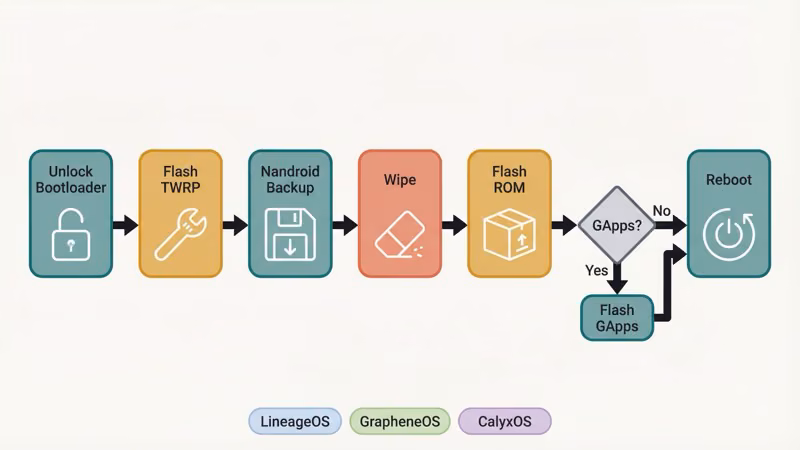
#Flashing for Custom ROMs: What’s Different
Custom ROM flashing follows the same basic flow but adds a step: you need to install a custom recovery (usually TWRP) before you can install the ROM.
The XDA Developers guide on custom ROM installation is the reference most experienced flashers point to. The short version:
- Unlock bootloader (same as above)
- Flash TWRP recovery using Odin (Samsung) or Fastboot
- Boot into TWRP
- Create a Nandroid backup. This is your only way back if the ROM doesn’t work
- Wipe system, data, cache, and Dalvik cache
- Flash the ROM zip
- Flash GApps zip if the ROM doesn’t include Google apps
- Reboot
Popular ROM choices in 2026: LineageOS (widest device support, clean Android), GrapheneOS (Google Pixel only, maximum privacy), and CalyxOS (Pixel and Fairphone, privacy-focused with microG).
Check the LineageOS wiki before committing. It lists exactly which devices are officially supported and links to device-specific installation guides. If your device isn’t listed, installation is possible but unsupported.
If you’re looking for less invasive ways to customize your Android device, Android root software gives you elevated permissions without fully replacing the OS. And if you’re dealing with a carrier-locked device, Android SIM unlock code generators may unlock it without any flashing at all.
For dealing with FRP lock after a flash, the best FRP bypass programs can help if you’ve lost access to the previously linked Google account.
#Bottom Line
Start with identifying your chipset. That determines your tool (Odin, SP Flash Tool, or Fastboot). Get firmware for your exact model number, not just the phone series. Back up first, unlock the bootloader, then flash. The most common failure is using the wrong firmware file, so double-check the model match before you hit Start.
If you want to go the custom ROM route, XDA Developers has device-specific threads with community-tested instructions that are far more reliable than generic guides.
#Frequently Asked Questions
#Will flashing my phone void the warranty?
Yes, in most cases. Samsung, Google, and most Android manufacturers consider bootloader unlocking a warranty-voiding action. Some brands like Fairphone explicitly support it. Check your device’s specific policy. A few manufacturers will still honor hardware warranties even if software has been modified.
#Can I flash any ROM on my device?
No. ROMs are built for specific devices, and sometimes specific hardware revisions of that device. Flashing an incompatible ROM usually results in a bootloop or a brick. Always verify the ROM is listed for your exact model number, not just the general phone name.
#Is it possible to go back to stock firmware after flashing a custom ROM?
Yes. Download the official stock firmware for your model, boot into Download Mode (Samsung) or Fastboot, and reflash using the appropriate tool. Your data will still be wiped, but the phone will return to full stock operation, including passing SafetyNet checks for apps like banking apps that block rooted/modified devices.
#What’s the difference between flashing and factory resetting?
A factory reset wipes user data but leaves the operating system untouched. Flashing replaces the OS itself. Factory reset can fix app crashes and account issues; flashing fixes corrupted system partitions, bootloops that survive factory reset, and carrier locks. If factory reset solves your problem, don’t flash.
#What should I do if my phone gets stuck on the boot screen after flashing?
Boot back into Download Mode or Fastboot and reflash the firmware. If that doesn’t work, try wiping all partitions and reflashing from scratch. If the device won’t enter Download Mode at all, you may need specialized tools or professional repair. For Samsung bootloops, check XDA’s device-specific subforum, where most models have a “how to unbrick” thread.
#Do I need a computer to flash a phone?
For stock firmware flashing with Odin, SP Flash Tool, or Fastboot: yes, you need a Windows, Mac, or Linux computer. Some custom ROMs can be sideloaded via ADB without installing a full flash tool, but you still need a PC. True “no-computer” flashing options are extremely limited and unreliable for full system flashes.
#How long does a phone flash take?
With Odin and a good USB cable, a Samsung firmware flash takes 5-15 minutes. Fastboot flashing on Pixel takes 10-15 minutes. SP Flash Tool on MediaTek devices is typically 10-20 minutes. First boot after flashing adds another 3-7 minutes. Total time from start to working phone: roughly 30-45 minutes.