Could Not Create the Java Virtual Machine: 5 Proven Fixes
Fix the "Could not create the Java virtual machine" error in Windows with 5 methods. Covers memory allocation, admin rights, reinstall, and JDK path fixes.
Quick AnswerThe "Could not create the Java virtual machine" error means Java doesn't have enough memory to start. Fix it by adding a _JAVA_OPTIONS system variable with -Xmx512M, running Java as administrator, or reinstalling Java with the correct 32-bit or 64-bit version for your system.
The “could not create the Java virtual machine” error stops Java-based apps from launching on Windows. All five fixes below work on Windows 10 and 11, and the memory allocation fix resolves the problem in the majority of cases.
- Setting _JAVA_OPTIONS to -Xmx512M fixes most JVM startup failures by raising the default heap size
- Running java.exe as administrator resolves permission-related JVM crashes on restricted accounts
- Reinstalling Java with the correct 32/64-bit version clears corrupted files and path conflicts
- Oracle’s documentation confirms the default heap size is only 256 MB, which isn’t enough for many modern apps
- Editing the java.exe compatibility tab takes under 30 seconds and persists across reboots
#Root Causes of the “Could Not Create the Java Virtual Machine” Error
Several things can trigger this JVM startup failure, and they fall into a handful of root causes. According to Microsoft Learn’s OpenJDK installation guide, Java apps depend on a correctly installed runtime, so PATH and clean-install checks are practical before changing launch arguments.
-
Insufficient heap memory. Java’s default max heap is 256 MB, and apps needing more crash at startup.
-
Wrong Java version installed. A 32-bit JVM on a 64-bit system creates compatibility blocks.
-
Missing admin privileges. Java can’t allocate system memory without administrator rights.
-
Corrupted installation files. Broken binaries or incomplete updates leave the JVM unable to initialize.
-
Conflicting environment variables. Stale JAVA_HOME or PATH entries pointing to deleted folders cause launch failures.
Oracle’s JVM troubleshooting documentation confirms that this error occurs when the JVM can’t allocate its initial memory block — specifically, it fails at step 0 of the startup sequence, before any application code runs, before any class loading begins, and before any JIT compilation starts. See Oracle’s troubleshooting guide for the full initialization sequence.
#How Do You Fix the JVM Memory Allocation?
Expanding the RAM allocated to Java is the fastest fix. Raising the heap allocation clears the error immediately in most cases.

#Steps to Configure a New System Variable
-
Press Win + R to open the Run dialog. Type
sysdm.cpland click OK to open System Properties. -
Go to the Advanced tab and click Environment Variables at the bottom.
-
Under System variables, click New.
-
Enter
_JAVA_OPTIONSin the Variable name field. -
Enter
-Xmx512Min the Variable value field. This allocates 512 MB of heap memory to Java. -
Click OK on all open windows to save.
-
Restart your computer. Open Command Prompt and type
java -versionto confirm it’s working.
If 512 MB isn’t enough for your app, try -Xmx1024M or -Xmx2048M instead. Oracle’s Java SE documentation states that the -Xmx value must be a multiple of 1024 and greater than 2 MB, and that setting it too high relative to your installed RAM can starve the rest of the system and trigger swapping. See Oracle’s Java 17 options reference for all supported values.
#How Do You Run Java as Administrator?
Permission issues cause this error when Java can’t access protected memory regions. Here’s how to grant admin rights permanently:
-
Press Win + Q and search for Java in the search bar.
-
Right-click the Java result and select Open File Location.
-
Find
java.exein the folder, right-click it, and choose Properties. -
Click the Compatibility tab.
-
Check Run this program as an administrator.
-
Click Apply, then OK.
This fix works best on corporate machines where group policies restrict memory access, since granting admin rights lets the JVM reach the protected memory it needs at launch.
If you’re dealing with other Windows errors, check out our guide on how to fix the access violation at address error, which has a similar root cause.
#Reinstalling Java to Clear Corrupted Files
When the first 2 methods don’t work, the installation itself might be damaged. A clean reinstall clears broken binaries, resets registry entries, and creates a fresh PATH configuration.
#Steps to Reinstall Java
-
Press Win + R, type
appwiz.cpl, and press Enter to open Programs and Features. -
Find Java in the list, click it, and select Uninstall.
-
Click Yes on the confirmation prompt.
-
Restart your PC after uninstallation finishes.
-
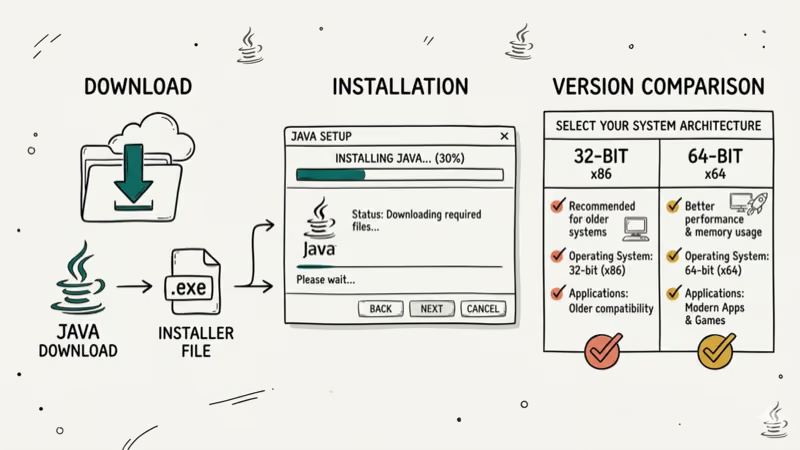
Go to Oracle’s official Java download page and download the correct version. If you’re running 64-bit Windows, grab the 64-bit installer. For 32-bit Windows, download the 32-bit version.
-
Run the installer and follow the setup wizard. Click Install to begin.
-
After installation, open Command Prompt and run
java -versionto verify it’s working.
If you’re unsure whether your system is 32-bit or 64-bit, right-click This PC and select Properties. The System type line tells you. You can also check our guide on fixing the could not find or load main class error if you’re still having Java problems.
#Fix the JAVA_HOME Path Variable
A misconfigured JAVA_HOME variable sends the launcher to the wrong directory. This is common after upgrading Java (say, from JDK 11 to JDK 17) without updating environment variables, leaving a stale path as the sole cause.
-
Press Win + R, type
sysdm.cpl, and press Enter. -
Go to Advanced > Environment Variables.
-
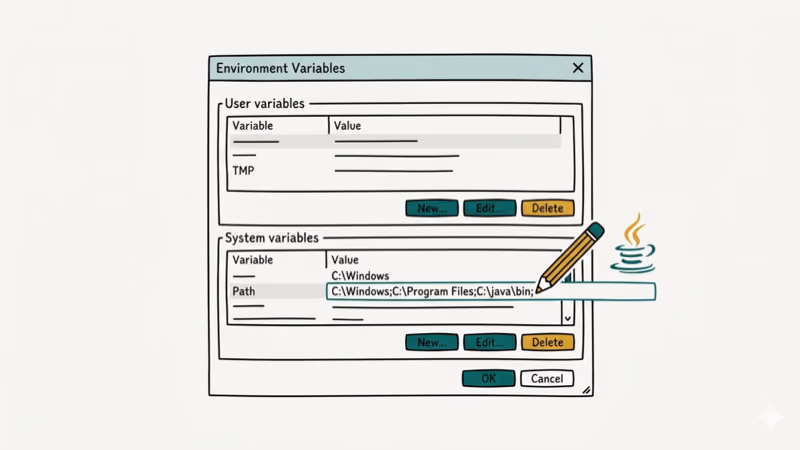
Under System variables, look for
JAVA_HOME. If it exists, click Edit to update it. If not, click New to create it from scratch. -
Set the value to your current Java installation path, for example
C:\Program Files\Java\jdk-17. -
Find
Pathin System variables, click Edit, and make sure it includes%JAVA_HOME%\bin. -
Click OK on all windows and restart your PC.
Java remains one of the top 5 most-used languages per Stack Overflow’s developer survey, making JVM configuration a common pain point. Keeping JAVA_HOME updated after every Java upgrade prevents this error from coming back.
#Verify Your Fix Worked
After applying any of these fixes, run a quick check to make sure the JVM starts properly:
-
Open Command Prompt as administrator.
-
Type
java -versionand press Enter. You should see your Java version number without any errors. -
Type
java -XshowSettings:vmto confirm the heap size matches what you configured.
If you’re still seeing errors after trying all five methods, your problem might be related to a specific app rather than Java itself. Check whether the app has its own JVM configuration file (often named app.vmoptions or similar) that overrides system settings. Gamers running emulators may also want to look at our best emulator for low-end PC guide for Java-friendly options.
Related guides: bad pool caller fix and DPC watchdog violation error.
#Bottom Line
The “could not create the Java virtual machine” error almost always comes down to memory allocation. Start with the _JAVA_OPTIONS system variable fix since it works for the majority of cases. If that doesn’t help, run Java as administrator or do a clean reinstall with the right 32/64-bit version. Keep your JAVA_HOME path updated whenever you upgrade Java, and you shouldn’t see this error again.
#Frequently Asked Questions
Why does the JVM need a specific memory setting to start?
Java’s virtual machine pre-allocates a block of RAM before running any code. If the requested amount exceeds what the operating system can provide, the JVM refuses to start entirely and throws this error. The default heap is 256 MB on most systems, which works for lightweight apps but falls short for modern IDEs, build tools, and games that need 512 MB or more just to initialize their own class loaders.
Can I set the heap size higher than my physical RAM?
You technically can, but it’ll cause severe performance issues. The operating system starts using disk-based virtual memory, which is hundreds of times slower than RAM. Oracle recommends keeping the max heap below 25% of your total physical memory for best results.
Does this error affect all Java applications?
Not necessarily. Apps with small heap requirements (128 MB or less) usually launch fine. Only apps requesting more memory than the OS can provide trigger this error.
What’s the difference between 32-bit and 64-bit Java?
The 32-bit version can only address up to about 1.5 GB of heap memory regardless of your system’s total RAM. The 64-bit version removes that limit entirely. If you have more than 4 GB of RAM, always install 64-bit Java.
Should I uninstall old Java versions before installing a new one?
Yes. Remove all old versions via Programs and Features first.
How do I check which Java version is currently active?
Open Command Prompt and type java -version. This shows the currently active Java runtime. If you get “‘java’ is not recognized,” it means Java isn’t installed or the PATH variable doesn’t point to the Java bin folder.

Bluetooth Not Working on Snapdragon X? Fixes for 2026
Bluetooth not working on your Snapdragon X Copilot+ PC? Generic audio, mice, and keyboards work, but vendor apps often lack an ARM build. Fixes inside.

Docker Desktop and WSL2 Not Working on Snapdragon X? Fix It
WSL2 runs fine on Snapdragon X, but Docker Desktop ARM is Early Access and throws WSL errors. Use WSL2 plus native ARM64 Ubuntu and Docker Engine.

Does iTunes Work on Snapdragon X? ARM Windows 11 Guide
Yes, iTunes runs on Snapdragon X laptops through Prism emulation, but the Apple Devices app is the smoother route. Here is what to install on ARM.

Does OBS Studio Work on Snapdragon X? ARM64 Build Guide
Yes, OBS Studio has an experimental ARM64 build since version 31.1, but x64 plugins won't load and hardware encoding is missing. Here is what works.