Your screen cracked and now you need USB debugging to get your data off. The catch: USB debugging is buried inside Developer Options, which normally requires tapping around your screen. Here’s how to get around that on Android 10 and later.
The method that works depends on one thing: was USB debugging already on before the screen broke? If yes, Method 1 (ADB command) gets you in within two minutes. If not, you have more work to do, but Method 3 (scrcpy OTG) or Method 4 (OTG mouse) will get you there without touching the screen at all.
- If USB debugging was already enabled, one ADB command (
adb shell settings put global adb_enabled 1) re-enables it in under 2 minutes. - Scrcpy OTG mode lets you control an Android phone with a PC keyboard and mouse over USB without requiring USB debugging at all, and it works on Android 6 and later.
- A USB OTG adapter and any wired USB mouse ($6-10) lets you navigate the phone without touching the screen, but the display must still show an image.
- Each PC must be manually authorized by the Android device the first time; a previously trusted computer skips this step entirely.
- Recovery mode ADB access only works on phones running TWRP or another custom recovery; stock recovery on unrooted phones does not enable ADB.
#Method 1: ADB Shell Command (Fastest, If USB Debugging Was On)
This is the fastest route. If USB debugging was already enabled on your phone, one command re-confirms it and lets you proceed.
#What you need
- A Windows, Mac, or Linux computer with ADB installed (part of Android Studio platform-tools, or install the standalone package)
- A USB cable that supports data transfer (not just charging)
- USB drivers for your phone installed on Windows (Google USB driver for Pixel; manufacturer drivers for Samsung, OnePlus, etc.)
#Steps
- Connect your Android phone to the computer with the USB cable.
- Open a terminal (Command Prompt on Windows, Terminal on Mac/Linux).
- Type
adb devicesand press Enter. Your device should appear, possibly listed as “unauthorized.” - If listed as unauthorized, check whether a “Allow USB debugging?” dialog is visible on the broken screen. If it is and you can still tap (even blindly), try accepting it.
- If your device shows as authorized (or was already trusted), run:
adb shell settings put global adb_enabled 1 - Your device should now have USB debugging active.
The tricky part is the authorization prompt. Google’s ADB documentation explains that each PC needs to be manually authorized by the device owner the first time. If your phone has never connected to this computer before and the screen is completely unresponsive, you won’t be able to tap “Allow.” Move to Method 2 or 3 instead.

#Method 2: Use a Previously Trusted Computer
Short but important.
When you’ve connected to a PC before and checked “Always allow from this computer,” the authorization is saved. The ADB command in Method 1 just works with no prompt needed. If you have an old laptop you regularly used with this phone, dig it out. This combo (trusted computer + Method 1) takes under two minutes.
#Method 3: Scrcpy OTG Mode (No USB Debugging Required)
This is the best option if USB debugging was never enabled. Scrcpy is a free, open-source tool. Its OTG mode lets you use your PC’s keyboard and mouse to control your Android phone over USB, without needing ADB or USB debugging at all.
XDA Developers covered scrcpy’s OTG mode as a major improvement for exactly this broken-screen scenario.
#What you need
- Scrcpy installed on your computer (download from github.com/Genymobile/scrcpy)
- A USB cable
- Your phone needs to be on (the screen doesn’t need to be functional)
#Steps
- Download and install scrcpy (the Windows release includes everything; Mac users can use
brew install scrcpy). - Connect your phone to the PC via USB. When prompted on the phone, choose “File Transfer” or “MTP” mode. You may need to swipe down the notification shade blindly; on most phones it’s the second tap in the notification area after connecting.
- Open a terminal and run:
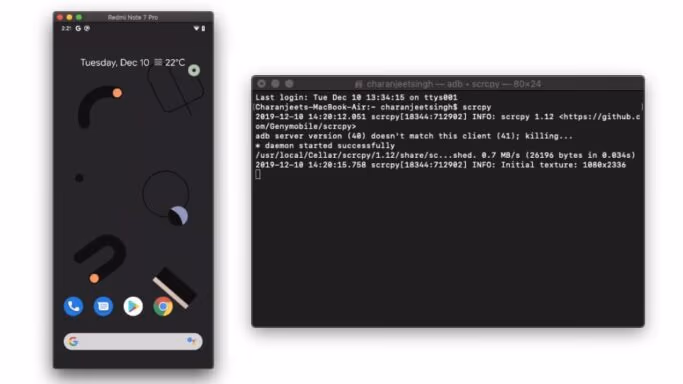
scrcpy --otg - A small scrcpy window opens on your PC. No phone screen is shown, but your keyboard and mouse are now controlling the Android device.
- Use mouse clicks and keyboard to navigate to Settings > About phone, click “Build number” seven times to unlock Developer Options, then go to Settings > System > Developer Options and enable USB debugging.
Note: scrcpy’s OTG mode doesn’t mirror the screen. You’re clicking “blind” with a mouse cursor — but since Android’s Settings layout is consistent, you can follow the steps above reliably. The phone display doesn’t need to respond. Works on Android 6+ according to the scrcpy OTG documentation.
#Method 4: OTG Adapter and USB Mouse (No Computer Required)
If you don’t have a PC handy, an OTG adapter plus any USB mouse gives you a working cursor on your phone’s screen, as long as the display still shows an image (even if the touchscreen is dead).
#What you need
- USB OTG adapter (USB-C to USB-A, or Micro-USB to USB-A; match your phone’s port)
- Any wired USB mouse
- Your phone screen must still display something (this won’t work on a fully black screen)
#Steps
- Plug the OTG adapter into your phone’s charging port.
- Connect the USB mouse to the OTG adapter.
- A cursor should appear on your phone’s screen within a few seconds.
- Navigate to Settings > About phone.
- Click “Build number” seven times. You’ll see a toast notification: “You are now a developer.”
- Go back to Settings > System > Developer Options.
- Scroll down to “USB debugging” and toggle it on.
- Disconnect the mouse and connect your USB cable to the computer.
This works on Android 4.0 and later. USB-C OTG adapters are around $6-10 on Amazon. If your Android home button isn’t working, you can still navigate Settings using the mouse’s back/home gestures.
#Method 5: Recovery Mode ADB (Rooted or Custom Recovery Only)
Heads up: this only works on phones with TWRP or another custom recovery installed. Stock recovery on most phones does not enable ADB.
If you have TWRP (or you previously used a custom Android root tool to flash a custom recovery):
- Power off the phone.
- Hold the power + volume down buttons (most Android phones) to enter recovery. Button combos vary by brand: Samsung uses power + volume up + Bixby/home.
- In TWRP, go to Advanced > ADB Sideload and swipe to enable it.
- On your computer, run
adb devices. Your phone should now appear as authorized in recovery. - You can now push files, pull data, or flash packages via ADB.
Multiple XDA threads confirm that stock recovery on unrooted phones typically shows “no devices” when you run adb devices in recovery, because ADB access isn’t active. This XDA tutorial on enabling USB debugging from recovery covers the TWRP path in detail.
#Method 6: Screen Mirroring from a Second Android Device
If you have another working Android phone, apps like Vysor or AnyDesk let you view and control your broken phone over Wi-Fi. Once you can see the broken phone’s screen on the working device, enabling USB debugging is straightforward.
The limitation: both phones need to be on the same Wi-Fi, and the broken phone needs to have one of those apps installed already. Most people don’t. Still worth trying if you happened to install Vysor previously or if you use your phone for screen mirroring to a TV.
#What If ADB Still Shows “Unauthorized”?
This comes up a lot. You ran adb devices, your phone appears, but the status says “unauthorized.” That means the phone is waiting for you to tap “Allow USB debugging” on screen.
Your options:
- If the screen shows the dialog but touch doesn’t work, try scrcpy OTG (Method 3) to tap Allow with a mouse.
- If you’ve connected this phone to the computer before and checked “Always allow,” try deleting the ADB key on the computer and reconnecting. Sometimes this triggers a re-auth that auto-approves on trusted devices.
- On rooted phones, you can push a custom
adb_keysfile to/data/misc/adb/to pre-authorize your computer. See this XDA thread for the exact steps.
#Bottom Line
If USB debugging was already on, the ADB command (Method 1) solves it in two minutes. If not, scrcpy OTG (Method 3) is your best bet: it’s free, works on Windows/Mac/Linux, and doesn’t need USB debugging to start. The OTG mouse method (Method 4) is a solid backup if you want a no-computer option, but only if your screen still displays an image. Recovery mode only helps if you’re already on TWRP.
Once you have USB debugging running, you can use tools like Android SMS recovery software to pull messages, or a full Android data recovery tool to save photos and files before you get the screen replaced.
#Frequently Asked Questions
#Can I enable USB debugging without a computer?
Yes. Use an OTG adapter and a USB mouse (Method 4). Plug the mouse into your phone via OTG, and a cursor appears on screen. Navigate to Developer Options and toggle USB debugging on. No PC needed. This only works if your phone’s display still shows an image.
#Does scrcpy OTG really work without USB debugging?
It does, according to the official scrcpy OTG documentation. OTG mode uses Android Open Accessory protocol to send keyboard and mouse events directly, bypassing ADB entirely. A handful of GitHub issues report edge cases where it fails, but for most phones on Android 6 and later it works reliably.
#What if my phone screen is completely black but the phone is on?
A completely black screen could be a dead display or just the digitizer cracked through. Plug in the OTG mouse and watch for a cursor. If one appears, the display is actually working and only the touch layer is broken. If nothing appears after 10 seconds, the display itself is gone. In that case, scrcpy OTG (Method 3) is your only non-hardware-repair option, since you can control the phone without seeing the screen at all.
#Will this work on Samsung phones?
All these methods work on Samsung, but Samsung’s Developer Options path is slightly different. On One UI (Android 10+): Settings > About phone > Software information, then tap Build number seven times. Developer Options appears under Settings directly on One UI 4+, not under Settings > System. Also, Samsung may ask for your PIN to confirm enabling USB debugging. If touch is dead, you’ll need the OTG mouse to enter it.
#Can I recover data once USB debugging is on?
Yes. With USB debugging active, you can copy files directly with adb pull /sdcard/DCIM ./photos. For contacts, messages, and app data, an Android repair and recovery tool can scan your storage without you needing to navigate the phone at all. That’s usually enough to save everything before getting the screen replaced.
#Is it safe to leave USB debugging on?
Turn it off after you’re done. Per Google’s developer options documentation, USB debugging gives any connected computer elevated access to your device. You don’t want that active if you plug your phone into a public charger or a computer you don’t own.
#What ADB version do I need?
Any recent version works. The platform-tools package from developer.android.com is the official source — download the latest and extract it, no full Android Studio install required. On Mac, brew install android-platform-tools is the fastest route.